2010 CHEVROLET SUBURBAN wheel
[x] Cancel search: wheelPage 422 of 608
Parking on Hills
{WARNING:
Parking the vehicle on a hill with the trailer
attached can be dangerous. If something goes
wrong, the rig could start to move. People can be
injured, and both the vehicle and the trailer can be
damaged. When possible, always park the rig on
a flat surface.
If parking the rig on a hill: 1. Press the brake pedal, but do not shift into P (Park) yet. Turn the wheels into the curb if facing downhill
or into traffic if facing uphill.
2. Have someone place chocks under the trailer wheels.
3. When the wheel chocks are in place, release the regular brakes until the chocks absorb the load.
4. Reapply the brake pedal. Then apply the parking brake and shift into P (Park).
5. If the vehicle is four-wheel-drive and has a two-speed transfer case, be sure the transfer case
is in a drive gear and not in N (Neutral).
6. Release the brake pedal.
{WARNING:
It can be dangerous to get out of the vehicle if the
shift lever is not fully in P (Park) with the parking
brake firmly set. The vehicle can roll.
If the engine has been left running, the vehicle
can move suddenly. You or others could be
injured. To be sure the vehicle will not move, even
when on fairly level ground, use the steps that
follow.
Always put the shift lever fully in P (Park) with the
parking brake firmly set.
If the transfer case on a four-wheel-drive vehicle
is in N (Neutral), the vehicle will be free to roll,
even if the shift lever is in P (Park). Be sure
the transfer case is in a drive gear —not in
N (Neutral).
5-64
Page 427 of 608

Section 6 Service and Appearance Care
Service. . . . . . . . . . . . . . . . . . . . . . . . . . . . . . . . . . . . . . . . . . . . . 6-4
Accessories and Modifications . . . . . . . . . . . . . . . . . . 6-4
California Proposition 65 Warning . . . . . . . . . . . . . . . 6-5
California Perchlorate Materials Requirements . . . . . . . . . . . . . . . . . . . . . . . . . . . . . . . . . 6-5
Doing Your Own Service Work . . . . . . . . . . . . . . . . . . 6-5
Adding Equipment to the Outside of the Vehicle . . . . . . . . . . . . . . . . . . . . . . . . . . . . . . . . . . . . . . . . 6-6
Fuel . . . . . . . . . . . . . . . . . . . . . . . . . . . . . . . . . . . . . . . . . . . . . . . . . 6-6
Gasoline Octane . . . . . . . . . . . . . . . . . . . . . . . . . . . . . . . . 6-7
Gasoline Specifications . . . . . . . . . . . . . . . . . . . . . . . . . 6-7
California Fuel . . . . . . . . . . . . . . . . . . . . . . . . . . . . . . . . . . 6-8
Additives . . . . . . . . . . . . . . . . . . . . . . . . . . . . . . . . . . . . . . . . 6-8
Fuel E85 (85% Ethanol) . . . . . . . . . . . . . . . . . . . . . . . . . 6-9
Fuels in Foreign Countries . . . . . . . . . . . . . . . . . . . . . 6-10
Filling the Tank . . . . . . . . . . . . . . . . . . . . . . . . . . . . . . . . . 6-11
Filling a Portable Fuel Container . . . . . . . . . . . . . . . 6-13
Checking Things Under the Hood . . . . . . . . . . . . . . . 6-14
Hood Release . . . . . . . . . . . . . . . . . . . . . . . . . . . . . . . . . 6-14
Engine Compartment Overview . . . . . . . . . . . . . . . . 6-16
Engine Oil . . . . . . . . . . . . . . . . . . . . . . . . . . . . . . . . . . . . . 6-17 Engine Oil Life System . . . . . . . . . . . . . . . . . . . . . . . . 6-20
Engine Air Cleaner/Filter . . . . . . . . . . . . . . . . . . . . . . . 6-21
Automatic Transmission Fluid (4-Speed
Transmission) . . . . . . . . . . . . . . . . . . . . . . . . . . . . . . . 6-23
Automatic Transmission Fluid (6-Speed
Transmission) . . . . . . . . . . . . . . . . . . . . . . . . . . . . . . . 6-26
Cooling System . . . . . . . . . . . . . . . . . . . . . . . . . . . . . . . . 6-30
Engine Coolant . . . . . . . . . . . . . . . . . . . . . . . . . . . . . . . . 6-31
Engine Overheating . . . . . . . . . . . . . . . . . . . . . . . . . . . 6-36
Overheated Engine Protection Operating Mode . . . . . . . . . . . . . . . . . . . . . . . . . . . . . 6-39
Engine Fan Noise . . . . . . . . . . . . . . . . . . . . . . . . . . . . . 6-39
Power Steering Fluid . . . . . . . . . . . . . . . . . . . . . . . . . . 6-40
Windshield Washer Fluid . . . . . . . . . . . . . . . . . . . . . . 6-41
Brakes . . . . . . . . . . . . . . . . . . . . . . . . . . . . . . . . . . . . . . . . . 6-42
Battery . . . . . . . . . . . . . . . . . . . . . . . . . . . . . . . . . . . . . . . . . 6-45
Jump Starting . . . . . . . . . . . . . . . . . . . . . . . . . . . . . . . . . . 6-46
Rear Axle . . . . . . . . . . . . . . . . . . . . . . . . . . . . . . . . . . . . . . . . . 6-51
Four-Wheel Drive . . . . . . . . . . . . . . . . . . . . . . . . . . . . . . . . . 6-53
Front Axle . . . . . . . . . . . . . . . . . . . . . . . . . . . . . . . . . . . . . . . . . 6-54
6-1
Page 428 of 608
Section 6 Service and Appearance Care
Headlamp Aiming. . . . . . . . . . . . . . . . . . . . . . . . . . . . . . . . 6-55
Bulb Replacement . . . . . . . . . . . . . . . . . . . . . . . . . . . . . . . . 6-58
Halogen Bulbs . . . . . . . . . . . . . . . . . . . . . . . . . . . . . . . . . 6-58
Taillamps, Turn Signal, Stoplamps and Back-up Lamps . . . . . . . . . . . . . . . . . . . . . . . . . . . . . . . . . . . . . . . 6-59
License Plate Lamp . . . . . . . . . . . . . . . . . . . . . . . . . . . . 6-60
Replacement Bulbs . . . . . . . . . . . . . . . . . . . . . . . . . . . . 6-60
Windshield Wiper Blade Replacement . . . . . . . . . . . 6-61
Tires . . . . . . . . . . . . . . . . . . . . . . . . . . . . . . . . . . . . . . . . . . . . . . . 6-63
Tire Sidewall Labeling . . . . . . . . . . . . . . . . . . . . . . . . . 6-64
Tire Terminology and Definitions . . . . . . . . . . . . . . . 6-69
Inflation - Tire Pressure . . . . . . . . . . . . . . . . . . . . . . . . 6-72
Tire Pressure Monitor System . . . . . . . . . . . . . . . . . 6-73
Tire Pressure Monitor Operation . . . . . . . . . . . . . . . 6-74
Tire Inspection and Rotation . . . . . . . . . . . . . . . . . . . 6-78
When It Is Time for New Tires . . . . . . . . . . . . . . . . . 6-79
Buying New Tires . . . . . . . . . . . . . . . . . . . . . . . . . . . . . . 6-80
Different Size Tires and Wheels . . . . . . . . . . . . . . . 6-82
Uniform Tire Quality Grading . . . . . . . . . . . . . . . . . . . 6-82
Wheel Alignment and Tire Balance . . . . . . . . . . . . 6-84
Wheel Replacement . . . . . . . . . . . . . . . . . . . . . . . . . . . 6-84 Tire Chains . . . . . . . . . . . . . . . . . . . . . . . . . . . . . . . . . . . . 6-86
If a Tire Goes Flat . . . . . . . . . . . . . . . . . . . . . . . . . . . . . 6-87
Changing a Flat Tire . . . . . . . . . . . . . . . . . . . . . . . . . . . 6-88
Removing the Spare Tire and Tools . . . . . . . . . . . . 6-89
Removing the Flat Tire and Installing the
Spare Tire . . . . . . . . . . . . . . . . . . . . . . . . . . . . . . . . . . . 6-94
Secondary Latch System . . . . . . . . . . . . . . . . . . . . . 6-101
Storing a Flat or Spare Tire and Tools . . . . . . . . 6-104
Spare Tire . . . . . . . . . . . . . . . . . . . . . . . . . . . . . . . . . . . . 6-107
Appearance Care . . . . . . . . . . . . . . . . . . . . . . . . . . . . . . . . 6-108
Interior Cleaning . . . . . . . . . . . . . . . . . . . . . . . . . . . . . 6-108
Fabric/Carpet . . . . . . . . . . . . . . . . . . . . . . . . . . . . . . . . . 6-109
Leather . . . . . . . . . . . . . . . . . . . . . . . . . . . . . . . . . . . . . . . 6-110
Instrument Panel, Vinyl, and Other Plastic Surfaces . . . . . . . . . . . . . . . . . . . . . . . . . . . . . . . . . . . . 6-110
Care of Safety Belts . . . . . . . . . . . . . . . . . . . . . . . . . . 6-111
Weatherstrips . . . . . . . . . . . . . . . . . . . . . . . . . . . . . . . . . 6-111
Washing Your Vehicle . . . . . . . . . . . . . . . . . . . . . . . . . 6-111
Cleaning Exterior Lamps/Lenses . . . . . . . . . . . . . 6-112
Finish Care . . . . . . . . . . . . . . . . . . . . . . . . . . . . . . . . . . . 6-112
Windshield, Backglass, and Wiper Blades . . . . 6-113
6-2
Page 429 of 608
Section 6 Service and Appearance Care
Aluminum or Chrome-Plated Wheelsand Trim . . . . . . . . . . . . . . . . . . . . . . . . . . . . . . . . . . . . 6-114
Tires . . . . . . . . . . . . . . . . . . . . . . . . . . . . . . . . . . . . . . . . . . 6-115
Sheet Metal Damage . . . . . . . . . . . . . . . . . . . . . . . . . 6-115
Finish Damage . . . . . . . . . . . . . . . . . . . . . . . . . . . . . . . 6-115
Underbody Maintenance . . . . . . . . . . . . . . . . . . . . . . 6-115
Chemical Paint Spotting . . . . . . . . . . . . . . . . . . . . . . 6-115
Vehicle Identification . . . . . . . . . . . . . . . . . . . . . . . . . . . . 6-116
Vehicle Identification Number (VIN) . . . . . . . . . . . 6-116
Service Parts Identification Label . . . . . . . . . . . . . 6-116 Electrical System
. . . . . . . . . . . . . . . . . . . . . . . . . . . . . . . . 6-117
Add-On Electrical Equipment . . . . . . . . . . . . . . . . . 6-117
Windshield Wiper Fuses . . . . . . . . . . . . . . . . . . . . . . 6-117
Power Windows and Other Power Options . . . 6-117
Fuses and Circuit Breakers . . . . . . . . . . . . . . . . . . . 6-118
Instrument Panel Fuse Block . . . . . . . . . . . . . . . . . 6-118
Center Instrument Panel Fuse Block . . . . . . . . . 6-120
Underhood Fuse Block . . . . . . . . . . . . . . . . . . . . . . . 6-121
Capacities and Specifications . . . . . . . . . . . . . . . . . . 6-125
6-3
Page 440 of 608
Checking Things Under
the Hood
{WARNING:
An electric fan under the hood can start up and
injure you even when the engine is not running.
Keep hands, clothing, and tools away from any
underhood electric fan.
{WARNING:
Things that burn can get on hot engine parts and
start a fire. These include liquids like fuel, oil,
coolant, brake fluid, windshield washer and other
fluids, and plastic or rubber. You or others could
be burned. Be careful not to drop or spill things
that will burn onto a hot engine.
Hood Release
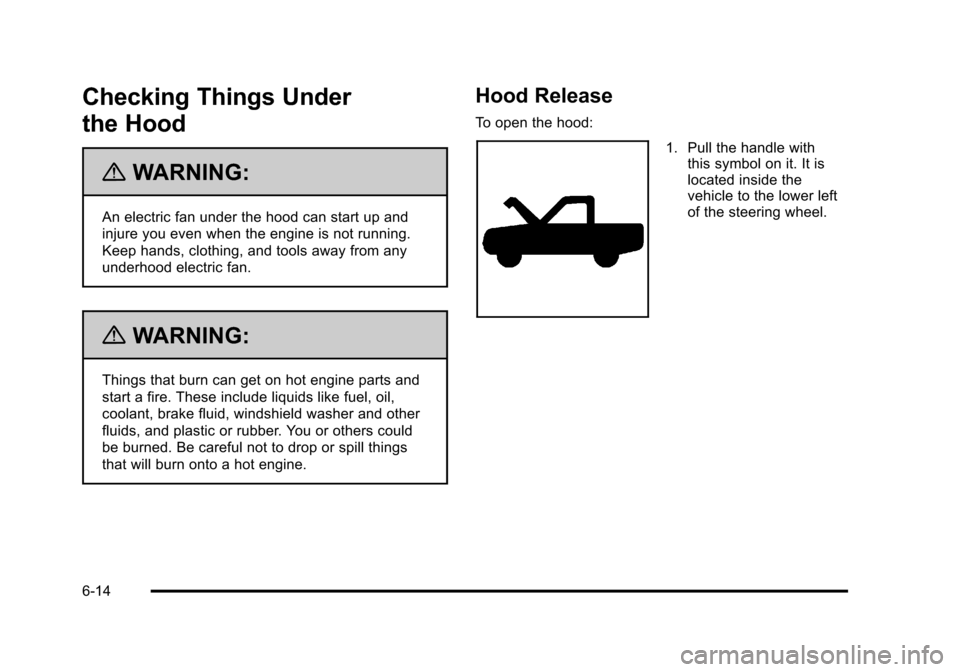
To open the hood:
1. Pull the handle withthis symbol on it. It is
located inside the
vehicle to the lower left
of the steering wheel.
6-14
Page 470 of 608
Brake Wear
This vehicle has disc brakes. Disc brake pads have
built-in wear indicators that make a high-pitched
warning sound when the brake pads are worn and new
pads are needed. The sound can come and go or be
heard all the time the vehicle is moving, except when
applying the brake pedal firmly.
{WARNING:
The brake wear warning sound means that soon
the brakes will not work well. That could lead to
an accident. When the brake wear warning sound
is heard, have the vehicle serviced.
Notice: Continuing to drive with worn-out brake
pads could result in costly brake repair. Some driving conditions or climates can cause a brake
squeal when the brakes are first applied or lightly
applied. This does not mean something is wrong with
the brakes.
Properly torqued wheel nuts are necessary to help
prevent brake pulsation. When tires are rotated, inspect
brake pads for wear and evenly tighten wheel nuts in
the proper sequence to torque specifications in
Capacities and Specifications on page 6‑125.
Brake linings should always be replaced as complete
axle sets.Brake Pedal Travel
See your dealer if the brake pedal does not return to
normal height, or if there is a rapid increase in pedal
travel. This could be a sign that brake service might be
required.
Brake Adjustment
Every brake stop, the disc brakes adjust for wear.
6-44
Page 472 of 608
Jump Starting
If the vehicle is a Two-mode Hybrid, see the Two-mode
Hybrid manual for more information.
If the vehicle's battery (or batteries) has run down, you
may want to use another vehicle and some jumper
cables to start your vehicle. Be sure to use the following
steps to do it safely.
{WARNING:
Batteries can hurt you. They can be dangerous
because:
.They contain acid that can burn you.
.They contain gas that can explode or ignite.
.They contain enough electricity to burn you.
If you do not follow these steps exactly, some or
all of these things can hurt you. Notice:
Ignoring these steps could result in costly
damage to the vehicle that would not be covered by
the warranty.
Trying to start the vehicle by pushing or pulling it
will not work, and it could damage the vehicle.
1. Check the other vehicle. It must have a 12-volt battery with a negative ground system.
Notice: If the other vehicle's system is not a 12-volt
system with a negative ground, both vehicles can
be damaged. Only use vehicles with 12-volt systems
with negative grounds to jump start your vehicle.
2. Get the vehicles close enough so the jumper cables can reach, but be sure the vehicles are not
touching each other. If they are, it could cause a
ground connection you do not want. You would
not be able to start your vehicle, and the bad
grounding could damage the electrical systems.
To avoid the possibility of the vehicles rolling, set
the parking brake firmly on both vehicles involved
in the jump start procedure. Put the automatic
transmission in P (Park) or a manual transmission
in N (Neutral) before setting the parking brake.
If the vehicle has a four-wheel-drive transfer case
with a N (Neutral) position, be sure the transfer
case is in a drive gear, not in N (Neutral).
6-46
Page 478 of 608
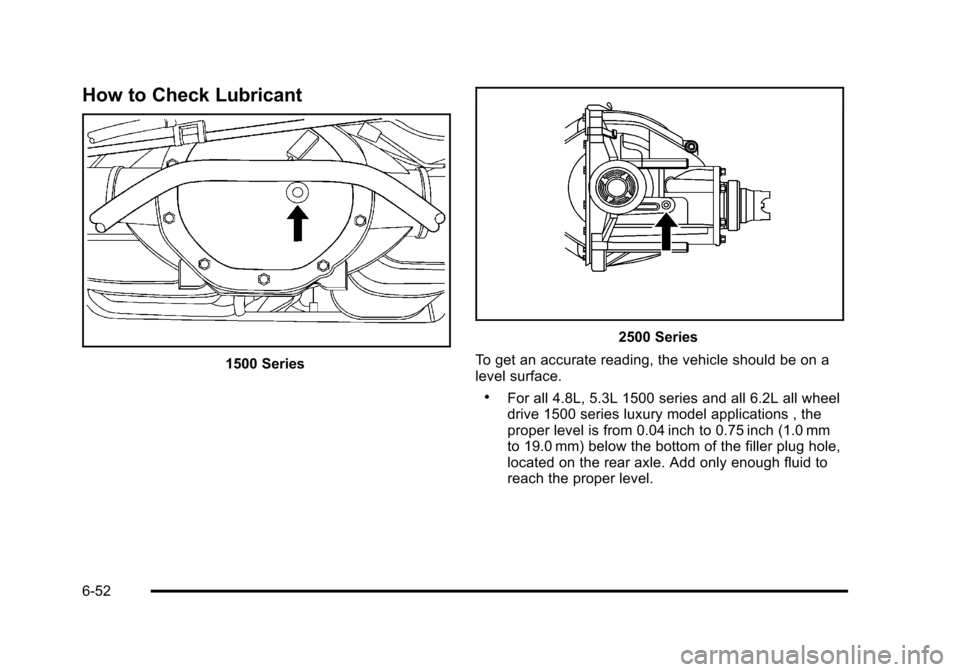
How to Check Lubricant
1500 Series
2500 Series
To get an accurate reading, the vehicle should be on a
level surface.
.For all 4.8L, 5.3L 1500 series and all 6.2L all wheel
drive 1500 series luxury model applications , the
proper level is from 0.04 inch to 0.75 inch (1.0 mm
to 19.0 mm) below the bottom of the filler plug hole,
located on the rear axle. Add only enough fluid to
reach the proper level.
6-52