2010 CHEVROLET SILVERADO transmission fluid
[x] Cancel search: transmission fluidPage 9 of 626

A.Outlet Adjustment on page 4‑28.
B. Turn Signal/Multifunction Lever on page 4‑4.
C. Driver Information Center (DIC) Buttons. See Driver Information Center (DIC) on page 4‑49.
D. Hazard Warning Flashers on page 4‑3.
E. Instrument Panel Cluster on page 4‑29.
F. Shift Lever. See Automatic Transmission Operation
on page 3‑28. Tow/Haul Selector Button
(If Equipped). See Tow/Haul Modeon page 3‑34.
Range Selection Mode (Allison Transmission and
Hydra-Matic
®6‐Speed Button (If Equipped). See
Automatic Transmission Operation on page 3‑28.
G. Audio System(s) on page 4‑82.
H. Instrument Panel Storage on page 3‑76.
I. Integrated Trailer Brake Controller (If Equipped). See Towing a Trailer on page 5‑51.
J. Exterior Lamps on page 4‑10.
K. Hood Release on page 6‑15.
L. Parking Brake on page 3‑50.
M. Dome Lamp Override
on page 4‑15.Dome Lampson page 4‑14.Fog Lampson page 4‑13(If Equipped).
N. Cruise Control on page 4‑7.
O. Tilt Wheel on page 4‑3. P.
Horn on page 4‑3.
Q. Audio Steering Wheel Controls
on page 4‑143(If Equipped).
R. Automatic Transfer Case Control (If Equipped). See Four-Wheel Drive on page 3‑36.
S. Ashtray (If Equipped). See Ashtray(s) and
Cigarette Lighter on page 4‑18.
T. StabiliTrak
®Systemon page 5‑6(If Equipped).
Ultrasonic Rear Parking Assist (URPA)on
page 3‑60(If Equipped). Pedal Adjust Button
(If Equipped). See Adjustable Throttle and Brake
Pedal
on page 3‑26. Heated Windshield Washer
Fluid Button (If Equipped). Windshield Washeron
page 4‑6.
U. Accessory Power Outlet(s) on page 4‑17.
V. Climate Control System (With Air Conditioning)
on
page 4‑18or Climate Control System (With Heater
Only)on page 4‑21and Dual Automatic Climate
Control System on page 4‑22.
W. Power Take Off (PTO) Control (If Equipped). See Power Take Off (PTO) in the Duramax Diesel
Supplement Index.
X. Passenger Airbag Off Control (If Equipped). See Airbag Off Switch on page 2‑82.
Y. Glove Box on page 3‑75.
1-3
Page 11 of 626

A.Outlet Adjustment on page 4‑28.
B. Turn Signal/Multifunction Lever on page 4‑4.
C. Instrument Panel Cluster on page 4‑29.
D. Hazard Warning Flashers
on page 4‑3.
E. Shift Lever. See Automatic Transmission Operation
on page 3‑28.
F. Tow/Haul Mode
on page 3‑34(If Equipped).
G. Driver Information Center (DIC) Buttons. See Driver Information Center (DIC) on page 4‑49.
H. Audio System(s) on page 4‑82.
I. Exterior Lamps on page 4‑10.
J. Integrated Trailer Brake Controller (If Equipped). See Towing a Trailer on page 5‑51.
K. Dome Lamp Override
on page 4‑15.Dome Lampson page 4‑14.
L. Automatic Transfer Case Control. (If Equipped). See Four-Wheel Drive on page 3‑36.
M. Hood Release on page 6‑15.
N. Parking Brake on page 3‑50. O.
Cruise Control on page 4‑7.
P. Tilt Wheel on page 4‑3.
Q. Horn on page 4‑3.
R. Audio Steering Wheel Controls on page 4‑143.
S. Climate Control System (With Air Conditioning)
on
page 4‑18or Climate Control System (With Heater
Only)on page 4‑21or Dual Automatic Climate
Control Systemon page 4‑22(If Equipped).
T. Accessory Power Outlet(s)
on page 4‑17.
Cigarette Lighter (If Equipped). See Ashtray(s) and
Cigarette Lighter
on page 4‑18.
U. StabiliTrak®Systemon page 5‑6(If Equipped).
Pedal Adjust Button (If Equipped). See Adjustable
Throttle and Brake Pedal
on page 3‑26. Ultrasonic
Rear Parking Assist (URPA)on page 3‑60(If Equipped). Heated Windshield Washer Fluid
Button (If Equipped). See Windshield Washeron
page 4‑6.
V. Passenger Airbag Off Control (If Equipped). See Airbag Off Switch on page 2‑82.
W. Glove Box on page 3‑75.
1-5
Page 270 of 626
Fuel Used
Press the trip/fuel button until FUEL USED displays.
This display shows the number of gallons (gal) or
liters (L) of fuel used since the last reset of this menu
item. To reset the fuel used information, press and hold
the set/reset button while FUEL USED is displayed.
Timer
Press the trip/fuel button until TIMER displays. This
display can be used as a timer.
To start the timer, press the set/reset button while
TIMER is displayed. The display will show the amount
of time that has passed since the timer was last reset,
not including time the ignition is off. Time will continue
to be counted as long as the ignition is on, even if
another display is being shown on the DIC. The
timer will record up to 99 hours, 59 minutes and
59 seconds (99:59:59) after which the display will return
to zero.
To stop the timer, press the set/reset button briefly while
TIMER is displayed.
To reset the timer to zero, press and hold the set/reset
button while TIMER is displayed.
Transmission Temperature
Press the trip/fuel button until TRANS TEMP displays.
This display shows the temperature of the automatic
transmission fluid in either degrees Fahrenheit (°F) or
degrees Celsius (°C).
Instantaneous Economy and Active Fuel
Management™Indicator
If your vehicle has this display, press the trip/fuel button
until INST ECON V8 displays. This display shows the
current fuel economy at a particular moment and will
change frequently as driving conditions change. This
display shows the instantaneous fuel economy in miles
per gallon (mpg) or liters per 100 kilometers (L/100 km).
Unlike average economy, this screen cannot be reset.
An Active Fuel Management indicator will display on the
right side of the DIC, while INST ECON displays on the
left side. Active Fuel Management allows the engine to
operate on either four or eight cylinders, depending on
your driving demands. When Active Fuel Management
is active, V4 will display on the DIC. When Active Fuel
Management is inactive, V8 will display. See Active
Fuel Management™
on page 3‑27for more
information.
Blank Display
This display shows no information.
4-52
Page 276 of 626
Transmission Temperature
Press the trip odometer reset stem until TRANS TEMP
displays. This display shows the temperature of the
automatic transmission fluid in either degrees
Fahrenheit (°F) or degrees Celsius (°C).
Trailer Gain and Output
On vehicles with the Integrated Trailer Brake Control
(ITBC) system, the trailer brake display appears in the
DIC. Press the trip odometer reset stem until TRAILER
GAIN and OUTPUT display.
TRAILER GAIN shows the trailer gain setting. This
setting can be adjusted from 0.0 to 10.0 with either a
trailer connected or disconnected. To adjust this setting,
see“Integrated Trailer Brake Control System” under
Towing a Trailer
on page 5‑51for more information.
OUTPUT shows the power output to the trailer anytime
a trailer with electric brakes is connected. Output is
displayed in 0 to 10 bars. Dashes may appear in the
OUTPUT display. See “Integrated Trailer Brake Control
System” underTowing a Trailer
on page 5‑51for more
information.
Compass Zone Setting
This display allows for setting the compass zone. See
DIC Compasson page 4‑60for more information.
Compass Recalibration
This display allows for calibrating the compass. See
DIC Compasson page 4‑60for more information.
Oil Life
To access this display, the vehicle must be in P (Park).
Press the trip odometer reset stem until OIL LIFE
REMAINING displays. This display shows an estimate
of the oil's remaining useful life. If you see 99% OIL
LIFE REMAINING on the display, that means 99% of
the current oil life remains. The engine oil life system
will alert you to change the oil on a schedule consistent
with your driving conditions.
When the remaining oil life is low, the CHANGE
ENGINE OIL SOON message will appear on the
display. See “CHANGE ENGINE OIL SOON” underDIC
Warnings and Messages
on page 4‑63. You should
change the oil as soon as you can. See Engine Oilon
page 6‑18. In addition to the engine oil life system
monitoring the oil life, additional maintenance is
recommended in the Maintenance Schedule in this
manual. See Scheduled Maintenance
on page 7‑3for
more information.
4-58
Page 290 of 626
TRAILER CONNECTED
On vehicles with the Integrated Trailer Brake Control
(ITBC) system, this message displays briefly when a
trailer with electric brakes is first connected to the
vehicle.
This message clears itself after several seconds. This
message also clears if you acknowledge it. After this
message clears, the TRAILER GAIN/OUTPUT display
appears in the DIC.
See“TRAILER GAIN/OUTPUT” underDIC Operation
and Displays (With DIC Buttons)
on page 4‑49or DIC
Operation and Displays (Without DIC Buttons)on
page 4‑56and “Integrated Trailer Brake Control
System” underTowing a Traileron page 5‑51for more
information.
TRANSMISSION HOT IDLE ENGINE
Notice: If you drive your vehicle while the
transmission fluid is overheating and the
transmission temperature warning is displayed on
the instrument panel cluster and/or DIC, you can
damage the transmission. This could lead to costly
repairs that would not be covered by your warranty.
Do not drive your vehicle with overheated
transmission fluid or while the transmission
temperature warning is displayed. This message displays and a chime may sound if the
transmission fluid in the vehicle gets hot. Driving with
the transmission fluid temperature high can cause
damage to the vehicle. Stop the vehicle and let it idle to
allow the transmission to cool. This message clears and
the chime stops when the fluid temperature reaches a
safe level.
TURN SIGNAL ON
This message displays and a chime may sound if a turn
signal is left on for 3/4 of a mile (1.2 km). Move the turn
signal/multifunction lever to the off position.
WASHER FLUID LOW ADD FLUID
This message displays when the windshield washer
fluid is low. Fill the windshield washer fluid reservoir as
soon as possible. See
Engine Compartment Overview
on page 6‑16for the location of the windshield washer
fluid reservoir. Also, see Windshield Washer Fluidon
page 6‑38for more information.
4-72
Page 390 of 626
Hill and Mountain Roads
Driving on steep hills or through mountains is different
than driving on flat or rolling terrain. Tips for driving in
these conditions include:
.Keep the vehicle serviced and in good shape.
.Check all fluid levels and brakes, tires, cooling
system, and transmission.
.Going down steep or long hills, shift to a
lower gear.
{WARNING:
If you do not shift down, the brakes could get so
hot that they would not work well. You would then
have poor braking or even none going down a hill.
You could crash. Shift down to let the engine
assist the brakes on a steep downhill slope.
{WARNING:
Coasting downhill in N (Neutral) or with the
ignition off is dangerous. The brakes will have to
do all the work of slowing down and they could
get so hot that they would not work well. You
would then have poor braking or even none going
down a hill. You could crash. Always have the
engine running and the vehicle in gear when
going downhill.
.Stay in your own lane. Do not swing wide or cut
across the center of the road. Drive at speeds that
let you stay in your own lane.
.Top of hills: Be alert—something could be in your
lane (stalled car, accident).
.Pay attention to special road signs (falling rocks
area, winding roads, long grades, passing or
no-passing zones) and take appropriate action.
See Off-Road Driving
on page 5‑11for information
about driving off-road.
5-24
Page 431 of 626
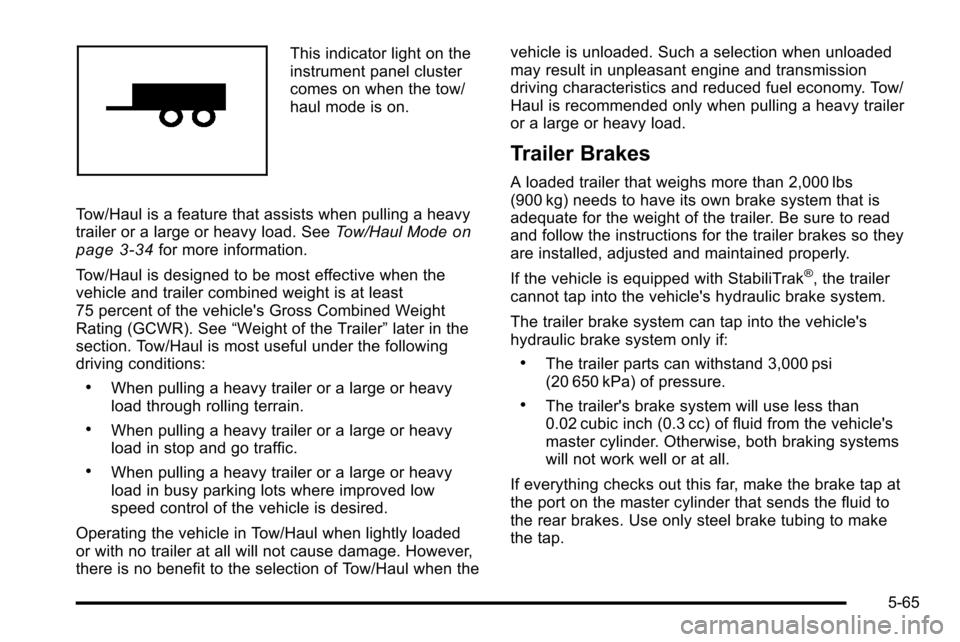
This indicator light on the
instrument panel cluster
comes on when the tow/
haul mode is on.
Tow/Haul is a feature that assists when pulling a heavy
trailer or a large or heavy load. See Tow/Haul Mode
on
page 3‑34for more information.
Tow/Haul is designed to be most effective when the
vehicle and trailer combined weight is at least
75 percent of the vehicle's Gross Combined Weight
Rating (GCWR). See “Weight of the Trailer” later in the
section. Tow/Haul is most useful under the following
driving conditions:
.When pulling a heavy trailer or a large or heavy
load through rolling terrain.
.When pulling a heavy trailer or a large or heavy
load in stop and go traffic.
.When pulling a heavy trailer or a large or heavy
load in busy parking lots where improved low
speed control of the vehicle is desired.
Operating the vehicle in Tow/Haul when lightly loaded
or with no trailer at all will not cause damage. However,
there is no benefit to the selection of Tow/Haul when the vehicle is unloaded. Such a selection when unloaded
may result in unpleasant engine and transmission
driving characteristics and reduced fuel economy. Tow/
Haul is recommended only when pulling a heavy trailer
or a large or heavy load.
Trailer Brakes
A loaded trailer that weighs more than 2,000 lbs
(900 kg) needs to have its own brake system that is
adequate for the weight of the trailer. Be sure to read
and follow the instructions for the trailer brakes so they
are installed, adjusted and maintained properly.
If the vehicle is equipped with StabiliTrak
®, the trailer
cannot tap into the vehicle's hydraulic brake system.
The trailer brake system can tap into the vehicle's
hydraulic brake system only if:
.The trailer parts can withstand 3,000 psi
(20 650 kPa) of pressure.
.The trailer's brake system will use less than
0.02 cubic inch (0.3 cc) of fluid from the vehicle's
master cylinder. Otherwise, both braking systems
will not work well or at all.
If everything checks out this far, make the brake tap at
the port on the master cylinder that sends the fluid to
the rear brakes. Use only steel brake tubing to make
the tap.
5-65
Page 441 of 626
Leaving After Parking on a Hill
1. Apply and hold the brake pedal.
2. Start the engine
3. Shift into a gear
4. Release the parking brake
5. Let up on the brake pedal.
6. Drive slowly until the trailer is clear of the chocks.
7. Stop and have someone pick up and store thechocks.
Maintenance When Trailer Towing
The vehicle needs service more often when pulling a
trailer. See this manual's Maintenance Schedule or
Index for more information. Things that are especially
important in trailer operation are automatic transmission
fluid, engine oil, axle lubricant, belts, cooling system
and brake system. It is a good idea to inspect these
before and during the trip.
Check periodically to see that all hitch nuts and bolts
are tight.
Trailer Wiring Harness
The vehicle is equipped with one of the following wiring
harnesses for towing a trailer or hauling a slide-in
camper.
Basic Trailer Wiring
All regular, extended cab and crew cab pickups have a
seven‐wire trailer towing harness.
For vehicles not equipped with heavy duty trailering, the
harness is secured to the vehicle's frame behind the
spare tire mount. The harness requires the installation
of a trailer connector, which is available through your
dealer.
If towing a light‐duty trailer with a standard four‐way
round pin connector, an adapter is available from your
dealer.
5-75