2010 CHEVROLET SILVERADO ignition
[x] Cancel search: ignitionPage 186 of 626
wait for the Four-Wheel-Drive Low indicator light to stop
flashing and remain on before shifting the transmission
into gear.
Notice:Shifting the transmission into gear before
the requested mode indicator light has stopped
flashing could damage the transfer case. To help
avoid damaging the vehicle, always wait for the
mode indicator lights to stop flashing before
shifting the transmission into gear.
It is typical for the vehicle to exhibit significant
engagement noise and bump when shifting between
Four-Wheel-Drive Low and Four-Wheel-Drive High
ranges or from N (Neutral) with the engine running.
If the knob is turned to the Four-Wheel-Drive Low
position when the vehicle is in gear and/or moving, the
Four-Wheel-Drive Low indicator light will flash for
30 seconds and not complete the shift unless the
vehicle is moving less than 3 mph (5 km/h) and the
transmission is in N (Neutral). After 30 seconds the
transfer case will shift to Four-Wheel-Drive High mode.
Shifting Out of Four-Wheel-Drive Low
To shift from Four-Wheel-Drive Low to
Four-Wheel-Drive High, AUTO or Two-Wheel-Drive
High, the vehicle must be stopped or moving less than
3 mph (5 km/h) with the transmission in N (Neutral) and
the ignition in ON/RUN. The preferred method for
shifting out of Four-Wheel-Drive Low is to have the vehicle moving 1 to 2 mph (1.6 to 3.2 km/h). Turn the
knob to the Four-Wheel-Drive High, AUTO or
Two-Wheel-Drive High position. You must wait for the
Four-Wheel-Drive High, AUTO or Two-Wheel-Drive
High indicator light to stop flashing and remain on
before shifting the transmission into gear.
Notice:
Shifting the transmission into gear before
the requested mode indicator light has stopped
flashing could damage the transfer case. To help
avoid damaging the vehicle, always wait for the
mode indicator lights to stop flashing before
shifting the transmission into gear.
It is typical for the vehicle to exhibit significant
engagement noise and bump when shifting between
Four-Wheel-Drive Low and Four-Wheel-Drive High
ranges or from N (Neutral) with the engine running.
If the knob is turned to the Four-Wheel-Drive High,
AUTO, or Two-Wheel-Drive High switch position
when the vehicle is in gear and/or moving, the
Four-Wheel-Drive High, AUTO or Two-Wheel-Drive
High indicator light will flash for 30 seconds but will not
complete the shift unless the vehicle is moving less
than 3 mph (5 km/h) and the transmission is in
N (Neutral).
3-48
Page 187 of 626
Shifting into Neutral
To shift the transfer case to N (Neutral) do the following:1. Make sure the vehicle is parked so that it will not roll.
2. Set the parking brake and apply the regular brake pedal. See Parking Brake
on page 3‑50for more
information.
3. Shifting the transfer case into N (Neutral) can be done with or without the engine running. Shifting
without the engine running should be done with the
ignition in ON/RUN.
4. Put the transmission in N (Neutral).
5. Shift the transfer case to Two-Wheel Drive High.
6. Turn the transfer case dial clockwise to N (Neutral) until it stops and hold it there until the N (Neutral)
light starts blinking. This will take at least
10 seconds. Then slowly release the dial to the
four low position. The N (Neutral) light will come on
when the transfer case shift to N (Neutral) is
complete.
7. If the engine is running, make sure that the transfer case is in N (Neutral) by shifting the transmission
to R (Reverse) for one second, then shift the
transmission to D (Drive) for one second.
8. Turn the ignition to ACC/ACCESSORY, which will turn the engine off. 9. Place the transmission shift lever in P (Park).
10. Release the parking brake prior to moving the vehicle.
11. Turn the ignition to LOCK/OFF.Shifting Out of Neutral
To shift out of N (Neutral) do the following: 1. Set the parking brake and apply the regular brake pedal.
2. Turn the ignition to ON/RUN with the engine off, and shift the transmission to N (Neutral).
3. Turn the transfer case dial to Two-Wheel-Drive High, Four-Wheel-Drive High, AUTO.
After the transfer case has shifted out of
N (Neutral), the N (Neutral) light will go out.
4. Release the parking brake prior to moving the vehicle.
Notice: Shifting the transmission into gear before
the requested mode indicator light has stopped
flashing could damage the transfer case. To help
avoid damaging the vehicle, always wait for the
mode indicator lights to stop flashing before
shifting the transmission into gear.
5. Start the engine and shift the transmission to the desired position.
3-49
Page 188 of 626
Parking Brake
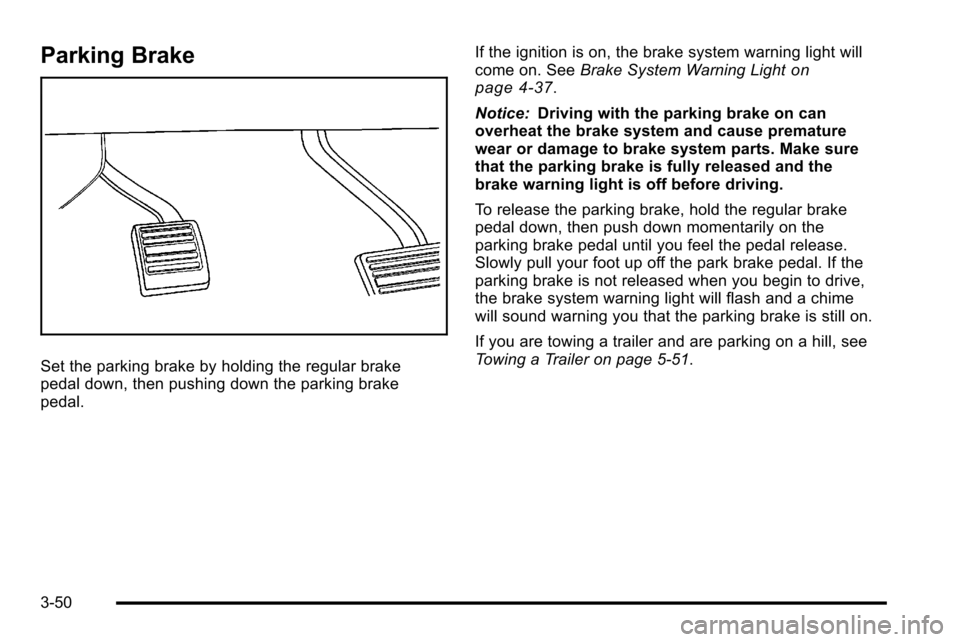
Set the parking brake by holding the regular brake
pedal down, then pushing down the parking brake
pedal.If the ignition is on, the brake system warning light will
come on. See
Brake System Warning Light
on
page 4‑37.
Notice: Driving with the parking brake on can
overheat the brake system and cause premature
wear or damage to brake system parts. Make sure
that the parking brake is fully released and the
brake warning light is off before driving.
To release the parking brake, hold the regular brake
pedal down, then push down momentarily on the
parking brake pedal until you feel the pedal release.
Slowly pull your foot up off the park brake pedal. If the
parking brake is not released when you begin to drive,
the brake system warning light will flash and a chime
will sound warning you that the parking brake is still on.
If you are towing a trailer and are parking on a hill, see
Towing a Trailer on page 5‑51.
3-50
Page 189 of 626
Shifting Into Park
{WARNING:
It can be dangerous to get out of the vehicle if the
shift lever is not fully in P (Park) with the parking
brake firmly set. The vehicle can roll. If you have
left the engine running, the vehicle can move
suddenly. You or others could be injured. To be
sure the vehicle will not move, even when you are
on fairly level ground, use the steps that follow.
With four-wheel drive, if the transfer case is in
N (Neutral), the vehicle will be free to roll, even if
the shift lever is in P (Park). So, be sure the
transfer case is in a drive gear—not in
N (Neutral). If you are pulling a trailer, see Towing
a Trailer on page 5‑51.
1. Hold the brake pedal down, then set the parking brake.
See Parking Brake
on page 3‑50for more
information. 2. Move the shift lever into the P (Park) position by
pulling the shift lever toward you and moving it up
as far as it will go.
3. Be sure the transfer case is in a drive gear —not
in N (Neutral).
4. Turn the ignition key to LOCK/OFF.
5. Remove the key and take it with you. If you can leave the vehicle with the ignition key in your hand,
the vehicle is in P (Park).
3-51
Page 191 of 626
Shifting Out of Park
This vehicle is equipped with an electronic shift lock
release system. The shift lock release is designed to:
.Prevent ignition key removal unless the shift lever
is in P (Park) with the shift lever button fully
released, and
.Prevent movement of the shift lever out of P (Park),
unless the ignition is in ON/RUN or ACC/
ACCESSORY and the regular brake pedal is
applied.
The shift lock release is always functional except in the
case of an uncharged or low voltage (less than 9 volt)
battery.
If the vehicle has an uncharged battery or a battery with
low voltage, try charging or jump starting the battery.
See Jump Starting
on page 6‑44for more information. To shift out of P (Park) use the following:
1. Apply the brake pedal.
2. Move the shift lever to the desired position.
If you still are unable to shift out of P (Park): 1. Ease the pressure on the shift lever.
2. While holding down the brake pedal, press the shift lever all the way into P (Park).
3. Move the shift lever to the desired position.
If you are still having a problem shifting, then have the
vehicle serviced soon.
Parking Over Things That Burn
{WARNING:
Things that can burn could touch hot exhaust
parts under the vehicle and ignite. Do not park
over papers, leaves, dry grass, or other things that
can burn.
3-53
Page 194 of 626

Mirrors
Manual Rearview Mirror
Hold the inside rearview mirror in the center to move it
for a clearer view behind your vehicle. Adjust the mirror
to avoid glare from the headlamps behind you. Push the
tab forward for daytime use and pull it for nighttime use.
Automatic Dimming Rearview Mirror
The vehicle may have an automatic dimming inside
rearview mirror.
Vehicles with OnStar
®have three additional control
buttons for the OnStar®system. See your dealer for
more information about OnStar®and how to subscribe
to it. See the OnStar®owner guide for more information
about the services OnStar®provides.
O(On/Off): Press to turn the dimming feature on or off.
The vehicle may also have a Rear Vision Camera
(RVC). See Rear Vision Camera (RVC)
on page 3‑63for more information.
If the vehicle has RVC, the
Obutton may not be
available.
Automatic Dimming Mirror Operation
Automatic dimming reduces the glare from the
headlamps of the vehicle behind you. The dimming
feature comes on and the indicator light illuminates
each time the ignition is turned to start.
Cleaning the Mirror
Do not spray glass cleaner directly on the mirror. Use a
soft towel dampened with water.
Outside Manual Mirrors
Adjust the outside mirror for a clearer view.
Manually fold the mirrors inward to prevent damage
when going through an automatic car wash. To fold,
push the mirror toward the vehicle. Push the mirror
outward, to return to its original position.
Using hood-mounted air deflectors and add-on convex
mirror attachments could decrease mirror performance.
3-56
Page 197 of 626
Park Tilt Mirrors
If the vehicle has the memory package, the passenger
and/or driver mirror tilts to a preselected position when
the vehicle is in R (Reverse). This feature lets the driver
view the curb when parallel parking. The mirror(s) return
to the original position when the vehicle is shifted out of
R (Reverse), or the ignition is turned off or to
OFF/LOCK.
Turn this feature on or off through the Driver Information
Center (DIC). SeeDIC Vehicle Customization (With DIC
Buttons)
on page 4‑73for more information.
Outside Convex Mirror
{WARNING:
A convex mirror can make things, like other
vehicles, look farther away than they really are.
If you cut too sharply into the right lane, you could
hit a vehicle on the right. Check the inside mirror
or glance over your shoulder before changing
lanes.
The passenger side mirror is convex shaped. A convex
mirror's surface is curved so more can be seen from the
driver seat.
Outside Heated Mirrors
For vehicles with heated mirrors:
<(Rear Window Defogger): Press to heat the
mirrors. If the vehicle has a towing mirror, only the
upper glass of the mirror is heated. The lower convex
part of the towing mirror is not heated.
Depending on the vehicle's features, see “Rear Window
Defogger” under,Climate Control System (With Air
Conditioning)
on page 4‑18or Climate Control System
(With Heater Only)on page 4‑21or Dual Automatic
Climate Control Systemon page 4‑22for more
information.
3-59
Page 216 of 626
Do not exceed the maximum vehicle capacity when
loading the vehicle. For more information on vehicle
capacity and loading, seeLoading the Vehicle
on
page 5‑29.
.If small heavy objects are placed on the roof, cut a
piece of 3/8 inch plywood to fit inside the crossrails
and siderails to spread the load. Tie the plywood to
the siderail supports.
.Tie the load and secure it to the crossrails or the
siderail supports. Use the crossrails only to keep
the load from sliding. To move a crossrail, lift the
release lever up, on both sides of the rail. Then
slide the crossrail to the desired position balancing
the force side to side. Press the release lever
down on both sides of the rail, down to tighten it.
Try to slide the crossrail back and forth slightly to
make sure it is tight.
.To carry long items, move the crossrails as far
apart as possible. Tie the load to the crossrails and
the siderails or siderail supports. Also tie the load
to the bumpers, but do not tie the load so tightly
that the crossrails or siderails are damaged.
.After moving a crossrail, be sure it is securely
locked into the siderail.
A Center High-Mounted Stoplamp (CHMSL) is located
above the rear window glass.
Make sure items loaded on the roof of the vehicle do
not block or damage the CHMSL.
Rear Seat Armrest
Vehicles with a rear seat armrest have two cupholders.
Pull the armrest down from the rear seatback to access
the cupholders.
Sunroof
On vehicles with a power sliding sunroof, the ignition
needs to be turned to RUN, or the Retained Accessory
Power (RAP) must be activated to open or close the
sunroof. When RAP is active, the sunroof will work for
10 minutes after the ignition is turned off, or until the
driver's door is opened. See Retained Accessory Power
(RAP)
on page 3‑23for more information.
Do not leave the sunroof open for long periods of time
while the vehicle is not in use. Debris can collect in the
tracks and damage the sunroof operation and plug the
water draining system.
3-78