2010 CHEVROLET SILVERADO warning light
[x] Cancel search: warning lightPage 188 of 626
Parking Brake
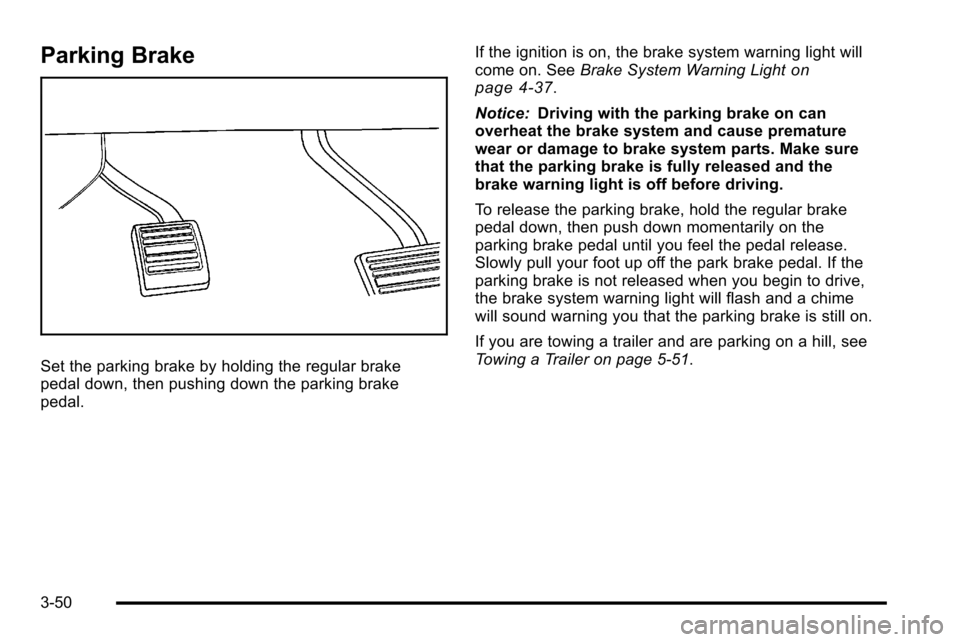
Set the parking brake by holding the regular brake
pedal down, then pushing down the parking brake
pedal.If the ignition is on, the brake system warning light will
come on. See
Brake System Warning Light
on
page 4‑37.
Notice: Driving with the parking brake on can
overheat the brake system and cause premature
wear or damage to brake system parts. Make sure
that the parking brake is fully released and the
brake warning light is off before driving.
To release the parking brake, hold the regular brake
pedal down, then push down momentarily on the
parking brake pedal until you feel the pedal release.
Slowly pull your foot up off the park brake pedal. If the
parking brake is not released when you begin to drive,
the brake system warning light will flash and a chime
will sound warning you that the parking brake is still on.
If you are towing a trailer and are parking on a hill, see
Towing a Trailer on page 5‑51.
3-50
Page 199 of 626
How the System Works
URPA comes on automatically when the shift lever is
moved into R (Reverse). A single tone sounds to
indicate the system is working.
URPA operates only at speeds less than
5 mph (8 km/h).
An obstacle is indicated by audible beeps. The interval
between the beeps becomes shorter as the vehicle gets
closer to the obstacle. When the distance is less than
30 cm (12 in) the beeps are continuous.
To be detected, objects must be at least 25.4 cm (10 in)
off the ground and below tailgate level. Objects must
also be within 2.5 m (8 ft) from the rear bumper. This
distance may be less during warmer or humid weather.
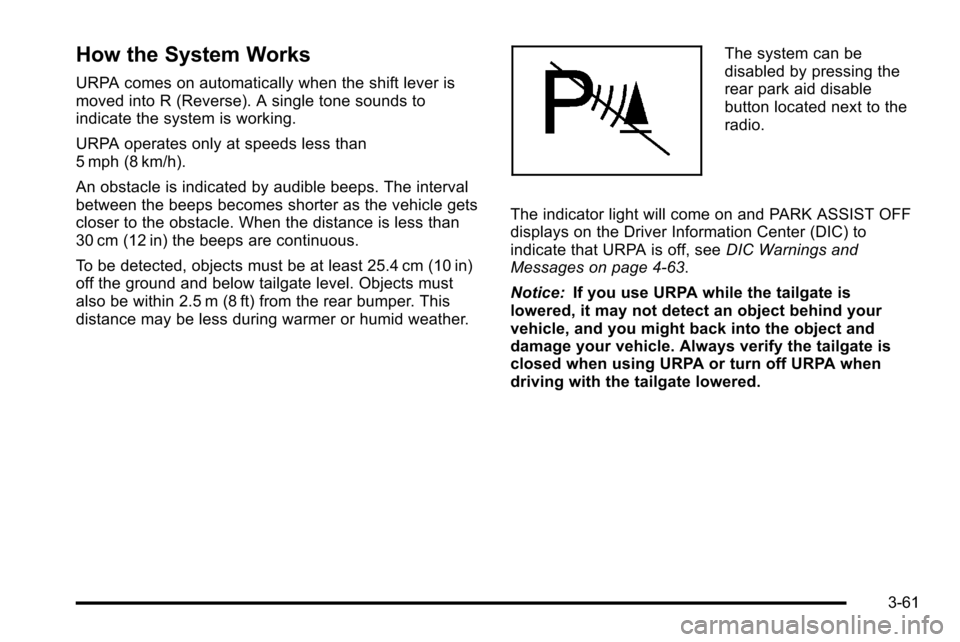
The system can be
disabled by pressing the
rear park aid disable
button located next to the
radio.
The indicator light will come on and PARK ASSIST OFF
displays on the Driver Information Center (DIC) to
indicate that URPA is off, see DIC Warnings and
Messages on page 4‑63.
Notice: If you use URPA while the tailgate is
lowered, it may not detect an object behind your
vehicle, and you might back into the object and
damage your vehicle. Always verify the tailgate is
closed when using URPA or turn off URPA when
driving with the tailgate lowered.
3-61
Page 201 of 626
Rear Vision Camera (RVC)
This vehicle may have a Rear Vision Camera system.
Read this entire section before using it.
{WARNING:
The Rear Vision Camera (RVC) system does not
replace driver vision. RVC does not:
.Detect objects that are outside the camera's
field of view, below the bumper, or underneath
the vehicle.
.Detect children, pedestrians, bicyclists,
or pets.
Do not back the vehicle by only looking at the
RVC screen, or use the screen during longer,
higher speed backing maneuvers or where there
could be cross-traffic. Your judged distances using
the screen will differ from actual distances.
So if you do not use proper care before backing
up, you could hit a vehicle, child, pedestrian,
bicyclist, or pet, resulting in vehicle damage,
injury, or death. Even though the vehicle has the
RVC system, always check carefully before
backing up by checking behind and around the
vehicle.
Vehicles Without Navigation System
The rear vision camera system is designed to help the
driver when backing up by displaying a view of the area
behind the vehicle. When the key is in the ON/RUN
position and the driver shifts the vehicle into
R (Reverse), the video image automatically appears on
the inside rear view mirror. Once the driver shifts out of
R (Reverse), the video image automatically disappears
from the inside rear view mirror.
Turning the Rear Vision Camera System Off
or On
To turn off the rear vision camera system, press and
hold
z, located on the inside rearview mirror, until the
left indicator light turns off. The rear camera vision
display is now disabled.
To turn the rear vision camera system on again, press
and hold
zuntil the left indicator light illuminates. The
rear vision camera system display is now enabled and
the display will appear in the mirror normally.
3-63
Page 219 of 626
Section 4 Instrument Panel
Instrument Panel Overview. . . . . . . . . . . . . . . . . . . . . . . .4-3
Hazard Warning Flashers . . . . . . . . . . . . . . . . . . . . . . . 4-3
Horn . . . . . . . . . . . . . . . . . . . . . . . . . . . . . . . . . . . . . . . . . . . . 4-3
Tilt Wheel . . . . . . . . . . . . . . . . . . . . . . . . . . . . . . . . . . . . . . . 4-3
Turn Signal/Multifunction Lever . . . . . . . . . . . . . . . . . . 4-4
Turn and Lane-Change Signals . . . . . . . . . . . . . . . . . 4-4
Headlamp High/Low-Beam Changer . . . . . . . . . . . . 4-5
Flash-to-Pass . . . . . . . . . . . . . . . . . . . . . . . . . . . . . . . . . . . 4-5
Windshield Wipers . . . . . . . . . . . . . . . . . . . . . . . . . . . . . . 4-6
Windshield Washer . . . . . . . . . . . . . . . . . . . . . . . . . . . . . 4-6
Cruise Control . . . . . . . . . . . . . . . . . . . . . . . . . . . . . . . . . . 4-7
Exterior Lamps . . . . . . . . . . . . . . . . . . . . . . . . . . . . . . . . 4-10
Headlamps on Reminder . . . . . . . . . . . . . . . . . . . . . . . 4-11
Daytime Running Lamps (DRL) . . . . . . . . . . . . . . . . 4-12
Automatic Headlamp System . . . . . . . . . . . . . . . . . . 4-12
Fog Lamps . . . . . . . . . . . . . . . . . . . . . . . . . . . . . . . . . . . . 4-13
Auxiliary Roof-Mounted Lamp . . . . . . . . . . . . . . . . . 4-14
Instrument Panel Brightness . . . . . . . . . . . . . . . . . . . 4-14
Dome Lamps . . . . . . . . . . . . . . . . . . . . . . . . . . . . . . . . . . 4-14
Dome Lamp Override . . . . . . . . . . . . . . . . . . . . . . . . . . 4-15
Entry Lighting . . . . . . . . . . . . . . . . . . . . . . . . . . . . . . . . . . 4-15
Exit Lighting . . . . . . . . . . . . . . . . . . . . . . . . . . . . . . . . . . . 4-15
Reading Lamps . . . . . . . . . . . . . . . . . . . . . . . . . . . . . . . . 4-15
Cargo Lamp . . . . . . . . . . . . . . . . . . . . . . . . . . . . . . . . . . . 4-15
Electric Power Management . . . . . . . . . . . . . . . . . . . 4-16 Battery Run-Down Protection . . . . . . . . . . . . . . . . . . 4-16
Accessory Power Outlet(s) . . . . . . . . . . . . . . . . . . . . . 4-17
Ashtray(s) and Cigarette Lighter . . . . . . . . . . . . . . . 4-18
Climate Controls . . . . . . . . . . . . . . . . . . . . . . . . . . . . . . . . . . 4-18
Climate Control System (With Air
Conditioning) . . . . . . . . . . . . . . . . . . . . . . . . . . . . . . . . 4-18
Climate Control System (With Heater Only) . . . . 4-21
Dual Automatic Climate Control System . . . . . . . 4-22
Outlet Adjustment . . . . . . . . . . . . . . . . . . . . . . . . . . . . . . 4-28
Warning Lights, Gauges, and Indicators . . . . . . . .4-28
Instrument Panel Cluster . . . . . . . . . . . . . . . . . . . . . . . 4-29
Speedometer and Odometer . . . . . . . . . . . . . . . . . . . 4-30
Trip Odometer . . . . . . . . . . . . . . . . . . . . . . . . . . . . . . . . . 4-30
Tachometer . . . . . . . . . . . . . . . . . . . . . . . . . . . . . . . . . . . . 4-30
Safety Belt Reminders . . . . . . . . . . . . . . . . . . . . . . . . . 4-31
Airbag Readiness Light . . . . . . . . . . . . . . . . . . . . . . . . 4-32
Airbag Off Light . . . . . . . . . . . . . . . . . . . . . . . . . . . . . . . . 4-32
Passenger Airbag Status Indicator . . . . . . . . . . . . . 4-34
Charging System Light . . . . . . . . . . . . . . . . . . . . . . . . 4-36
Voltmeter Gauge . . . . . . . . . . . . . . . . . . . . . . . . . . . . . . . 4-36
Brake System Warning Light . . . . . . . . . . . . . . . . . . . 4-37
Antilock Brake System (ABS) Warning Light . . . 4-38
StabiliTrak
®Indicator Light . . . . . . . . . . . . . . . . . . . . . 4-39
Engine Coolant Temperature Gauge . . . . . . . . . . . 4-40
Tire Pressure Light . . . . . . . . . . . . . . . . . . . . . . . . . . . . 4-40
Malfunction Indicator Lamp . . . . . . . . . . . . . . . . . . . . 4-41
4-1
Page 220 of 626

Section 4 Instrument Panel
Oil Pressure Gauge . . . . . . . . . . . . . . . . . . . . . . . . . . . . 4-44
Oil Pressure Light . . . . . . . . . . . . . . . . . . . . . . . . . . . . . 4-45
Security Light . . . . . . . . . . . . . . . . . . . . . . . . . . . . . . . . . . 4-46
Fog Lamp Light . . . . . . . . . . . . . . . . . . . . . . . . . . . . . . . . 4-46
Cruise Control Light . . . . . . . . . . . . . . . . . . . . . . . . . . . 4-46
Highbeam On Light . . . . . . . . . . . . . . . . . . . . . . . . . . . . 4-46
Four-Wheel-Drive Light . . . . . . . . . . . . . . . . . . . . . . . . 4-47
Tow/Haul Mode Light . . . . . . . . . . . . . . . . . . . . . . . . . . 4-47
Fuel Gauge . . . . . . . . . . . . . . . . . . . . . . . . . . . . . . . . . . . . 4-47
Low Fuel Warning Light . . . . . . . . . . . . . . . . . . . . . . . . 4-48
Driver Information Center (DIC) . . . . . . . . . . . . . . . . . .4-49
DIC Operation and Displays (With DIC Buttons) . . . . . . . . . . . . . . . . . . . . . . . . . . . . . . . . . . . . . 4-49
DIC Operation and Displays (Without DIC Buttons) . . . . . . . . . . . . . . . . . . . . . . . . . . . . . . . . . . . . . 4-56
DIC Compass . . . . . . . . . . . . . . . . . . . . . . . . . . . . . . . . . . 4-60
DIC Warnings and Messages . . . . . . . . . . . . . . . . . . 4-63
DIC Vehicle Customization (With DIC Buttons) . . . . . . . . . . . . . . . . . . . . . . . . . . . . . . . . . . . . . 4-73 Audio System(s)
. . . . . . . . . . . . . . . . . . . . . . . . . . . . . . . . . . 4-82
Setting the Clock . . . . . . . . . . . . . . . . . . . . . . . . . . . . . . 4-82
Radio(s) . . . . . . . . . . . . . . . . . . . . . . . . . . . . . . . . . . . . . . . 4-85
Using an MP3 (Radios with CD) . . . . . . . . . . . . . . 4-105
Using an MP3 (Radios with CD and DVD) . . . . 4-112
XM Radio Messages . . . . . . . . . . . . . . . . . . . . . . . . . 4-120
Navigation/Radio System . . . . . . . . . . . . . . . . . . . . . 4-121
Bluetooth
®. . . . . . . . . . . . . . . . . . . . . . . . . . . . . . . . . . . . 4-121
Rear Seat Entertainment (RSE) System . . . . . . 4-132
Rear Seat Audio (RSA) . . . . . . . . . . . . . . . . . . . . . . . 4-141
Theft-Deterrent Feature . . . . . . . . . . . . . . . . . . . . . . 4-143
Audio Steering Wheel Controls . . . . . . . . . . . . . . . 4-143
Radio Reception . . . . . . . . . . . . . . . . . . . . . . . . . . . . . . 4-146
Fixed Mast Antenna . . . . . . . . . . . . . . . . . . . . . . . . . . 4-147
XM™ Satellite Radio Antenna System . . . . . . . . 4-147
4-2
Page 234 of 626
Electric Power Management
The vehicle has Electric Power Management (EPM) that
estimates the battery's temperature and state of charge.
It then adjusts the voltage for best performance and
extended life of the battery.
When the battery's state of charge is low, the voltage is
raised slightly to quickly bring the charge back up.
When the state of charge is high, the voltage is lowered
slightly to prevent overcharging. If the vehicle has a
voltmeter gauge or a voltage display on the Driver
Information Center (DIC), you may see the voltage
move up or down. This is normal. If there is a problem,
an alert will be displayed.
The battery can be discharged at idle if the electrical
loads are very high. This is true for all vehicles. This is
because the generator (alternator) may not be spinning
fast enough at idle to produce all the power that is
needed for very high electrical loads.
A high electrical load occurs when several of the
following are on, such as: headlamps, high beams, fog
lamps, rear window defogger, climate control fan at high
speed, heated seats, engine cooling fans, trailer loads,
and loads plugged into accessory power outlets.EPM works to prevent excessive discharge of the
battery. It does this by balancing the generator's output
and the vehicle's electrical needs. It can increase
engine idle speed to generate more power, whenever
needed. It can temporarily reduce the power demands
of some accessories.
Normally, these actions occur in steps or levels, without
being noticeable. In rare cases at the highest levels of
corrective action, this action may be noticeable to the
driver. If so, a Driver Information Center (DIC) message
might be displayed, such as BATTERY SAVER
ACTIVE, BATTERY VOLTAGE LOW, or LOW
BATTERY. If this message is displayed, it is
recommended that the driver reduce the electrical loads
as much as possible. See
DIC Warnings and Messages
on page 4‑63.
Battery Run-Down Protection
This feature shuts off the dome and reading lamps,
if they are left on for more than 10 minutes after the
ignition is turned off. The cargo lamp shuts off after
20 minutes. This prevents the battery from
running down.
4-16
Page 246 of 626
Outlet Adjustment
Use the air outlets located in the center and on the side
of the instrument panel to direct the airflow. Use the
thumbwheels near the air outlets to open or close off
the airflow.
Operation Tips
.Clear away any ice, snow, or leaves from air inlets
at the base of the windshield that could block the
flow of air into the vehicle.
.Keep the path under the front seats clear of
objects to help circulate the air inside of the vehicle
more effectively.
.Use of non‐GM approved hood deflectors can
adversely affect the performance of the system.
Check with your dealer before adding equipment to
the outside of the vehicle.
Warning Lights, Gauges, and
Indicators
Warning lights and gauges can signal that something is
wrong before it becomes serious enough to cause an
expensive repair or replacement. Paying attention to the
warning lights and gauges could prevent injury.
Warning lights come on when there might be or there is
a problem with one of the vehicle's functions. Some
warning lights come on briefly when the engine is
started to indicate they are working.
Gauges can indicate when there might be or there is a
problem with one of the vehicle's functions. Often
gauges and warning lights work together to indicate a
problem with the vehicle.
When one of the warning lights comes on and stays on
while driving, or when one of the gauges shows there
could be a problem, check the section that explains
what to do. Follow this manual's advice. Waiting to do
repairs can be costly and even dangerous.
4-28
Page 249 of 626
Safety Belt Reminders
Driver Safety Belt Reminder Light
When the engine is started, a chime sounds for
several seconds to remind a driver to fasten the safety
belt, unless the driver safety belt is already buckled.
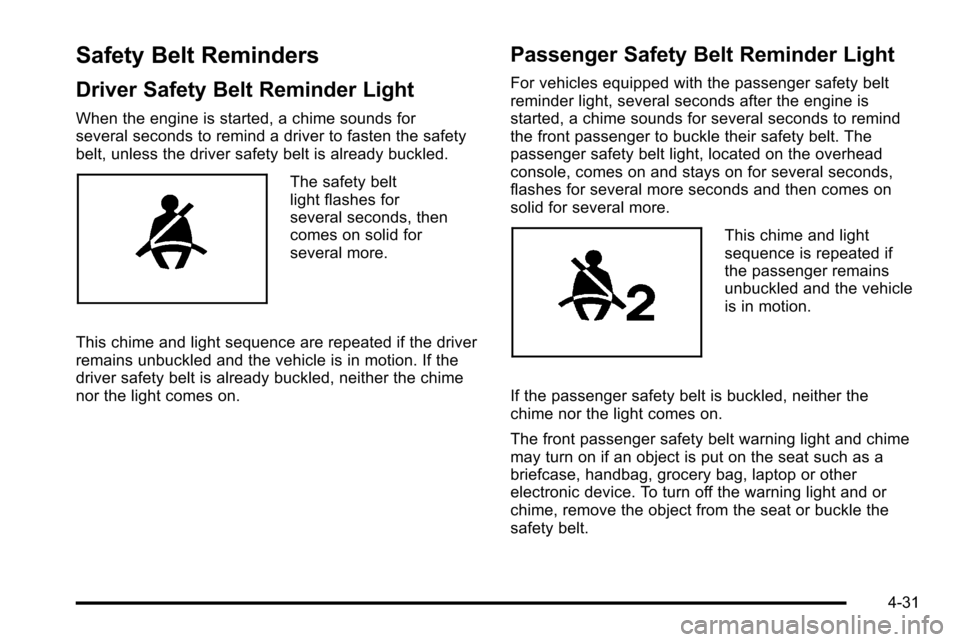
The safety belt
light flashes for
several seconds, then
comes on solid for
several more.
This chime and light sequence are repeated if the driver
remains unbuckled and the vehicle is in motion. If the
driver safety belt is already buckled, neither the chime
nor the light comes on.
Passenger Safety Belt Reminder Light
For vehicles equipped with the passenger safety belt
reminder light, several seconds after the engine is
started, a chime sounds for several seconds to remind
the front passenger to buckle their safety belt. The
passenger safety belt light, located on the overhead
console, comes on and stays on for several seconds,
flashes for several more seconds and then comes on
solid for several more.
This chime and light
sequence is repeated if
the passenger remains
unbuckled and the vehicle
is in motion.
If the passenger safety belt is buckled, neither the
chime nor the light comes on.
The front passenger safety belt warning light and chime
may turn on if an object is put on the seat such as a
briefcase, handbag, grocery bag, laptop or other
electronic device. To turn off the warning light and or
chime, remove the object from the seat or buckle the
safety belt.
4-31