2010 CHEVROLET SILVERADO instrument cluster
[x] Cancel search: instrument clusterPage 172 of 626
Tow/Haul Mode
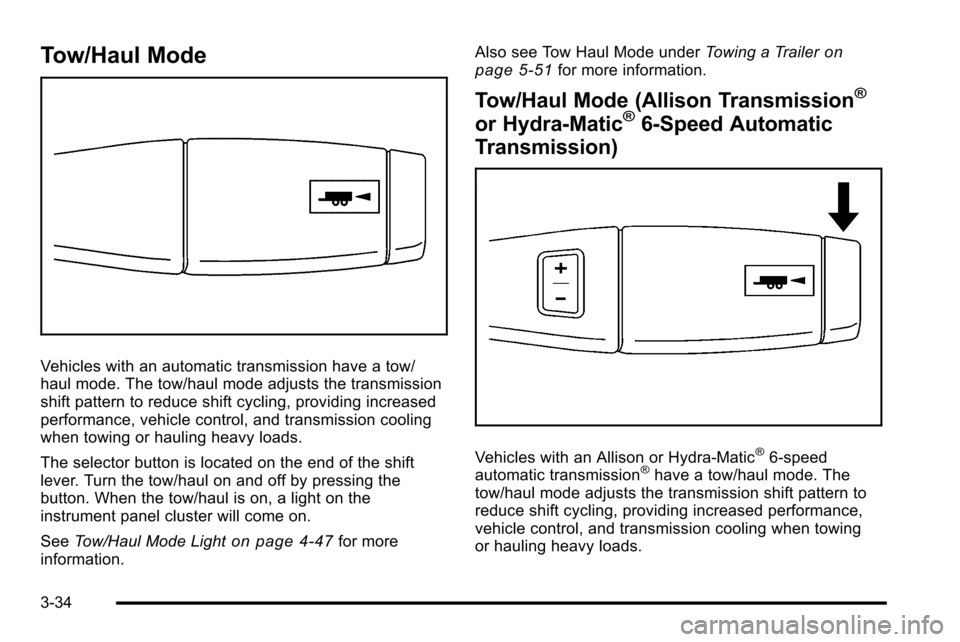
Vehicles with an automatic transmission have a tow/
haul mode. The tow/haul mode adjusts the transmission
shift pattern to reduce shift cycling, providing increased
performance, vehicle control, and transmission cooling
when towing or hauling heavy loads.
The selector button is located on the end of the shift
lever. Turn the tow/haul on and off by pressing the
button. When the tow/haul is on, a light on the
instrument panel cluster will come on.
SeeTow/Haul Mode Light
on page 4‑47for more
information. Also see Tow Haul Mode under
Towing a Trailer
on
page 5‑51for more information.
Tow/Haul Mode (Allison Transmission®
or Hydra-Matic®6-Speed Automatic
Transmission)
Vehicles with an Allison or Hydra-Matic®6-speed
automatic transmission®have a tow/haul mode. The
tow/haul mode adjusts the transmission shift pattern to
reduce shift cycling, providing increased performance,
vehicle control, and transmission cooling when towing
or hauling heavy loads.
3-34
Page 173 of 626
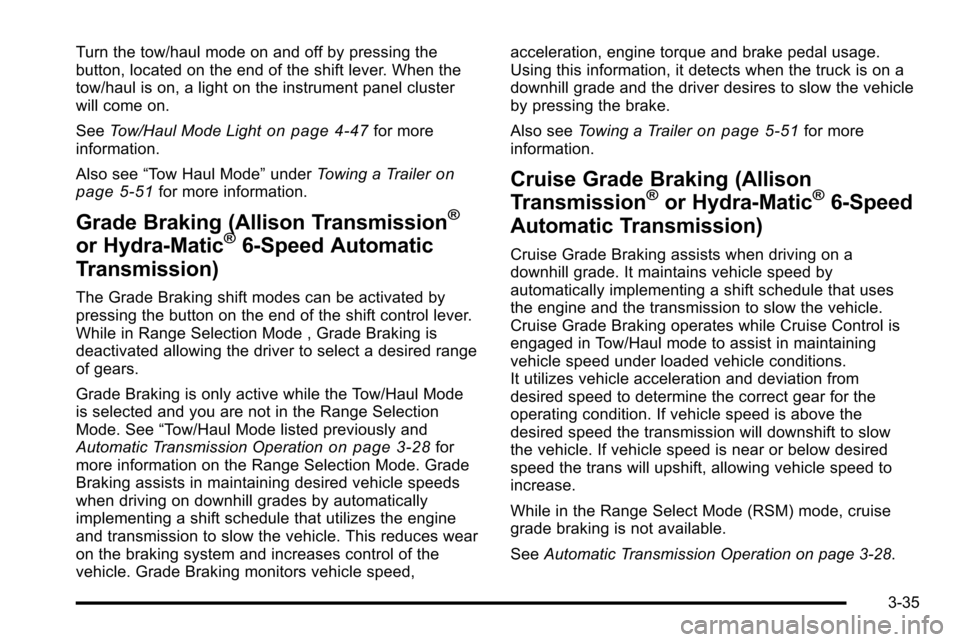
Turn the tow/haul mode on and off by pressing the
button, located on the end of the shift lever. When the
tow/haul is on, a light on the instrument panel cluster
will come on.
SeeTow/Haul Mode Light
on page 4‑47for more
information.
Also see “Tow Haul Mode” underTowing a Trailer
on
page 5‑51for more information.
Grade Braking (Allison Transmission®
or Hydra-Matic®6-Speed Automatic
Transmission)
The Grade Braking shift modes can be activated by
pressing the button on the end of the shift control lever.
While in Range Selection Mode , Grade Braking is
deactivated allowing the driver to select a desired range
of gears.
Grade Braking is only active while the Tow/Haul Mode
is selected and you are not in the Range Selection
Mode. See “Tow/Haul Mode listed previously and
Automatic Transmission Operation
on page 3‑28for
more information on the Range Selection Mode. Grade
Braking assists in maintaining desired vehicle speeds
when driving on downhill grades by automatically
implementing a shift schedule that utilizes the engine
and transmission to slow the vehicle. This reduces wear
on the braking system and increases control of the
vehicle. Grade Braking monitors vehicle speed, acceleration, engine torque and brake pedal usage.
Using this information, it detects when the truck is on a
downhill grade and the driver desires to slow the vehicle
by pressing the brake.
Also see
Towing a Trailer
on page 5‑51for more
information.
Cruise Grade Braking (Allison
Transmission®or Hydra-Matic®6-Speed
Automatic Transmission)
Cruise Grade Braking assists when driving on a
downhill grade. It maintains vehicle speed by
automatically implementing a shift schedule that uses
the engine and the transmission to slow the vehicle.
Cruise Grade Braking operates while Cruise Control is
engaged in Tow/Haul mode to assist in maintaining
vehicle speed under loaded vehicle conditions.
It utilizes vehicle acceleration and deviation from
desired speed to determine the correct gear for the
operating condition. If vehicle speed is above the
desired speed the transmission will downshift to slow
the vehicle. If vehicle speed is near or below desired
speed the trans will upshift, allowing vehicle speed to
increase.
While in the Range Select Mode (RSM) mode, cruise
grade braking is not available.
See Automatic Transmission Operation on page 3‑28.
3-35
Page 219 of 626
Section 4 Instrument Panel
Instrument Panel Overview. . . . . . . . . . . . . . . . . . . . . . . .4-3
Hazard Warning Flashers . . . . . . . . . . . . . . . . . . . . . . . 4-3
Horn . . . . . . . . . . . . . . . . . . . . . . . . . . . . . . . . . . . . . . . . . . . . 4-3
Tilt Wheel . . . . . . . . . . . . . . . . . . . . . . . . . . . . . . . . . . . . . . . 4-3
Turn Signal/Multifunction Lever . . . . . . . . . . . . . . . . . . 4-4
Turn and Lane-Change Signals . . . . . . . . . . . . . . . . . 4-4
Headlamp High/Low-Beam Changer . . . . . . . . . . . . 4-5
Flash-to-Pass . . . . . . . . . . . . . . . . . . . . . . . . . . . . . . . . . . . 4-5
Windshield Wipers . . . . . . . . . . . . . . . . . . . . . . . . . . . . . . 4-6
Windshield Washer . . . . . . . . . . . . . . . . . . . . . . . . . . . . . 4-6
Cruise Control . . . . . . . . . . . . . . . . . . . . . . . . . . . . . . . . . . 4-7
Exterior Lamps . . . . . . . . . . . . . . . . . . . . . . . . . . . . . . . . 4-10
Headlamps on Reminder . . . . . . . . . . . . . . . . . . . . . . . 4-11
Daytime Running Lamps (DRL) . . . . . . . . . . . . . . . . 4-12
Automatic Headlamp System . . . . . . . . . . . . . . . . . . 4-12
Fog Lamps . . . . . . . . . . . . . . . . . . . . . . . . . . . . . . . . . . . . 4-13
Auxiliary Roof-Mounted Lamp . . . . . . . . . . . . . . . . . 4-14
Instrument Panel Brightness . . . . . . . . . . . . . . . . . . . 4-14
Dome Lamps . . . . . . . . . . . . . . . . . . . . . . . . . . . . . . . . . . 4-14
Dome Lamp Override . . . . . . . . . . . . . . . . . . . . . . . . . . 4-15
Entry Lighting . . . . . . . . . . . . . . . . . . . . . . . . . . . . . . . . . . 4-15
Exit Lighting . . . . . . . . . . . . . . . . . . . . . . . . . . . . . . . . . . . 4-15
Reading Lamps . . . . . . . . . . . . . . . . . . . . . . . . . . . . . . . . 4-15
Cargo Lamp . . . . . . . . . . . . . . . . . . . . . . . . . . . . . . . . . . . 4-15
Electric Power Management . . . . . . . . . . . . . . . . . . . 4-16 Battery Run-Down Protection . . . . . . . . . . . . . . . . . . 4-16
Accessory Power Outlet(s) . . . . . . . . . . . . . . . . . . . . . 4-17
Ashtray(s) and Cigarette Lighter . . . . . . . . . . . . . . . 4-18
Climate Controls . . . . . . . . . . . . . . . . . . . . . . . . . . . . . . . . . . 4-18
Climate Control System (With Air
Conditioning) . . . . . . . . . . . . . . . . . . . . . . . . . . . . . . . . 4-18
Climate Control System (With Heater Only) . . . . 4-21
Dual Automatic Climate Control System . . . . . . . 4-22
Outlet Adjustment . . . . . . . . . . . . . . . . . . . . . . . . . . . . . . 4-28
Warning Lights, Gauges, and Indicators . . . . . . . .4-28
Instrument Panel Cluster . . . . . . . . . . . . . . . . . . . . . . . 4-29
Speedometer and Odometer . . . . . . . . . . . . . . . . . . . 4-30
Trip Odometer . . . . . . . . . . . . . . . . . . . . . . . . . . . . . . . . . 4-30
Tachometer . . . . . . . . . . . . . . . . . . . . . . . . . . . . . . . . . . . . 4-30
Safety Belt Reminders . . . . . . . . . . . . . . . . . . . . . . . . . 4-31
Airbag Readiness Light . . . . . . . . . . . . . . . . . . . . . . . . 4-32
Airbag Off Light . . . . . . . . . . . . . . . . . . . . . . . . . . . . . . . . 4-32
Passenger Airbag Status Indicator . . . . . . . . . . . . . 4-34
Charging System Light . . . . . . . . . . . . . . . . . . . . . . . . 4-36
Voltmeter Gauge . . . . . . . . . . . . . . . . . . . . . . . . . . . . . . . 4-36
Brake System Warning Light . . . . . . . . . . . . . . . . . . . 4-37
Antilock Brake System (ABS) Warning Light . . . 4-38
StabiliTrak
®Indicator Light . . . . . . . . . . . . . . . . . . . . . 4-39
Engine Coolant Temperature Gauge . . . . . . . . . . . 4-40
Tire Pressure Light . . . . . . . . . . . . . . . . . . . . . . . . . . . . 4-40
Malfunction Indicator Lamp . . . . . . . . . . . . . . . . . . . . 4-41
4-1
Page 222 of 626
Turn Signal/Multifunction Lever
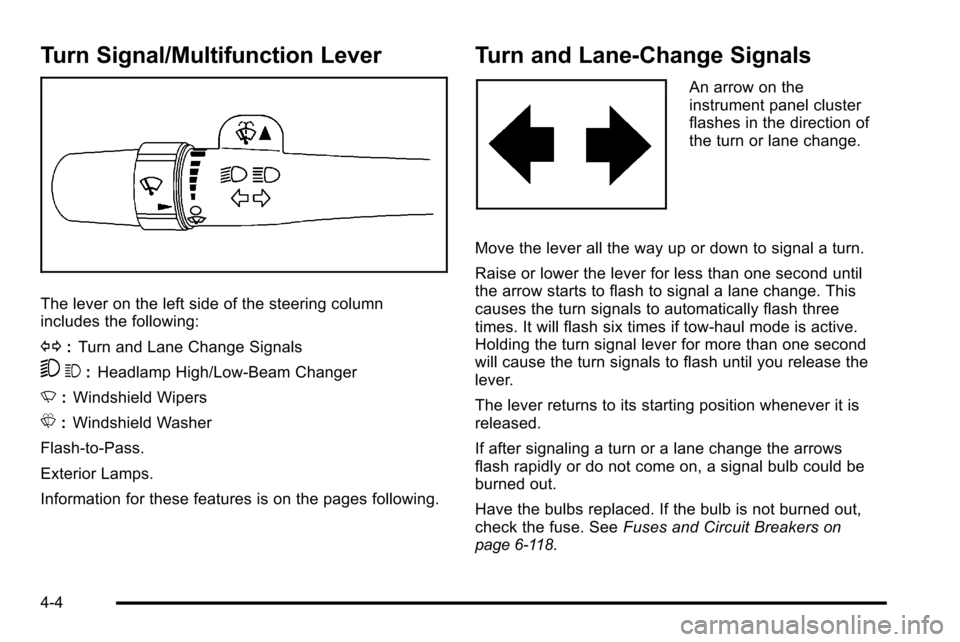
The lever on the left side of the steering column
includes the following:
G:Turn and Lane Change Signals
53 :Headlamp High/Low-Beam Changer
N :Windshield Wipers
L :Windshield Washer
Flash-to-Pass.
Exterior Lamps.
Information for these features is on the pages following.
Turn and Lane-Change Signals
An arrow on the
instrument panel cluster
flashes in the direction of
the turn or lane change.
Move the lever all the way up or down to signal a turn.
Raise or lower the lever for less than one second until
the arrow starts to flash to signal a lane change. This
causes the turn signals to automatically flash three
times. It will flash six times if tow-haul mode is active.
Holding the turn signal lever for more than one second
will cause the turn signals to flash until you release the
lever.
The lever returns to its starting position whenever it is
released.
If after signaling a turn or a lane change the arrows
flash rapidly or do not come on, a signal bulb could be
burned out.
Have the bulbs replaced. If the bulb is not burned out,
check the fuse. See Fuses and Circuit Breakers
on
page 6‑118.
4-4
Page 223 of 626
Turn Signal On Chime
If the turn signal is left on for more than 3/4 of a mile
(1.2 km), a chime sounds at each flash of the turn
signal, if the vehicle has a radio. The message TURN
SIGNAL ON will also appear in the Driver Information
Control (DIC). To turn the chime and message off, move
the turn signal lever to the off position.
Headlamp High/Low-Beam Changer
53(Headlamp High/Low Beam Changer): To
change the headlamps from low to high beam, push the
lever toward the instrument panel. To return to
low-beam headlamps, pull the multifunction lever toward
you. Then release it.
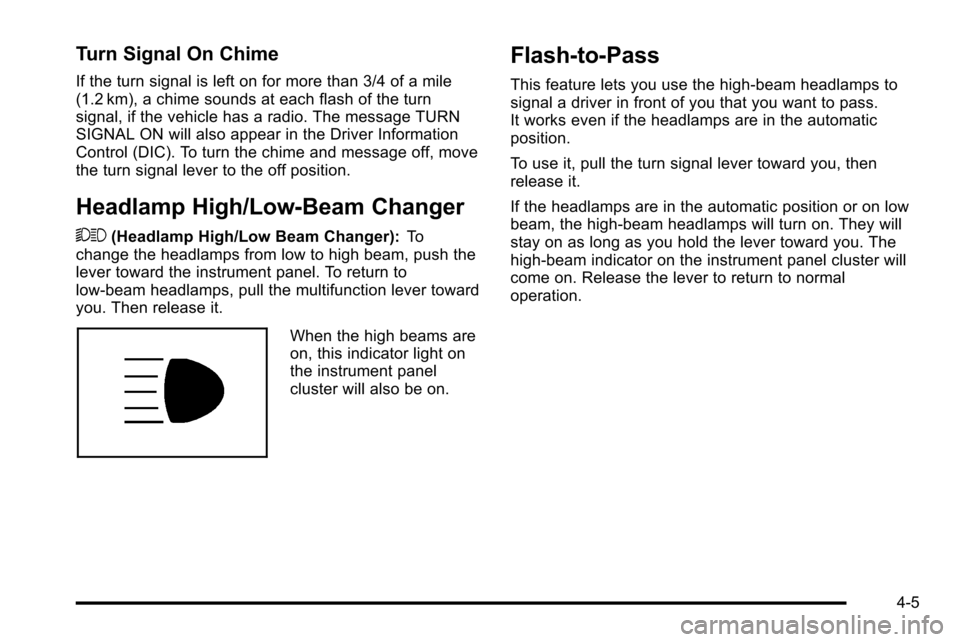
When the high beams are
on, this indicator light on
the instrument panel
cluster will also be on.
Flash-to-Pass
This feature lets you use the high-beam headlamps to
signal a driver in front of you that you want to pass.
It works even if the headlamps are in the automatic
position.
To use it, pull the turn signal lever toward you, then
release it.
If the headlamps are in the automatic position or on low
beam, the high-beam headlamps will turn on. They will
stay on as long as you hold the lever toward you. The
high-beam indicator on the instrument panel cluster will
come on. Release the lever to return to normal
operation.
4-5
Page 226 of 626
The cruise control buttons
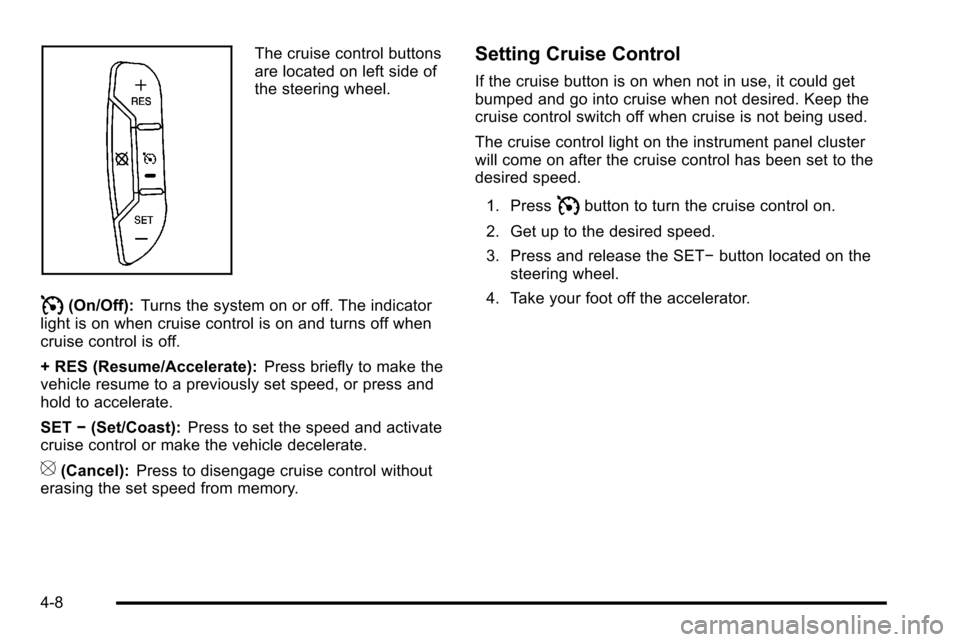
are located on left side of
the steering wheel.
I(On/Off):Turns the system on or off. The indicator
light is on when cruise control is on and turns off when
cruise control is off.
+ RES (Resume/Accelerate): Press briefly to make the
vehicle resume to a previously set speed, or press and
hold to accelerate.
SET −(Set/Coast): Press to set the speed and activate
cruise control or make the vehicle decelerate.
[(Cancel): Press to disengage cruise control without
erasing the set speed from memory.
Setting Cruise Control
If the cruise button is on when not in use, it could get
bumped and go into cruise when not desired. Keep the
cruise control switch off when cruise is not being used.
The cruise control light on the instrument panel cluster
will come on after the cruise control has been set to the
desired speed.
1. Press
Ibutton to turn the cruise control on.
2. Get up to the desired speed.
3. Press and release the SET− button located on the
steering wheel.
4. Take your foot off the accelerator.
4-8
Page 231 of 626
If the vehicle is started in a dark garage, the automatic
headlamp system comes on immediately. Once the
vehicle leaves the garage, it takes approximately
one minute for the automatic headlamp system to
change to DRL if it is bright enough outside. During that
delay, the instrument panel cluster may not be as bright
as usual. Make sure the instrument panel brightness
control is in the full bright position. SeeInstrument
Panel Brightness on page 4‑14.
To idle the vehicle with the automatic headlamp system
off, turn the control to the off position.
The headlamps will also stay on after you exit the
vehicle. This feature can be programmed using the
Driver Information Center (DIC), if equipped. See DIC
Vehicle Customization (With DIC Buttons)
on
page 4‑73.
If the vehicle is not equipped with DIC buttons, exit
lighting is automatic. When it is dark enough outside,
the exterior lamps remain on for 30 seconds after the
ignition is moved from ON/RUN to LOCK/OFF.
For vehicles without a radio, the instrument panel light
remains on for 30 seconds with the driver's door closed.
For vehicles with a radio, the instrument panel light
remains on for 10 minutes with the driver's door closed.
See Retained Accessory Power (RAP) on page 3‑23.
The regular headlamp system can be turned on when
needed.
Fog Lamps
For vehicles with fog lamps, the control is located next
to the exterior lamps control on the instrument panel, to
the left of the steering column.
The ignition must be in the ON/RUN position for the fog
lamps to come on.
#(Fog Lamps): Press to turn the fog lamps on or off.
A light will come on in the instrument panel cluster.
When the fog lamps are turned on, the parking lamps
automatically turn on.
When the headlamps are changed to high-beam, the
fog lamps also go off. When the high-beam headlamps
are turned off, the fog lamps will come on again.
Some localities have laws that require the headlamps to
be on along with the fog lamps.
4-13
Page 247 of 626
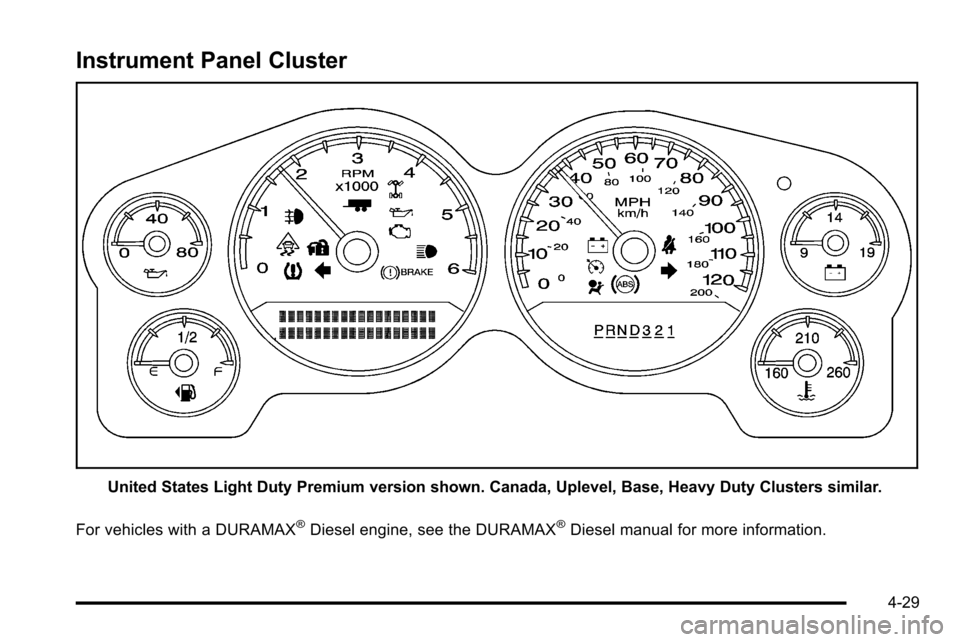
Instrument Panel Cluster
United States Light Duty Premium version shown. Canada, Uplevel, Base, Heavy Duty Clusters similar.
For vehicles with a DURAMAX
®Diesel engine, see the DURAMAX®Diesel manual for more information.
4-29