2010 CHEVROLET SILVERADO odometer
[x] Cancel search: odometerPage 33 of 626
Driver Information Center (DIC)
The DIC display is located at the bottom of the
instrument panel cluster. It shows the status of many
vehicle systems and enables access to the
personalization menu.
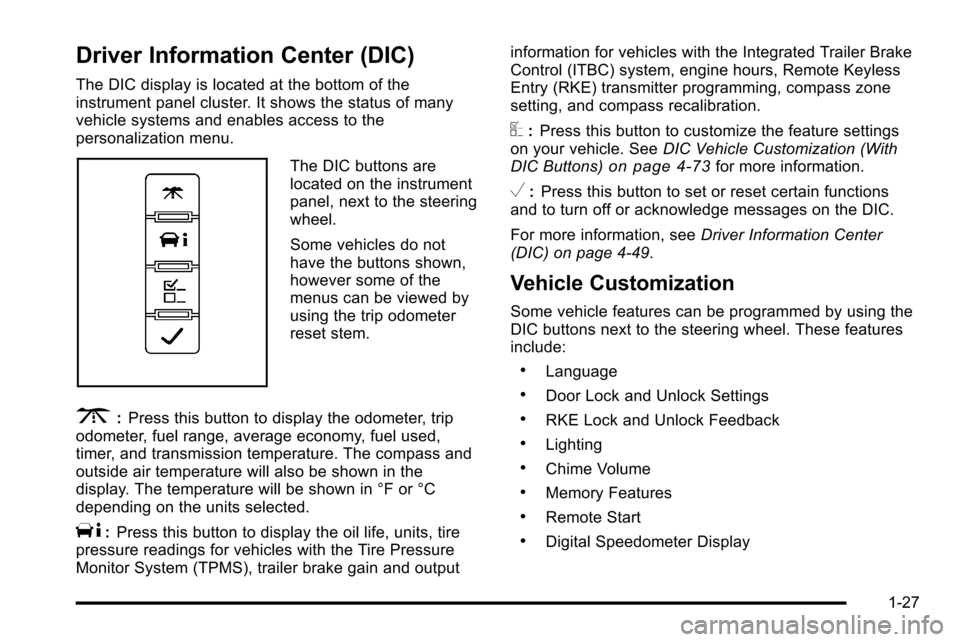
The DIC buttons are
located on the instrument
panel, next to the steering
wheel.
Some vehicles do not
have the buttons shown,
however some of the
menus can be viewed by
using the trip odometer
reset stem.
3:Press this button to display the odometer, trip
odometer, fuel range, average economy, fuel used,
timer, and transmission temperature. The compass and
outside air temperature will also be shown in the
display. The temperature will be shown in °F or °C
depending on the units selected.
T: Press this button to display the oil life, units, tire
pressure readings for vehicles with the Tire Pressure
Monitor System (TPMS), trailer brake gain and output information for vehicles with the Integrated Trailer Brake
Control (ITBC) system, engine hours, Remote Keyless
Entry (RKE) transmitter programming, compass zone
setting, and compass recalibration.
U:
Press this button to customize the feature settings
on your vehicle. See DIC Vehicle Customization (With
DIC Buttons)
on page 4‑73for more information.
V: Press this button to set or reset certain functions
and to turn off or acknowledge messages on the DIC.
For more information, see Driver Information Center
(DIC) on page 4‑49.
Vehicle Customization
Some vehicle features can be programmed by using the
DIC buttons next to the steering wheel. These features
include:
.Language
.Door Lock and Unlock Settings
.RKE Lock and Unlock Feedback
.Lighting
.Chime Volume
.Memory Features
.Remote Start
.Digital Speedometer Display
1-27
Page 38 of 626
Tire Pressure Monitor
This vehicle may have a Tire Pressure Monitor
System (TPMS).
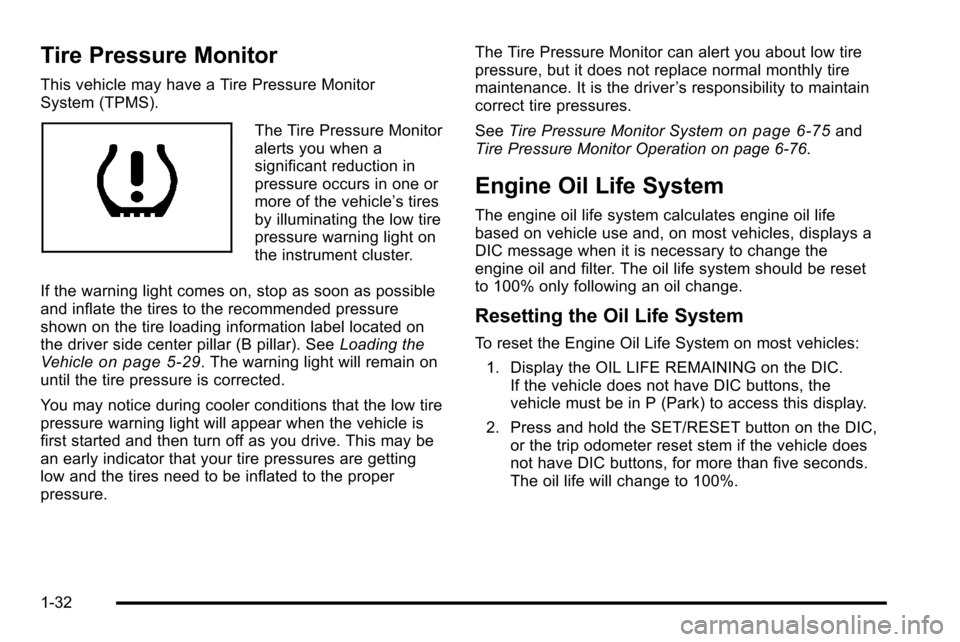
The Tire Pressure Monitor
alerts you when a
significant reduction in
pressure occurs in one or
more of the vehicle’s tires
by illuminating the low tire
pressure warning light on
the instrument cluster.
If the warning light comes on, stop as soon as possible
and inflate the tires to the recommended pressure
shown on the tire loading information label located on
the driver side center pillar (B pillar). See Loading the
Vehicle
on page 5‑29. The warning light will remain on
until the tire pressure is corrected.
You may notice during cooler conditions that the low tire
pressure warning light will appear when the vehicle is
first started and then turn off as you drive. This may be
an early indicator that your tire pressures are getting
low and the tires need to be inflated to the proper
pressure. The Tire Pressure Monitor can alert you about low tire
pressure, but it does not replace normal monthly tire
maintenance. It is the driver
’s responsibility to maintain
correct tire pressures.
See Tire Pressure Monitor System
on page 6‑75and
Tire Pressure Monitor Operation on page 6‑76.
Engine Oil Life System
The engine oil life system calculates engine oil life
based on vehicle use and, on most vehicles, displays a
DIC message when it is necessary to change the
engine oil and filter. The oil life system should be reset
to 100% only following an oil change.
Resetting the Oil Life System
To reset the Engine Oil Life System on most vehicles:
1. Display the OIL LIFE REMAINING on the DIC. If the vehicle does not have DIC buttons, the
vehicle must be in P (Park) to access this display.
2. Press and hold the SET/RESET button on the DIC, or the trip odometer reset stem if the vehicle does
not have DIC buttons, for more than five seconds.
The oil life will change to 100%.
1-32
Page 219 of 626
Section 4 Instrument Panel
Instrument Panel Overview. . . . . . . . . . . . . . . . . . . . . . . .4-3
Hazard Warning Flashers . . . . . . . . . . . . . . . . . . . . . . . 4-3
Horn . . . . . . . . . . . . . . . . . . . . . . . . . . . . . . . . . . . . . . . . . . . . 4-3
Tilt Wheel . . . . . . . . . . . . . . . . . . . . . . . . . . . . . . . . . . . . . . . 4-3
Turn Signal/Multifunction Lever . . . . . . . . . . . . . . . . . . 4-4
Turn and Lane-Change Signals . . . . . . . . . . . . . . . . . 4-4
Headlamp High/Low-Beam Changer . . . . . . . . . . . . 4-5
Flash-to-Pass . . . . . . . . . . . . . . . . . . . . . . . . . . . . . . . . . . . 4-5
Windshield Wipers . . . . . . . . . . . . . . . . . . . . . . . . . . . . . . 4-6
Windshield Washer . . . . . . . . . . . . . . . . . . . . . . . . . . . . . 4-6
Cruise Control . . . . . . . . . . . . . . . . . . . . . . . . . . . . . . . . . . 4-7
Exterior Lamps . . . . . . . . . . . . . . . . . . . . . . . . . . . . . . . . 4-10
Headlamps on Reminder . . . . . . . . . . . . . . . . . . . . . . . 4-11
Daytime Running Lamps (DRL) . . . . . . . . . . . . . . . . 4-12
Automatic Headlamp System . . . . . . . . . . . . . . . . . . 4-12
Fog Lamps . . . . . . . . . . . . . . . . . . . . . . . . . . . . . . . . . . . . 4-13
Auxiliary Roof-Mounted Lamp . . . . . . . . . . . . . . . . . 4-14
Instrument Panel Brightness . . . . . . . . . . . . . . . . . . . 4-14
Dome Lamps . . . . . . . . . . . . . . . . . . . . . . . . . . . . . . . . . . 4-14
Dome Lamp Override . . . . . . . . . . . . . . . . . . . . . . . . . . 4-15
Entry Lighting . . . . . . . . . . . . . . . . . . . . . . . . . . . . . . . . . . 4-15
Exit Lighting . . . . . . . . . . . . . . . . . . . . . . . . . . . . . . . . . . . 4-15
Reading Lamps . . . . . . . . . . . . . . . . . . . . . . . . . . . . . . . . 4-15
Cargo Lamp . . . . . . . . . . . . . . . . . . . . . . . . . . . . . . . . . . . 4-15
Electric Power Management . . . . . . . . . . . . . . . . . . . 4-16 Battery Run-Down Protection . . . . . . . . . . . . . . . . . . 4-16
Accessory Power Outlet(s) . . . . . . . . . . . . . . . . . . . . . 4-17
Ashtray(s) and Cigarette Lighter . . . . . . . . . . . . . . . 4-18
Climate Controls . . . . . . . . . . . . . . . . . . . . . . . . . . . . . . . . . . 4-18
Climate Control System (With Air
Conditioning) . . . . . . . . . . . . . . . . . . . . . . . . . . . . . . . . 4-18
Climate Control System (With Heater Only) . . . . 4-21
Dual Automatic Climate Control System . . . . . . . 4-22
Outlet Adjustment . . . . . . . . . . . . . . . . . . . . . . . . . . . . . . 4-28
Warning Lights, Gauges, and Indicators . . . . . . . .4-28
Instrument Panel Cluster . . . . . . . . . . . . . . . . . . . . . . . 4-29
Speedometer and Odometer . . . . . . . . . . . . . . . . . . . 4-30
Trip Odometer . . . . . . . . . . . . . . . . . . . . . . . . . . . . . . . . . 4-30
Tachometer . . . . . . . . . . . . . . . . . . . . . . . . . . . . . . . . . . . . 4-30
Safety Belt Reminders . . . . . . . . . . . . . . . . . . . . . . . . . 4-31
Airbag Readiness Light . . . . . . . . . . . . . . . . . . . . . . . . 4-32
Airbag Off Light . . . . . . . . . . . . . . . . . . . . . . . . . . . . . . . . 4-32
Passenger Airbag Status Indicator . . . . . . . . . . . . . 4-34
Charging System Light . . . . . . . . . . . . . . . . . . . . . . . . 4-36
Voltmeter Gauge . . . . . . . . . . . . . . . . . . . . . . . . . . . . . . . 4-36
Brake System Warning Light . . . . . . . . . . . . . . . . . . . 4-37
Antilock Brake System (ABS) Warning Light . . . 4-38
StabiliTrak
®Indicator Light . . . . . . . . . . . . . . . . . . . . . 4-39
Engine Coolant Temperature Gauge . . . . . . . . . . . 4-40
Tire Pressure Light . . . . . . . . . . . . . . . . . . . . . . . . . . . . 4-40
Malfunction Indicator Lamp . . . . . . . . . . . . . . . . . . . . 4-41
4-1
Page 248 of 626
Speedometer and Odometer
The speedometer shows the vehicle speed in both
miles per hour (mph) and kilometers per hour (km/h).
The odometer shows how far the vehicle has been
driven, in either miles (used in the United States) or
kilometers (used in Canada).
Engine Hour Meter Display
The Driver Information Center (DIC) can also display
the number of hours the engine has run. To display the
engine hours, turn the ignition off, press and hold the
reset button for at least four seconds. The hour meter
displays for up to 30 seconds, or until the ignition is
turned on. SeeDIC Operation and Displays (With DIC
Buttons)
on page 4‑49or DIC Operation and Displays
(Without DIC Buttons)on page 4‑56for more
information.
Trip Odometer
The trip odometer shows how far the vehicle has been
driven since the trip odometer was last set to zero.
Press the reset button, located on the instrument panel
cluster next to the voltmeter, to toggle between the trip
odometer and the regular odometer. Holding the reset
button for approximately one second while the trip
odometer is displayed will reset it.
To display the odometer reading with the ignition off,
press the reset button.
See DIC Operation and Displays (With DIC Buttons)
on
page 4‑49or DIC Operation and Displays (Without DIC
Buttons)on page 4‑56for more information.
Tachometer
The tachometer displays the engine speed in
revolutions per minute (rpm). For a description of how
Grade Braking affects vehicle speed while the Tow/Haul
Mode is activated, see “Grade Braking (Allison
Transmission
®)” under Tow/Haul Modeon page 3‑34for more information.
4-30
Page 267 of 626
Driver Information Center (DIC)
Your vehicle has a Driver Information Center (DIC).
The DIC displays information about your vehicle. It also
displays warning messages if a system problem is
detected.
All messages will appear in the DIC display located
below the tachometer in the instrument panel cluster.
The DIC comes on when the ignition is on. After a short
delay, the DIC will display the information that was last
displayed before the engine was turned off.
If your vehicle has DIC buttons, see“DIC Operation and
Displays (With DIC Buttons)” later in this section and
DIC Vehicle Customization (With DIC Buttons)
on
page 4‑73for the displays available.
If your vehicle does not have DIC buttons, see “DIC
Operation and Displays (Without DIC Buttons)” later in
this section for the displays available.
DIC Operation and Displays (With
DIC Buttons)
If your vehicle has DIC buttons, the information below
explains the operation of this system.
The DIC has different displays which can be accessed
by pressing the DIC buttons located on the instrument
panel, next to the steering wheel.
The DIC displays trip, fuel, and vehicle system
information, and warning messages if a system problem
is detected.
The DIC also allows some features to be customized.
See DIC Vehicle Customization (With DIC Buttons)
on
page 4‑73for more information.
If the vehicle has DIC buttons, you can also use the trip
odometer reset stem to view some of the DIC displays.
See “Trip Odometer Reset Stem Menu Items” later in
this section.
4-49
Page 268 of 626
DIC Buttons
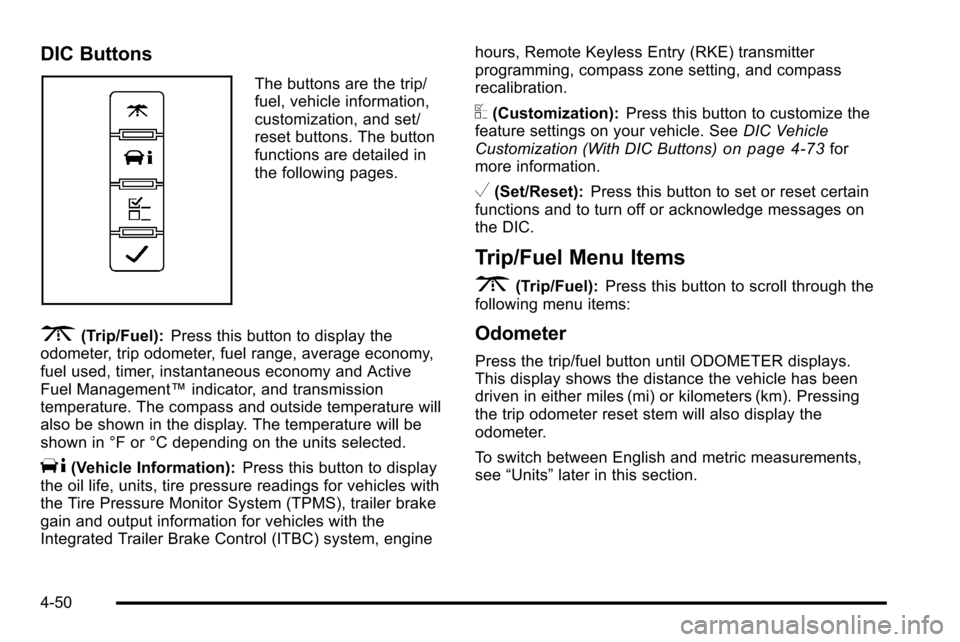
The buttons are the trip/
fuel, vehicle information,
customization, and set/
reset buttons. The button
functions are detailed in
the following pages.
3(Trip/Fuel):Press this button to display the
odometer, trip odometer, fuel range, average economy,
fuel used, timer, instantaneous economy and Active
Fuel Management™ indicator, and transmission
temperature. The compass and outside temperature will
also be shown in the display. The temperature will be
shown in °F or °C depending on the units selected.
T(Vehicle Information): Press this button to display
the oil life, units, tire pressure readings for vehicles with
the Tire Pressure Monitor System (TPMS), trailer brake
gain and output information for vehicles with the
Integrated Trailer Brake Control (ITBC) system, engine hours, Remote Keyless Entry (RKE) transmitter
programming, compass zone setting, and compass
recalibration.
U(Customization):
Press this button to customize the
feature settings on your vehicle. See DIC Vehicle
Customization (With DIC Buttons)
on page 4‑73for
more information.
V(Set/Reset): Press this button to set or reset certain
functions and to turn off or acknowledge messages on
the DIC.
Trip/Fuel Menu Items
3
(Trip/Fuel): Press this button to scroll through the
following menu items:
Odometer
Press the trip/fuel button until ODOMETER displays.
This display shows the distance the vehicle has been
driven in either miles (mi) or kilometers (km). Pressing
the trip odometer reset stem will also display the
odometer.
To switch between English and metric measurements,
see “Units” later in this section.
4-50
Page 269 of 626
Trip Odometer
Press the trip/fuel button until TRIP displays. This
display shows the current distance traveled in either
miles (mi) or kilometers (km) since the last reset for the
trip odometer. Pressing the trip odometer reset stem will
also display the trip odometer.
The trip odometer can be reset to zero by pressing the
set/reset button while the trip odometer is displayed.
You can also reset the trip odometer while it is
displayed by pressing and holding the trip odometer
reset stem.
The trip odometer has a feature called the retro-active
reset. This can be used to set the trip odometer to the
number of miles (kilometers) driven since the ignition
was last turned on. This can be used if the trip
odometer is not reset at the beginning of the trip.
To use the retro-active reset feature, press and hold the
set/reset button for at least four seconds. The trip
odometer will display the number of miles (mi) or
kilometers (km) driven since the ignition was last turned
on and the vehicle was moving. Once the vehicle
begins moving, the trip odometer will accumulate
mileage. For example, if the vehicle was driven 5 miles
(8 km) before it is started again, and then the
retro-active reset feature is activated, the display will
show 5 miles (8 km). As the vehicle begins moving, the
display will then increase to 5.1 miles (8.2 km), 5.2 miles
(8.4 km), etc.
Fuel Range
Press the trip/fuel button until FUEL RANGE displays.
This display shows the approximate number of
remaining miles (mi) or kilometers (km) the vehicle can
be driven without refueling. The display will show LOW
if the fuel level is low.
The fuel range estimate is based on an average of the
vehicle's fuel economy over recent driving history and
the amount of fuel remaining in the fuel tank. This
estimate will change if driving conditions change. For
example, if driving in traffic and making frequent stops,
this display may read one number, but if the vehicle is
driven on a freeway, the number may change even
though the same amount of fuel is in the fuel tank. This
is because different driving conditions produce different
fuel economies. Generally, freeway driving produces
better fuel economy than city driving. Fuel range cannot
be reset.
Average Economy
Press the trip/fuel button until AVG ECONOMY
displays. This display shows the approximate average
miles per gallon (mpg) or liters per 100 kilometers
(L/100 km). This number is calculated based on the
number of mpg (L/100 km) recorded since the last time
this menu item was reset. To reset AVG ECONOMY,
press and hold the set/reset button.
4-51
Page 273 of 626
Compass Zone Setting
This display allows for setting the compass zone. See
DIC Compasson page 4‑60for more information.
Compass Recalibration
This display allows for calibrating the compass. See
DIC Compasson page 4‑60for more information.
Blank Display
This display shows no information.
Trip Odometer Reset Stem Menu Items
Use the trip odometer reset stem to view the odometer
and trip odometer. The Language selection and Engine
Hours display can also be accessed with the trip
odometer reset stem.
Odometer
Press the trip odometer reset stem until ODOMETER
displays. This display shows the distance the vehicle
has been driven in either miles (mi) or kilometers (km).
Trip Odometer
Press the trip odometer reset stem until TRIP displays.
This display shows the current distance traveled in
either miles (mi) or kilometers (km) since the last reset
for the trip odometer.
The trip odometer can be reset to zero by pressing and
holding the trip odometer reset stem while the trip
odometer is displayed.
The trip odometer has a feature called the retro-active
reset. This can be used to set the trip odometer to the
number of miles (kilometers) driven since the ignition
was last turned on. This can be used if the trip
odometer is not reset at the beginning of the trip.
To use the retro-active reset feature, press and hold the
trip odometer reset stem for at least four seconds. The
trip odometer will display the number of miles (mi) or
kilometers (km) driven since the ignition was last turned
on and the vehicle was moving. Once the vehicle
begins moving, the trip odometer will accumulate
mileage. For example, if the vehicle was driven 5 miles
(8 km) before it is started again, and then the
retro-active reset feature is activated, the display will
show 5 miles (8 km). As the vehicle begins moving, the
display will then increase to 5.1 miles (8.2 km), 5.2 miles
(8.4 km), etc.
4-55