2010 CHEVROLET HHR steering
[x] Cancel search: steeringPage 177 of 480
Erasing Speed Memory
The cruise control set speed memory is erased when
the cruise control or the ignition is turned off.
Headlamps
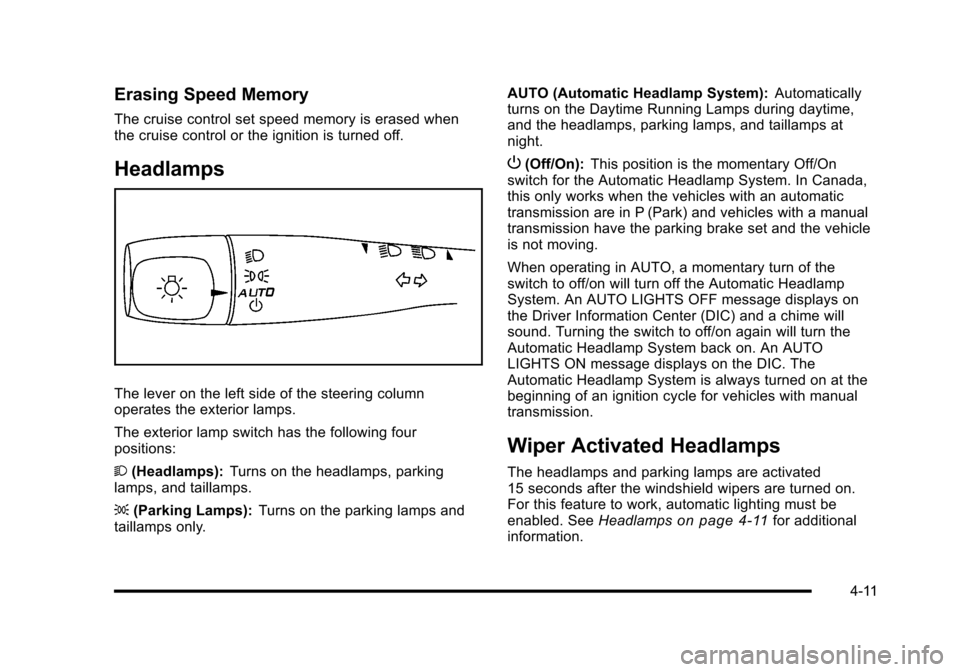
The lever on the left side of the steering column
operates the exterior lamps.
The exterior lamp switch has the following four
positions:
2(Headlamps): Turns on the headlamps, parking
lamps, and taillamps.
; (Parking Lamps): Turns on the parking lamps and
taillamps only. AUTO (Automatic Headlamp System):
Automatically
turns on the Daytime Running Lamps during daytime,
and the headlamps, parking lamps, and taillamps at
night.
P (Off/On): This position is the momentary Off/On
switch for the Automatic Headlamp System. In Canada,
this only works when the vehicles with an automatic
transmission are in P (Park) and vehicles with a manual
transmission have the parking brake set and the vehicle
is not moving.
When operating in AUTO, a momentary turn of the
switch to off/on will turn off the Automatic Headlamp
System. An AUTO LIGHTS OFF message displays on
the Driver Information Center (DIC) and a chime will
sound. Turning the switch to off/on again will turn the
Automatic Headlamp System back on. An AUTO
LIGHTS ON message displays on the DIC. The
Automatic Headlamp System is always turned on at the
beginning of an ignition cycle for vehicles with manual
transmission.
Wiper Activated Headlamps
The headlamps and parking lamps are activated
15 seconds after the windshield wipers are turned on.
For this feature to work, automatic lighting must be
enabled. See Headlamps
on page 4‑11for additional
information.
4-11
Page 179 of 480

There is a delay in the transition between the daytime
and nighttime operation of the automatic lamp control
system so that driving under bridges or bright overhead
street lights does not affect the system. The automatic
lamp control system will only be affected when the light
sensor sees a change in lighting lasting longer than
this delay.
If the vehicle is started in a dark garage, the automatic
lamp system turns on immediately. Once the vehicle
exits the garage, it will take about 20 seconds for the
automatic lamp system to change to DRL if it is light
outside. During that delay, the instrument panel
cluster may not be as bright as usual. Make sure the
instrument panel brightness control is in the full bright
position. SeeInstrument Panel Brightness
on
page 4‑14.
To idle the vehicle with the system off, turn the ignition
on and turn the exterior light switch to the off/on
position. For vehicles first sold in Canada, the
transmission must stay in P (Park) for this function
or the parking brake must be set for vehicles with
manual transmissions.
Turn on the regular headlamps when they are needed.
Fog Lamps
For vehicles with fog lamps, the button is located on the
instrument panel, to the right of the steering wheel.
The ignition must be on to use the fog lamps.
#: Press to turn the fog lamps on and off. An indicator
light on the button comes on when the fog lamps
are on.
The parking lamps automatically turn on and off when
the fog lamps are turned on and off.
The fog lamps will turn off while the high-beam
headlamps are turned on.
Some localities have laws that require the headlamps to
be on along with the fog lamps.
4-13
Page 180 of 480
Instrument Panel Brightness
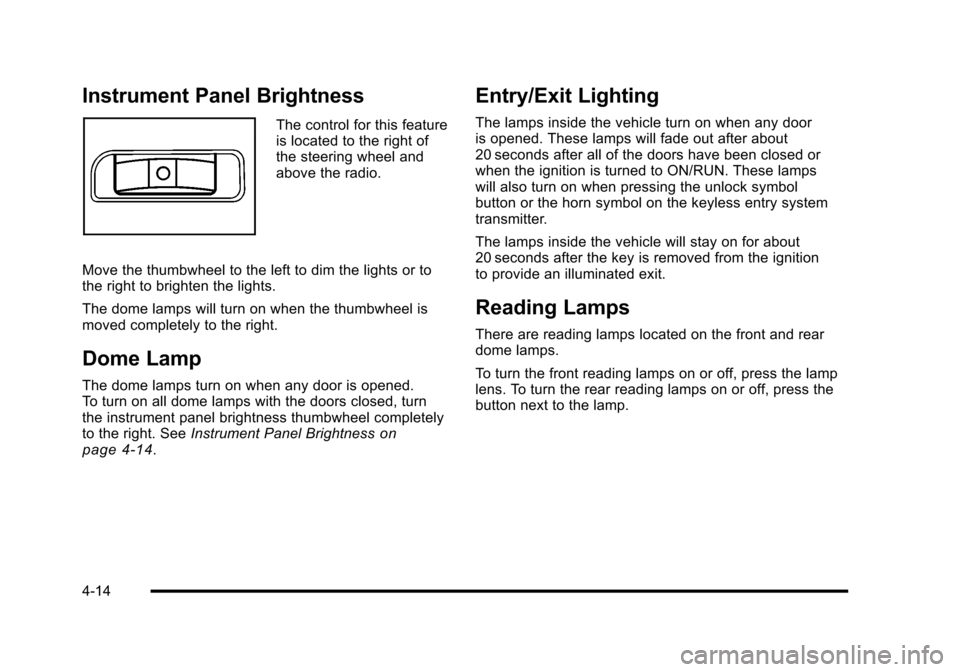
The control for this feature
is located to the right of
the steering wheel and
above the radio.
Move the thumbwheel to the left to dim the lights or to
the right to brighten the lights.
The dome lamps will turn on when the thumbwheel is
moved completely to the right.
Dome Lamp
The dome lamps turn on when any door is opened.
To turn on all dome lamps with the doors closed, turn
the instrument panel brightness thumbwheel completely
to the right. See Instrument Panel Brightness
on
page 4‑14.
Entry/Exit Lighting
The lamps inside the vehicle turn on when any door
is opened. These lamps will fade out after about
20 seconds after all of the doors have been closed or
when the ignition is turned to ON/RUN. These lamps
will also turn on when pressing the unlock symbol
button or the horn symbol on the keyless entry system
transmitter.
The lamps inside the vehicle will stay on for about
20 seconds after the key is removed from the ignition
to provide an illuminated exit.
Reading Lamps
There are reading lamps located on the front and rear
dome lamps.
To turn the front reading lamps on or off, press the lamp
lens. To turn the rear reading lamps on or off, press the
button next to the lamp.
4-14
Page 212 of 480
Driver Information Center (DIC)
Your vehicle has a Driver Information Center (DIC). The
DIC display gives you the status of many of your
vehicle's systems. The DIC is also used to display
driver personalization menu modes and warning/status
messages. All messages will appear in the DIC display,
located at the bottom of the instrument panel cluster.
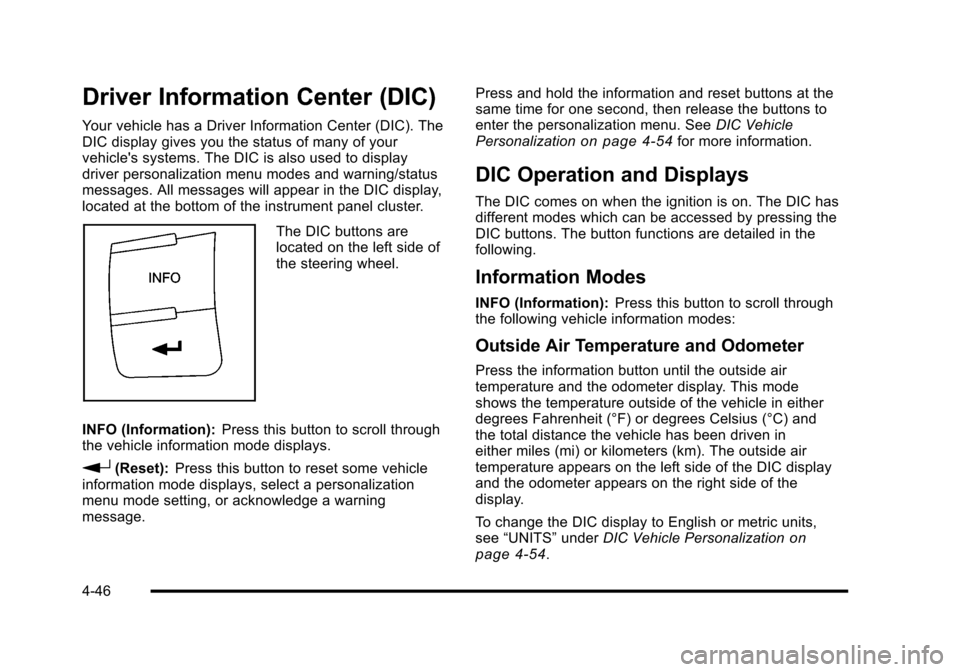
The DIC buttons are
located on the left side of
the steering wheel.
INFO (Information): Press this button to scroll through
the vehicle information mode displays.
r(Reset): Press this button to reset some vehicle
information mode displays, select a personalization
menu mode setting, or acknowledge a warning
message. Press and hold the information and reset buttons at the
same time for one second, then release the buttons to
enter the personalization menu. See
DIC Vehicle
Personalization
on page 4‑54for more information.
DIC Operation and Displays
The DIC comes on when the ignition is on. The DIC has
different modes which can be accessed by pressing the
DIC buttons. The button functions are detailed in the
following.
Information Modes
INFO (Information): Press this button to scroll through
the following vehicle information modes:
Outside Air Temperature and Odometer
Press the information button until the outside air
temperature and the odometer display. This mode
shows the temperature outside of the vehicle in either
degrees Fahrenheit (°F) or degrees Celsius (°C) and
the total distance the vehicle has been driven in
either miles (mi) or kilometers (km). The outside air
temperature appears on the left side of the DIC display
and the odometer appears on the right side of the
display.
To change the DIC display to English or metric units,
see “UNITS” underDIC Vehicle Personalization
on
page 4‑54.
4-46
Page 218 of 480
LOW TRACTION
If your vehicle has the Enhanced Traction System
(ETS) or Traction Control System (TCS), this message
displays and the ETS light or the ESC/TCS light on the
instrument panel cluster flashes when the system is
actively limiting wheel spin. Slippery road conditions
may exist if this message is displayed, so adjust your
driving accordingly. This message stays on for a few
seconds after the system stops limiting wheel spin.
SeeEnhanced Traction System (ETS)
on page 5‑11orTraction Control System (TCS)on page 5‑9and
Enhanced Traction System (ETS) Indicator/Warning
Light
on page 4‑32or Electronic Stability Control
(ESC)/Traction Control System (TCS) Indicator/Warning
Light
on page 4‑33for more information.
PARKING BRAKE
This message displays if the parking brake is left
engaged. See Parking Brakeon page 3‑34for
more information.
POWER STEERING
This message displays if a problem has been detected
with the electric power steering. Have your vehicle
serviced by your dealer/retailer immediately.
SERVICE AIR BAG
This message displays when there is a problem with
the airbag system. Have your vehicle serviced by your
dealer/retailer immediately.
SERVICE ESC (ELECTRONIC STABILITY
CONTROL)
If your vehicle has Electronic Stability Control (ESC),
this message displays and a chime sounds if there has
been a problem detected with ESC. The ESC/TCS light
also appears on the instrument panel cluster. This light
stays on solid as long as the detected problem remains
present. When this message displays, the system is not
working. Adjust your driving accordingly. See Electronic
Stability Control (ESC)
on page 5‑6and Electronic
Stability Control (ESC)/Traction Control System (TCS)
Indicator/Warning Light
on page 4‑33for more
information.
If this message turns on while you are driving, pull off
the road as soon as possible and stop carefully. Try
resetting the system by turning the ignition off and then
back on. If this message still stays on or turns back on
again while you are driving, your vehicle needs service.
Have the ESC inspected by your dealer/retailer as soon
as possible.
4-52
Page 231 of 480
¨SEEK:Press to seek or scan stations with a strong
signal in the selected band.
.To seek stations, press and release¨SEEK to
go to the next station and stay there.
.To scan stations, press and hold¨SEEK for a
few seconds until the radio beeps once. The radio
goes to a station, plays for a few seconds, then
goes to the next station. Press
¨SEEK again to
stop scanning.
.To scan preset stations in the selected band, press
and hold
¨SEEK for four seconds until a double
beep sounds. The radio goes to a stored preset,
plays for a few seconds, then goes to the next
stored preset. Press
¨SEEK again to stop
scanning preset stations.
4(Information): For vehicles with the Radio with CD
(Base), press to switch the display between the radio
station frequency and the time. While the ignition is off,
press
4to display the time. For vehicles with XM, MP3, WMA, or RDS features,
press
4to display additional text information related to
the current FM-RDS or XM station; or CD, MP3, WMA
song. Song title information will be displayed on the
top line of the display while the artist information will
be displayed on the bottom line, it the information is
available during XM, CD, MP3, or WMA playback.
When information is not available, “No Info”displays.
Storing Radio Stations
Depending on which radio the vehicle has, radio
stations are stored as either favorites or presets.
Storing a Radio Station as a Favorite
Radio that have a FAV button store radio stations as
favorites.
Drivers are encouraged to set up radio station favorites
while the vehicle is in P (Park). Tune to favorite stations
using the softkeys, favorites button, and steering wheel
controls. See Defensive Driving on page 5‑2.
4-65
Page 248 of 480
Bluetooth®
Vehicles with a Bluetooth system can use a Bluetooth
capable cell phone with a Hands Free Profile to make
and receive phone calls. The system can be used while
the key is in ON/RUN or ACC/ACCESSORY position.
The range of the Bluetooth system can be up to 9.1 m
(30 ft). Not all phones support all functions, and not all
phones are guaranteed to work with the in-vehicle
Bluetooth system. See www.gm.com/bluetooth for
more information on compatible phones.
Voice Recognition
The Bluetooth system uses voice recognition to
interpret voice commands to dial phone numbers
and name tags.
Noise:Keep interior noise levels to a minimum. The
system may not recognize voice commands if there is
too much background noise.
When to Speak: A short tone sounds after the system
responds indicating when it is waiting for a voice
command. Wait until the tone and then speak.
How to Speak: Speak clearly in a calm and natural
voice.
Audio System
When using the in‐vehicle Bluetooth system, sound
comes through the vehicle's front audio system
speakers and overrides the audio system. Use the
audio system volume knob, during a call, to change
the volume level. The adjusted volume level remains in
memory for later calls. To prevent missed calls, a
minimum volume level is used if the volume is turned
down too low.
Bluetooth Controls
Use the buttons located on the steering wheel to
operate the in‐vehicle Bluetooth system. See Audio
Steering Wheel Controls
on page 4‑92for more
information.
b g(Push To Talk) : Press to answer incoming calls,
to confirm system information, and to start speech
recognition.
c x(Phone On Hook): Press to end a call, reject a
call, or to cancel an operation.
4-82
Page 258 of 480
Other Information
The Bluetooth®word mark and logos are owned by the
Bluetooth®SIG, Inc. and any use of such marks by
General Motors is under license. Other trademarks and
trade names are those of their respective owners.
See Radio Frequency Statement
on page 8‑17for FCC
information.
Theft-Deterrent Feature
THEFTLOCK®is designed to discourage theft of the
vehicle's radio by learning a portion of the Vehicle
Identification Number (VIN). The radio does not operate
if it is stolen or moved to a different vehicle.
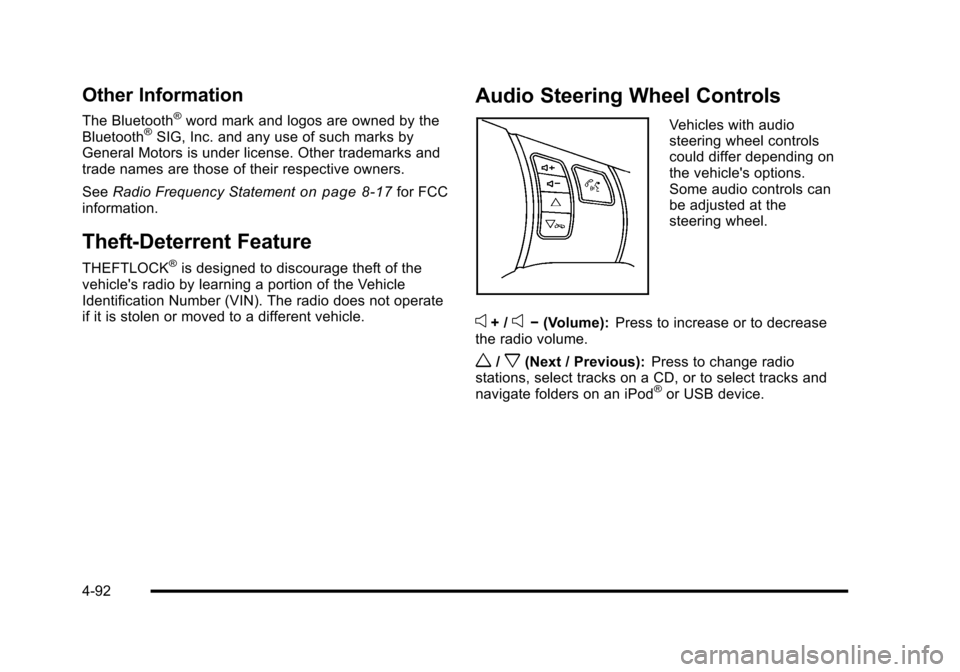
Audio Steering Wheel Controls
Vehicles with audio
steering wheel controls
could differ depending on
the vehicle's options.
Some audio controls can
be adjusted at the
steering wheel.
e+ /e− (Volume): Press to increase or to decrease
the radio volume.
w/x(Next / Previous): Press to change radio
stations, select tracks on a CD, or to select tracks and
navigate folders on an iPod
®or USB device.
4-92