2010 CHEVROLET HHR maintenance
[x] Cancel search: maintenancePage 306 of 480
California Proposition 65 Warning
Most motor vehicles, including this one, contain and/or
emit chemicals known to the State of California to
cause cancer and birth defects or other reproductive
harm. Engine exhaust, many parts and systems, many
fluids, and some component wear by-products contain
and/or emit these chemicals.
California Perchlorate Materials
Requirements
Certain types of automotive applications, such as
airbag initiators, seat belt pretensioners, and lithium
batteries contained in remote keyless transmitters,
may contain perchlorate materials. Special handling
may be necessary. For additional information, see
www.dtsc.ca.gov/hazardouswaste/perchlorate.
Doing Your Own Service Work
{WARNING:
You can be injured and the vehicle could be
damaged if you try to do service work on a
vehicle without knowing enough about it.
.Be sure you have sufficient knowledge,
experience, the proper replacement parts,
and tools before attempting any vehicle
maintenance task.
.Be sure to use the proper nuts, bolts, and
other fasteners. English and metric fasteners
can be easily confused. If the wrong fasteners
are used, parts can later break or fall off. You
could be hurt.
If doing some of your own service work, use the proper
service manual. It tells you much more about how to
service the vehicle than this manual can. To order the
proper service manual, see Service Publications
Ordering Information on page 8‑14.
This vehicle has an airbag system. Before attempting
to do your own service work, see Servicing Your
Airbag-Equipped Vehicle on page 2‑76.
6-4
Page 307 of 480
Keep a record with all parts receipts and list the mileage
and the date of any service work performed. See
Maintenance Record on page 7‑14.
Adding Equipment to the Outside of
the Vehicle
Things added to the outside of the vehicle can affect
the airflow around it. This can cause wind noise and
can affect fuel economy and windshield washer
performance. Check with your dealer/retailer before
adding equipment to the outside of the vehicle.
Fuel
Use of the recommended fuel is an important part of
the proper maintenance of this vehicle. To help keep
the engine clean and maintain optimum vehicle
performance, we recommend the use of gasoline
advertised as TOP TIER Detergent Gasoline.
Look for the TOP TIER label on the fuel pump to
ensure gasoline meets enhanced detergency standards
developed by auto companies. A list of marketers
providing TOP TIER Detergent Gasoline can be found
at www.toptiergas.com.
The 8th digit of the Vehicle Identification Number (VIN)
shows the code letter or number that identifies the
vehicle's engine. The VIN is at the top left of the
instrument panel. SeeVehicle Identification Number
(VIN) on page 6‑118.
6-5
Page 327 of 480
What to Do with Used Oil
Used engine oil contains certain elements that can be
unhealthy for your skin and could even cause cancer.
Do not let used oil stay on your skin for very long. Clean
your skin and nails with soap and water, or a good hand
cleaner. Wash or properly dispose of clothing or rags
containing used engine oil. See the manufacturer's
warnings about the use and disposal of oil products.
Used oil can be a threat to the environment. If you
change your own oil, be sure to drain all the oil from the
filter before disposal. Never dispose of oil by putting it in
the trash, pouring it on the ground, into sewers, or into
streams or bodies of water. Recycle it by taking it to a
place that collects used oil.
Engine Air Cleaner/Filter
When to Inspect the Engine Air
Cleaner/Filter
Inspect the air cleaner/filter at the MaintenanceII
intervals and replace it at the first oil change after each
50,000 mile (80 000 km) interval. See Scheduled
Maintenance
on page 7‑3for more information. If you
are driving in dusty/dirty conditions, inspect the filter at
each engine oil change. The 2.0L engine inspect at
each oil change. Replace filter if appears dusty or dirty.
How to Inspect the Engine Air
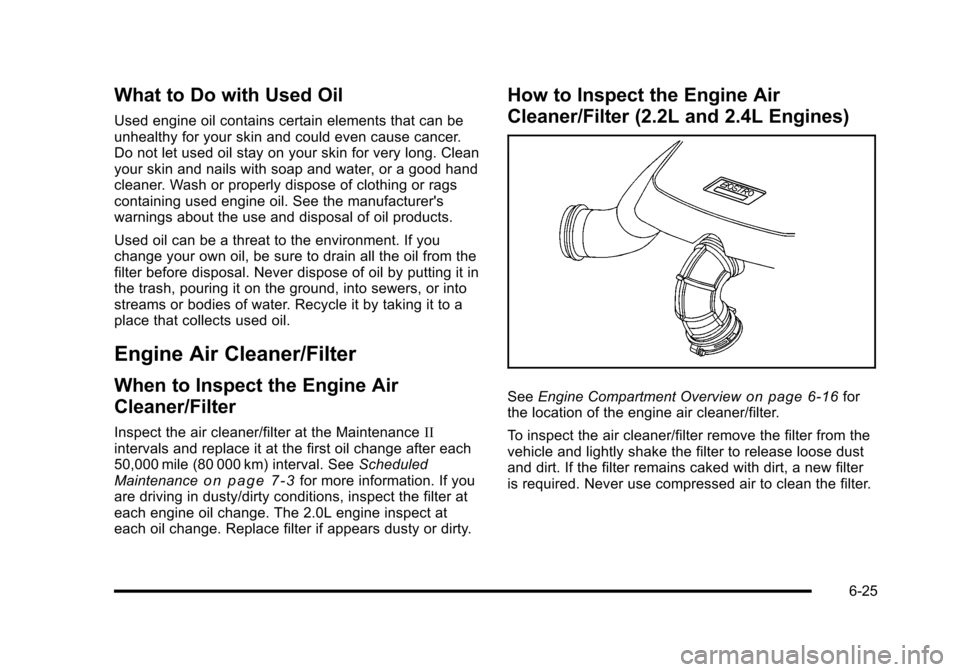
Cleaner/Filter (2.2L and 2.4L Engines)
See Engine Compartment Overviewon page 6‑16for
the location of the engine air cleaner/filter.
To inspect the air cleaner/filter remove the filter from the
vehicle and lightly shake the filter to release loose dust
and dirt. If the filter remains caked with dirt, a new filter
is required. Never use compressed air to clean the filter.
6-25
Page 329 of 480
To inspect or replace the filter, do the following:1. Remove the screws that hold the housing and cover together and lift off the cover.
2. Inspect or replace the engine air cleaner/filter.
3. Reverse the steps to reinstall the system. Be sure to reinstall the housing tightly.
{WARNING:
Operating the engine with the air cleaner/filter off
can cause you or others to be burned. The air
cleaner not only cleans the air; it helps to stop
flames if the engine backfires. Use caution when
working on the engine and do not drive with the
air cleaner/filter off.
Notice: If the air cleaner/filter is off, dirt can easily
get into the engine, which could damage it. Always
have the air cleaner/filter in place when you are
driving.
Automatic Transmission Fluid
It is not necessary to check the transmission fluid level.
A transmission fluid leak is the only reason for fluid
loss. If a leak occurs, take your vehicle to a dealer/
retailer and have it repaired as soon as possible.
Change the fluid and filter at the intervals listed in the
Maintenance Schedule. See Scheduled Maintenance
on page 7‑3. Be sure to use the transmission fluid
listed in Recommended Fluids and Lubricantson
page 7‑10.
Notice: Use of the incorrect automatic transmission
fluid may damage the vehicle, and the damages may
not be covered by the vehicle's warranty. Always
use the automatic transmission fluid listed in
Recommended Fluids and Lubricants on page 7‑10.
6-27
Page 355 of 480
5. Push and turn the license plate back through thefascia opening.
6. Reinstall the two screws holding the license plate lamps to the fascia.
Replacement Bulbs
Exterior Lamp Bulb Number
Back-up Lamp and CHMSL 921
Front Turn Signal and Parking
Lamp (Amber) 5702KA
Front Turn Signal and Parking
Lamp (Clear) B2N
Headlamp High/Low-Beam H13
Stoplamp/Taillamp/Turn Signal 3057KX
For replacement bulbs not listed here, contact your
dealer/retailer.
Windshield Wiper Blade
Replacement
Windshield wiper blades should be inspected for wear
or cracking. SeeScheduled Maintenanceon page 7‑3for more information on wiper blade inspection. Replacement blades come in different types and are
removed in different ways. For the proper type and
length, see
Maintenance Replacement Parts
on
page 7‑12. Here's how to remove the wiper blade:
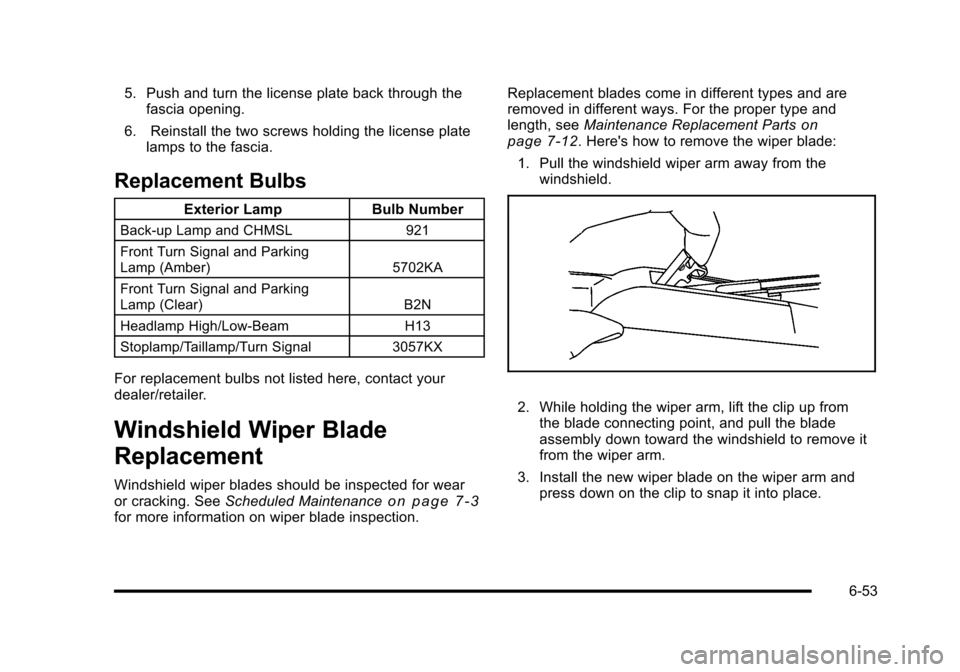
1. Pull the windshield wiper arm away from the windshield.
2. While holding the wiper arm, lift the clip up fromthe blade connecting point, and pull the blade
assembly down toward the windshield to remove it
from the wiper arm.
3. Install the new wiper blade on the wiper arm and press down on the clip to snap it into place.
6-53
Page 367 of 480
Please note that the TPMS is not a substitute for proper
tire maintenance, and it is the driver's responsibility to
maintain correct tire pressure, even if under‐inflation
has not reached the level to trigger illumination of the
TPMS low tire pressure telltale.
Your vehicle has also been equipped with a TPMS
malfunction indicator to indicate when the system is
not operating properly. The TPMS malfunction indicator
is combined with the low tire pressure telltale. When
the system detects a malfunction, the telltale will flash
for approximately one minute and then remain
continuously illuminated. This sequence will continue
upon subsequent vehicle start‐ups as long as the
malfunction exists.
When the malfunction indicator is illuminated, the
system may not be able to detect or signal low tire
pressure as intended. TPMS malfunctions may occur
for a variety of reasons, including the installation of
replacement or alternate tires or wheels on the
vehicle that prevent the TPMS from functioning
properly. Always check the TPMS malfunction telltale
after replacing one or more tires or wheels on your
vehicle to ensure that the replacement or alternate tires
and wheels allow the TPMS to continue to function
properly.
SeeTire Pressure Monitor Operation
on page 6‑65for
additional information.
Federal Communications Commission
(FCC) and Industry Canada
See Radio Frequency Statementon page 8‑17for
information regarding Part 15 of the Federal
Communications Commission (FCC) Rules and
RSS-210/211 of Industry Canada.
Tire Pressure Monitor Operation
This vehicle may have a Tire Pressure Monitor System
(TPMS). The TPMS is designed to warn the driver when
a low tire pressure condition exists. If your vehicle has
this feature, TPMS sensors are mounted onto each tire
and wheel assembly, excluding the spare tire and wheel
assembly. The TPMS sensors monitor the air pressure
in the vehicle's tires and transmits the tire pressure
readings to a receiver located in the vehicle.
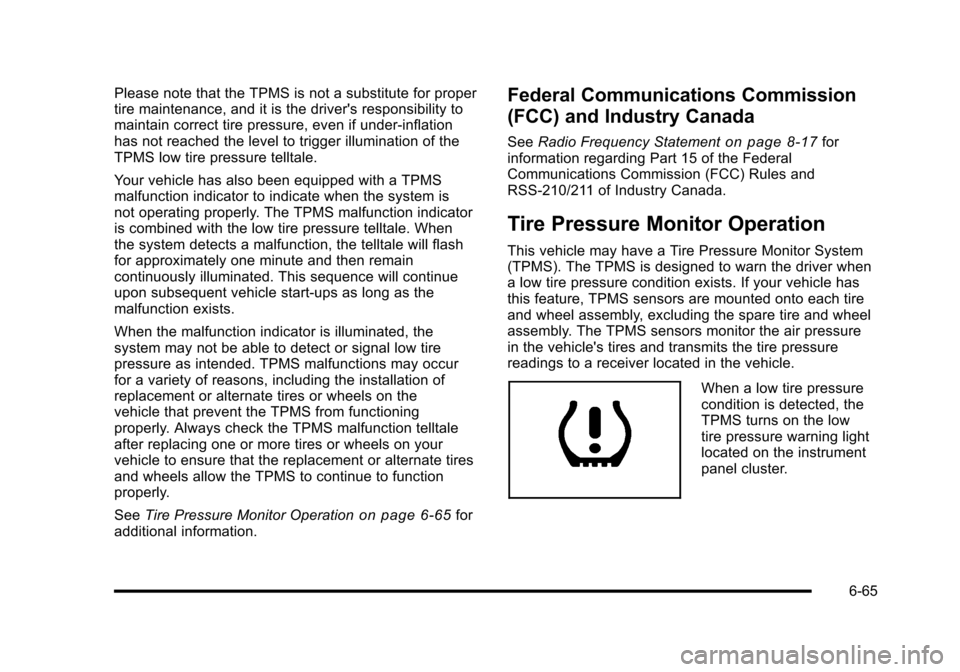
When a low tire pressure
condition is detected, the
TPMS turns on the low
tire pressure warning light
located on the instrument
panel cluster.
6-65
Page 368 of 480
If the warning light comes on, stop as soon as possible
and inflate the tires to the recommended pressure
shown on the tire loading information label. See
Loading the Vehicle on page 5‑24.
At the same time a message to check the pressure in a
specific tire appears on the Driver Information Center
(DIC) display. The low tire pressure warning light and
the DIC warning message come on at each ignition
cycle until the tires are inflated to the correct inflation
pressure. Using the DIC, tire pressure levels can be
viewed by the driver. For additional information and
details about the DIC operation and displays seeDIC
Operation and Displays
on page 4‑46and DIC
Warnings and Messages on page 4‑48.
The low tire pressure warning light may come on in cool
weather when the vehicle is first started, and then turn
off as you start to drive. This could be an early indicator
that the air pressure in the tire(s) are getting low and
need to be inflated to the proper pressure. A Tire and Loading Information label shows the size of
your vehicle's original equipment tires and the correct
inflation pressure for your vehicle's tires when they are
cold. See
Loading the Vehicle
on page 5‑24, for an
example of the Tire and Loading Information label and
its location on your vehicle. Also see Inflation - Tire
Pressure on page 6‑63.
Your vehicle's TPMS system can warn you about a low
tire pressure condition but it does not replace normal
tire maintenance. See Tire Inspection and Rotation
on
page 6‑69and Tires on page 6‑54.
Notice: Using non‐approved tire sealants could
damage the Tire Pressure Monitor System (TPMS)
sensors. TPMS sensor damage caused by using an
incorrect tire sealant is not covered by the vehicle
warranty. Always use the GM approved tire sealant
available through your dealer/retailer.
Factory-installed Tire Inflator Kits use a GM approved
liquid tire sealant. Using non-approved tire sealants
could damage the TPMS sensors. See Tire Sealant and
Compressor Kit
on page 6‑78for information regarding
the inflator kit materials and instructions.
6-66
Page 371 of 480
8. The driver side rear turn signal comes on toindicate that corner sensor is ready to be learned.
Proceed to the driver side rear tire, and repeat the
procedure in Step 5.
9. After hearing the single horn chirp for the driver side rear tire, two additional horn chirps sound to
indicate the tire learning process is done. Turn the
ignition switch to LOCK/OFF.
If no tires are learned after entering the TPMS
learn mode, or if communication with the receiver
stops, or if the time limit has expired, turn the
ignition switch to LOCK/OFF and start over
beginning with Step 2.
10. Set all four tires to the recommended air pressure level as indicated on the Tire and Loading
Information label.
11. Put the valve caps back on the valve stems.Tire Inspection and Rotation
We recommend that you regularly inspect your
vehicle's tires, including the spare tire, for signs of
wear or damage. See When It Is Time for New
Tires
on page 6‑71for more information.
Tires should be rotated every 5,000 to 8,000 miles
(8 000 to 13 000 km). See Scheduled Maintenance
on page 7‑3.
The purpose of a regular tire rotation is to achieve
a uniform wear for all tires on the vehicle. This will
ensure that your vehicle continues to perform
most like it did when the tires were new.
Any time you notice unusual wear, rotate the tires
as soon as possible and check wheel alignment.
Also check for damaged tires or wheels.
SeeWhen It Is Time for New Tires
on page 6‑71
and Wheel Replacementon page 6‑76.
6-69