2010 CHEVROLET HHR lights
[x] Cancel search: lightsPage 177 of 480

Erasing Speed Memory
The cruise control set speed memory is erased when
the cruise control or the ignition is turned off.
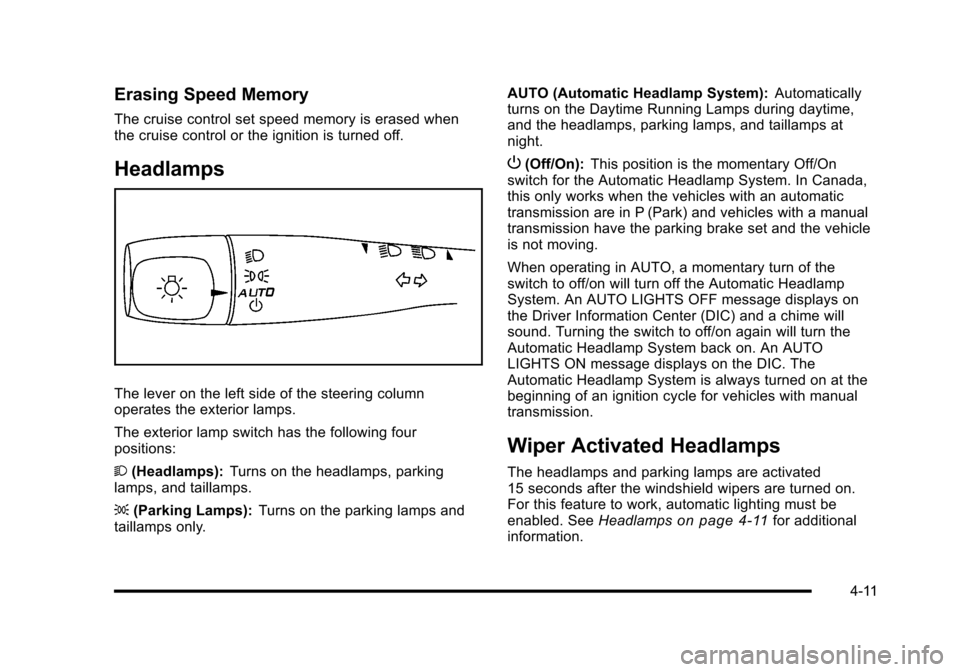
Headlamps
The lever on the left side of the steering column
operates the exterior lamps.
The exterior lamp switch has the following four
positions:
2(Headlamps): Turns on the headlamps, parking
lamps, and taillamps.
; (Parking Lamps): Turns on the parking lamps and
taillamps only. AUTO (Automatic Headlamp System):
Automatically
turns on the Daytime Running Lamps during daytime,
and the headlamps, parking lamps, and taillamps at
night.
P (Off/On): This position is the momentary Off/On
switch for the Automatic Headlamp System. In Canada,
this only works when the vehicles with an automatic
transmission are in P (Park) and vehicles with a manual
transmission have the parking brake set and the vehicle
is not moving.
When operating in AUTO, a momentary turn of the
switch to off/on will turn off the Automatic Headlamp
System. An AUTO LIGHTS OFF message displays on
the Driver Information Center (DIC) and a chime will
sound. Turning the switch to off/on again will turn the
Automatic Headlamp System back on. An AUTO
LIGHTS ON message displays on the DIC. The
Automatic Headlamp System is always turned on at the
beginning of an ignition cycle for vehicles with manual
transmission.
Wiper Activated Headlamps
The headlamps and parking lamps are activated
15 seconds after the windshield wipers are turned on.
For this feature to work, automatic lighting must be
enabled. See Headlamps
on page 4‑11for additional
information.
4-11
Page 178 of 480

When the ignition is turned off, the wiper-activated
headlamps will immediately turn off. They also turn
off 15 seconds after the windshield wiper control is
turned off.
Headlamps on Reminder
If the drivers door is opened with the ignition off and the
lamps on, a warning chime will sound. This indicates
that the headlamps are still on.
Daytime Running Lamps (DRL)
Daytime Running Lamps (DRL) can make it easier for
others to see the front of your vehicle during the day.
Fully functional daytime running lamps are required on
all vehicles first sold in Canada.
The vehicle has a light sensor on top of the instrument
panel. Do not cover this sensor or the headlamps will
come on when they are not needed.
The DRL system will make the headlamps come on at
reduced brightness when the following conditions
are met:
.The ignition is on.
.The exterior lamp control is turned to AUTO.
.The light sensor detects daytime light.
.The shift lever is not in P (Park).While the DRL system is on, the taillamps, sidemarker
lamps, and instrument panel lights will not be on.
For vehicles with an Automatic Transmission, the DRL
system is off any time the vehicle is in P (Park). For
vehicles with a Manual Transmission, the DRL system
will be off when the vehicle is first started, the park
brake is applied, and the vehicle has not moved. The
DRL system on U.S. vehicles can also be turned off by
using the off/on switch for one ignition cycle.
The regular headlamp system should be turned on
when needed.
Automatic Headlamp System
When it is dark enough outside, the automatic system
turns on the headlamps at the normal brightness along
with other lamps such as the taillamps, sidemarker,
parking lamps, instrument panel lights, and interior
switch backlighting.
Do not cover the light sensor, located on top of the
instrument panel. If the sensor is covered the
headlamps may remain on when they are not needed.
If the vehicle is driven through a parking garage,
overcast weather or a tunnel, the automatic headlamp
system may turn on.
4-12
Page 179 of 480

There is a delay in the transition between the daytime
and nighttime operation of the automatic lamp control
system so that driving under bridges or bright overhead
street lights does not affect the system. The automatic
lamp control system will only be affected when the light
sensor sees a change in lighting lasting longer than
this delay.
If the vehicle is started in a dark garage, the automatic
lamp system turns on immediately. Once the vehicle
exits the garage, it will take about 20 seconds for the
automatic lamp system to change to DRL if it is light
outside. During that delay, the instrument panel
cluster may not be as bright as usual. Make sure the
instrument panel brightness control is in the full bright
position. SeeInstrument Panel Brightness
on
page 4‑14.
To idle the vehicle with the system off, turn the ignition
on and turn the exterior light switch to the off/on
position. For vehicles first sold in Canada, the
transmission must stay in P (Park) for this function
or the parking brake must be set for vehicles with
manual transmissions.
Turn on the regular headlamps when they are needed.
Fog Lamps
For vehicles with fog lamps, the button is located on the
instrument panel, to the right of the steering wheel.
The ignition must be on to use the fog lamps.
#: Press to turn the fog lamps on and off. An indicator
light on the button comes on when the fog lamps
are on.
The parking lamps automatically turn on and off when
the fog lamps are turned on and off.
The fog lamps will turn off while the high-beam
headlamps are turned on.
Some localities have laws that require the headlamps to
be on along with the fog lamps.
4-13
Page 180 of 480

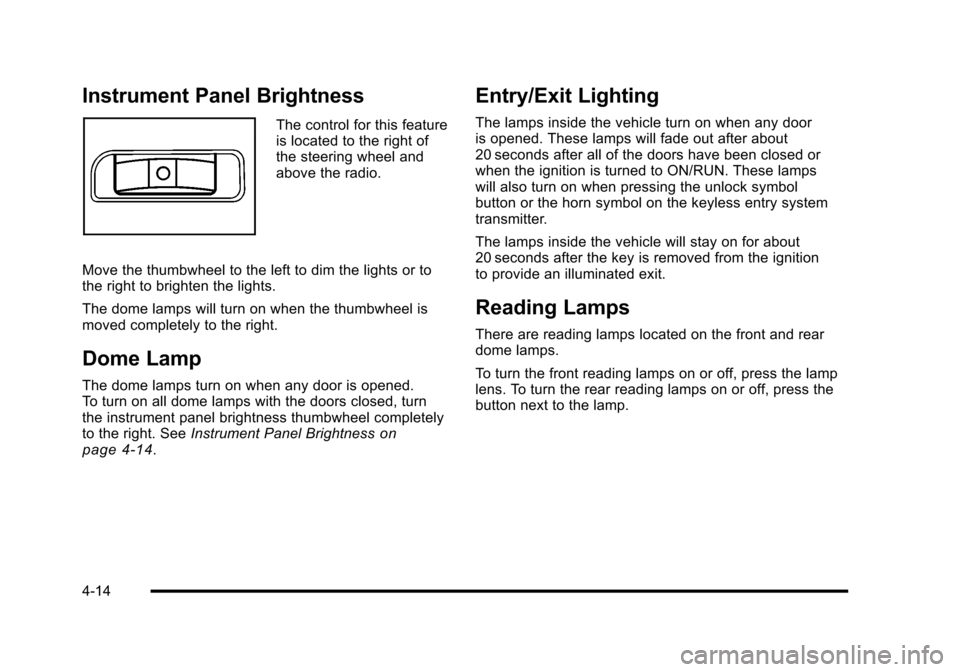
Instrument Panel Brightness
The control for this feature
is located to the right of
the steering wheel and
above the radio.
Move the thumbwheel to the left to dim the lights or to
the right to brighten the lights.
The dome lamps will turn on when the thumbwheel is
moved completely to the right.
Dome Lamp
The dome lamps turn on when any door is opened.
To turn on all dome lamps with the doors closed, turn
the instrument panel brightness thumbwheel completely
to the right. See Instrument Panel Brightness
on
page 4‑14.
Entry/Exit Lighting
The lamps inside the vehicle turn on when any door
is opened. These lamps will fade out after about
20 seconds after all of the doors have been closed or
when the ignition is turned to ON/RUN. These lamps
will also turn on when pressing the unlock symbol
button or the horn symbol on the keyless entry system
transmitter.
The lamps inside the vehicle will stay on for about
20 seconds after the key is removed from the ignition
to provide an illuminated exit.
Reading Lamps
There are reading lamps located on the front and rear
dome lamps.
To turn the front reading lamps on or off, press the lamp
lens. To turn the rear reading lamps on or off, press the
button next to the lamp.
4-14
Page 189 of 480

4. Pull the filter out, keeping it upwards.
Install the new air filter with the AIR FLOW arrow
pointing downward. Reverse Steps 1 through 4 to
reassemble.
Warning Lights, Gauges, and
Indicators
Warning lights and gauges can signal that something is
wrong before it becomes serious enough to cause an
expensive repair or replacement. Paying attention to the
warning lights and gauges could prevent injury.
Warning lights come on when there might be or there is
a problem with one of the vehicle's functions. Some
warning lights come on briefly when the engine is
started to indicate they are working.
Gauges can indicate when there might be or there is
a problem with one of the vehicle's functions. Often
gauges and warning lights work together to indicate a
problem with the vehicle.
When one of the warning lights comes on and stays on
while driving, or when one of the gauges shows there
could be a problem, check the section that explains
what to do. Follow this manual's advice. Waiting to do
repairs can be costly and even dangerous.
4-23
Page 194 of 480

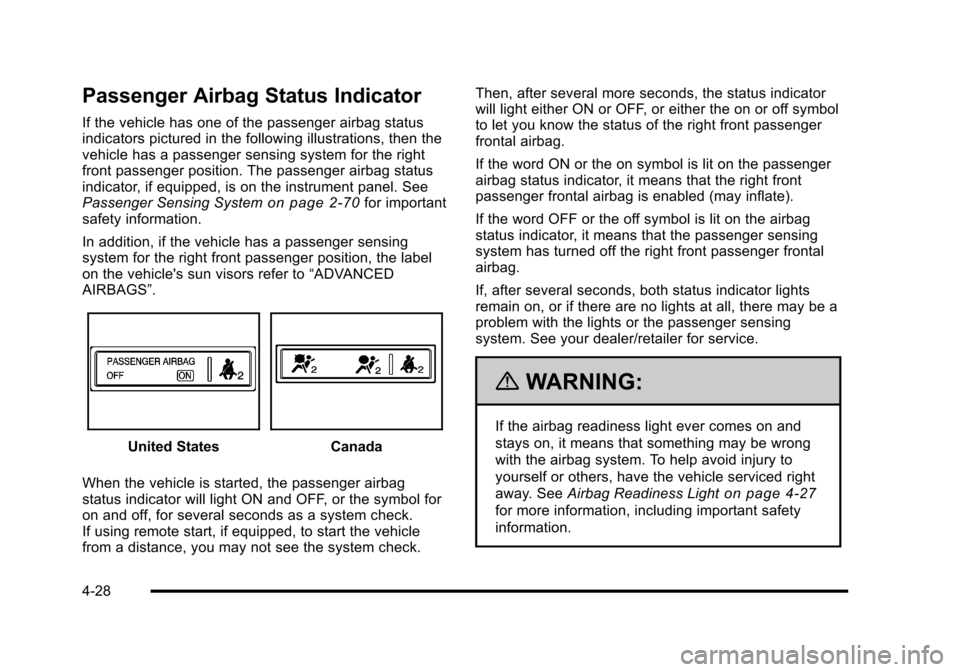
Passenger Airbag Status Indicator
If the vehicle has one of the passenger airbag status
indicators pictured in the following illustrations, then the
vehicle has a passenger sensing system for the right
front passenger position. The passenger airbag status
indicator, if equipped, is on the instrument panel. See
Passenger Sensing System
on page 2‑70for important
safety information.
In addition, if the vehicle has a passenger sensing
system for the right front passenger position, the label
on the vehicle's sun visors refer to “ADVANCED
AIRBAGS”.
United StatesCanada
When the vehicle is started, the passenger airbag
status indicator will light ON and OFF, or the symbol for
on and off, for several seconds as a system check.
If using remote start, if equipped, to start the vehicle
from a distance, you may not see the system check. Then, after several more seconds, the status indicator
will light either ON or OFF, or either the on or off symbol
to let you know the status of the right front passenger
frontal airbag.
If the word ON or the on symbol is lit on the passenger
airbag status indicator, it means that the right front
passenger frontal airbag is enabled (may inflate).
If the word OFF or the off symbol is lit on the airbag
status indicator, it means that the passenger sensing
system has turned off the right front passenger frontal
airbag.
If, after several seconds, both status indicator lights
remain on, or if there are no lights at all, there may be a
problem with the lights or the passenger sensing
system. See your dealer/retailer for service.
{WARNING:
If the airbag readiness light ever comes on and
stays on, it means that something may be wrong
with the airbag system. To help avoid injury to
yourself or others, have the vehicle serviced right
away. See
Airbag Readiness Light
on page 4‑27
for more information, including important safety
information.
4-28
Page 208 of 480

Region A Gauge and Speedometer
Displays
Change the information displayed in Region A by
turning the knob either clockwise or counterclockwise.
The available gauges are:
BOOST:Displays positive boost pressure as
determined by the manifold air pressure (MAP) sensor.
AIR/FUEL RATIO: Displays the mass ratio of air to fuel.
CAM PHASER ANGLES: Displays orientation of the
intake and exhaust cam shafts relative to their park
positions as commanded by the engine control module.
OVERLAP represents the total distance the intake and
exhaust cam shafts have phased.
SPARK ADVANCE/ KNOCK RETARD: The spark
advance gauge displays ignition timing. Knock retard
indicates the amount of ignition delay to reduce spark
knock.
ENGINE POWER & TORQUE : Displayed engine
power and torque are engine flywheel output values
calculated by the engine control module. These
values are approximate and may change with the air
conditioning load, generator output, air temperature, air
pressure, and fuel octane. SPEEDOMETER & G FORCE :
The G FORCE meter
displays lateral acceleration. While turning right,
G forces are felt on the left, and vice versa. PEAK
values are stored indefinitely, and can be reset with
a press and hold of the RPD knob while viewing the
G FORCE meter.
SETUP MENU: Press the RPD knob to enter this
menu. The vehicle should be stopped while configuring
the setup menu selections.
SCREEN OFF: Turns the screen off.
Region B Readout Displays
Press the RPD knob to highlight Region B. The
information displayed can be changed by turning the
RPD knob either clockwise or counterclockwise.
Press the RPD knob again, to store the selection. The
selection will also be stored after a few seconds of no
activity. Available modes are:
Readouts #1
SHIFT LIGHTS/GEAR INDICATION: The shift lights
provide visual identification of engine speed for a
transmission gear. Shift light minimum and maximum
RPM settings can be viewed and configured in the
SETUP screen. The gear indication on manual
transmission vehicles is calculated by the engine
control module. The gear is only displayed when
enough torque is available to determine the selected
forward gear.
4-42
Page 215 of 480

AUTO (Automatic) LIGHTS OFF
This message displays if the automatic headlamp
system is disabled with the headlamp switch. See
Automatic Headlamp System
on page 4‑12for more
information.
AUTO (Automatic) LIGHTS ON
This message displays if the automatic headlamp
system is enabled with the headlamp switch. See
Automatic Headlamp System
on page 4‑12for more
information.
BRAKE FLUID
This message displays, while the ignition is on, when
the brake fluid level is low. The brake system warning
light on the instrument panel cluster also comes on.
See Brake System Warning Light
on page 4‑30for
more information. Have the brake system serviced by
your dealer/retailer as soon as possible.
CHANGE OIL SOON
This message displays when the life of the engine oil
has expired and it should be changed.
When this message is acknowledged and cleared from
the display, the engine oil life system must still be reset
separately. See Engine Oil Life System
on page 6‑23andScheduled Maintenanceon page 7‑3for more
information.
CHECK GAS CAP
This message displays if the fuel cap has not been fully
tightened. Recheck the fuel cap to make sure that it is
on properly. A few driving trips with the cap properly
installed should turn the message off.
COMPETITIVE MODE
If your vehicle has this feature, this message displays
when the Competitive Driving mode is selected. The
Traction Control System (TCS) will not be operating
while in the Competitive Driving mode and the ESC/
TCS light on the instrument panel cluster will be on
solid. Adjust your driving accordingly. See Traction
Control System (TCS)
on page 5‑9, Electronic
Stability Control (ESC)on page 5‑6, and Electronic
Stability Control (ESC)/Traction Control System (TCS)
Indicator/Warning Light
on page 4‑33for more
information.
COOLING MODE ON
This message may display on some vehicles. Under
severe conditions, hot ambient temperatures, steep
grades, and towing, your vehicle may experience more
transmission shifting. This is temporary and normal
under these conditions. This does not require engine or
transmission service.
4-49