2010 CHEVROLET CORVETTE check oil
[x] Cancel search: check oilPage 331 of 472
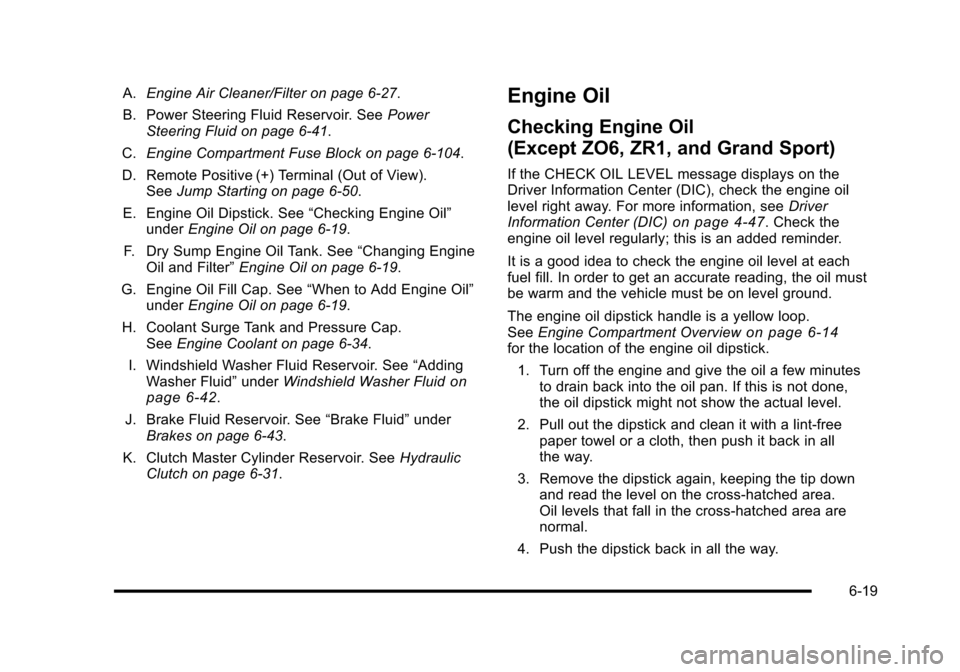
A.Engine Air Cleaner/Filter on page 6‑27.
B. Power Steering Fluid Reservoir. See Power
Steering Fluid on page 6‑41.
C. Engine Compartment Fuse Block on page 6‑104.
D. Remote Positive (+) Terminal (Out of View). See Jump Starting on page 6‑50.
E. Engine Oil Dipstick. See “Checking Engine Oil”
under Engine Oil on page 6‑19.
F. Dry Sump Engine Oil Tank. See “Changing Engine
Oil and Filter” Engine Oil on page 6‑19.
G. Engine Oil Fill Cap. See “When to Add Engine Oil”
under Engine Oil on page 6‑19.
H. Coolant Surge Tank and Pressure Cap. See Engine Coolant on page 6‑34.
I. Windshield Washer Fluid Reservoir. See “Adding
Washer Fluid” underWindshield Washer Fluid
on
page 6‑42.
J. Brake Fluid Reservoir. See “Brake Fluid”under
Brakes on page 6‑43.
K. Clutch Master Cylinder Reservoir. See Hydraulic
Clutch on page 6‑31.
Engine Oil
Checking Engine Oil
(Except ZO6, ZR1, and Grand Sport)
If the CHECK OIL LEVEL message displays on the
Driver Information Center (DIC), check the engine oil
level right away. For more information, see Driver
Information Center (DIC)
on page 4‑47. Check the
engine oil level regularly; this is an added reminder.
It is a good idea to check the engine oil level at each
fuel fill. In order to get an accurate reading, the oil must
be warm and the vehicle must be on level ground.
The engine oil dipstick handle is a yellow loop.
See Engine Compartment Overview
on page 6‑14for the location of the engine oil dipstick.
1. Turn off the engine and give the oil a few minutes to drain back into the oil pan. If this is not done,
the oil dipstick might not show the actual level.
2. Pull out the dipstick and clean it with a lint‐free paper towel or a cloth, then push it back in all
the way.
3. Remove the dipstick again, keeping the tip down and read the level on the cross‐hatched area.
Oil levels that fall in the cross‐hatched area are
normal.
4. Push the dipstick back in all the way.
6-19
Page 333 of 472
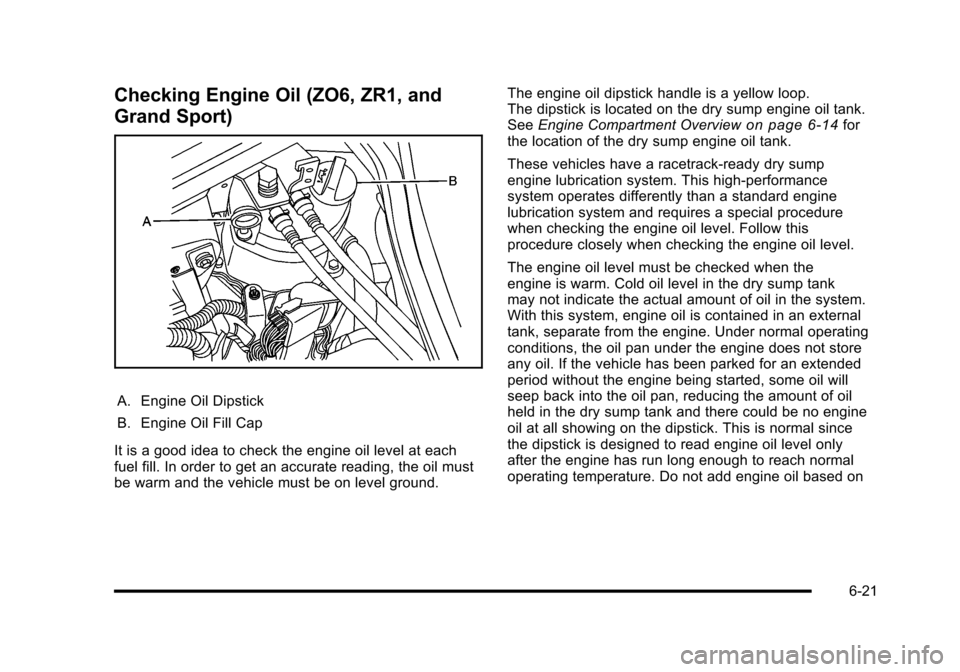
Checking Engine Oil (ZO6, ZR1, and
Grand Sport)
A. Engine Oil Dipstick
B. Engine Oil Fill Cap
It is a good idea to check the engine oil level at each
fuel fill. In order to get an accurate reading, the oil must
be warm and the vehicle must be on level ground. The engine oil dipstick handle is a yellow loop.
The dipstick is located on the dry sump engine oil tank.
See
Engine Compartment Overview
on page 6‑14for
the location of the dry sump engine oil tank.
These vehicles have a racetrack‐ready dry sump
engine lubrication system. This high‐performance
system operates differently than a standard engine
lubrication system and requires a special procedure
when checking the engine oil level. Follow this
procedure closely when checking the engine oil level.
The engine oil level must be checked when the
engine is warm. Cold oil level in the dry sump tank
may not indicate the actual amount of oil in the system.
With this system, engine oil is contained in an external
tank, separate from the engine. Under normal operating
conditions, the oil pan under the engine does not store
any oil. If the vehicle has been parked for an extended
period without the engine being started, some oil will
seep back into the oil pan, reducing the amount of oil
held in the dry sump tank and there could be no engine
oil at all showing on the dipstick. This is normal since
the dipstick is designed to read engine oil level only
after the engine has run long enough to reach normal
operating temperature. Do not add engine oil based on
6-21
Page 334 of 472
cold engine dipstick readings. The engine oil level on
the dipstick will also be inaccurate if checked while the
engine is running. 1. To obtain an accurate engine oil level reading, warm up the engine to at least 80°C (175°F).
Cold oil will not give a correct oil level reading.
2. Once the engine is warm, turn off the engine. Checking the oil while the engine is running will
result in an incorrect oil level reading.
3. Wait at least five minutes (but not more than 20 minutes) to allow oil to drain and settle in the
engine.
4. Remove the dipstick from the external engine oil tank and clean it with a lint‐free paper towel or a
cloth. Re‐insert the dipstick into the external oil
tank, pushing it all the way in until it stops.
5. Remove the dipstick from the oil tank and read the level on the cross‐hatched area. Oil levels that fall
in the cross‐hatched area are normal.When to Add Engine Oil
(ZO6, ZR1, and Grand Sport)
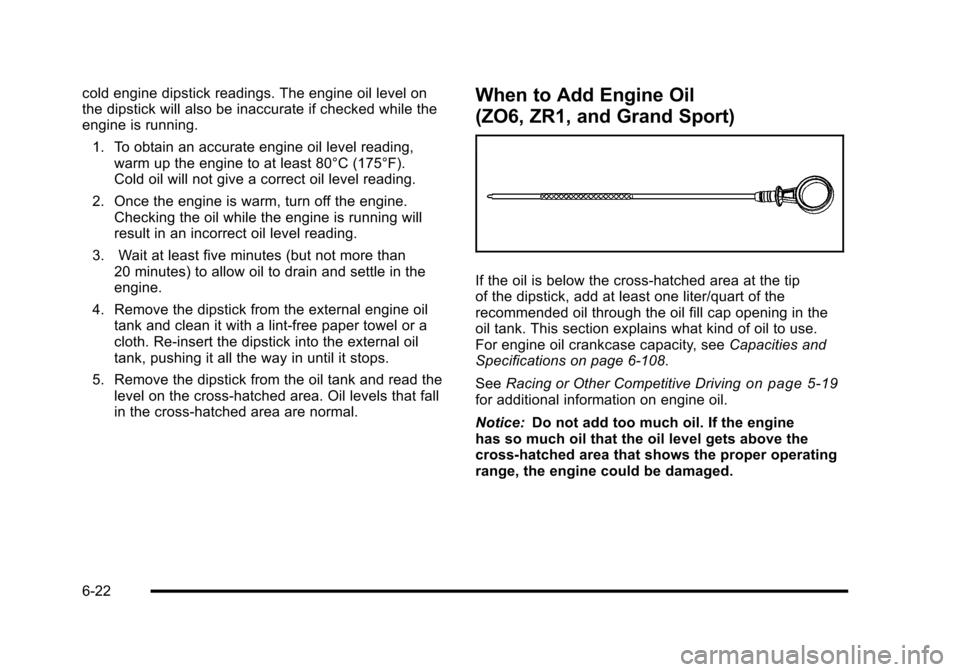
If the oil is below the cross-hatched area at the tip
of the dipstick, add at least one liter/quart of the
recommended oil through the oil fill cap opening in the
oil tank. This section explains what kind of oil to use.
For engine oil crankcase capacity, see Capacities and
Specifications on page 6‑108.
See Racing or Other Competitive Driving
on page 5‑19for additional information on engine oil.
Notice: Do not add too much oil. If the engine
has so much oil that the oil level gets above the
cross-hatched area that shows the proper operating
range, the engine could be damaged.
6-22
Page 336 of 472
2. Once the oil has been drained from the engine, remove the engine oil filter and allow the oil to
drain.
3. Re‐install both drain plugs and tighten them to 25 Y (18 lb ft).
4. Replace the oil filter and tighten it to 30 Y
(22 lb ft). See Maintenance Replacement Parts
on
page 7‑12for the correct filter.
5. Oil is filled through the opening in the top of the external engine oil tank. Remove the oil fill cap.
6. Add 9.9 L (10.5 quarts) of oil to the oil tank. See Capacities and Specifications on page 6‑108.
7. Install the oil fill cap and insert the dipstick, if removed.
8. Start the engine and let it run at idle for at least 15 seconds. This will circulate the fresh engine oil
through the lubrication system.
9. Shut off the engine and check the oil level as described under “Checking Engine Oil (ZO6, ZR1,
and Grand Sport).”
What Kind of Engine Oil to Use
Look for three things:
.GM4718M
This vehicle's engine requires a special oil
meeting GM Standard GM4718M. Oils meeting
this standard may be identified as synthetic.
However, not all synthetic oils will meet this
GM standard. Use only an oil that meets GM
Standard GM4718M.
Notice: Using oils that do not have the GM4718M
Standard designation can cause engine damage not
covered by the vehicle warranty.
.SAE 5W-30
SAE 5W-30 is best for the vehicle. These numbers
on an oil container show its viscosity, or thickness.
Do not use other viscosity oils such as
SAE 20W-50.
.American Petroleum Institute (API) starburst
symbol
6-24
Page 338 of 472
Z06, ZR1, and Grand Sport models have a
racetrack‐ready dry sump engine lubrication system.
This high‐performance system operates differently
than a standard engine lubrication system and requires
a special procedure when changing the engine oil and
filter. See Engine Oil on page 6‑19.
When the system has calculated that oil life has been
diminished, it indicates that an oil change is necessary.
A CHANGE ENGINE OIL message comes on. Change
the oil as soon as possible within the next 1 000 km
(600 miles). It is possible that, if driving under the best
conditions, the oil life system might not indicate that
an oil change is necessary for over a year. However,
the engine oil and filter must be changed at least once
a year and at this time the system must be reset.
Your dealer/retailer has trained service people who
will perform this work using genuine parts and reset
the system. It is also important to check the oil regularly
and keep it at the proper level.
If the system is ever reset accidentally, the oil must be
changed at 5 000 km (3,000 miles) since the last oil
change. Remember to reset the oil life system
whenever the oil is changed.How to Reset the Engine Oil Life
System
The Engine Oil Life System calculates when to
change the engine oil and filter based on vehicle use.
Whenever the oil is changed, reset the system so it
can calculate when the next oil change is required.
If a situation occurs where the oil is changed prior to
a CHANGE ENGINE OIL message being turned on,
reset the system.
To reset the CHANGE ENGINE OIL message after an
oil change: 1. Press the TRIP button so the OIL LIFE percentage is displayed.
2. Press RESET and hold for two seconds. OIL LIFE REMAINING 100% will appear.
If the CHANGE ENGINE OIL message comes back on
when the vehicle is started, the engine oil life system
has not reset. Repeat the procedure.
6-26
Page 347 of 472
What to Use
{WARNING:
Adding only plain water to the cooling system
can be dangerous. Plain water, or some other
liquid such as alcohol, can boil before the proper
coolant mixture will. The vehicle's coolant warning
system is set for the proper coolant mixture.
With plain water or the wrong mixture, the engine
could get too hot but would not get the overheat
warning. The engine could catch fire and you or
others could be burned. Use a 50/50 mixture of
clean, drinkable water and DEX-COOL
®coolant.
Use a 50/50 mixture of clean, drinkable water and
DEX-COOL
®coolant. If using this mixture, nothing else
needs to be added. This mixture:
.Gives freezing protection down to −37°C (−34°F),
outside temperature.
.Gives boiling protection up to 129°C (265°F),
engine temperature.
.Protects against rust and corrosion.
.Will not damage aluminum parts.
.Helps keep the proper engine temperature. Notice:
If an improper coolant mixture is used,
the engine could overheat and be badly damaged.
The repair cost would not be covered by the vehicle
warranty. Too much water in the mixture can freeze
and crack the engine, radiator, heater core, and
other parts.
Notice: If extra inhibitors and/or additives are used
in the vehicle's cooling system, the vehicle could be
damaged. Use only the proper mixture of the engine
coolant listed in this manual for the cooling system.
See Recommended Fluids and Lubricants
on
page 7‑10for more information.
Checking Coolant
The vehicle must be on a level surface when checking
the coolant level.
Check to see if coolant is visible in the coolant surge
tank. If the coolant inside the coolant surge tank is
boiling, do not do anything else until it cools down.
If coolant is visible but the coolant level is not at or
above the FULL COLD mark, add a 50/50 mixture of
clean, drinkable water and DEX-COOL coolant at the
coolant recovery tank, but be sure the cooling system
is cool before this is done. See Engine Coolant
on
page 6‑34for more information.
6-35
Page 353 of 472
Overheated Engine Protection
Operating Mode
This emergency operating mode lets the vehicle
be driven to a safe place, up to 50 miles (80 km),
in an emergency situation. If an overheated engine
condition exists and the messages COOLANT OVER
TEMPERATURE and REDUCED ENGINE POWER
are displayed, along with the check engine light, an
overheat protection mode which alternates firing groups
of cylinders helps prevent engine damage. In this
mode, there is a significant loss in power and engine
performance.
Driving extended distances in the overheat protection
mode should be avoided.
Notice: After driving in the overheated engine
protection operating mode, to avoid engine damage,
allow the engine to cool before attempting any
repair. The engine oil will be severely degraded.
Repair the cause of coolant loss, change the oil
and reset the oil life system. See Engine Oil
on
page 6‑19.
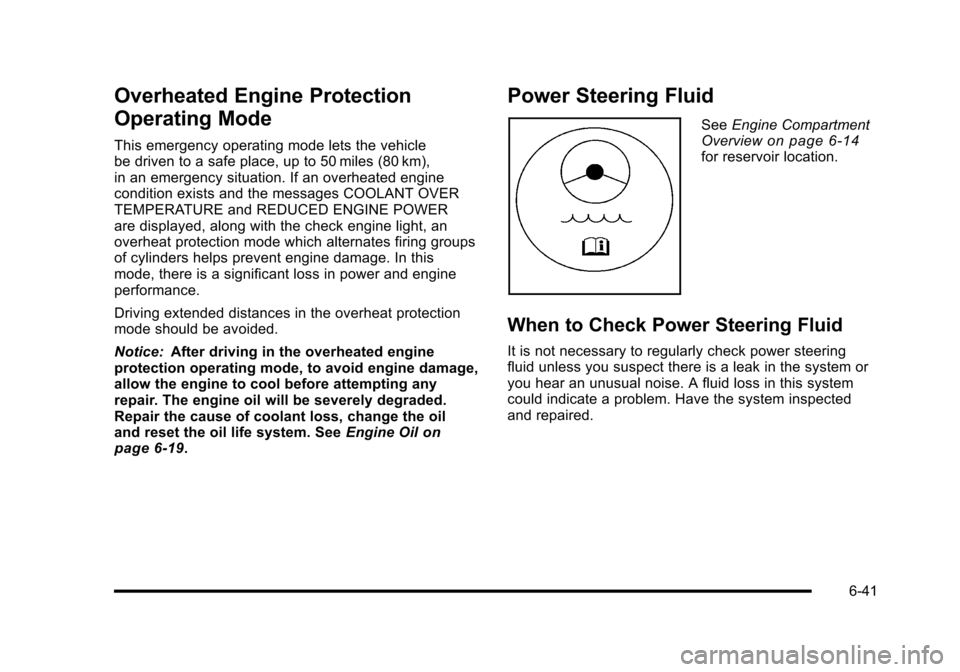
Power Steering Fluid
See Engine Compartment
Overviewon page 6‑14for reservoir location.
When to Check Power Steering Fluid
It is not necessary to regularly check power steering
fluid unless you suspect there is a leak in the system or
you hear an unusual noise. A fluid loss in this system
could indicate a problem. Have the system inspected
and repaired.
6-41
Page 367 of 472
Rear Axle
When to Check Lubricant
It is not necessary to regularly check rear axle fluid
unless you suspect there is a leak or you hear an
unusual noise. A fluid loss could indicate a problem.
Have it inspected and repaired.
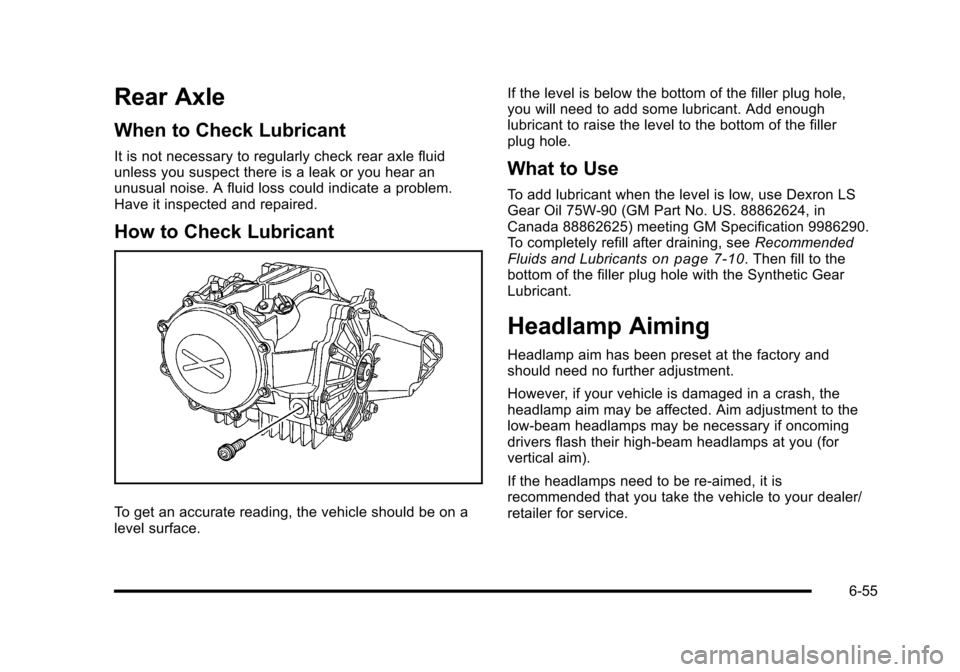
How to Check Lubricant
To get an accurate reading, the vehicle should be on a
level surface. If the level is below the bottom of the filler plug hole,
you will need to add some lubricant. Add enough
lubricant to raise the level to the bottom of the filler
plug hole.
What to Use
To add lubricant when the level is low, use Dexron LS
Gear Oil 75W-90 (GM Part No. US. 88862624, in
Canada 88862625) meeting GM Specification 9986290.
To completely refill after draining, see
Recommended
Fluids and Lubricants
on page 7‑10. Then fill to the
bottom of the filler plug hole with the Synthetic Gear
Lubricant.
Headlamp Aiming
Headlamp aim has been preset at the factory and
should need no further adjustment.
However, if your vehicle is damaged in a crash, the
headlamp aim may be affected. Aim adjustment to the
low-beam headlamps may be necessary if oncoming
drivers flash their high-beam headlamps at you (for
vertical aim).
If the headlamps need to be re-aimed, it is
recommended that you take the vehicle to your dealer/
retailer for service.
6-55