2010 CHEVROLET CORVETTE seat memory
[x] Cancel search: seat memoryPage 18 of 472

Steering Wheel Adjustment
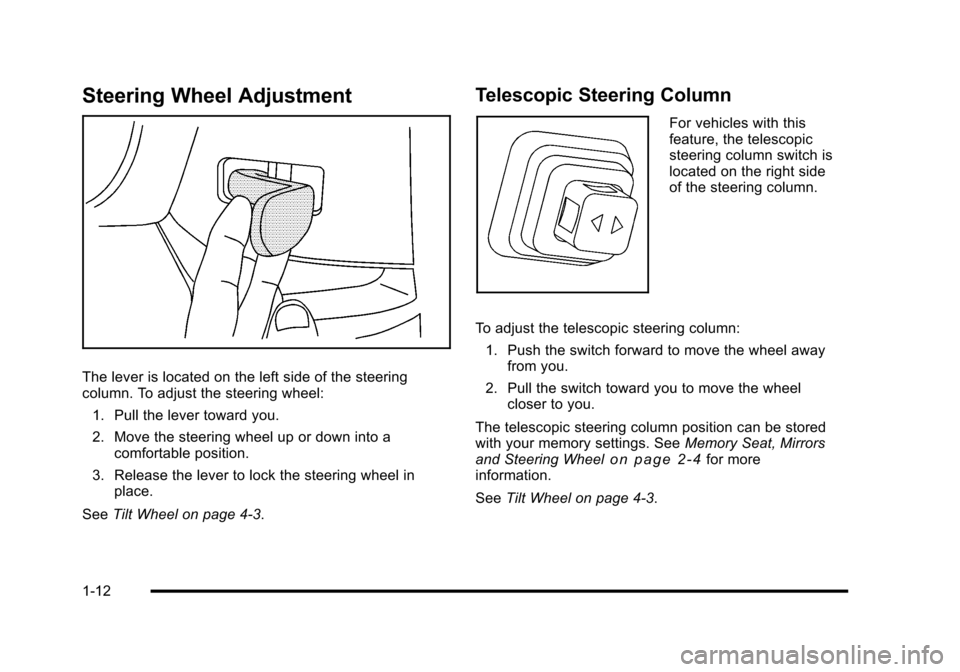
The lever is located on the left side of the steering
column. To adjust the steering wheel: 1. Pull the lever toward you.
2. Move the steering wheel up or down into a comfortable position.
3. Release the lever to lock the steering wheel in place.
See Tilt Wheel on page 4‑3.
Telescopic Steering Column
For vehicles with this
feature, the telescopic
steering column switch is
located on the right side
of the steering column.
To adjust the telescopic steering column: 1. Push the switch forward to move the wheel away from you.
2. Pull the switch toward you to move the wheel closer to you.
The telescopic steering column position can be stored
with your memory settings. See Memory Seat, Mirrors
and Steering Wheel
on page 2‑4for more
information.
See Tilt Wheel on page 4‑3.
1-12
Page 26 of 472

TRIP :Press to display your total and trip distance
driven, the elapsed time function, your average speed,
and the engine oil life.
OPTION : Press to choose personal options that are
available on your vehicle, depending on the options
your vehicle is equipped with, such as door locks, easy
entry seats, and language.
RESET : Press, along with the other buttons, to reset
system functions, select personal options, and turn off
or acknowledge messages on the DIC.
For more information, see Driver Information Center
(DIC) on page 4‑47.
Vehicle Personalization
Some vehicle features can be programmed by using
the DIC buttons on the left side of the steering wheel.
The features that can be programmed include:
.Units
.Memory Features
.Lighting Features
.Lock and Unlock Feedback
.Door Lock and Unlock Settings
.Language
.Personalization Name
See DIC Vehicle Personalization on page 4‑71.
Cruise Control
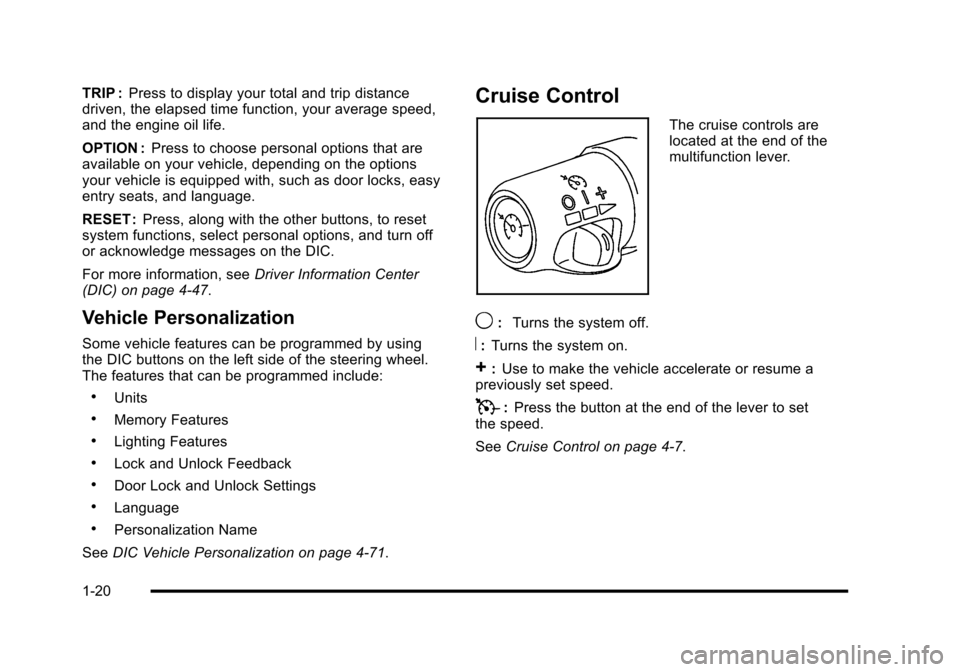
The cruise controls are
located at the end of the
multifunction lever.
9: Turns the system off.
R:Turns the system on.
+:Use to make the vehicle accelerate or resume a
previously set speed.
T: Press the button at the end of the lever to set
the speed.
See Cruise Control on page 4‑7.
1-20
Page 35 of 472

Section 2 Seats and Restraint System
Front Seats. . . . . . . . . . . . . . . . . . . . . . . . . . . . . . . . . . . . . . . . . 2-2
Manual Seats . . . . . . . . . . . . . . . . . . . . . . . . . . . . . . . . . . . 2-2
Power Seats . . . . . . . . . . . . . . . . . . . . . . . . . . . . . . . . . . . . 2-3
Power Lumbar and Side Bolsters . . . . . . . . . . . . . . . 2-3
Heated Seats . . . . . . . . . . . . . . . . . . . . . . . . . . . . . . . . . . . 2-4
Memory Seat, Mirrors and Steering Wheel . . . . . . 2-4
Reclining Seatbacks . . . . . . . . . . . . . . . . . . . . . . . . . . . . 2-6
Seatback Latches . . . . . . . . . . . . . . . . . . . . . . . . . . . . . . . 2-8
Safety Belts . . . . . . . . . . . . . . . . . . . . . . . . . . . . . . . . . . . . . . . . 2-9
Safety Belts: They Are for Everyone . . . . . . . . . . . . 2-9
How to Wear Safety Belts Properly . . . . . . . . . . . . 2-14
Lap-Shoulder Belt . . . . . . . . . . . . . . . . . . . . . . . . . . . . . 2-23
Safety Belt Use During Pregnancy . . . . . . . . . . . . . 2-25
Safety Belt Extender . . . . . . . . . . . . . . . . . . . . . . . . . . . 2-26
Child Restraints . . . . . . . . . . . . . . . . . . . . . . . . . . . . . . . . . . 2-26
Older Children . . . . . . . . . . . . . . . . . . . . . . . . . . . . . . . . . 2-26
Infants and Young Children . . . . . . . . . . . . . . . . . . . . 2-29
Child Restraint Systems . . . . . . . . . . . . . . . . . . . . . . . 2-33 Lower Anchors and Tethers for Children
(LATCH) (Coupe and Convertible
Models Only) . . . . . . . . . . . . . . . . . . . . . . . . . . . . . . . . 2-35
Lower Anchors and Tethers for Children (LATCH) (Z06 and ZR1 Models Only) . . . . . . . . 2-36
Securing a Child Restraint in the Right Front Seat Position . . . . . . . . . . . . . . . . . . . . . . . . . . . . . . . . 2-40
Airbag System . . . . . . . . . . . . . . . . . . . . . . . . . . . . . . . . . . . . 2-44
Where Are the Airbags? . . . . . . . . . . . . . . . . . . . . . . . 2-46
When Should an Airbag Inflate? . . . . . . . . . . . . . . . 2-48
What Makes an Airbag Inflate? . . . . . . . . . . . . . . . . 2-50
How Does an Airbag Restrain? . . . . . . . . . . . . . . . . 2-50
What Will You See After an Airbag Inflates? . . . 2-51
Passenger Sensing System . . . . . . . . . . . . . . . . . . . 2-53
Servicing Your Airbag-Equipped Vehicle . . . . . . . 2-58
Adding Equipment to Your Airbag-Equipped Vehicle . . . . . . . . . . . . . . . . . . . . . . . . . . . . . . . . . . . . . . 2-59
Restraint System Check . . . . . . . . . . . . . . . . . . . . . . . . . 2-60
Checking the Restraint Systems . . . . . . . . . . . . . . . 2-60
Replacing Restraint System Parts After a Crash . . . . . . . . . . . . . . . . . . . . . . . . . . . . . . . . . . . . . . . . 2-61
2-1
Page 37 of 472

Power Seats
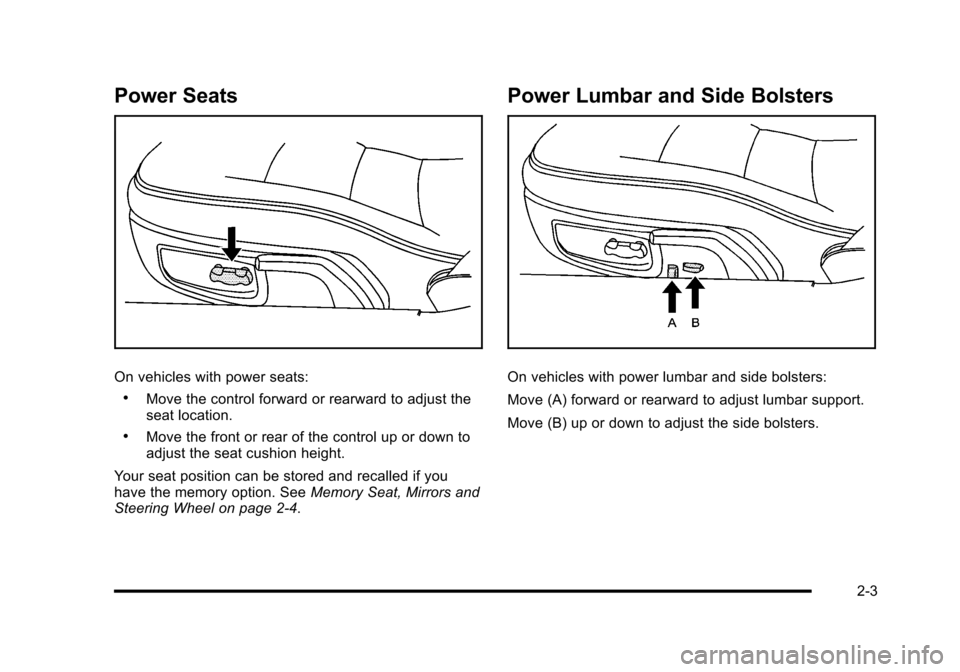
On vehicles with power seats:
.Move the control forward or rearward to adjust the
seat location.
.Move the front or rear of the control up or down to
adjust the seat cushion height.
Your seat position can be stored and recalled if you
have the memory option. See Memory Seat, Mirrors and
Steering Wheel on page 2‑4.
Power Lumbar and Side Bolsters
On vehicles with power lumbar and side bolsters:
Move (A) forward or rearward to adjust lumbar support.
Move (B) up or down to adjust the side bolsters.
2-3
Page 38 of 472

Heated Seats
On vehicles with heated seats, the buttons are located
on the center console.
The ignition must be on for this feature to work.
L: Press to turn the seat on at the high setting.
Press again to turn it to the low setting
9: Press to turn the system off.
Memory Seat, Mirrors and Steering
Wheel
On vehicles with the memory package, the controls are
located on the driver's door.
1 : Saves the seating position for driver 1.
2 : Saves the seating position for driver 2.
B:Recalls the easy exit position. The numbers on the back of the keyless access
transmitters correspond to the numbers on the
memory buttons.
To save seating positions in the memory:
1. Adjust the driver's seat, both outside mirrors, and the telescopic steering column to a comfortable
driving position.
2. Press and hold button 1 until two beeps let you know that the position has been stored in the
memory.
A second seating, mirror, and telescopic steering
column position can be set by repeating the above
steps and pressing button 2.
2-4
Page 39 of 472

To recall a memory position:
.On vehicles with an automatic transmission, press
and release the desired button.
If the vehicle is in P (Park), a single beep sounds
and the memory position is recalled after a brief
delay.
If the vehicle is not in P (Park), three beeps sound
and the memory position is not recalled.
.On vehicles with a manual transmission, when the
vehicle is on, the parking brake needs to be set to
recall the memory position. Press and release the
desired button.
A single beep sounds and the memory position is
recalled after a brief delay.
If the vehicle is on and the parking brake is not set,
three beeps sound and the memory position is not
recalled.
For vehicles with the Auto Memory Recall, see “Auto
Memory Recall” underDIC Vehicle Personalization
on
page 4‑71for more information.
To stop recall movement of the memory feature, press
one of the power seat controls, power mirror or memory
buttons, or the telescopic steering column switch.
Easy Exit Seat
B (Easy Exit Seat) : This button is used to program
and recall the desired driver's seat exit position.
To program an exit position:
1. Recall the desired driving position by pressing button 1.
2. Adjust the seat and the telescopic steering column position to a comfortable exit position.
3. Press and hold the exit button until two beeps sound to let you know that the exit position is
now programmed.
A second exit position can be programmed by repeating
the above steps and pressing button 2.
To recall an exit position:
.On vehicles with an automatic transmission, the
vehicle needs to be in P (Park).
.On vehicles with a manual transmission, the
parking brake must be set.
B: Press to recall an exit position.
One beep will sound and the exit position for the
currently identified driver will be recalled.
For vehicles with the Auto Exit Recall, see “Auto Exit
Recall” underDIC Vehicle Personalization
on
page 4‑71for more information.
2-5
Page 102 of 472

Keyless Trunk Opening
Press the hatch/trunk release button located on the rear
of the hatch/trunk lid above the license plate to open the
trunk if the keyless access transmitter is within range.
See Hatch
on page 3‑14for additional information.
There are other conditions that can affect the
performance of the transmitter. See Keyless Access
System
on page 3‑5Keyless Access System.
This vehicle comes with
two transmitters.
Q(Lock): Press once to lock the doors. WhenQis
pressed twice, the lights flash and the horn sounds to
confirm locking.
K(Unlock): Press once to unlock only the driver door.
Press
Ktwice within five seconds to unlock both doors.
The interior lamps may come on.
Pressing
Kalso recalls the memory settings.
See Memory Seat, Mirrors and Steering Wheel
on
page 2‑4for more information.
}(Hatch/Trunk): Press and hold for about
one second to unlock the hatch/trunk. If the engine
is running, the shift lever must be in P (Park) for an
automatic transmission. For a manual transmission,
the shift lever must be in NEUTRAL with the parking
brake set.
L(Panic): Press to sound the horn. Press any other
button on the keyless access transmitter to stop it.
The vehicle comes with two transmitters. Each
transmitter will have a number on top of it, “1”or“2”.
These numbers correspond to the driver of the vehicle.
For example, the memory seat position for driver 1 will
be recalled when using the transmitter labeled “1”,
if enabled through the DIC. See Memory Seat, Mirrors
and Steering Wheel
on page 2‑4and DIC Vehicle
Personalizationon page 4‑71for more information.
3-6
Page 137 of 472

Outside Power Mirrors
Controls for the outside power mirrors are located on
the driver door.
To adjust the mirrors: 1. Move the top selector control to the left or right to select either the driver or passenger mirror.
2. Use the arrows located on the four-way control pad to move the mirror in the desired direction.
3. Adjust each outside mirror so that a little of the vehicle and the area behind it can be seen. Keep the control in the center position when not
adjusting either outside mirror.
If the vehicle has the memory feature, a preferred mirror
position can be stored. See
Memory Seat, Mirrors and
Steering Wheel on page 2‑4.
Manually fold the mirrors inward to prevent damage
when going through an automatic car wash. To fold, pull
the mirror toward the vehicle. Push the mirror outward,
to return it to the original position.
Outside Automatic Dimming Mirror
If the vehicle has this feature, the driver side outside
mirror adjusts for the glare of headlamps behind you.
This feature is controlled by the on and off setting on
the inside rearview mirror.
3-41