2010 CHEVROLET CAMARO steering wheel
[x] Cancel search: steering wheelPage 208 of 378
Black plate (32,1)Chevrolet Camaro Owner Manual - 2010
8-32 Driving and Operating
If driving safely on a wet road
and it becomes necessary to slam
on the brakes and continue braking
to avoid a sudden obstacle, a
computer senses that the wheels
are slowing down. If one of the
wheels is about to stop rolling,
the computer will separately work
the brakes at each wheel.
ABS can change the brake pressure
to each wheel, as required, faster
than any driver could. This can help
the driver steer around the obstacle
while braking hard.
As the brakes are applied, the
computer keeps receiving updates
on wheel speed and controls
braking pressure accordingly.
Remember: ABS does not change
the time needed to get a foot up to
the brake pedal or always decreasestopping distance. If you get too
close to the vehicle in front of you,
there will not be enough time to
apply the brakes if that vehicle
suddenly slows or stops. Always
leave enough room up ahead to
stop, even with ABS.
Using ABS
Do not pump the brakes. Just hold
the brake pedal down firmly and let
ABS work. You might hear the ABS
pump or motor operating and feel
the brake pedal pulsate, but this is
normal.
Braking in Emergencies
ABS allows the driver to steer and
brake at the same time. In many
emergencies, steering can help
more than even the very best
braking.
Parking Brake
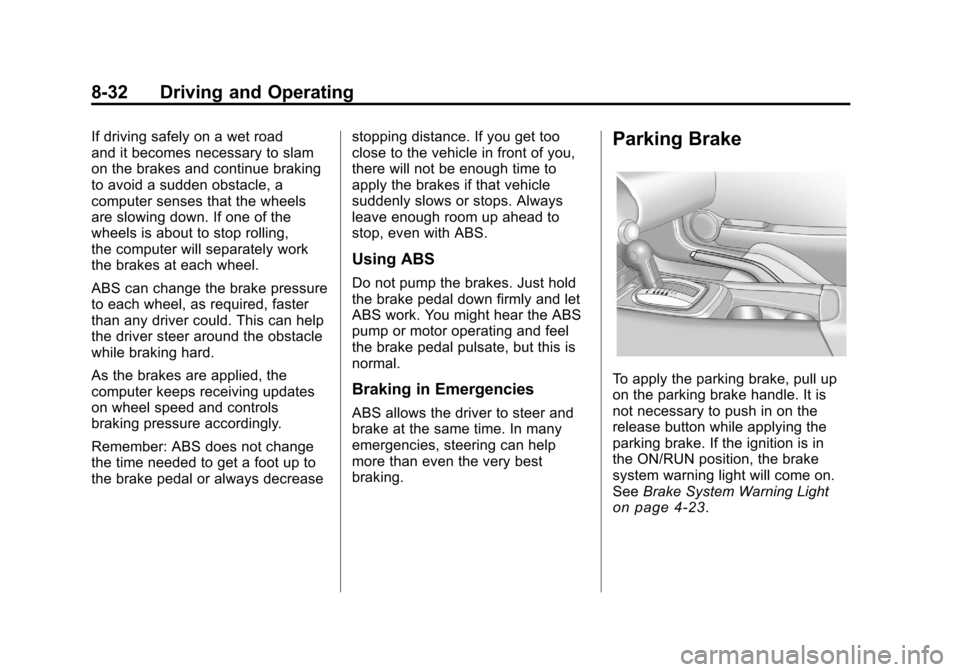
To apply the parking brake, pull up
on the parking brake handle. It is
not necessary to push in on the
release button while applying the
parking brake. If the ignition is in
the ON/RUN position, the brake
system warning light will come on.
See
Brake System Warning Light
on page 4‑23.
Page 214 of 378
Black plate (38,1)Chevrolet Camaro Owner Manual - 2010
8-38 Driving and Operating
Launch Control (V8 with
Manual Transmission
Models Only)
A Launch Control feature is
available, within Competitive
Driving Mode on vehicles with a
manual transmission to allow the
driver to achieve high levels of
vehicle acceleration in a straight
line. Launch Control is a form of
traction control that manages tire
spin while launching the vehicle.
This feature is intended for use
during closed course race events
where consistent zero to sixty
and quarter mile times are
desirable.Launch Control is only available
when the following criteria are met:
1. Competitive Driving Mode is
selected.
2. The vehicle is not moving.
3. The steering wheel is pointing straight.
4. The clutch is pressed and the vehicle is in first gear.
5. The accelerator pedal is rapidly applied to wide open throttle.
The Launch Control feature will
initially limit engine speed as the
driver rapidly applies the accelerator
pedal to wide open throttle.
A smooth, quick release of the
clutch, while maintaining the fully
pressed accelerator pedal, will
manage wheel slip. Complete
shifts as described in Manual
Transmission on page 8‑30. After the vehicle is launched,
the system continues in
Competitive Mode.
Competitive Driving Mode and
Launch Control are systems
designed for a closed course race
track and not intended for use on
public roads. The systems are not
intended to compensate for lack of
driver experience or familiarity with
the race track.
Limited-Slip Rear Axle
Vehicles with a limited-slip rear
axle can give more traction on
snow, mud, ice, sand, or gravel.
When traction is low, this feature
allows the drive wheel with the
most traction to move the vehicle.
The limited-slip rear axle also gives
the driver enhanced control when
cornering hard or completing a
maneuver, such as a lane change.
Page 215 of 378
Black plate (39,1)Chevrolet Camaro Owner Manual - 2010
Driving and Operating 8-39
Cruise Control
With cruise control, the vehicle can
maintain a speed of about 40 km/h
(25 mph) or more without keeping
your foot on the accelerator. Cruise
control does not work at speeds
below 40 km/h (25 mph).
{WARNING
Cruise control can be dangerous
where you cannot drive safely at
a steady speed. So, do not use
the cruise control on winding
roads or in heavy traffic.
Cruise control can be dangerous
on slippery roads. On such roads,
fast changes in tire traction can
cause excessive wheel slip, and
you could lose control. Do not use
cruise control on slippery roads.Setting Cruise Control
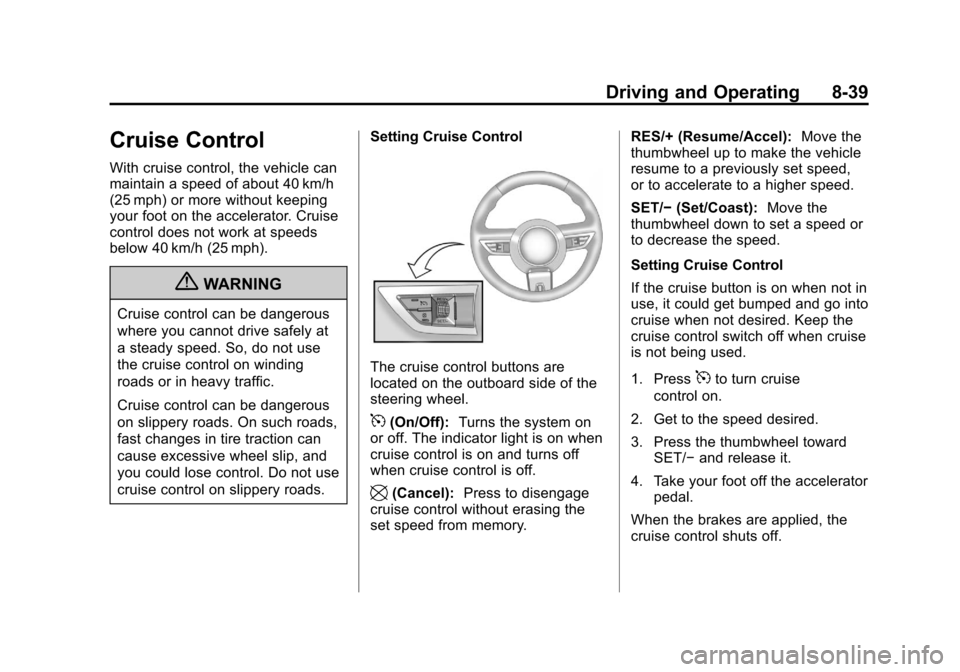
The cruise control buttons are
located on the outboard side of the
steering wheel.
5(On/Off):
Turns the system on
or off. The indicator light is on when
cruise control is on and turns off
when cruise control is off.
\(Cancel): Press to disengage
cruise control without erasing the
set speed from memory. RES/+ (Resume/Accel):
Move the
thumbwheel up to make the vehicle
resume to a previously set speed,
or to accelerate to a higher speed.
SET/− (Set/Coast): Move the
thumbwheel down to set a speed or
to decrease the speed.
Setting Cruise Control
If the cruise button is on when not in
use, it could get bumped and go into
cruise when not desired. Keep the
cruise control switch off when cruise
is not being used.
1. Press
5to turn cruise
control on.
2. Get to the speed desired.
3. Press the thumbwheel toward SET/− and release it.
4. Take your foot off the accelerator pedal.
When the brakes are applied, the
cruise control shuts off.
Page 217 of 378

Black plate (41,1)Chevrolet Camaro Owner Manual - 2010
Driving and Operating 8-41
Ending Cruise Control
There are three ways to end the
cruise control:
.To disengage cruise control;
Step lightly on the brake pedal
or clutch.
.Press\to disengage the
cruise control.
.To turn off the cruise control,
press
5on the steering wheel.
Erasing Speed Memory
The cruise control set speed is
erased from memory by pressing
the
5button or if the ignition is
turned off.
Object Detection
Systems
Ultrasonic Parking Assist
For vehicles with the Ultrasonic
Rear Parking Assist (URPA)
system, it assists the driver with
parking and avoiding objects while
in R (Reverse). URPA operates at
speeds less than 8 km/h (5 mph),
and the sensors on the rear bumper
detect objects up to 2.5 m (8 ft)
behind the vehicle, and at least
20 cm (8 in) off the ground.
{WARNING
The Ultrasonic Rear Parking
Assist (URPA) system does not
replace driver vision. It cannot
detect:
.Objects that are below the
bumper, underneath the
vehicle, or too close or far
from the vehicle
.Children, pedestrians,
bicyclists, or pets.
If you do not use proper care
before and while backing, vehicle
damage, injury, or death could
occur. Even with URPA, always
check behind the vehicle before
backing up. While backing, be
sure to look for objects and check
the vehicle's mirrors.
Page 227 of 378

Black plate (51,1)Chevrolet Camaro Owner Manual - 2010
Driving and Operating 8-51
Backing Up
Hold the bottom of the steering
wheel with one hand. Then, to
move the trailer to the left, move
that hand to the left. To move the
trailer to the right, move your hand
to the right. Always back up slowly
and, if possible, have someone
guide you.
Making Turns
Notice:Making very sharp turns
while trailering could cause the
trailer to come in contact with the
vehicle. The vehicle could be
damaged. Avoid making very
sharp turns while trailering.
When turning with a trailer,
make wider turns than normal.
Do this so the trailer won't strike
soft shoulders, curbs, road signs,
trees or other objects. Avoid jerky or
sudden maneuvers. Signal well in
advance.
Turn Signals When Towing a
Trailer
The arrows on the instrument panel
flash whenever signaling a turn or
lane change. Properly hooked up,
the trailer lamps also flash, telling
other drivers the vehicle is turning,
changing lanes or stopping.
When towing a trailer, the arrows on
the instrument panel flash for turns
even if the bulbs on the trailer are
burned out. For this reason you
may think other drivers are seeing
the signal when they are not. It is
important to check occasionally to
be sure the trailer bulbs are still
working.
Driving On Grades
Reduce speed and shift to a
lower gear before starting down
a long or steep downgrade. If the
transmission is not shifted down,
the brakes might have to be used
so much that they would get hot
and no longer work well.
Vehicles with automatic
transmissions can tow in
D (Drive) but M (Manual Mode) is
recommended. See “Manual Mode”
in Automatic Transmission
on
page 8‑26for more information.
Use a lower gear if the transmission
shifts too often. For vehicles with a
manual transmission, it is better not
to use the highest gear.
Page 237 of 378
Black plate (5,1)Chevrolet Camaro Owner Manual - 2010
Vehicle Care 9-5
If doing some of your own service
work, use the proper service
manual. It tells you much more
about how to service the vehicle
than this manual can. To order the
proper service manual, seeService
Publications Ordering Information
on
page 12‑13.
This vehicle has an airbag system.
Before attempting to do your own
service work, see Servicing the
Airbag-Equipped Vehicle
on
page 2‑34.
Keep a record with all parts receipts
and list the mileage and the date
of any service work performed.
See Maintenance Records
on
page 10‑12.
Hood
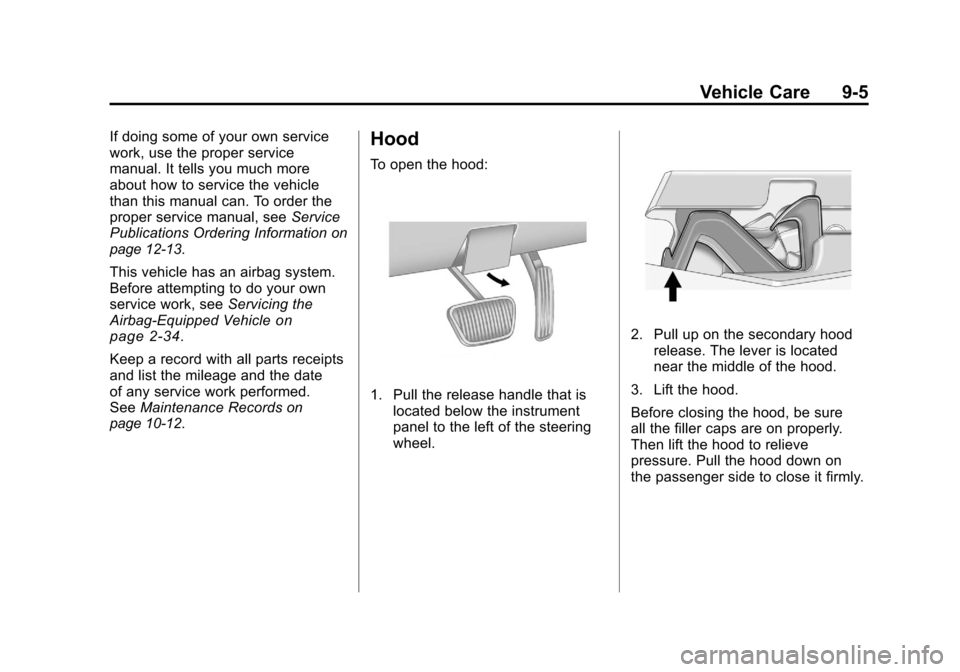
To open the hood:
1. Pull the release handle that is located below the instrument
panel to the left of the steering
wheel.
2. Pull up on the secondary hoodrelease. The lever is located
near the middle of the hood.
3. Lift the hood.
Before closing the hood, be sure
all the filler caps are on properly.
Then lift the hood to relieve
pressure. Pull the hood down on
the passenger side to close it firmly.
Page 278 of 378

Black plate (46,1)Chevrolet Camaro Owner Manual - 2010
9-46 Vehicle Care
Instrument Panel Fuse Block
Fuses Usage
F1 Discrete Logic
Ignition Switch
F2 Diagnostic Link
Connector
F3 Airbag
F4 Cluster Fuses
Usage
F5 Heating Ventilation
Air Conditioning
Controller
F6 Body Control
Module
F8 Battery Fuses
Usage
F9 Spare
F10 Spare
F11 Not Used
F12 Spare
F13 Display
F14 OnStar
®Universal
Hands Free Phone
F15 Body Control
Module 3
F16 Body Control
Module 4
F17 Power Outlet 1
F18 Power Outlet 2
F19 Steering Wheel
Controls Backlight
F20 Spare
F21 Spare
F22 Not Used
F23 Trunk
Page 303 of 378
Black plate (71,1)Chevrolet Camaro Owner Manual - 2010
Vehicle Care 9-71
Tire Chains
{WARNING
Do not use tire chains. There is
not enough clearance. Tire chains
used on a vehicle without the
proper amount of clearance can
cause damage to the brakes,
suspension, or other vehicle
parts. The area damaged by the
tire chains could cause you to
lose control of the vehicle and
you or others may be injured
in a crash. Use another type
of traction device only if its
manufacturer recommends it for
use on the vehicle and tire size
combination and road conditions.
Follow that manufacturer's
instructions. To help avoid
damage to the vehicle, drive
slowly, re‐adjust or remove the
device if it is contacting the(Continued)
WARNING (Continued)
vehicle, and do not spin the
wheels. If you do find traction
devices that will fit, install them
on the rear tires.
If a Tire Goes Flat
It is unusual for a tire to blowout
while you are driving, especially if
you maintain your vehicle's tires
properly. If air goes out of a tire,
it is much more likely to leak out
slowly. But if you should ever have a
blowout, here are a few tips about
what to expect and what to do:
If a front tire fails, the flat tire
creates a drag that pulls the vehicle
toward that side. Take your foot off
the accelerator pedal and grip the
steering wheel firmly. Steer to
maintain lane position, and then
gently brake to a stop well out of
the traffic lane. A rear blowout, particularly on a
curve, acts much like a skid and
may require the same correction
you would use in a skid. In any rear
blowout remove your foot from the
accelerator pedal. Get the vehicle
under control by steering the way
you want the vehicle to go. It may
be very bumpy and noisy, but you
can still steer. Gently brake to a
stop, well off the road if possible.
{WARNING
Lifting a vehicle and getting under
it to do maintenance or repairs
is dangerous without the
appropriate safety equipment and
training. If a jack is provided with
the vehicle, it is designed only for
changing a flat tire. If it is used for
anything else, you or others could
be badly injured or killed if the
vehicle slips off the jack. If a jack
is provided with the vehicle, only
use it for changing a flat tire.