2010 CHEVROLET CAMARO spare tire
[x] Cancel search: spare tirePage 295 of 378
Black plate (63,1)Chevrolet Camaro Owner Manual - 2010
Vehicle Care 9-63
7. Proceed to the passengerside rear tire, and repeat the
procedure in Step 5.
8. Proceed to the driver side rear tire, and repeat the procedure in
Step 5.
9. After hearing the confirming horn chirp, for the driver side rear tire,
the horn sounds two more times
to signal the tire learning mode
is no longer active. Turn the
ignition switch to LOCK/OFF.
10. Set all four tires to the recommended air pressure
level as indicated on the tire
and loading information label.
11. Put the valve caps back on the valve stems.
The tires air pressure will not
appear on the screen until you start
driving the vehicle.Tire Inspection
We recommend that you
regularly inspect your vehicle's
tires, including the spare tire,
if the vehicle has one, for signs
of wear or damage. See When It
Is Time for New Tires
on
page 9‑64
for more information.
Tire Rotation
Tire rotation is not
recommended if the vehicle has
different size tires on the front
and rear wheels.
Different tire sizes should not be
rotated front to rear. Each tire
and wheel should only be used
in its original front or rear
position. Tire rotation is recommended if
the vehicle has the same size
tires on all four wheel positions.
These tires should be rotated
every 5,000 to 8,000 miles
(8 000 to 13 000 km). See
Scheduled Maintenance
on
page 10‑2
.
The purpose of a regular tire
rotation is to achieve a uniform
wear for all tires on the vehicle.
This will ensure that your vehicle
continues to perform most like it
did when the tires were new.
Any time you notice unusual
wear, rotate the tires as soon
as possible and check wheel
alignment. Also check for
damaged tires or wheels.
See When It Is Time for New
Tires
on page 9‑64and Wheel
Replacement
on page 9‑69.
Page 296 of 378
Black plate (64,1)Chevrolet Camaro Owner Manual - 2010
9-64 Vehicle Care
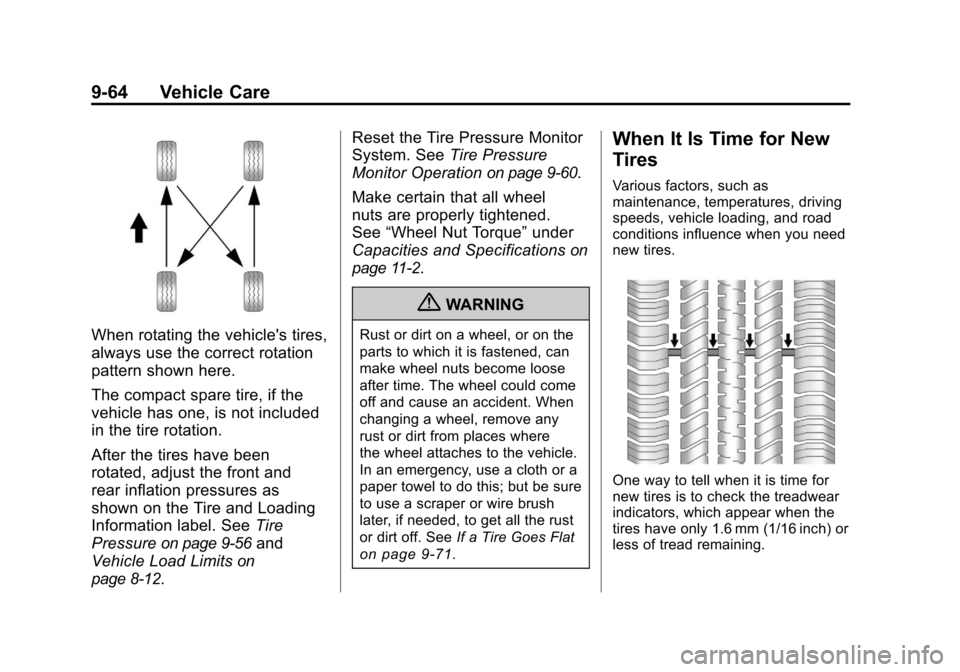
When rotating the vehicle's tires,
always use the correct rotation
pattern shown here.
The compact spare tire, if the
vehicle has one, is not included
in the tire rotation.
After the tires have been
rotated, adjust the front and
rear inflation pressures as
shown on the Tire and Loading
Information label. SeeTire
Pressure
on page 9‑56and
Vehicle Load Limits
on
page 8‑12
. Reset the Tire Pressure Monitor
System. See
Tire Pressure
Monitor Operation
on page 9‑60.
Make certain that all wheel
nuts are properly tightened.
See “Wheel Nut Torque” under
Capacities and Specifications
on
page 11‑2
.
{WARNING
Rust or dirt on a wheel, or on the
parts to which it is fastened, can
make wheel nuts become loose
after time. The wheel could come
off and cause an accident. When
changing a wheel, remove any
rust or dirt from places where
the wheel attaches to the vehicle.
In an emergency, use a cloth or a
paper towel to do this; but be sure
to use a scraper or wire brush
later, if needed, to get all the rust
or dirt off. See If a Tire Goes Flat
on page 9‑71.
When It Is Time for New
Tires
Various factors, such as
maintenance, temperatures, driving
speeds, vehicle loading, and road
conditions influence when you need
new tires.
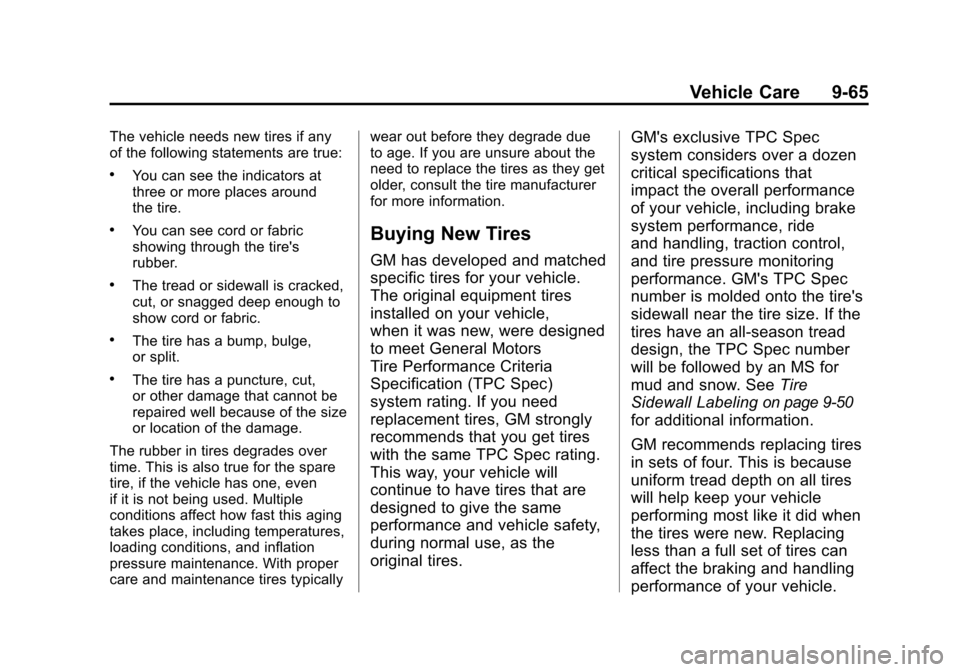
One way to tell when it is time for
new tires is to check the treadwear
indicators, which appear when the
tires have only 1.6 mm (1/16 inch) or
less of tread remaining.
Page 297 of 378
Black plate (65,1)Chevrolet Camaro Owner Manual - 2010
Vehicle Care 9-65
The vehicle needs new tires if any
of the following statements are true:
.You can see the indicators at
three or more places around
the tire.
.You can see cord or fabric
showing through the tire's
rubber.
.The tread or sidewall is cracked,
cut, or snagged deep enough to
show cord or fabric.
.The tire has a bump, bulge,
or split.
.The tire has a puncture, cut,
or other damage that cannot be
repaired well because of the size
or location of the damage.
The rubber in tires degrades over
time. This is also true for the spare
tire, if the vehicle has one, even
if it is not being used. Multiple
conditions affect how fast this aging
takes place, including temperatures,
loading conditions, and inflation
pressure maintenance. With proper
care and maintenance tires typically wear out before they degrade due
to age. If you are unsure about the
need to replace the tires as they get
older, consult the tire manufacturer
for more information.
Buying New Tires
GM has developed and matched
specific tires for your vehicle.
The original equipment tires
installed on your vehicle,
when it was new, were designed
to meet General Motors
Tire Performance Criteria
Specification (TPC Spec)
system rating. If you need
replacement tires, GM strongly
recommends that you get tires
with the same TPC Spec rating.
This way, your vehicle will
continue to have tires that are
designed to give the same
performance and vehicle safety,
during normal use, as the
original tires.
GM's exclusive TPC Spec
system considers over a dozen
critical specifications that
impact the overall performance
of your vehicle, including brake
system performance, ride
and handling, traction control,
and tire pressure monitoring
performance. GM's TPC Spec
number is molded onto the tire's
sidewall near the tire size. If the
tires have an all‐season tread
design, the TPC Spec number
will be followed by an MS for
mud and snow. See
Tire
Sidewall Labeling
on page 9‑50
for additional information.
GM recommends replacing tires
in sets of four. This is because
uniform tread depth on all tires
will help keep your vehicle
performing most like it did when
the tires were new. Replacing
less than a full set of tires can
affect the braking and handling
performance of your vehicle.
Page 298 of 378
Black plate (66,1)Chevrolet Camaro Owner Manual - 2010
9-66 Vehicle Care
SeeTire Inspectionon page 9‑63
andTire Rotationon page 9‑63
for information on proper tire
rotation.
{WARNING
Mixing tires could cause you
to lose control while driving.
If you mix tires of different
sizes, brands, or types (radial
and bias-belted tires), the
vehicle may not handle
properly, and you could have
a crash. Using tires of different
sizes, brands, or types may
also cause damage to your
vehicle. Be sure to use the
correct size, brand, and type
of tires on all wheels. It is
all right to drive with your
compact spare temporarily, as
it was developed for use on
your vehicle. See Compact
Spare Tire
on page 9‑85.
{WARNING
If you use bias-ply tires on the
vehicle, the wheel rim flanges
could develop cracks after
many miles of driving. A tire
and/or wheel could fail
suddenly, causing a crash.
Use only radial-ply tires with
the wheels on the vehicle.
If you must replace your
vehicle's tires with those that do
not have a TPC Spec number,
make sure they are the same
size, load range, speed rating,
and construction type (radial
and bias‐belted tires) as your
vehicle's original tires. Vehicles that have a tire
pressure monitoring system
could give an inaccurate
low‐pressure warning if
non‐TPC Spec rated tires
are installed on your vehicle.
Non‐TPC Spec rated tires may
give a low‐pressure warning
that is higher or lower than the
proper warning level you would
get with TPC Spec rated tires.
See
Tire Pressure Monitor
System
on page 9‑58.
Your vehicle's original
equipment tires are listed
on the Tire and Loading
Information Label. See Vehicle
Load Limits
on page 8‑12, for
more information about the Tire
and Loading Information Label
and its location on your vehicle.
Page 300 of 378
Black plate (68,1)Chevrolet Camaro Owner Manual - 2010
9-68 Vehicle Care
The Uniform Tire Quality
Grading (UTQG) system
does not apply to deep
tread, winter-type snow tires,
space-saver, or temporary use
spare tires, tires with nominal
rim diameters of 10 to 12 inches
(25 to 30 cm), or to some
limited-production tires.
While the tires available on
General Motors passenger
cars and light trucks may vary
with respect to these grades,
they must also conform to
federal safety requirements and
additional General Motors Tire
Performance Criteria (TPC)
standards.
All Passenger Car Tires Must
Conform to Federal Safety
Requirements In Addition To
These Grades.Treadwear
The treadwear grade is a
comparative rating based
on the wear rate of the tire
when tested under controlled
conditions on a specified
government test course.
For example, a tire graded
150 would wear one and a
half (1½) times as well on the
government course as a tire
graded 100. The relative
performance of tires depends
upon the actual conditions of
their use, however, and may
depart significantly from the
norm due to variations in
driving habits, service practices
and differences in road
characteristics and climate.
Traction
–AA, A, B, C
The traction grades, from
highest to lowest, are AA, A, B,
and C. Those grades represent
the tire's ability to stop on wet
pavement as measured under
controlled conditions on
specified government test
surfaces of asphalt and
concrete. A tire marked C may
have poor traction performance.
Warning: The traction grade
assigned to this tire is based on
straight-ahead braking traction
tests, and does not include
acceleration, cornering,
hydroplaning, or peak
traction characteristics.
Page 304 of 378

Black plate (72,1)Chevrolet Camaro Owner Manual - 2010
9-72 Vehicle Care
If a tire goes flat, avoid further tire
and wheel damage by driving slowly
to a level place. Turn on the hazard
warning flashers. SeeHazard
Warning Flashers on page 5‑4.
{WARNING
Changing a tire can be
dangerous. The vehicle can
slip off the jack and roll over
or fall on you or other people.
You and they could be badly
injured or even killed. Find a level
place to change your tire. To help
prevent the vehicle from moving:
1. Set the parking brake firmly.
2. Put an automatic transmission shift lever in
P (Park), or shift a manual
transmission to 1 (First) or
R (Reverse).
(Continued)
WARNING (Continued)
3. Turn off the engine and donot restart while the vehicle
is raised.
4. Do not allow passengers to remain in the vehicle.
To be certain the vehicle will
not move, put blocks at the front
and rear of the tire farthest away
from the one being changed.
That would be the tire on the
other side, at the opposite end
of the vehicle.
This vehicle may come with a jack
and spare tire or a tire sealant and
compressor kit. To use the jacking
equipment to change a spare tire
safely, follow the instructions below.
Then see Tire Changing
on
page 9‑79. To use the tire sealant
and compressor kit, see Tire
Sealant and Compressor Kit
on
page 9‑73. When the vehicle has a flat tire (B),
use the following example as a
guide to assist you in the placement
of wheel blocks (A).
A. Wheel Block
B. Flat Tire
The following information explains
how to repair or change a tire.
Page 305 of 378
Black plate (73,1)Chevrolet Camaro Owner Manual - 2010
Vehicle Care 9-73
Tire Sealant and
Compressor Kit
{WARNING
Idling a vehicle in an enclosed
area with poor ventilation is
dangerous. Engine exhaust may
enter the vehicle. Engine exhaust
contains Carbon Monoxide (CO)
which cannot be seen or smelled.
It can cause unconsciousness
and even death. Never run the
engine in an enclosed area
that has no fresh air ventilation.
For more information, seeEngine
Exhaust on page 8‑25.
{WARNING
Over-inflating a tire could
cause the tire to rupture and
you or others could be injured.
Be sure to read and follow the
tire sealant and compressor kit
instructions and inflate the tire
to its recommended pressure.
Do not exceed the recommended
pressure.
{WARNING
Storing the tire sealant and
compressor kit or other
equipment in the passenger
compartment of the vehicle could
cause injury. In a sudden stop or
collision, loose equipment could
strike someone. Store the tire
sealant and compressor kit in its
original location. If this vehicle has a tire sealant and
compressor kit, there may not be a
spare tire, tire changing equipment,
and on some vehicles there may not
be a place to store a tire.
The tire sealant and compressor
can be used to temporarily seal
punctures up to 6 mm (¼ inch) in
the tread area of the tire. It can
also be used to inflate an under
inflated tire.
If the tire has been separated from
the wheel, has damaged sidewalls,
or has a large puncture, the tire is
too severely damaged for the tire
sealant and compressor kit to be
effective. See
Roadside Assistance
Program on page 12‑6.
Read and follow all of the tire
sealant and compressor kit
instructions.
Page 311 of 378
Black plate (79,1)Chevrolet Camaro Owner Manual - 2010
Vehicle Care 9-79
Removal and Installation of the
Sealant Canister
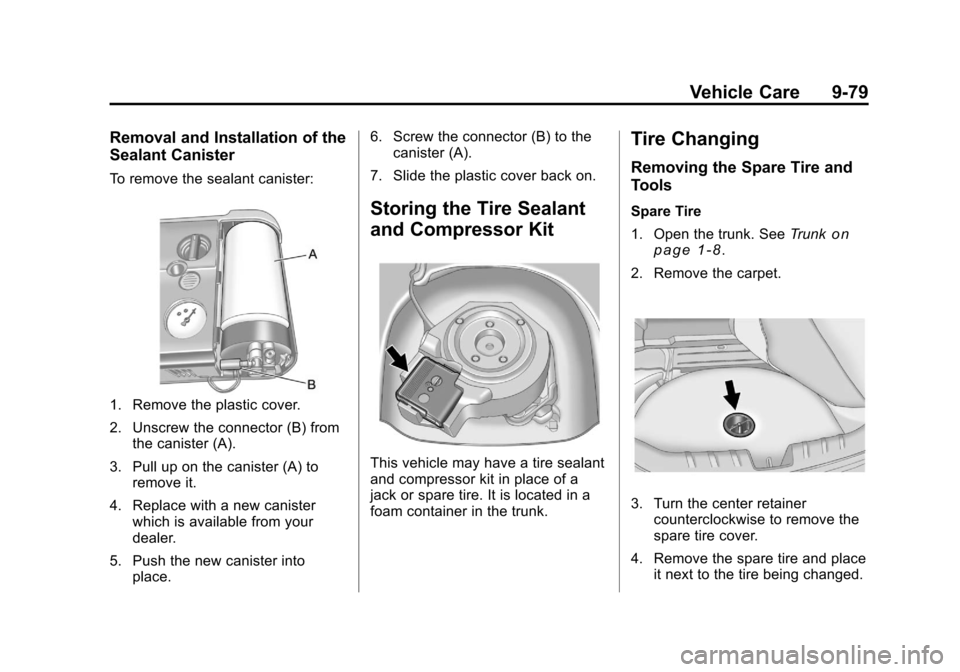
To remove the sealant canister:
1. Remove the plastic cover.
2. Unscrew the connector (B) fromthe canister (A).
3. Pull up on the canister (A) to remove it.
4. Replace with a new canister which is available from your
dealer.
5. Push the new canister into place. 6. Screw the connector (B) to the
canister (A).
7. Slide the plastic cover back on.
Storing the Tire Sealant
and Compressor Kit
This vehicle may have a tire sealant
and compressor kit in place of a
jack or spare tire. It is located in a
foam container in the trunk.
Tire Changing
Removing the Spare Tire and
Tools
Spare Tire
1. Open the trunk. See Trunk
on
page 1‑8.
2. Remove the carpet.
3. Turn the center retainer counterclockwise to remove the
spare tire cover.
4. Remove the spare tire and place it next to the tire being changed.