2010 CHEVROLET CAMARO door lock
[x] Cancel search: door lockPage 16 of 378

Black plate (10,1)Chevrolet Camaro Owner Manual - 2010
1-10 Keys, Doors and Windows
Arming the System
To arm the system, pressQon the
RKE transmitter.
The alarm automatically arms after
about 30 seconds. The security
light, located on the instrument
panel, flashes.
Disarming the System
To disarm the system, do one of the
following:
.PressKon the RKE transmitter.
.Turn the ignition to ON/RUN.
The security light stays on for
approximately one second when the
vehicle is disarming.
If the system is armed when there
are people inside of the vehicle,
pulling the door handle from the
inside one time will unlock the door.
Pulling the handle a second time will
unlatch the door.
How the System Alarm is
Activated
To activate the system if it is armed,
open any door, the trunk or hood.
The horn will sound and the hazard
warning flashers will flash.
How to Turn Off the System
Alarm
To turn off the system alarm, do one
of the following:
.PressKon the RKE transmitter.
.Turn the ignition to ON/RUN.
The theft-deterrent system is
disarmed when the alarm is
turned off.
How to Detect a Tamper
Condition
If the horn sounds and the turn
signal lamps flash three times
when
Kis pressed, an attempted
break-in has occurred while the
system was armed. The vehicle
may also display a message on the
DIC. See Anti-Theft Alarm System
Messages
on page 4‑36for more
information.
Immobilizer
See Radio Frequency Statementon
page 12‑17for information
regarding Part 15 of the Federal
Communications Commission (FCC)
rules and Industry Canada
Standards RSS-210/220/310.
Page 49 of 378

Black plate (25,1)Chevrolet Camaro Owner Manual - 2010
Seats and Restraints 2-25
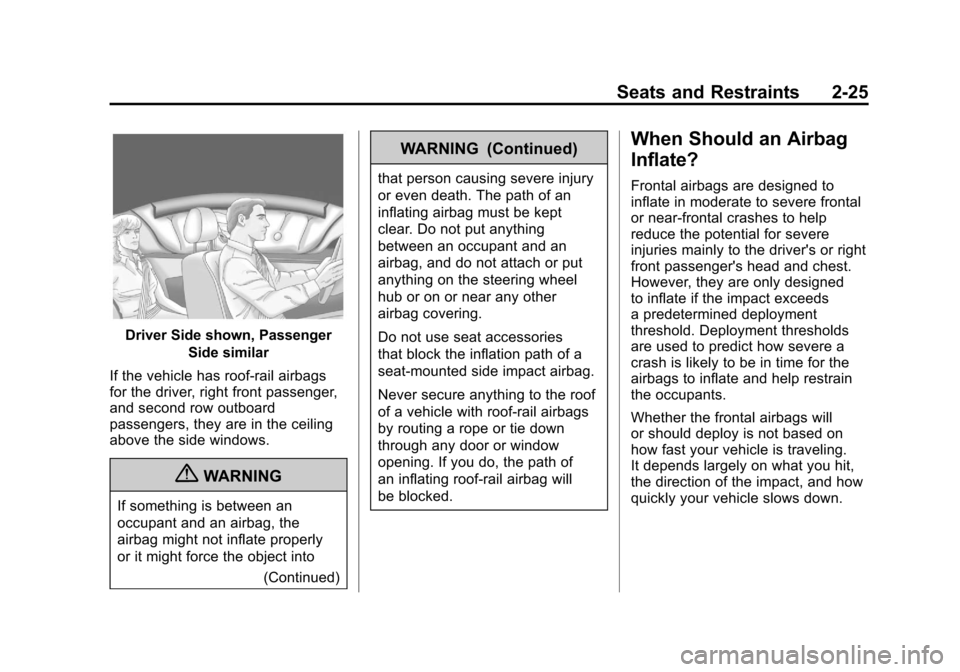
Driver Side shown, PassengerSide similar
If the vehicle has roof-rail airbags
for the driver, right front passenger,
and second row outboard
passengers, they are in the ceiling
above the side windows.
{WARNING
If something is between an
occupant and an airbag, the
airbag might not inflate properly
or it might force the object into (Continued)
WARNING (Continued)
that person causing severe injury
or even death. The path of an
inflating airbag must be kept
clear. Do not put anything
between an occupant and an
airbag, and do not attach or put
anything on the steering wheel
hub or on or near any other
airbag covering.
Do not use seat accessories
that block the inflation path of a
seat-mounted side impact airbag.
Never secure anything to the roof
of a vehicle with roof-rail airbags
by routing a rope or tie down
through any door or window
opening. If you do, the path of
an inflating roof-rail airbag will
be blocked.
When Should an Airbag
Inflate?
Frontal airbags are designed to
inflate in moderate to severe frontal
or near-frontal crashes to help
reduce the potential for severe
injuries mainly to the driver's or right
front passenger's head and chest.
However, they are only designed
to inflate if the impact exceeds
a predetermined deployment
threshold. Deployment thresholds
are used to predict how severe a
crash is likely to be in time for the
airbags to inflate and help restrain
the occupants.
Whether the frontal airbags will
or should deploy is not based on
how fast your vehicle is traveling.
It depends largely on what you hit,
the direction of the impact, and how
quickly your vehicle slows down.
Page 52 of 378

Black plate (28,1)Chevrolet Camaro Owner Manual - 2010
2-28 Seats and Restraints
What Will You See After
an Airbag Inflates?
After the frontal airbags and
seat-mounted side impact airbags
inflate, they quickly deflate, so
quickly that some people may not
even realize an airbag inflated.
Roof-rail airbags may still be at least
partially inflated for some time after
they deploy. Some components of
the airbag module may be hot for
several minutes. For location of the
airbag modules, seeWhat Makes
an Airbag Inflate? on page 2‑27. The parts of the airbag that come
into contact with you may be warm,
but not too hot to touch. There may
be some smoke and dust coming
from the vents in the deflated
airbags. Airbag inflation does not
prevent the driver from seeing out
of the windshield or being able to
steer the vehicle, nor does it prevent
people from leaving the vehicle.
{WARNING
When an airbag inflates, there
may be dust in the air. This dust
could cause breathing problems
for people with a history of
asthma or other breathing trouble.
To avoid this, everyone in the
vehicle should get out as soon as
it is safe to do so. If you have
(Continued)
WARNING (Continued)
breathing problems but cannot
get out of the vehicle after an
airbag inflates, then get fresh air
by opening a window or a door.
If you experience breathing
problems following an airbag
deployment, you should seek
medical attention.
The vehicle has a feature that may
automatically unlock the doors, turn
the interior lamps on, and turn the
hazard warning flashers on when
the airbags inflate. You can lock the
doors, turn the interior lamps off,
and turn the hazard warning
flashers off by using the controls
for those features.
Page 83 of 378

Black plate (1,1)Chevrolet Camaro Owner Manual - 2010
Instruments and Controls 4-1
Instruments and
Controls
Instrument Panel Overview
Instrument Panel Overview . . . . 4-4
Controls
Steering Wheel Adjustment . . . 4-6
Steering Wheel Controls . . . . . . 4-6
Horn . . . . . . . . . . . . . . . . . . . . . . . . . . 4-7
Windshield Wiper/Washer . . . . . 4-7
Compass . . . . . . . . . . . . . . . . . . . . . 4-8
Clock . . . . . . . . . . . . . . . . . . . . . . . . . 4-8
Power Outlets . . . . . . . . . . . . . . . . . 4-9
Warning Lights, Gauges, and
Indicators
Warning Lights, Gauges, andIndicators . . . . . . . . . . . . . . . . . . 4-10
Instrument Cluster . . . . . . . . . . . 4-11
Speedometer . . . . . . . . . . . . . . . . 4-12
Odometer . . . . . . . . . . . . . . . . . . . . 4-12
Trip Odometer . . . . . . . . . . . . . . . 4-12
Tachometer . . . . . . . . . . . . . . . . . . 4-12
Fuel Gauge . . . . . . . . . . . . . . . . . . 4-12
Engine Oil Pressure Gauge . . . . . . . . . . . . . . . . . . . . . . 4-13 Engine Oil Temperature
Gauge . . . . . . . . . . . . . . . . . . . . . . 4-14
Engine Coolant Temperature Gauge . . . . . . . . . . . . . . . . . . . . . . 4-15
Transmission Temperature
Gauge . . . . . . . . . . . . . . . . . . . . . . 4-16
Voltmeter Gauge . . . . . . . . . . . . . 4-17
Safety Belt Reminders . . . . . . . 4-17
Airbag Readiness Light . . . . . . 4-18
Passenger Airbag Status Indicator . . . . . . . . . . . . . . . . . . . . 4-19
Charging System Light . . . . . . 4-20
Malfunction Indicator Lamp . . . . . . . . . . . . . 4-20
Brake System Warning Light . . . . . . . . . . . . . . . . . . . . . . . 4-23
Antilock Brake System (ABS) Warning Light . . . . . . . . . . . . . . 4-24
Traction Off Light . . . . . . . . . . . . 4-24
Traction Control System (TCS)/StabiliTrak®Light . . . . 4-25
Traction Control System (TCS) OFF/StabiliTrak
®OFF
Light . . . . . . . . . . . . . . . . . . . . . . . 4-25
Tire Pressure Light . . . . . . . . . . 4-26
Engine Oil Pressure Light . . . . 4-26
Immobilizer Light . . . . . . . . . . . . 4-27 Fog Lamp Light . . . . . . . . . . . . . . 4-27
Taillamp Indicator Light . . . . . . 4-27
Cruise Control Light . . . . . . . . . 4-27
Information Displays
Driver Information
Center (DIC) . . . . . . . . . . . . . . . 4-28
Vehicle Messages
Vehicle Messages . . . . . . . . . . . 4-31
Battery Voltage and ChargingMessages . . . . . . . . . . . . . . . . . . 4-31
Brake System Messages . . . . 4-32
Compass Messages . . . . . . . . . 4-32
Cruise Control Messages . . . . 4-32
Door Ajar Messages . . . . . . . . . 4-32
Engine Cooling System Messages . . . . . . . . . . . . . . . . . . 4-33
Engine Oil Messages . . . . . . . . 4-33
Engine Power Messages . . . . 4-34
Fuel System Messages . . . . . . 4-34
Key and Lock Messages . . . . . 4-34
Lamp Messages . . . . . . . . . . . . . 4-34
Object Detection System Messages . . . . . . . . . . . . . . . . . . 4-35
Ride Control System Messages . . . . . . . . . . . . . . . . . . 4-35
Airbag System Messages . . . . 4-36
Safety Belt Messages . . . . . . . 4-36
Page 87 of 378

Black plate (5,1)Chevrolet Camaro Owner Manual - 2010
Instruments and Controls 4-5
A.Air Vents on page 7‑3.
B. Driver Shift Controls (If Equipped). See Automatic
Transmission on page 8‑26.
C. Instrument Cluster
on
page 4‑11.
D. Windshield Wiper/Washer
on
page 4‑7.
E. AM-FM Radio on page 6‑7.
F. Turn and Lane-Change Signals
on page 5‑5.Headlamp
High/Low-Beam Changeron
page 5‑3. Flash-to-Passon
page 5‑3. Driver Information
Center (DIC)on page 4‑28(If Equipped). G.
Cruise Control
on page 8‑39.
H. Exterior Lamp Controls
on
page 5‑1. Front Fog Lampson page 5‑5(If Equipped).
Instrument Panel Illumination
Control
on page 5‑6.
I. Steering Wheel Adjustment
on
page 4‑6.
J. Horn on page 4‑7.
K. Steering Wheel Controls
on
page 4‑6.
L. Climate Control Systems
on
page 7‑1. M.
Transmission Temperature
Gauge
on page 4‑16.
Voltmeter Gaugeon
page 4‑17. Engine Oil
Temperature Gaugeon
page 4‑14. Engine Oil Pressure
Gauge on page 4‑13.
N. Shift Lever. See Shifting Into
Park on page 8‑22.
O. Power Outlets on page 4‑9.
P. Hazard Warning Flashers
on
page 5‑4. Power Door Lockson page 1‑7.
Q. Glove Box on page 3‑1.
Page 120 of 378

Black plate (38,1)Chevrolet Camaro Owner Manual - 2010
4-38 Instruments and Controls
Window Messages
Open, Then Close Driver
Window
This message is displayed when the
window needs to be reprogrammed.
If the vehicle's battery has been
recharged or disconnected, you
will need to reprogram each front
window for the express up feature
to work. SeePower Windows
on
page 1‑14for more information.
Open, Then Close Passenger
Window
This message is displayed when the
window needs to be reprogrammed.
If the vehicle's battery has been
recharged or disconnected, you
will need to reprogram each front
window for the express up feature
to work. See Power Windows
on
page 1‑14for more information.
Vehicle
Personalization
The audio system controls are
used to access the personalization
menus for customizing vehicle
features.
CONFIG (Configuration): Press
to access the Configuration
Settings Menu.
MENU / SELECT Knob: Press
the center of this knob to enter
the menus and select menu items.
Turn the knob to scroll through the
menus.
0BACK: Press to exit or move
backwards in a menu.
Entering the Personalization
Menus
1. Press the CONFIG button to access the Configuration
Settings menu.
2. Turn the MENU / SELECT knob to highlight Vehicle Settings. 3. Press the center of the
MENU / SELECT knob to select
the Vehicle Settings menu.
The following list of menu items will
be available:
.Climate and Air Quality
.Comfort and Convenience
.Collision/Detection Systems
.Language
.Lighting
.Power Door Locks
.Remote Lock/Unlock/Start
.Return to Factory Settings
Turn the MENU / SELECT knob to
highlight the menu. Press the knob
to select it. Each of the menus is
detailed in the following information.
Page 122 of 378

Black plate (40,1)Chevrolet Camaro Owner Manual - 2010
4-40 Instruments and Controls
Exit Lighting
This allows the selection of how
long the exterior lamps stay on
when leaving the vehicle when it is
dark outside.
Press the MENU / SELECT knob
when Exit Lighting is highlighted.
Turn the knob to select Off,
30 Seconds, 1 Minute, or 2 Minutes.
Press the knob to confirm and go
back to the last menu.
Vehicle Locator Lights
This allows the vehicle locator lights
to be turned on or off.
Press the MENU / SELECT knob
when Vehicle Locator Lights is
highlighted. Turn the knob to select
On or Off. Press the knob to confirm
and go back to the last menu.Power Door Locks
Select Power Door Locks and the
following will be displayed:
.Unlocked Door Anti Lock Out
.Auto Door Unlock
.Delayed Door Lock
Unlocked Door Anti Lock Out
When on, this feature will keep the
driver's door from locking when the
door is open. If off is selected, the
Delayed Door Lock menu will be
available.
Press the MENU / SELECT
knob when Auto Door Unlock is
highlighted. Turn the knob to select
On or Off. Press the knob to confirm
and go back to the last menu. Auto Door Unlock
This allows selection of which of the
doors will automatically unlock when
the vehicle is shifted into P (Park)
(automatic transmission) or when
the key is removed from the ignition
(manual transmission).
Press the MENU / SELECT
knob when Auto Door Unlock is
highlighted. Turn the knob to select
All Doors, Driver Door, or Off. Press
the knob to confirm and go back to
the last menu.
Delayed Door Lock
When on, this feature will delay the
locking of the doors. If you want to
override the delay you can press the
power door lock on the driver's door.
Press the MENU / SELECT knob
when Delayed Door Lock is
highlighted. Turn the knob to select
On or Off. Press the knob to confirm
and go back to the last menu.
Page 123 of 378

Black plate (41,1)Chevrolet Camaro Owner Manual - 2010
Instruments and Controls 4-41
Remote Lock/Unlock/Start
Select Remote Lock/Unlock/Start
and the following will be displayed:
.Unlock Feedback (Lights)
.Locking Feedback
.Door Unlock Options
.Remote Vehicle Start
Unlock Feedback (Lights)
When on, the exterior lamps will
flash when unlocking the vehicle
with the RKE transmitter.
Press the MENU / SELECT knob
when Unlock Feedback (Lights) is
highlighted. Turn the knob to select
Flash Lights or Off. Press the knob
to confirm and go back to the
last menu. Locking Feedback
This allows selection of what type of
feedback is given when unlocking
the vehicle with the RKE transmitter.
Press the MENU / SELECT
knob when Locking Feedback is
highlighted. Turn the knob to select
Lights and Horn, Lights Only, Horn
Only, or Off. Press the knob to
confirm and go back to the
last menu.
Door Unlock Options
This allows selection of which doors
will unlock when pressing the unlock
button on the RKE transmitter.
Press the MENU / SELECT knob
when Door Unlock Options is
highlighted. Turn the knob to select
All Doors or Driver Door Only. Press
the knob to confirm and go back to
the last menu.Remote Vehicle Start
This allows the Remote Vehicle
Start to be turned on or off, if the
vehicle has this feature.
Press the MENU / SELECT knob
when Remote Vehicle Start is
highlighted. Turn the knob to select
On or Off. Press the knob to confirm
and go back to the last menu.
Return to Factory Settings
Select Return to Factory
Settings to return all of the vehicle
personalization to the default
settings. Turn the knob to select Yes
or No. Press the knob to confirm
and go back to the last menu.