2010 CADILLAC ESCALADE ESV bluetooth
[x] Cancel search: bluetoothPage 267 of 620

Black plate (75,1)Cadillac Escalade/Escalade ESV Owner Manual - 2010
3. Say the name tag of the person to call. .
If the system clearly recognizes the name tag it
responds with “ OK, calling,
dials the number. .
If the system is unsure it recognizes the right
name tag, it confirms the name tag followed by
a tone. If the name tag is correct, say “ Yes ” .
The system responds with “ OK, calling,
not correct, say “ No ” . The system will ask for
the name tag to be re ‐ entered.
Once connected, the person called will be heard
through the audio speakers.
Using the Re ‐ dial Command1. Press and hold
b g for two seconds. The system
responds with “ Ready ” followed by a tone.
2. After the tone, say “ Re ‐ dial ” . The system responds
with “ Re ‐ dial using
last number called from the connected Bluetooth
phone.
Once connected, the person called will be heard
through the audio speakers. Receiving a Call When an incoming call is received, the audio system
mutes and a ring tone is heard in the vehicle. .
Press
b g and begin speaking to answer the call. .
Press
c x to ignore a call.
Call Waiting Call waiting must be supported on the Bluetooth phone
and enabled by the wireless service carrier to work. .
Press
b g to answer an incoming call when
another call is active. The original call is placed
on hold. .
Press
b g again to return to the original call. .
To ignore the incoming call, continue with the
original call with no action. .
Press
c x to disconnect the current call and
switch to the call on hold.
4-75
Page 268 of 620

Black plate (76,1)Cadillac Escalade/Escalade ESV Owner Manual - 2010
Three ‐ Way CallingThree ‐ Way Calling must be supported on the Bluetooth
phone and enabled by the wireless service carrier
to work.
1. While on a call press
b g . The system responds
with “ Ready ” followed by a tone.
2. Say “ Three ‐ way call ” . The system responds with
“ Three ‐ way call, please say dial or call ” .
3. Use the dial or call command to dial the number of
the third party to be called.
4. Once the call is connected, press
b g to link all
the callers together.
Ending a Call Press
c x to end a call.
Muting a Call During a call, all sounds from inside the vehicle can be
muted so that the person on the other end of the call
cannot hear them. To Mute a call 1. Press
b g . The system responds with “ Ready ”
followed by a tone.
2. Say “ Mute Call ” . The system responds with
“ Call muted ” .
To Cancel Mute 1. Press
b g . The system responds with “ Ready ”
followed by a tone.
2. After the tone, say “ Mute Call ” . The system
responds with “ Resuming call ” .
Transferring a Call Audio can be transferred between the in ‐ vehicle
Bluetooth system and the cell phone.
To Transfer Audio to the Cell Phone During a call with the audio in the vehicle:
1. Press
b g . The system responds with “ Ready ”
followed by a tone.
2. Say “ Transfer Call. ” The system responds with
“ Transferring call ” and the audio will switch from
the vehicle to the cell phone.
4-76
Page 269 of 620

Black plate (77,1)Cadillac Escalade/Escalade ESV Owner Manual - 2010
To Transfer Audio to the In-Vehicle
Bluetooth System The cellular phone must be paired and connected with
the Bluetooth system before a call can be transferred.
The connection process can take up to two minutes
after the key is turned to the ON/RUN or ACC/
ACCESSORY position.
During a call with the audio on the cell phone,
press
b g for more than two seconds. The audio
switches from the cell phone to the vehicle.
Voice Pass-Thru Voice Pass ‐ Thru allows access to the voice recognition
commands on the cell phone. See the cell phone
manufacturers user guide to see if the cell phone
supports this feature. This feature can be used to
verbally access contacts stored in the cell phone.
1. Press and hold
b g for two seconds. The system
responds with “ Ready ” followed by a tone.
2. Say “ Bluetooth ” . The system responds with
“ Bluetooth ready ” followed by a tone.
3. Say “ Voice ” . The system responds with
“ OK, accessing
The cell phone's normal prompt messages will
go through its cycle according to the phone's
operating instructions. Dual Tone Multi-Frequency (DTMF)
Tones The in ‐ vehicle Bluetooth system can send numbers and
numbers stored as name tags during a call. This is used
when calling a menu driven phone system. Account
numbers can be programmed into the phonebook for
retrieval during menu driven calls.
Sending a Number During a Call 1. Press
b g . The system responds with “ Ready ”
followed by a tone.
2. Say “ Dial ” . The system responds with “ Say a
number to send tones ” followed by a tone.
3. Say the number to send. .
If the system clearly recognizes the number it
responds with “ OK, Sending Number ” and the
dial tones are sent and the call continues. .
If the system is not sure it recognized the
number properly, it responds “ Dial Number,
Please say yes or no? ” followed by a tone.
If the number is correct, say “ Yes ” . The system
responds with “ OK, Sending Number ” and the
dial tones are sent and the call continues.
4-77
Page 270 of 620

Black plate (78,1)Cadillac Escalade/Escalade ESV Owner Manual - 2010
Sending a Stored Name Tag During a Call 1. Press
b g . The system responds with “ Ready ”
followed by a tone.
2. Say “ Send name tag. ” The system responds with
“ Say a name tag to send tones ” followed by a tone.
3. Say the name tag to send. .
If the system clearly recognizes the name tag it
responds with “ OK, Sending
the dial tones are sent and the call continues. .
If the system is not sure it recognized the name
tag properly, it responds “ Dial
Please say yes or no? ” followed by a tone.
If the name tag is correct, say “ Yes ” . The
system responds with “ OK, Sending
continues.
Clearing the System Unless information is deleted out of the in ‐ vehicle
Bluetooth system, it will be retained indefinitely. This
includes all saved name tags in the phonebook and
phone pairing information. For information on how to
delete this information, see the above sections on
Deleting a Paired Phone and Deleting Name Tags. Other Information The Bluetooth ®
word mark and logos are owned by the
Bluetooth ®
SIG, Inc. and any use of such marks by
General Motors is under license. Other trademarks and
trade names are those of their respective owners.
See Radio Frequency Statement
on page 9 ‑ 21 for FCC
information.
Rear Seat Entertainment (RSE)
System (Overhead) The vehicle may have an Overhead DVD Rear Seat
Entertainment (RSE) system. The RSE system works
with the vehicle's audio system. The DVD player is part
of the front radio. The RSE system includes a radio with
a DVD player, a video display screen, and if the vehicle
has a third row seat, it could have a second video
display screen, audio/video jacks, two wireless
headphones, and a remote control. See Navigation
Audio System
on page 5 ‑ 60 for more information on
the vehicle's audio/DVD system.
4-78
Page 299 of 620

Black plate (107,1)Cadillac Escalade/Escalade ESV Owner Manual - 2010
Radio To select preset or favorite radio stations:
Press and release
w or
x to go to the next or previous
radio station stored as a preset or favorite.
CD/DVD To select tracks/chapters on a CD/DVD:
Press and release
w or
x to go to the next or previous
track/chapter.
b g (Mute/Push to Talk): Press to silence the vehicle
speakers only. Press again to turn the sound on.
For vehicles with Bluetooth or OnStar ®
systems, press
and hold for longer than two seconds to interact with
those systems. See Bluetooth ®
on page 4 ‑ 68 and the
OnStar Owner's Guide for more information.
c (End): Press to reject an incoming call, or end a
current call.
SRCE (Source/Voice Recognition): Press to switch
between the radio, CD, DVD, and rear auxiliary,
if equipped.
Press and hold this button for longer than one second
to initiate voice recognition. See Voice Recognition on
page 5 ‑ 86 for more information.
¨ (Seek): Press to go to the next radio station while in
AM, FM, or XM ™ . To scan available radio stations:
1. Press and hold
¨ until a beep is heard, to place
the radio into SCAN mode, a station will play for
five seconds before moving to the next station.
2. To stop the SCAN function, press
¨ again.
While listening to a CD press and release
¨ to select
the next disc.
+
e −
e (Volume): Press to increase or to decrease
the volume.
Navigating an iPod or USB Device Audio steering wheel controls can be used to navigate
an iPod or USB device while on the main audio screen
or the music navigator screen.
Main Audio Screen Press and release
w or
x to select the next or
previous track.
Press and hold
w or
x to select the next or previous
category/folder, if available.
Press and release
¨ to enter the music navigator menu.
4-107
Page 305 of 620

Black plate (3,1)Cadillac Escalade/Escalade ESV Owner Manual - 2010
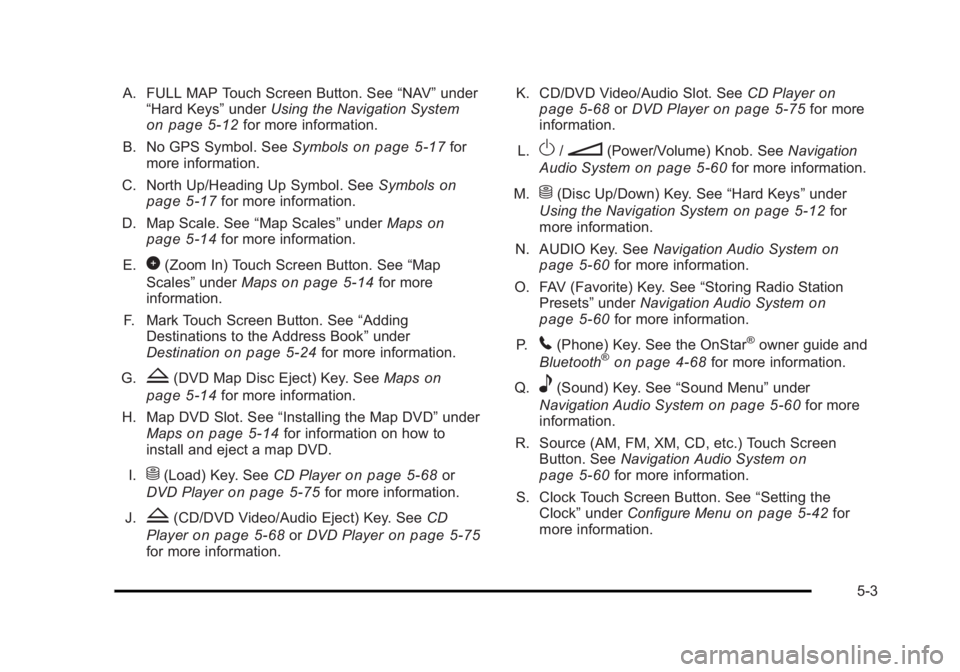
A. FULL MAP Touch Screen Button. See “ NAV ” under
“ Hard Keys ” under Using the Navigation System
on page 5 ‑ 12 for more information.
B. No GPS Symbol. See Symbols on page 5 ‑ 17 for
more information.
C. North Up/Heading Up Symbol. See Symbols
on
page 5 ‑ 17 for more information.
D. Map Scale. See “ Map Scales ” under Maps on
page 5 ‑ 14
for more information.
E.
0 (Zoom In) Touch Screen Button. See “ Map
Scales ” under Maps on page 5 ‑ 14 for more
information.
F. Mark Touch Screen Button. See “ Adding
Destinations to the Address Book ” under
Destination
on page 5 ‑ 24 for more information.
G.
Z (DVD Map Disc Eject) Key. See Maps on
page 5 ‑ 14 for more information.
H. Map DVD Slot. See “ Installing the Map DVD ” under
Maps
on page 5 ‑ 14 for information on how to
install and eject a map DVD.
I.
M (Load) Key. See CD Player on page 5 ‑ 68 or
DVD Player on page 5 ‑ 75 for more information.
J.
Z (CD/DVD Video/Audio Eject) Key. See CD
Player
on page 5 ‑ 68 or DVD Player on page 5 ‑ 75
for more information. K. CD/DVD Video/Audio Slot. See CD Player on
page 5 ‑ 68
or DVD Player on page 5 ‑ 75 for more
information.
L.
O /
n (Power/Volume) Knob. See Navigation
Audio System on page 5 ‑ 60 for more information.
M.
M (Disc Up/Down) Key. See “ Hard Keys ” under
Using the Navigation System on page 5 ‑ 12 for
more information.
N. AUDIO Key. See Navigation Audio System on
page 5 ‑ 60 for more information.
O. FAV (Favorite) Key. See “ Storing Radio Station
Presets ” under Navigation Audio System
on
page 5 ‑ 60 for more information.
P.
5 (Phone) Key. See the OnStar ®
owner guide and
Bluetooth ®
on page 4 ‑ 68 for more information.
Q.
e (Sound) Key. See “ Sound Menu ” under
Navigation Audio System
on page 5 ‑ 60 for more
information.
R. Source (AM, FM, XM, CD, etc.) Touch Screen
Button. See Navigation Audio System
on
page 5 ‑ 60 for more information.
S. Clock Touch Screen Button. See “ Setting the
Clock ” under Configure Menu on page 5 ‑ 42 for
more information.
5-3
Page 315 of 620

Black plate (13,1)Cadillac Escalade/Escalade ESV Owner Manual - 2010
5 (Phone): Press to access calling through OnStar ®
.
See the OnStar ®
owner guide and Bluetooth ®
on
page 4 ‑ 68 for more information.
e (Sound): Press to access the Sound screen to
adjust bass, midrange, treble, and Digital Signal
Processing (DSP). See “ Sound Menu ” under Navigation
Audio System on page 5 ‑ 60 for more information.
DEST (Destination): Press to access the Destination
Entry screen to plan a destination. See Destination on
page 5 ‑ 24 for more information.
CONFIG (Configure Menu): Press to adjust features
for sound, radio, navigation, and the display. See
Configure Menu on page 5 ‑ 42 for more information.
NAV (Navigation): Press to view your vehicle's current
position on the map screen. Each press of this key
cycles through Full Map and the tab that displays the
current audio source (AM, FM, CD, etc.). Full Map
displays the screen in full map view. Selecting the audio
tab splits the screen between the map screen and the
current audio source screen menu. See “ Audio ” under
Navigation Audio System
on page 5 ‑ 60 for more
information.
RPT (Navigation Repeat): Press to repeat the last
voice guidance prompt. y © ¨ z (Seek): Press the seek arrows to seek and
scan radio stations, to seek tracks on a CD, and to seek
chapters on a DVD. See Navigation Audio System on
page 5 ‑ 60
, CD Player on page 5 ‑ 68 , or DVD Player
on page 5 ‑ 75 for more information.
Touch-Sensitive Screen Buttons Touch-sensitive screen buttons are located on the
screen. When a screen button has been selected, a
beep sounds. Screen buttons are highlighted when a
feature is available.
Alpha-Numeric Keyboard Letters of the alphabet, symbols, punctuation, and
numbers, when available, displays on the navigation
screen as an alpha or numeric keyboard. The alpha
keyboard displays when the system requires entry of a
city or street name.
All characters are touch-sensitive screen buttons. Touch
a character to select it.
A-Y (Accent Alphabet): Select to enter letters with
accent symbols. This button may toggle to A-Z.
A-Z (Alphabet): Select to enter letters from the
alphabet. This button may toggle to A-Y.
0-9 (Numbers): Select to enter numbers.
5-13
Page 323 of 620

Black plate (21,1)Cadillac Escalade/Escalade ESV Owner Manual - 2010
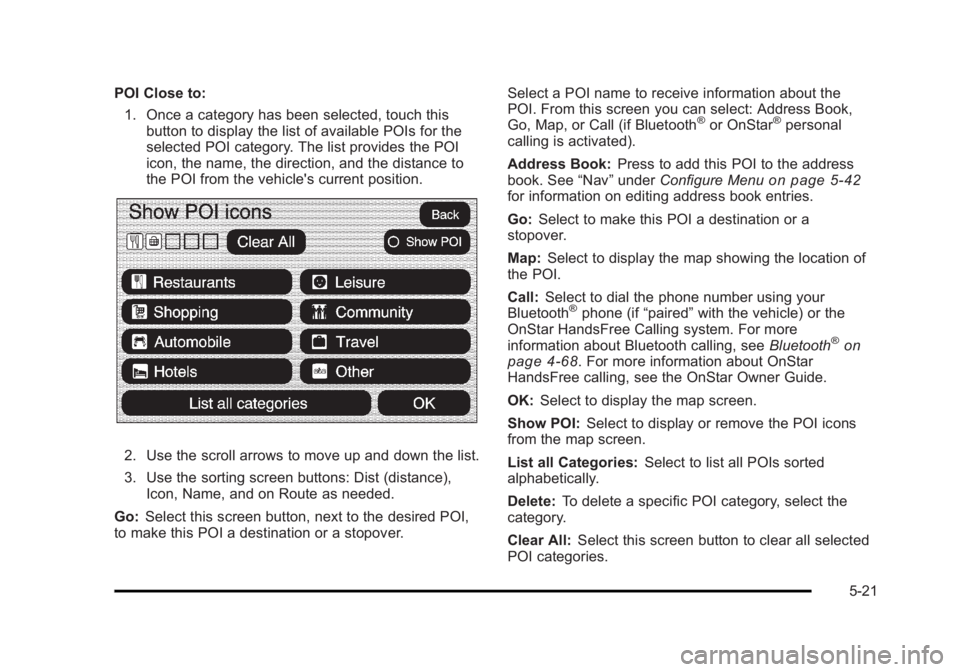
POI Close to:
1. Once a category has been selected, touch this
button to display the list of available POIs for the
selected POI category. The list provides the POI
icon, the name, the direction, and the distance to
the POI from the vehicle's current position.
2. Use the scroll arrows to move up and down the list.
3. Use the sorting screen buttons: Dist (distance),
Icon, Name, and on Route as needed.
Go: Select this screen button, next to the desired POI,
to make this POI a destination or a stopover. Select a POI name to receive information about the
POI. From this screen you can select: Address Book,
Go, Map, or Call (if Bluetooth ®
or OnStar ®
personal
calling is activated).
Address Book: Press to add this POI to the address
book. See “ Nav ” under Configure Menu
on page 5 ‑ 42
for information on editing address book entries.
Go: Select to make this POI a destination or a
stopover.
Map: Select to display the map showing the location of
the POI.
Call: Select to dial the phone number using your
Bluetooth ®
phone (if “ paired ” with the vehicle) or the
OnStar HandsFree Calling system. For more
information about Bluetooth calling, see Bluetooth ®
on
page 4 ‑ 68 . For more information about OnStar
HandsFree calling, see the OnStar Owner Guide.
OK: Select to display the map screen.
Show POI: Select to display or remove the POI icons
from the map screen.
List all Categories: Select to list all POIs sorted
alphabetically.
Delete: To delete a specific POI category, select the
category.
Clear All: Select this screen button to clear all selected
POI categories.
5-21