2010 BMW Z4 SDRIVE30I lock
[x] Cancel search: lockPage 56 of 254
Driving
54
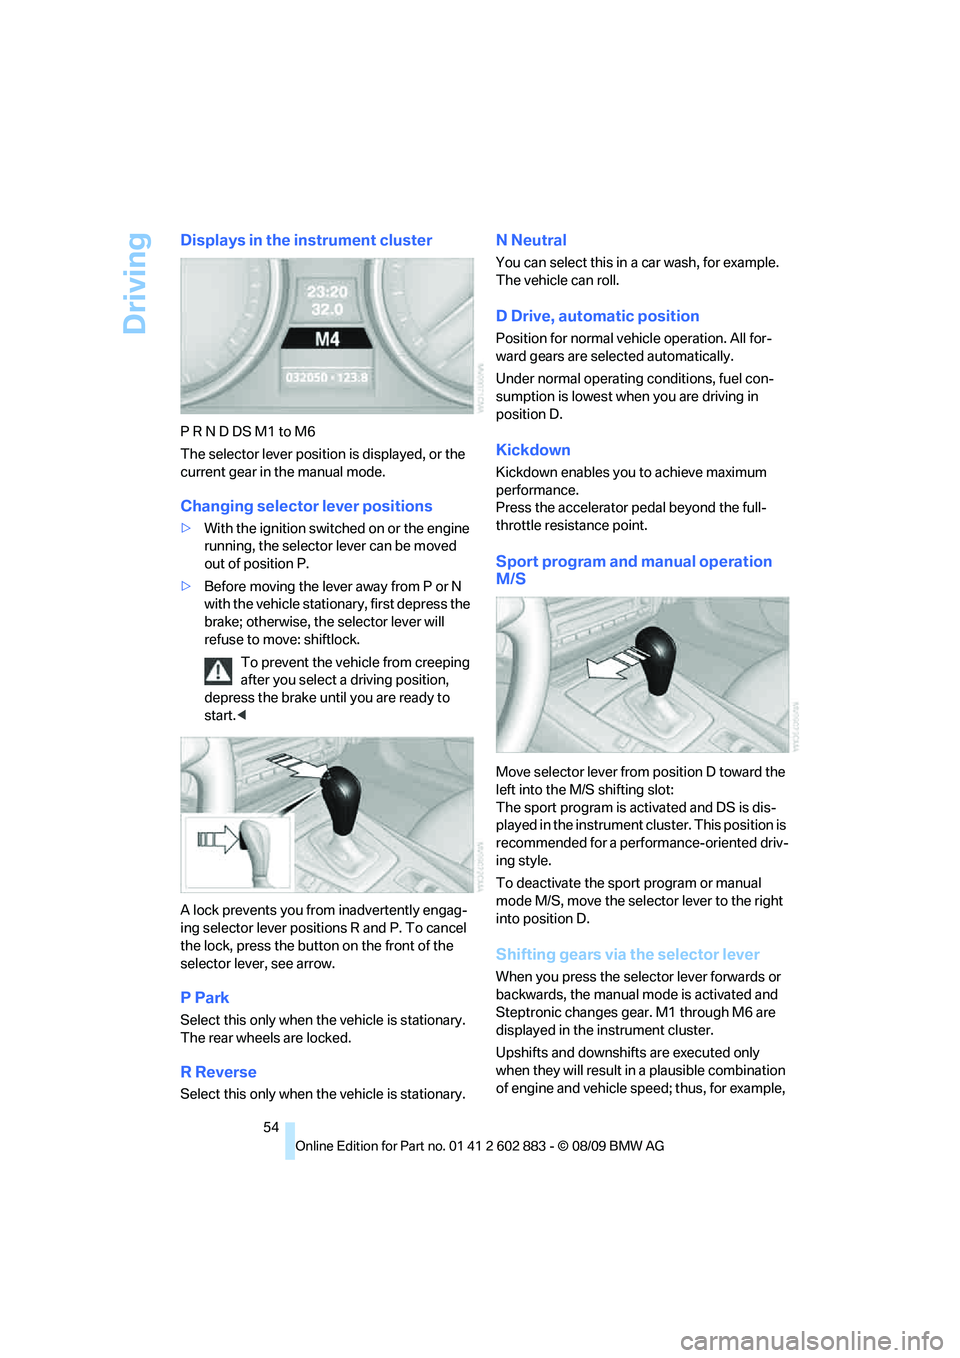
Displays in the instrument cluster
P R N D DS M1 to M6
The selector lever position is displayed, or the
current gear in the manual mode.
Changing selector lever positions
>With the ignition switched on or the engine
running, the selector lever can be moved
out of position P.
>Before moving the lever away from P or N
with the vehicle stationary, first depress the
brake; otherwise, the selector lever will
refuse to move: shiftlock.
To prevent the vehicle from creeping
after you select a driving position,
depress the brake until you are ready to
start.<
A lock prevents you from inadvertently engag-
ing selector lever positions R and P. To cancel
the lock, press the button on the front of the
selector lever, see arrow.
P Park
Select this only when the vehicle is stationary.
The rear wheels are locked.
R Reverse
Select this only when the vehicle is stationary.
N Neutral
You can select this in a car wash, for example.
The vehicle can roll.
D Drive, automatic position
Position for normal vehicle operation. All for-
ward gears are selected automatically.
Under normal operating conditions, fuel con-
sumption is lowest when you are driving in
position D.
Kickdown
Kickdown enables you to achieve maximum
performance.
Press the accelerator pedal beyond the full-
throttle resistance point.
Sport program and manual operation
M/S
Move selector lever from position D toward the
left into the M/S shifting slot:
The sport program is activated and DS is dis-
played in the instrument cluster. This position is
recommended for a performance-oriented driv-
ing style.
To deactivate the sport program or manual
mode M/S, move the selector lever to the right
into position D.
Shifting gears via the selector lever
When you press the selector lever forwards or
backwards, the manual mode is activated and
Steptronic changes gear. M1 through M6 are
displayed in the instrument cluster.
Upshifts and downshifts are executed only
when they will result in a plausible combination
of engine and vehicle speed; thus, for example,
Page 57 of 254
Controls
55Reference
At a glance
Driving tips
Communications
Navigation
Entertainment
Mobility
a downshift that would cause the engine to
overrev will not be executed by the system. The
gear selected is briefly displayed in the instru-
ment cluster, followed by the gear actually
in use.
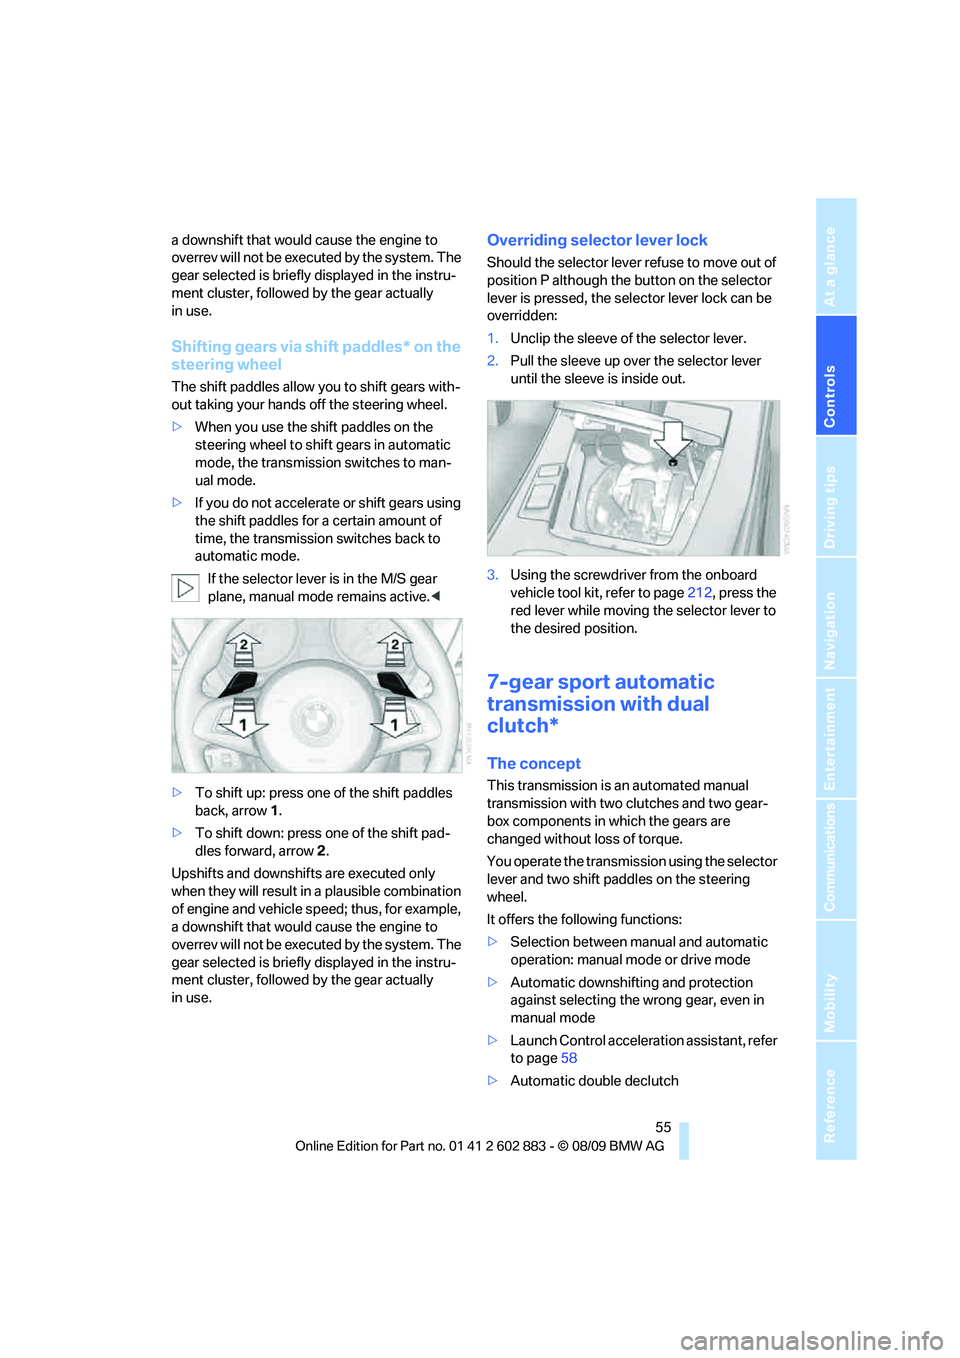
Shifting gears via shift paddles* on the
steering wheel
The shift paddles allow you to shift gears with-
out taking your hands off the steering wheel.
>When you use the shift paddles on the
steering wheel to shift gears in automatic
mode, the transmission switches to man-
ual mode.
>If you do not accelerate or shift gears using
the shift paddles for a certain amount of
time, the transmission switches back to
automatic mode.
If the selector lever is in the M/S gear
plane, manual mode remains active.<
>To shift up: press one of the shift paddles
back, arrow 1.
>To shift down: press one of the shift pad-
dles forward, arrow 2.
Upshifts and downshifts are executed only
when they will result in a plausible combination
of engine and vehicle speed; thus, for example,
a downshift that would cause the engine to
overrev will not be executed by the system. The
gear selected is briefly displayed in the instru-
ment cluster, followed by the gear actually
in use.
Overriding selector lever lock
Should the selector lever refuse to move out of
position P although the button on the selector
lever is pressed, the selector lever lock can be
overridden:
1.Unclip the sleeve of the selector lever.
2.Pull the sleeve up over the selector lever
until the sleeve is inside out.
3.Using the screwdriver from the onboard
vehicle tool kit, refer to page212, press the
red lever while moving the selector lever to
the desired position.
7-gear sport automatic
transmission with dual
clutch*
The concept
This transmission is an automated manual
transmission with two clutches and two gear-
box components in which the gears are
changed without loss of torque.
You operate the transmission using the selector
lever and two shift paddles on the steering
wheel.
It offers the following functions:
>Selection between manual and automatic
operation: manual mode or drive mode
>Automatic downshifting and protection
against selecting the wrong gear, even in
manual mode
>Launch Control acceleration assistant, refer
to page58
>Automatic double declutch
Page 58 of 254
Driving
56
System limitations
This transmission is equipped with an over-
heating protection system that protects the
clutches against extremely high loads.
The indicator lamp lights up yellow if
the transmission becomes too warm.
Avoid high engine loads and driving off
frequently.
If the transmission overheats, the indicator
lamp lights up red and power flow to the engine
is interrupted. You can only continue driving
after the transmission has cooled down.
Avoid driving off frequently with high accelera-
tion and do not hold the vehicle on inclines by
depressing the accelerator lightly; otherwise,
the transmission may overheat.
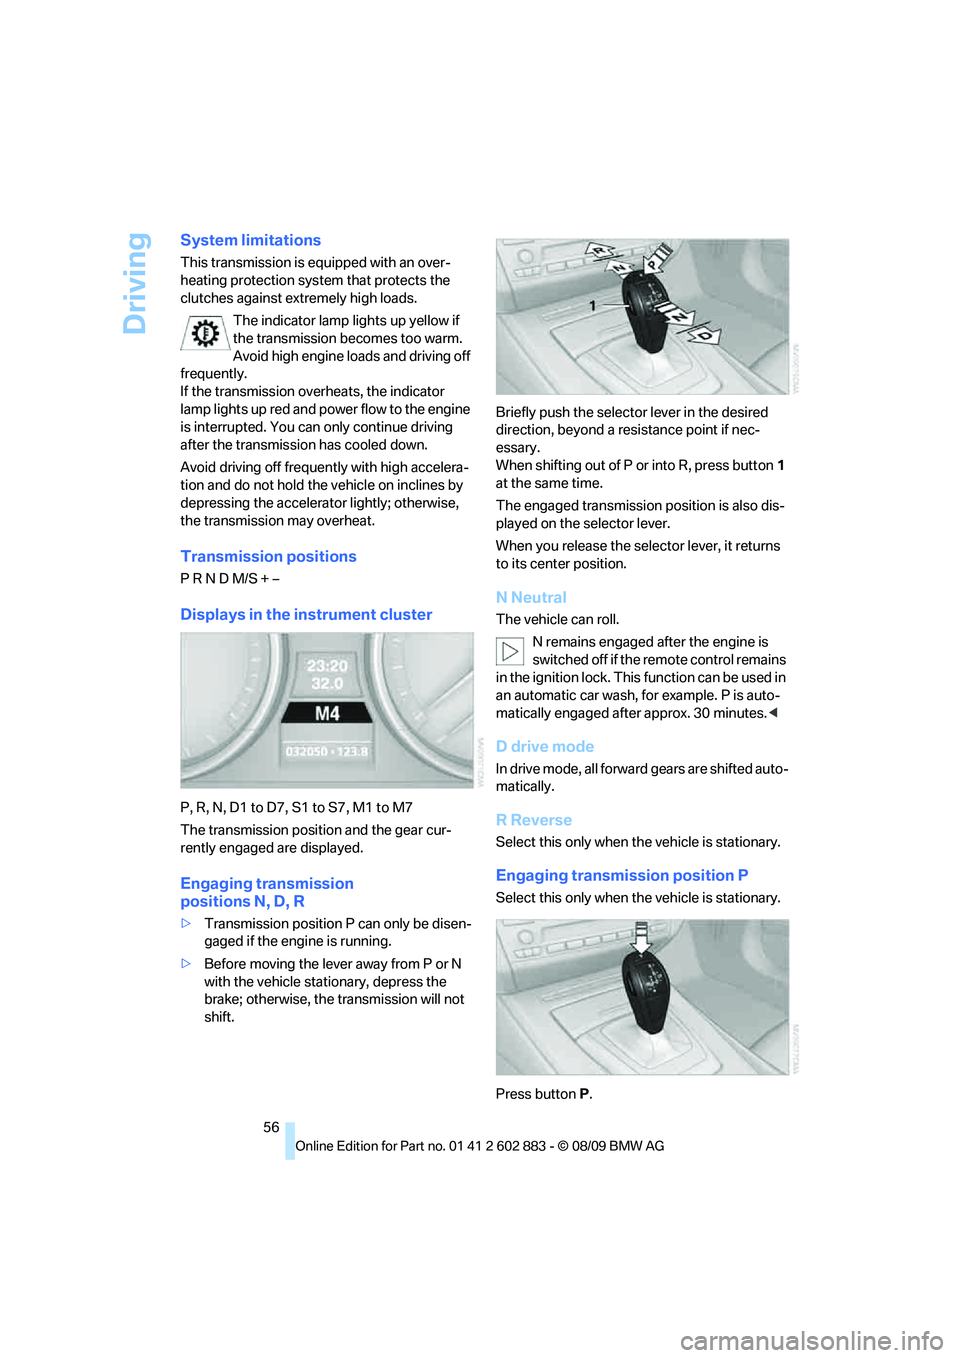
Transmission positions
P R N D M/S + –
Displays in the instrument cluster
P, R, N, D1 to D7, S1 to S7, M1 to M7
The transmission position and the gear cur-
rently engaged are displayed.
Engaging transmission
positionsN,D,R
>Transmission position P can only be disen-
gaged if the engine is running.
>Before moving the lever away from P or N
with the vehicle stationary, depress the
brake; otherwise, the transmission will not
shift.Briefly push the selector lever in the desired
direction, beyond a resistance point if nec-
essary.
When shifting out of P or into R, press button1
at the same time.
The engaged transmission position is also dis-
played on the selector lever.
When you release the selector lever, it returns
to its center position.
N Neutral
The vehicle can roll.
N remains engaged after the engine is
switched off if the remote control remains
in the ignition lock. This function can be used in
an automatic car wash, for example. P is auto-
matically engaged after approx. 30 minutes.<
D drive mode
In drive mode, all forward gears are shifted auto-
matically.
R Reverse
Select this only when the vehicle is stationary.
Engaging transmission position P
Select this only when the vehicle is stationary.
Press buttonP.
Page 59 of 254
Controls
57Reference
At a glance
Driving tips
Communications
Navigation
Entertainment
Mobility
P Park
The rear wheels are locked.
P is engaged automatically when the following
conditions are met:
>The driver's door is opened while the
engine is running, your safety belt is not fas-
tened and neither the brake pedal nor the
accelerator are activated.
>The engine is switched off unless N is
engaged and the remote control is in the
ignition lock.
>The remote control is removed from the
ignition lock.
Kickdown
T o a cc ele ra te ra pidly, e.g., when passing, press
the accelerator down past the resistance point.
This provides maximum acceleration.
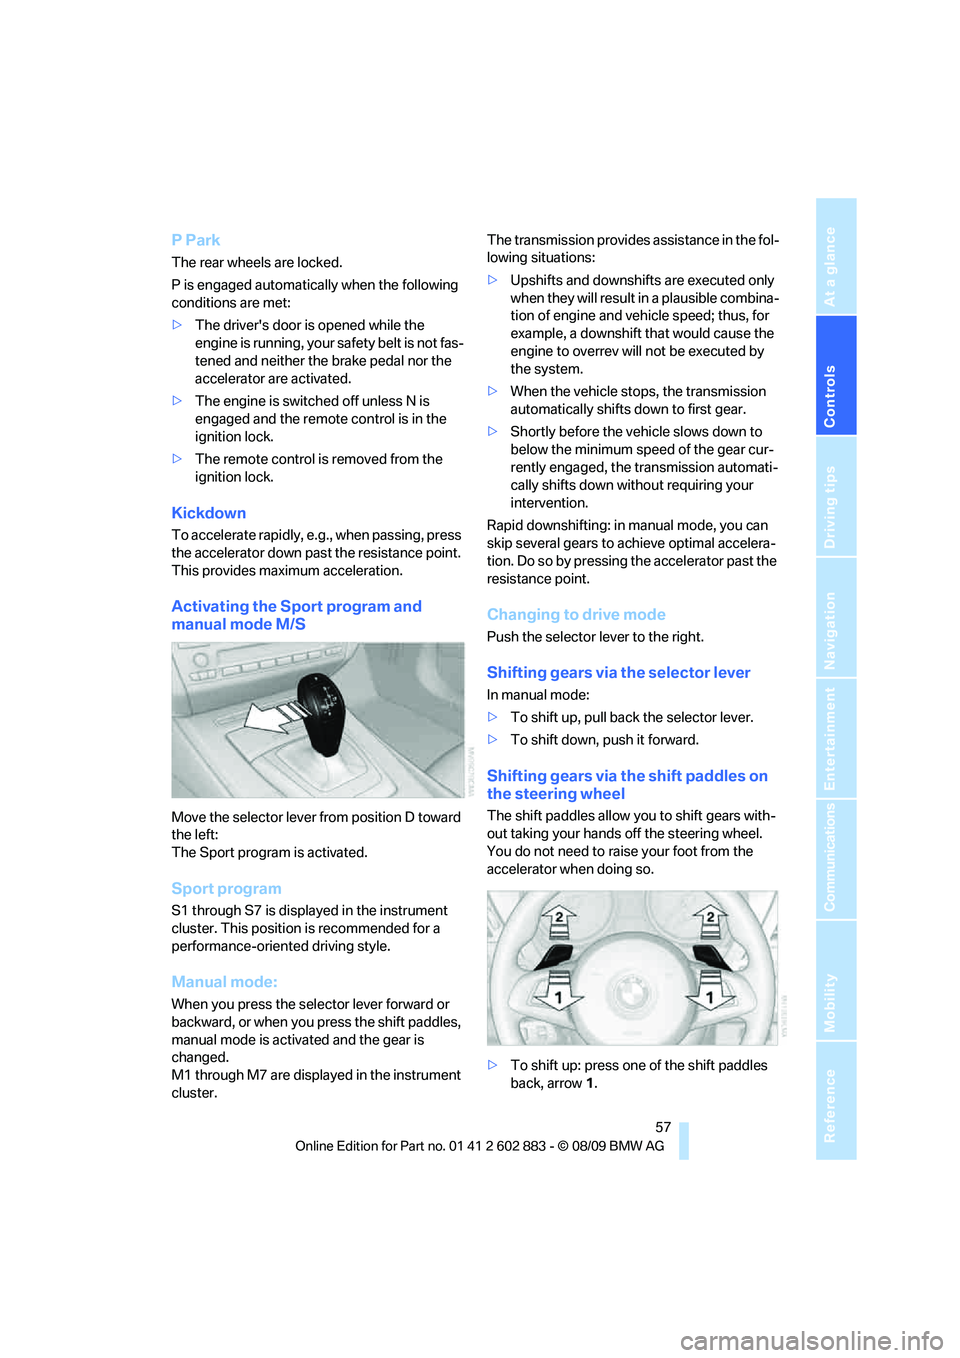
Activating the Sport program and
manual mode M/S
Move the selector lever from position D toward
the left:
The Sport program is activated.
Sport program
S1 through S7 is displayed in the instrument
cluster. This position is recommended for a
performance-oriented driving style.
Manual mode:
When you press the selector lever forward or
backward, or when you press the shift paddles,
manual mode is activated and the gear is
changed.
M1 through M7 are displayed in the instrument
cluster.The transmission provides assistance in the fol-
lowing situations:
>Upshifts and downshifts are executed only
when they will result in a plausible combina-
tion of engine and vehicle speed; thus, for
example, a downshift that would cause the
engine to overrev will not be executed by
the system.
>When the vehicle stops, the transmission
automatically shifts down to first gear.
>Shortly before the vehicle slows down to
below the minimum speed of the gear cur-
rently engaged, the transmission automati-
cally shifts down without requiring your
intervention.
Rapid downshifting: in manual mode, you can
skip several gears to achieve optimal accelera-
tion. Do so by pressing the accelerator past the
resistance point.
Changing to drive mode
Push the selector lever to the right.
Shifting gears via the selector lever
In manual mode:
>To shift up, pull back the selector lever.
>To shift down, push it forward.
Shifting gears via the shift paddles on
the steering wheel
The shift paddles allow you to shift gears with-
out taking your hands off the steering wheel.
You do not need to raise your foot from the
accelerator when doing so.
>To shift up: press one of the shift paddles
back, arrow1.
Page 60 of 254
Driving
58 >To shift down: press one of the shift pad-
dles forward, arrow2.
Gears can be shifted using the shift paddles in
drive mode or in manual mode.
Gear change in manual mode:
When manual mode is active, refer to page57,
gears can be changed using the shift paddles or
the selector lever.
Gear change in drive mode
The shift paddles can be used to change gears
in drive mode as well.
Afterwards, if the shift paddles are not used for
some time and vehicle acceleration is insuffi-
cient, the forward gears are changed again
automatically.
Launch Control
Launch Control enables you to drive off with an
optimal vehicle acceleration on a high grip road
surface.
Do not use Launch Control too often, as
the higher loads on the vehicle lead to
premature component wear.<
Launch Control is available when the engine is
at operating temperature, i.e., after driving con-
tinuously for at least 6 miles/10 km.
1.With the engine running, depress the brake
pedal with your left foot.
2.Activate the SPORT+ program of the
Dynamic Driving Control, refer to page79.
3.With the vehicle stationary, activate manual
mode and select first gear.
4.Press the accelerator all the way down. The
engine speed when driving off is controlled.
A flag symbol appears in the instrument
cluster.
5.The vehicle accelerates when you release
the brake pedal. Keep the accelerator
pressed all the way down.
6.The transmission shifts up automatically as
long as the accelerator is pressed all the
way down.Launch Control only becomes available again
after a certain distance has been driven.
Launch Control can only be used after the
break-in phase, refer to page112.
To maintain driving stability, activate DSC
whenever possible.<
Manually releasing and engaging the
transmission lock
If a power failure occurs, e.g., if the battery
is discharged or disconnected or if there
is an electrical malfunction, the transmission
lock must be released manually; otherwise, the
rear wheels are blocked and the vehicle cannot
be towed.<
Release the transmission lock manually for tow-
ing only and set the parking brake beforehand
to prevent the vehicle from rolling. After parking
the vehicle, lock the transmission lock again
manually, refer to page59.
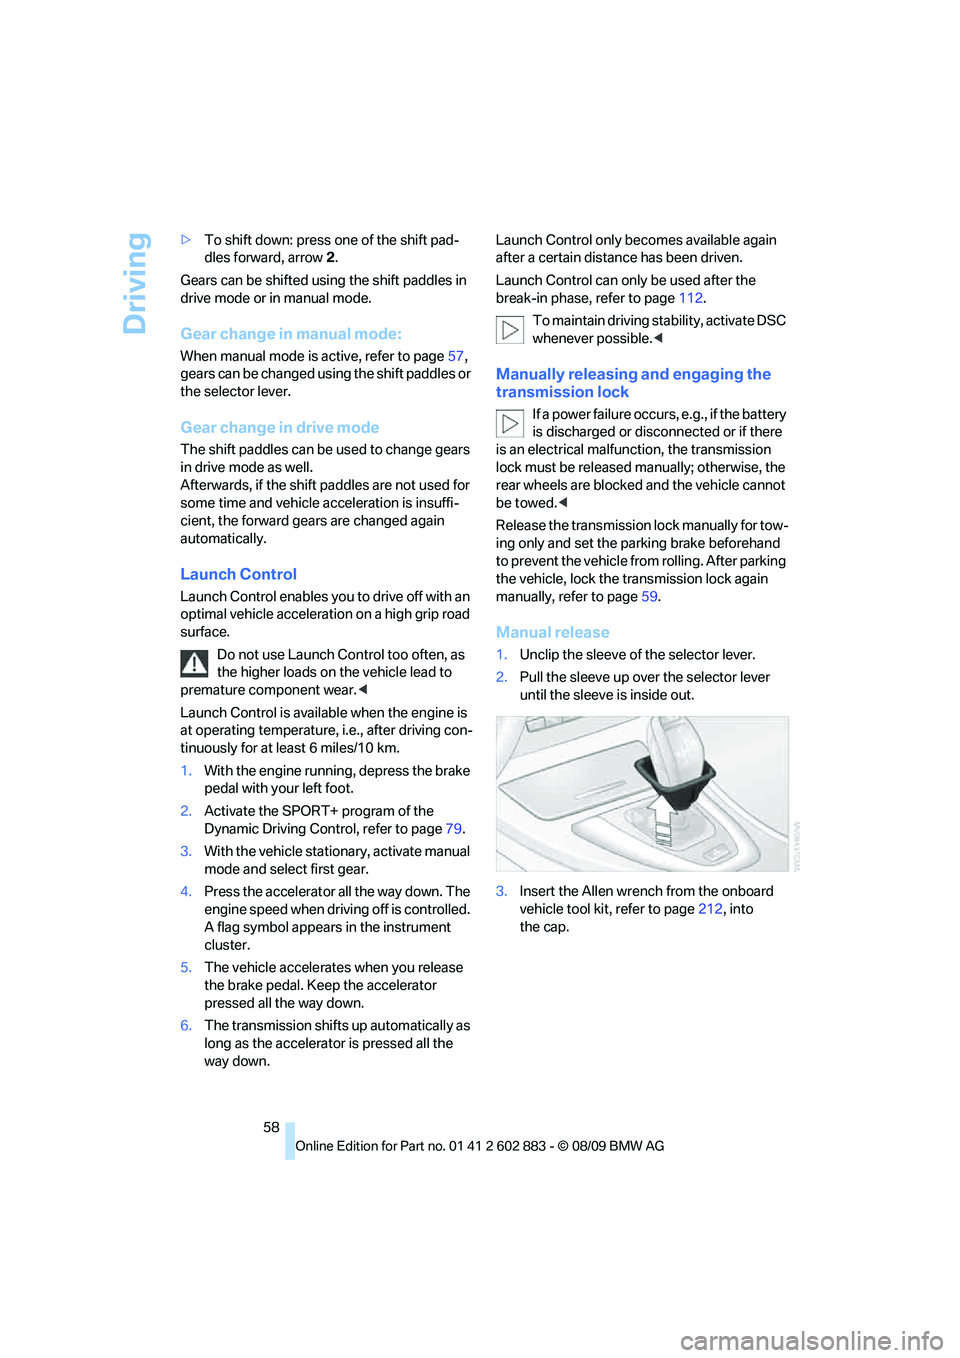
Manual release
1.Unclip the sleeve of the selector lever.
2.Pull the sleeve up over the selector lever
until the sleeve is inside out.
3.Insert the Allen wrench from the onboard
vehicle tool kit, refer to page212, into
the cap.
Page 61 of 254

Controls
59Reference
At a glance
Driving tips
Communications
Navigation
Entertainment
Mobility
4.Turn the cap with the Allen wrench, arrow 1,
and remove it, arrow 2.
5.Insert the Allen wrench into the opening,
arrow 1.
6.Turn the Allen wrench as far as it will go,
arrow 2. The transmission lock is released.
Do not turn the Allen wrench in the
opposite direction as this may dam-
age the mechanism.<
7.Draw the Allen wrench out of the opening.
After parking the vehicle, lock the trans-
mission lock again, refer to Locking man-
ually. Otherwise, there is a danger of the vehicle
rolling.
The transmission lock is locked again.
2.Clip the sleeve of the selector lever back in
place.
3.Set the parking brake.
Jump-starting and towing, refer to page 219.
Turn signals/
headlamp flasher
1High beams
2Headlamp flasher
3Turn signals
Using turn signals
Press the lever beyond the resistance point.
To turn off manually, press the lever to the
resistance point.
Unusually rapid flashing of the indicator
lamp indicates that a turn signal indicator
has failed.<
Indicating a turn briefly
Press the lever as far as the resistance point for
as long as you wish to indicate a turn.
Page 66 of 254

Controls overview
64
Controls overview
Odometer, outside
temperature display, clock
1Knob in the instrument cluster
2Outside temperature display and clock
3Odometer and trip odometer
Knob in the instrument cluster
>To reset the trip odometer while the ignition
is switched on
>To display the time, outside temperature
and odometer briefly while the ignition is
switched off
Units of measure
To select the respective units of measure, miles
or km for the odometer as well as 7 or 6 for
the outside temperature, refer to page68.
The setting is stored for the remote control cur-
rently in use.
Time, outside temperature display
Setting the time, refer to page71.
Outside temperature warning
When the displayed temperature sinks to
approx. +377/+36, a signal sounds and a
warning lamp lights up. There is an increased
risk of black ice.Black ice can also form at temperatures
above +377/+36. You should there-
fore drive carefully on bridges and shaded
roads, for example; otherwise, there is an
increased risk of an accident.<
Odometer and trip odometer
Resetting trip odometer:
With the ignition switched on, press button1 in
the instrument cluster.
When the vehicle is parked
If you still want to view the time, outside tem-
perature and odometer reading briefly after the
remote control has been taken out of the igni-
tion lock:
Press button 1 in the instrument cluster.
Tachometer
Never force the engine speed up into the red
warning field, see arrow. In this range, the fuel
supply is interrupted to protect the engine.
Page 73 of 254

Controls
71Reference
At a glance
Driving tips
Communications
Navigation
Entertainment
Mobility
Entering deadlines for legally required
inspections*
Make sure the date on the Control Display is set
correctly, refer to page72; otherwise, the effec-
tiveness of CBS Condition Based Service is not
ensured.
1."Vehicle Info"
2."Vehicle status"
3."Service required"
4."§ Vehicle inspection"
5.Open the menu for entering the deadline.
6."Date:"
7.Create the settings.
8.Press the controller to apply the setting.
The year is highlighted.
9.Turn the controller to make the adjustment.
10.Press the controller to apply the setting.
The date entry is stored.
To exit from the menu:
Move the controller to the left.
More information on the BMW Maintenance
System can be found on page206.
Clock
Setting the time
In the instrument cluster
To set the 12h/24h mode, refer to Setting the
time format below.
1.Push button 1 in the turn indicator lever up
or down repeatedly until the appropriate
symbol appears in the display, accompa-
nied by the time and the word "SET".
2.Press button 2.
3.Use button 1 to set the hours.
4.Press button 2 to confirm the entry.
5.Use button 1 to set the minutes.
6.Press button 2 to confirm the entry.
7.Press button 2.
The system accepts the new time.
Via iDrive
1. Press the button.
The main menu is displayed.