2010 BMW M3 display
[x] Cancel search: displayPage 82 of 196
Lamps
80
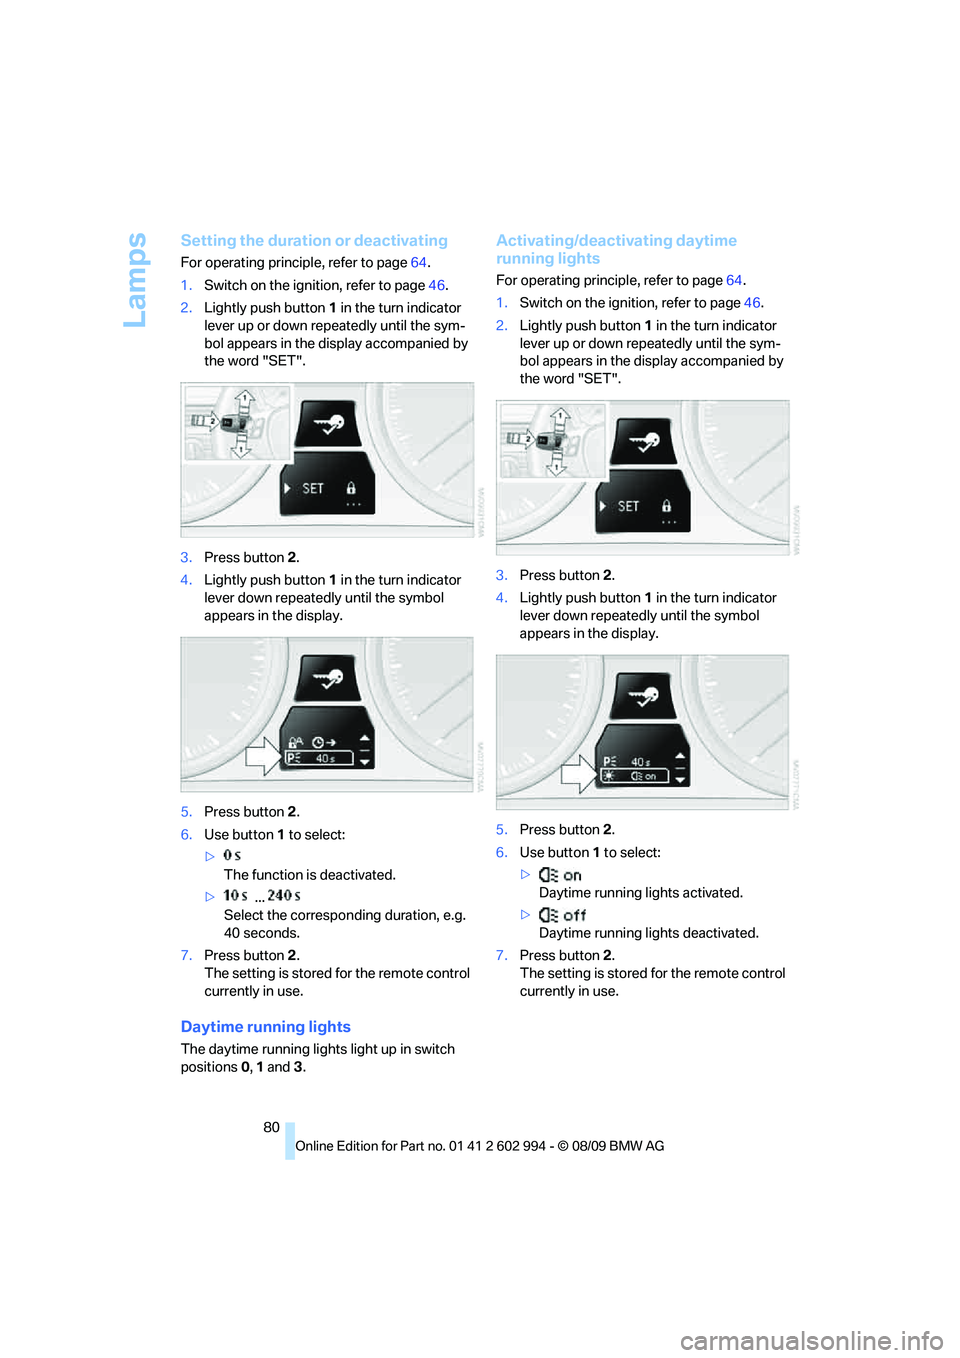
Setting the duration or deactivating
For operating principle, refer to page64.
1.Switch on the ignition, refer to page46.
2.Lightly push button1 in the turn indicator
lever up or down repeatedly until the sym-
bol appears in the display accompanied by
the word "SET".
3.Press button 2.
4.Lightly push button1 in the turn indicator
lever down repeatedly until the symbol
appears in the display.
5.Press button 2.
6.Use button 1 to select:
>
The function is deactivated.
> ...
Select the corresponding duration, e.g.
40 seconds.
7.Press button 2.
The setting is stored for the remote control
currently in use.
Daytime running lights
The daytime running lights light up in switch
positions 0, 1 and 3.
Activating/deactivating daytime
running lights
For operating principle, refer to page64.
1.Switch on the ignition, refer to page46.
2.Lightly push button1 in the turn indicator
lever up or down repeatedly until the sym-
bol appears in the display accompanied by
the word "SET".
3.Press button 2.
4.Lightly push button1 in the turn indicator
lever down repeatedly until the symbol
appears in the display.
5.Press button 2.
6.Use button 1 to select:
>
Daytime running lights activated.
>
Daytime running lights deactivated.
7.Press button 2.
The setting is stored for the remote control
currently in use.
Page 85 of 196

Reference
At a glance
Controls
Driving tips
Mobility
83
3.Push button 1 up or down to select the
desired brightness level.
4.Press button 2.
The display again shows the outside tem-
perature and the time.
Interior lamps
The interior lamps, the footwell lamps*, entry
lamps
*, cargo area lamp and courtesy lamps*
are controlled automatically.
The LEDs for the courtesy lamps
are set in the
door handles and illuminate the ground in front
of the doors.
To avoid draining the battery, all lamps
inside the car are switched off about
8 minutes after the ignition is switched off, refer
to Start/stop button on page46.<
Switching interior lamps on/off
manually
Interior lamps, front and rear*:
To switch on and off, press the button.
To switch off the interior lamps, footwell
lamps
*, entry lamps* and courtesy lamps* per-
manently, press the button for the front interior
lamps for about 3 seconds.
Reading lamps
There are reading lamps at the front and rear*,
next to the interior lamps. To switch on and off,
press the button.
Page 90 of 196
Climate
88 Air flows out of the vent outlets for the upper
body region. Open them for this purpose.
Air is cooled as quickly as possible:
>Above an outside temperature of approx.
327/06
>When the engine is running
AUTO program
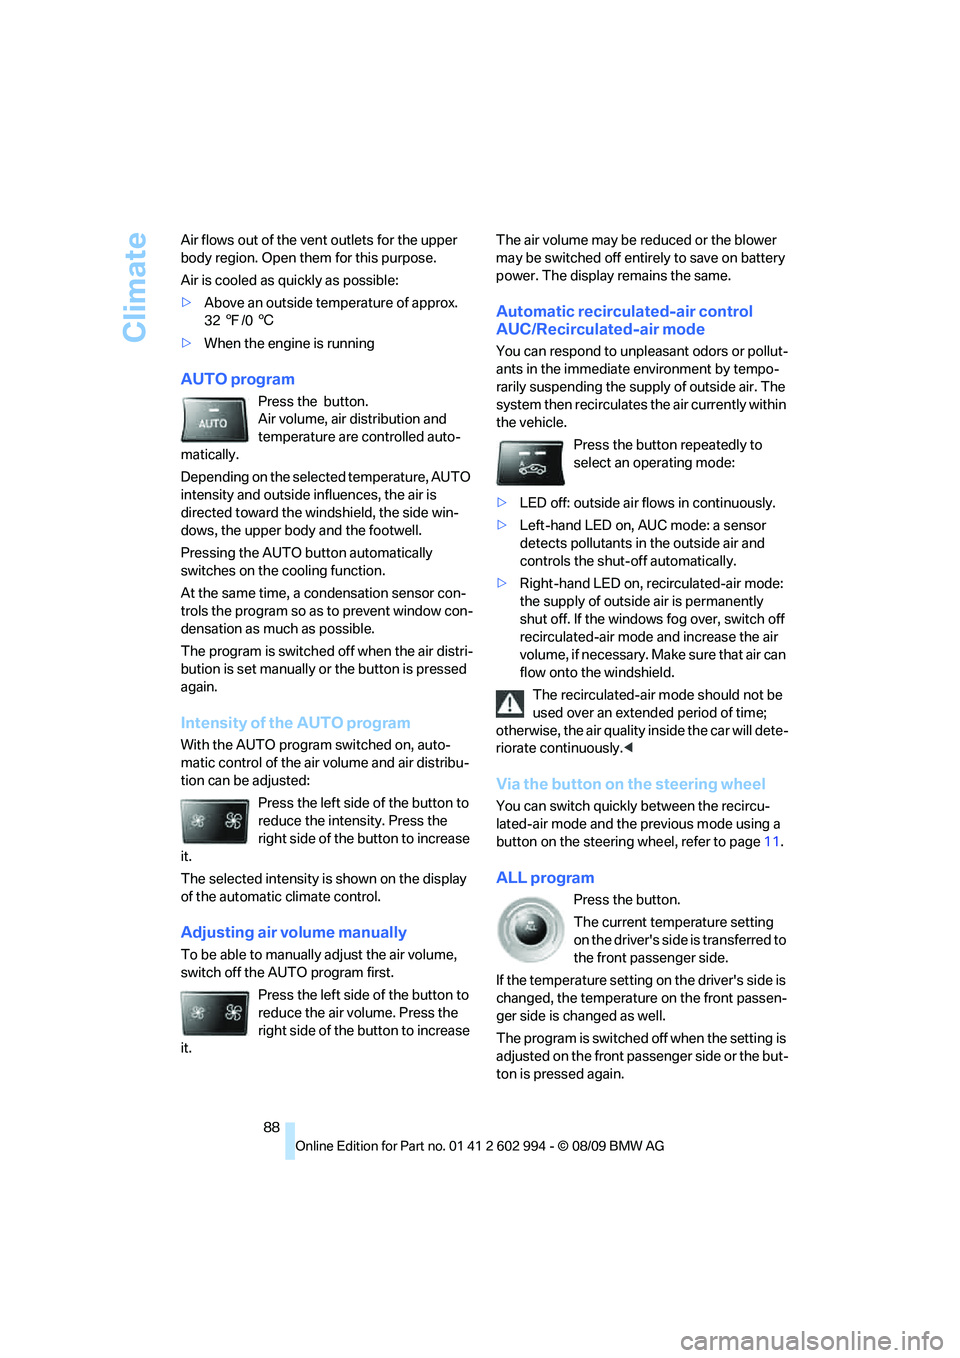
Press the button.
Air volume, air distribution and
temperature are controlled auto-
matically.
Depending on the selected temperature, AUTO
intensity and outside influences, the air is
directed toward the windshield, the side win-
dows, the upper body and the footwell.
Pressing the AUTO button automatically
switches on the cooling function.
At the same time, a condensation sensor con-
trols the program so as to prevent window con-
densation as much as possible.
The program is switched off when the air distri-
bution is set manually or the button is pressed
again.
Intensity of the AUTO program
With the AUTO program switched on, auto-
matic control of the air volume and air distribu-
tion can be adjusted:
Press the left side of the button to
reduce the intensity. Press the
right side of the button to increase
it.
The selected intensity is shown on the display
of the automatic climate control.
Adjusting air volume manually
To be able to manually adjust the air volume,
switch off the AUTO program first.
Press the left side of the button to
reduce the air volume. Press the
right side of the button to increase
it.The air volume may be reduced or the blower
may be switched off entirely to save on battery
power. The display remains the same.
Automatic recirculated-air control
AUC/Recirculated-air mode
You can respond to unpleasant odors or pollut-
ants in the immediate environment by tempo-
rarily suspending the supply of outside air. The
system then recirculates the air currently within
the vehicle.
Press the button repeatedly to
select an operating mode:
>LED off: outside air flows in continuously.
>Left-hand LED on, AUC mode: a sensor
detects pollutants in the outside air and
controls the shut-off automatically.
>Right-hand LED on, recirculated-air mode:
the supply of outside air is permanently
shut off. If the windows fog over, switch off
recirculated-air mode and increase the air
volume, if necessary. Make sure that air can
flow onto the windshield.
The recirculated-air mode should not be
used over an extended period of time;
otherwise, the air quality inside the car will dete-
riorate continuously.<
Via the button on the steering wheel
You can switch quickly between the recircu-
lated-air mode and the previous mode using a
button
on the steering wheel, refer to page11.
ALL program
Press the button.
The current temperature setting
on the driver's side is transferred to
the front passenger side.
If the temperature setting on the driver's side is
changed, the temperature on the front passen-
ger side is changed as well.
The program is switched off when the setting is
adjusted on the front passenger side or the but-
ton is pressed again.
Page 91 of 196
Reference
At a glance
Controls
Driving tips
Mobility
89
Defrosting windows and removing
condensation
Press the button.
Quickly removes ice and conden-
sation from the windshield and
front side windows.
For this purpose, also switch on the cooling
function.
Switching cooling function on/off
The passenger compartment can only be
cooled while the engine is running.
Press the button.
The air is cooled and dehumidified
and – depending on the tempera-
ture setting – warmed again.
Depending on the weather, the windshield may
fog up briefly when the engine is started.
Pressing the AUTO button automatically
switches on the cooling function.
Rear window defroster
Press the button.
The defroster is switched off auto-
matically after a certain time.
Depending on your vehicle's equipment, the
upper wires serve as an antenna and are not
part of the rear window defroster.
Switching the system on/off
Switching off
With the blower at its lowest set-
ting, press the left side of the but-
ton to switch off the automatic cli-
mate control.
All displays are cleared except for the rear win-
dow defroster if it is switched on.
The outside air supply is blocked when
the automatic climate control is switched
off. If the air quality deteriorates or the window
fogs over, switch the system back on and
increase the air volume.<
Switching on
Press any button except the ALL or the rear
window defroster button to reactivate the auto-
matic climate control.
Ventilation
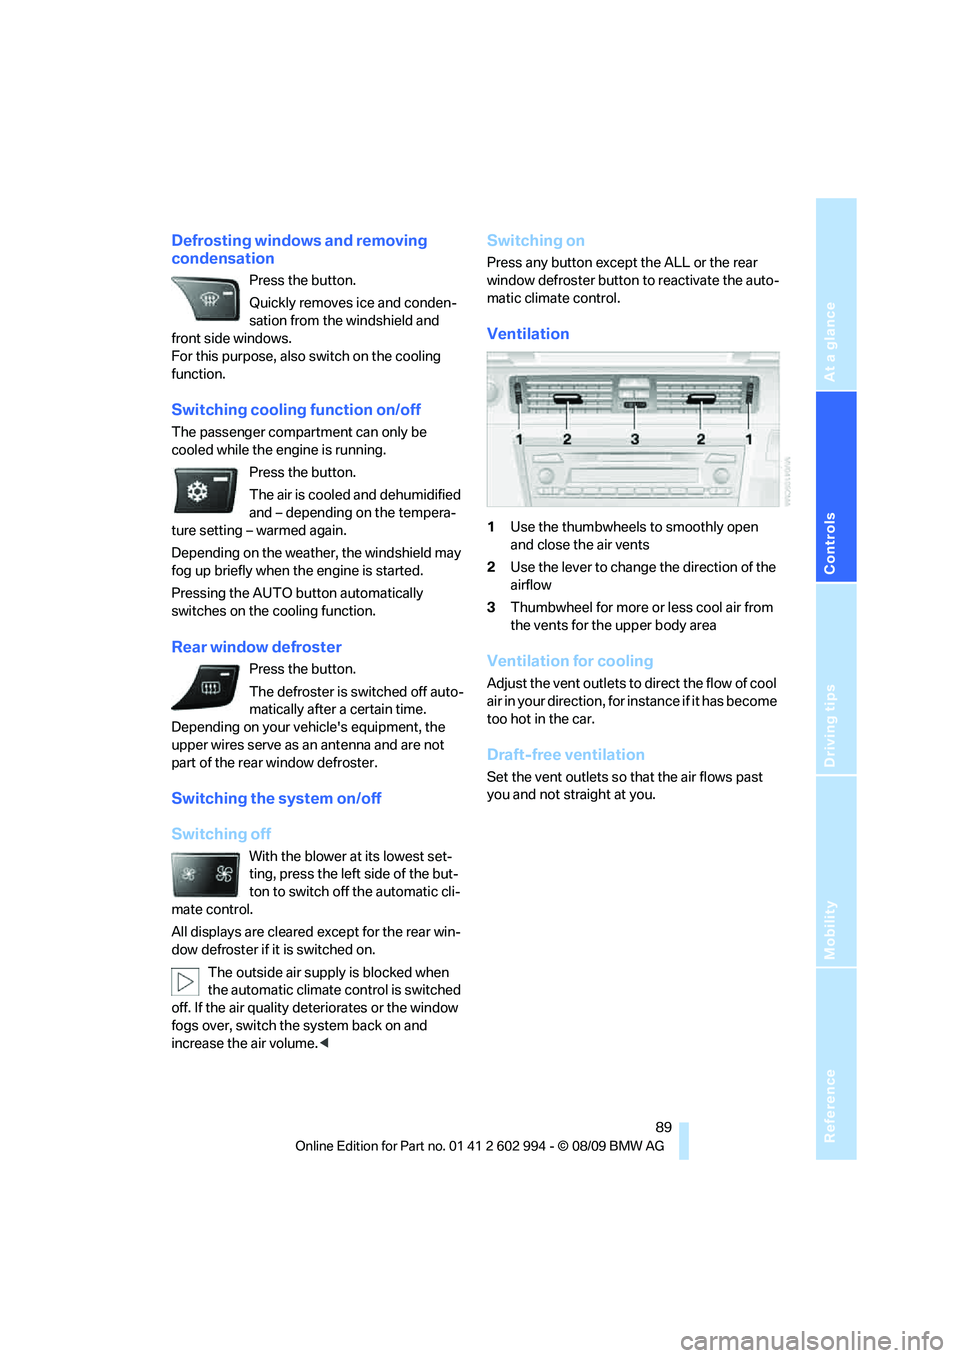
1Use the thumbwheels to smoothly open
and close the air vents
2Use the lever to change the direction of the
airflow
3Thumbwheel for more or less cool air from
the vents for the upper body area
Ventilation for cooling
Adjust the vent outlets to direct the flow of cool
air in your direction, for instance if it has become
too hot in the car.
Draft-free ventilation
Set the vent outlets so that the air flows past
you and not straight at you.
Page 95 of 196
Reference
At a glance
Controls
Driving tips
Mobility
93
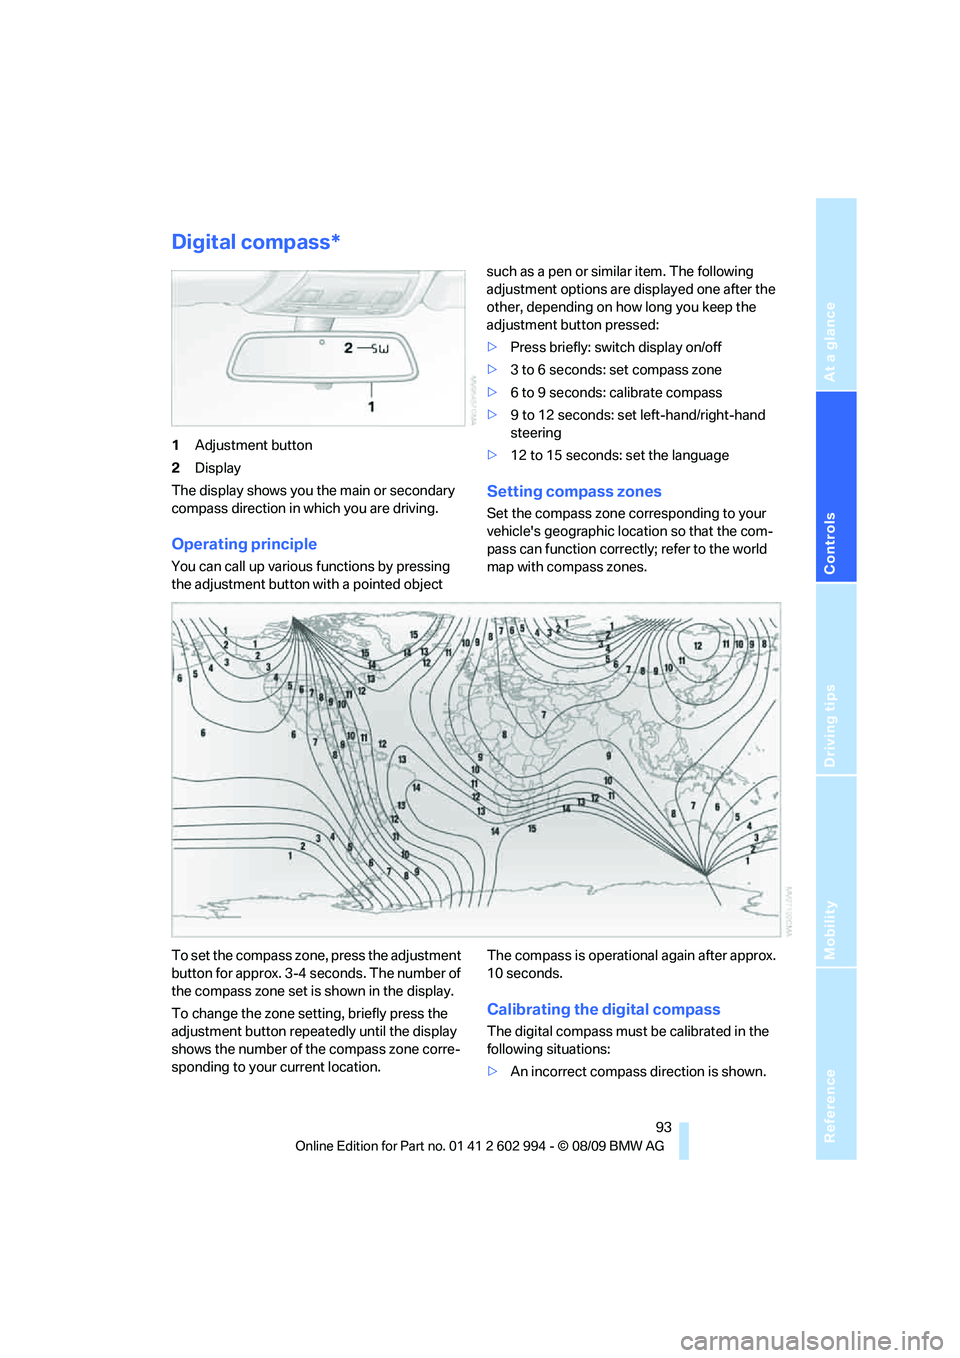
Digital compass*
1Adjustment button
2Display
The display shows you the main or secondary
compass direction in which you are driving.
Operating principle
You can call up various functions by pressing
the adjustment button with a pointed object such as a pen or similar item. The following
adjustment options are displayed one after the
other, depending on how long you keep the
adjustment button pressed:
>Press briefly: switch display on/off
>3 to 6 seconds: set compass zone
>6 to 9 seconds: calibrate compass
>9 to 12 seconds: set left-hand/right-hand
steering
>12 to 15 seconds: set the language
Setting compass zones
Set the compass zone corresponding to your
vehicle's geographic location so that the com-
pass can function correctly; refer to the world
map with compass zones.
To set the compass zone, press the adjustment
button for approx. 3-4 seconds. The number of
the compass zone set is shown in the display.
To change the zone setting, briefly press the
adjustment button repeatedly until the display
shows the number of the compass zone corre-
sponding to your current location.The compass is operational again after approx.
10 seconds.
Calibrating the digital compass
The digital compass must be calibrated in the
following situations:
>An incorrect compass direction is shown.
Page 96 of 196
Practical interior accessories
94 >The compass direction shown does not
change although the direction of travel
does.
>Not all compass directions are shown.
Procedure
1.Make sure that no large metal objects or
overhead power lines are in the vicinity of
your vehicle and that you have enough
space to drive in a circle.
2.Set the currently valid compass zone.
3.Press the adjustment button for approx.
6-7 seconds to call up C. Then drive in at
least one full circle at a speed of no more
than 4mph or 7km/h.
If calibration is successful, the display
changes from C to a compass direction.
Setting right-hand/left-hand steering
Your digital compass is factory-set to right-
hand or left-hand steering, in accordance with
your vehicle.
Set the language
You can set the language of the display:
Press the adjustment button for approx.
12-13 seconds. Briefly press the adjustment
button again to switch between English, "E",
and German, "O".
The setting is automatically saved after approx.
10 seconds.
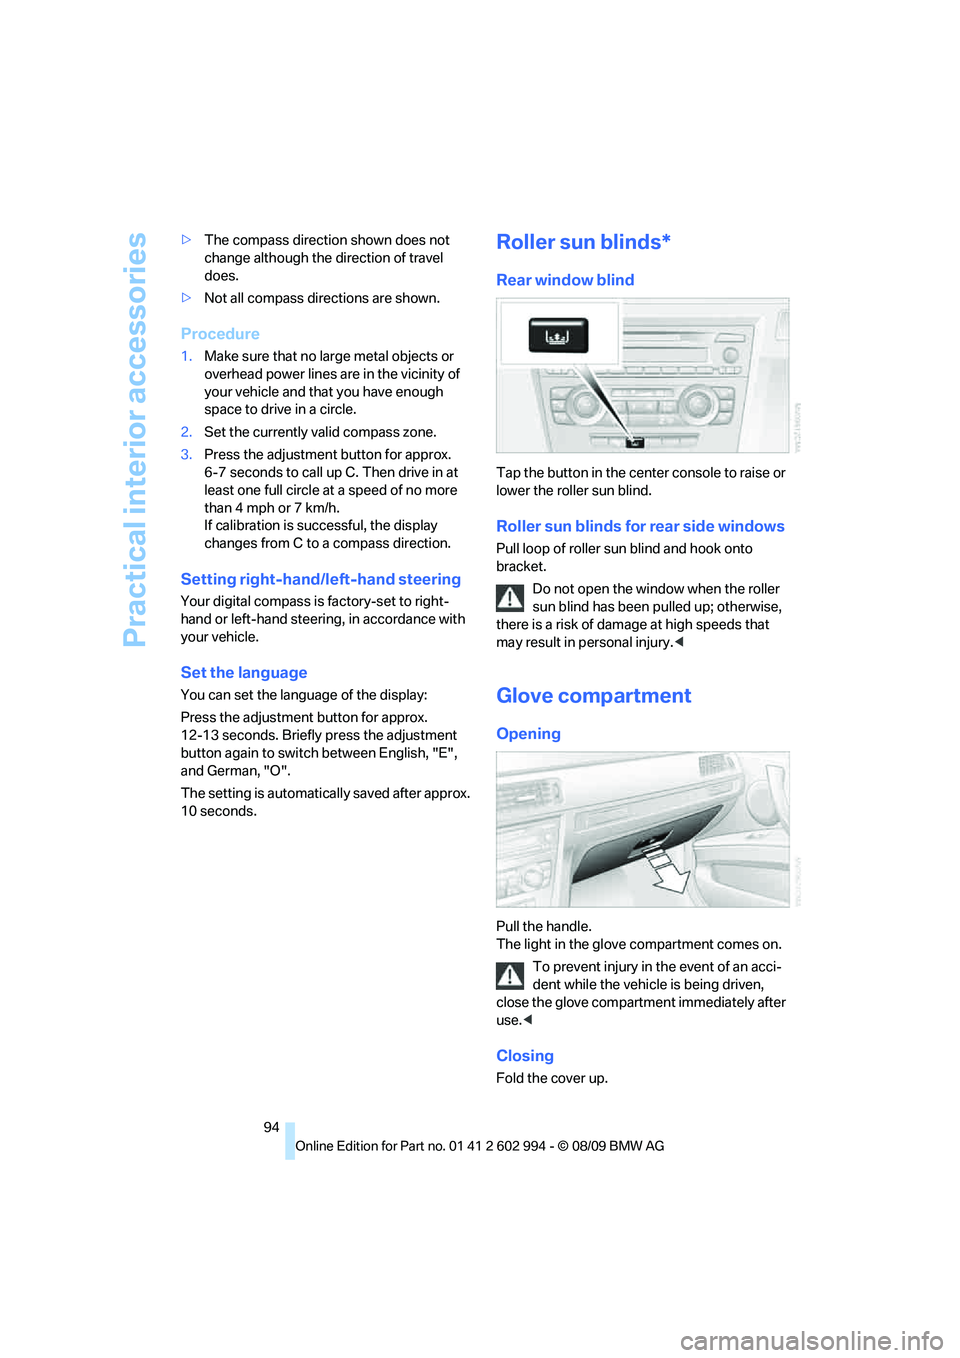
Roller sun blinds*
Rear window blind
Tap the button in the center console to raise or
lower the roller sun blind.
Roller sun blinds for rear side windows
Pull loop of roller sun blind and hook onto
bracket.
Do not open the window when the roller
sun blind has been pulled up; otherwise,
there is a risk of damage at high speeds that
may result in personal injury.<
Glove compartment
Opening
Pull the handle.
The light in the glove compartment comes on.
To prevent injury in the event of an acci-
dent while the vehicle is being driven,
close the glove compartment immediately after
use.<
Closing
Fold the cover up.
Page 116 of 196
Refueling
114
Refueling
Always switch off the engine before refu-
eling; otherwise, fuel cannot be added to
the tank and a message will be displayed.<
Take all precautionary measures and
observe all applicable regulations when
handling fuel. Do not carry any spare fuel con-
tainers in your vehicle. They can develop a leak
and cause an explosion or cause a fire in the
event of an accident.<
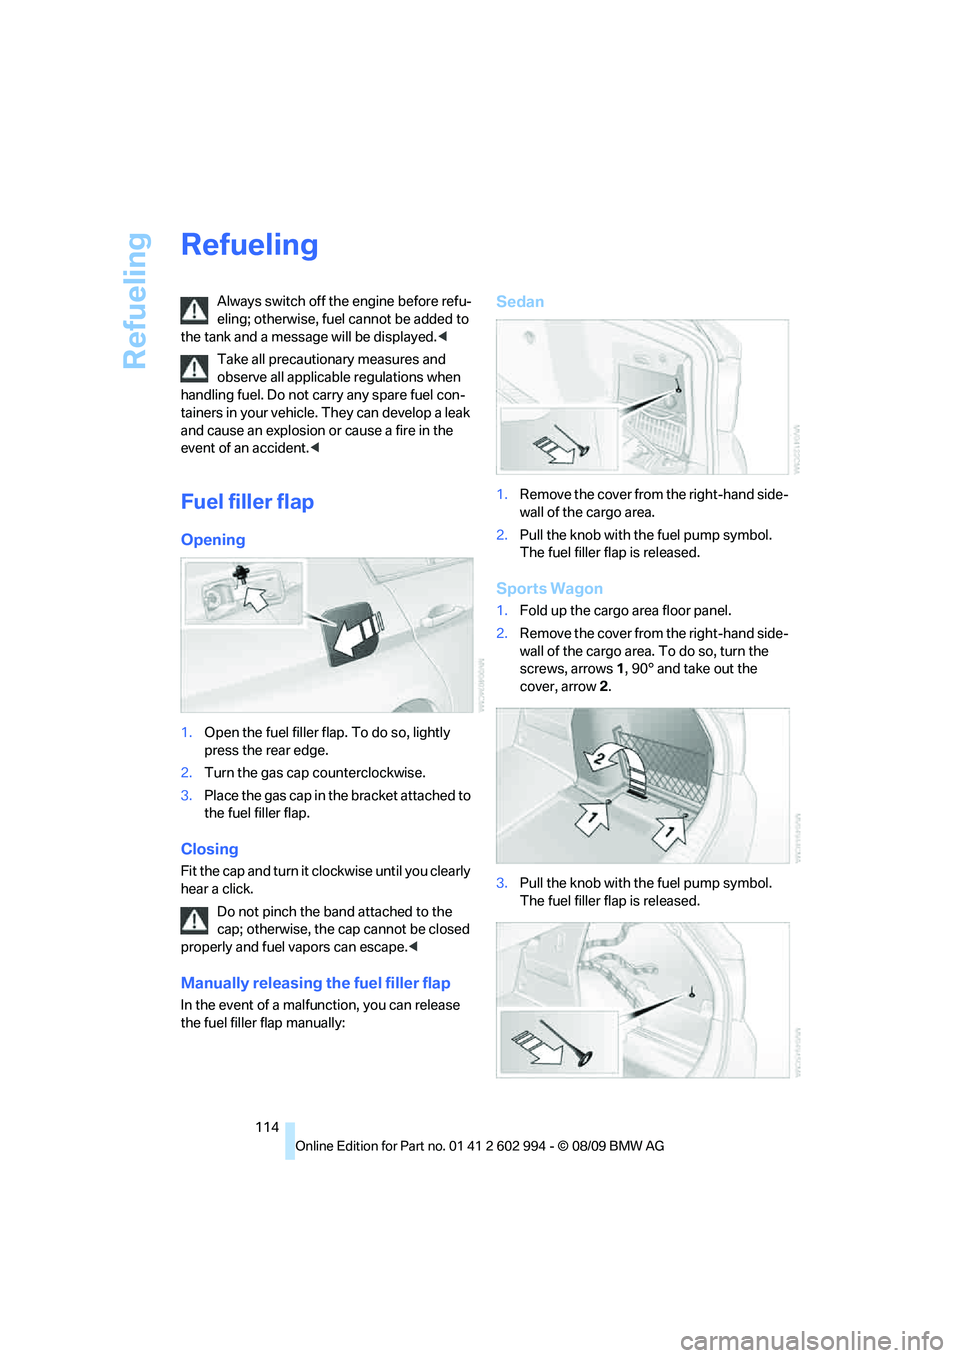
Fuel filler flap
Opening
1.Open the fuel filler flap. To do so, lightly
press the rear edge.
2.Turn the gas cap counterclockwise.
3.Place the gas cap in the bracket attached to
the fuel filler flap.
Closing
Fit the cap and turn it clockwise until you clearly
hear a click.
Do not pinch the band attached to the
cap; otherwise, the cap cannot be closed
properly and fuel vapors can escape.<
Manually releasing the fuel filler flap
In the event of a malfunction, you can release
the fuel filler flap manually:
Sedan
1.Remove the cover from the right-hand side-
wall of the cargo area.
2.Pull the knob with the fuel pump symbol.
The fuel filler flap is released.
Sports Wagon
1.Fold up the cargo area floor panel.
2.Remove the cover from the right-hand side-
wall of the cargo area. To do so, turn the
screws, arrows 1, 90° and take out the
cover, arrow 2.
3.Pull the knob with the fuel pump symbol.
The fuel filler flap is released.
Page 118 of 196
Refueling
116 If you have refueled with the wrong fuel, contact
your BMW center.
The filler neck is designed for refueling at
diesel fuel pumps.
If the filler nozzle cannot be inserted into your
BMW's filler pipe, please ensure that you are
refueling at a diesel fuel pump and that it is
equipped with a diesel filler nozzle.<
In the event the Ultra-Low Sulfur Diesel
fuel cannot be fully inserted into the fuel
filler neck, please contact BMW Roadside
Assistance for instructions on how to add fuel.
For more information on BMW Roadside Assis-
tance, refer to page155.<
Winter diesel
To ensure that the diesel engine remains oper-
ational in the winter, please use winter diesel,
which is available at gas stations during winter
months. The fuel filter heating system, included
a s a s t a n d a r d f e a t u r e , p r e v e n t s d i s r u p t i o n o f t h e
fuel supply while driving.
Do not add additives, including gasoline;
otherwise, engine damage may occur.<
BMW Advanced Diesel
The concept
BMW Advanced Diesel reduces nitrogen oxide
in the diesel emissions of your vehicle by means
of a mechanism that injects diesel exhaust fluid,
a reduction agent, into the exhaust tract. A
chemical reaction occurs in the catalytic con-
verter that minimizes the nitrogen oxide con-
tent.
To be able to start the engine as usual, a suffi-
cient amount of diesel exhaust fluid must be
present in a separate reservoir.
Warming the system
To warm the system to its operating tempera-
ture after starting with a cold engine, the auto-
matic transmission delays shifting to the next
higher gear, if necessary.
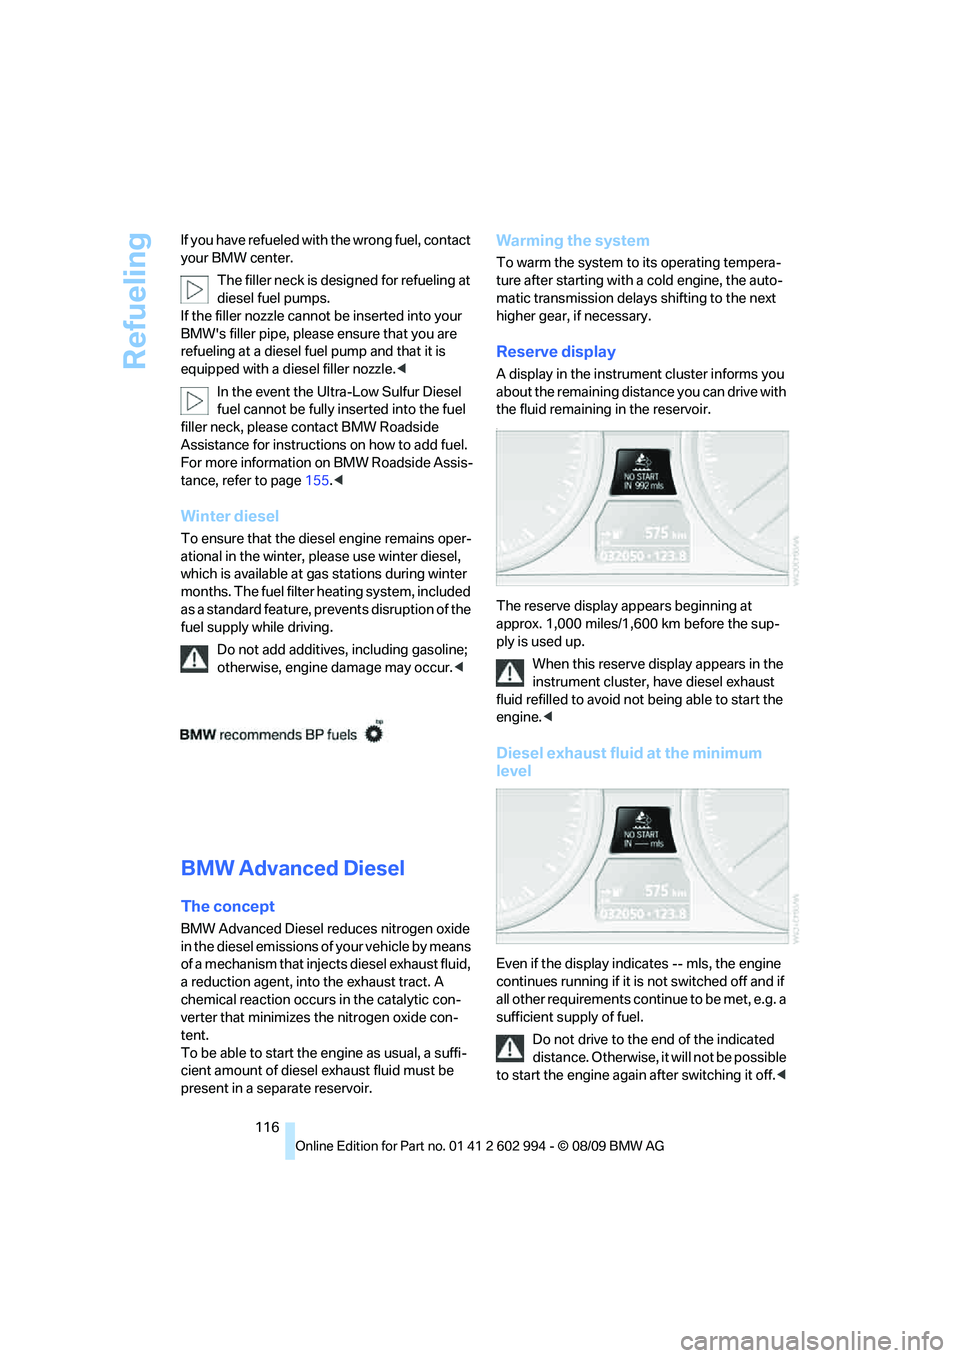
Reserve display
A display in the instrument cluster informs you
about the remaining distance you can drive with
the fluid remaining in the reservoir.
-
The reserve display appears beginning at
approx. 1,000 miles/1,600 km before the sup-
ply is used up.
When this reserve display appears in the
instrument cluster, have diesel exhaust
fluid refilled to avoid not being able to start the
engine.<
Diesel exhaust fluid at the minimum
level
Even if the display indicates -- mls, the engine
continues running if it is not switched off and if
all other requirements continue to be met, e.g. a
sufficient supply of fuel.
Do not drive to the end of the indicated
distance. Otherwise, it will not be possible
to start the engine again after switching it off.<