2010 BMW 535I SEDAN change time
[x] Cancel search: change timePage 91 of 271

Controls
89Reference
At a glance
Driving tips
Communications
Navigation
Entertainment
Mobility
Initializing system
The initialization finishes during driving,
which can be interrupted at any time.
When driving resumes, the initialization is con-
tinued automatically. The system is initialized
after this activation phase.
The initialization process adopts the set infla-
tion tire pressures as reference values for the
detection of a flat tire. Initialization is started by
confirming the inflation pressures.<
iDrive, for operating principle refer to page16:
1."Vehicle Info"
2."Vehicle status"
3."Reset"
4.Start the engine - do not drive away.
5.Start the initialization using "Reset".
"Activating…" is displayed on the Control
Display.
6.Start to drive.
The initialization finishes during driving, which
can be interrupted at any time. "Flat Tire Moni-
tor active" is displayed on the Control Display.
Indication of a flat tire
The warning lamp lights up red. A mes-
sage appears on the Control Display.
In addition, an acoustic signal sounds.
There is a flat tire or extensive inflation pressure
loss.
1.Reduce speed and stop the vehicle care-
fully. Avoid sudden braking and steering
maneuvers.
2.Identify damaged tire.
If identification is not possible, con-
tact a BMW center.<3.Replace the damaged wheel, refer to
Changing wheels on page226.
Run-flat tires*
1.Cautiously reduce speed to below 50 mph/
80 km/h. Avoid severe braking and steering
maneuvers and do not exceed a speed of
50 mph/80 km/h.
If the vehicle is not equipped with run-
flat tires, refer to page208, do not
continue driving. Continuing to drive with a
flat tire could cause severe accidents.<
2.At the next opportunity, check the air pres-
sure in all four tires.
If the tire inflation pressure in all four
tires is correct, the Flat Tire Monitor
may not have been initialized. The system
must then be initialized.<
3.In the event of complete tire pressure loss,
0 psi/0 kPa, you can estimate the possible
distance for continued driving on the basis
of the following guide values:
>With a light load:
1 to 2 persons without luggage:
approx. 155 miles/250 km
>With a medium load:
2 persons, cargo bay full, or
4 persons without luggage:
approx. 94 miles/150 km
>With a full load:
4 or more persons, cargo bay full:
approx. 30 miles/50 km
Drive cautiously and do not exceed
50 mph/80 km/h or else you run the risk of
causing an accident. In the event of pressure
loss, vehicle handling changes. This includes
reduced tracking stability in braking, extended
braking distance and altered natural steering
characteristics.
If unusual vibrations or loud noises occur while
the vehicle is being driven, this can indicate final
failure of the damaged tire. Reduce speed and
stop at a suitable location as soon as possible,
otherwise pieces of the tire could become
detached and cause an accident. Do not con-
Page 102 of 271
Lamps
100
Lamps
Parking lamps/low beams
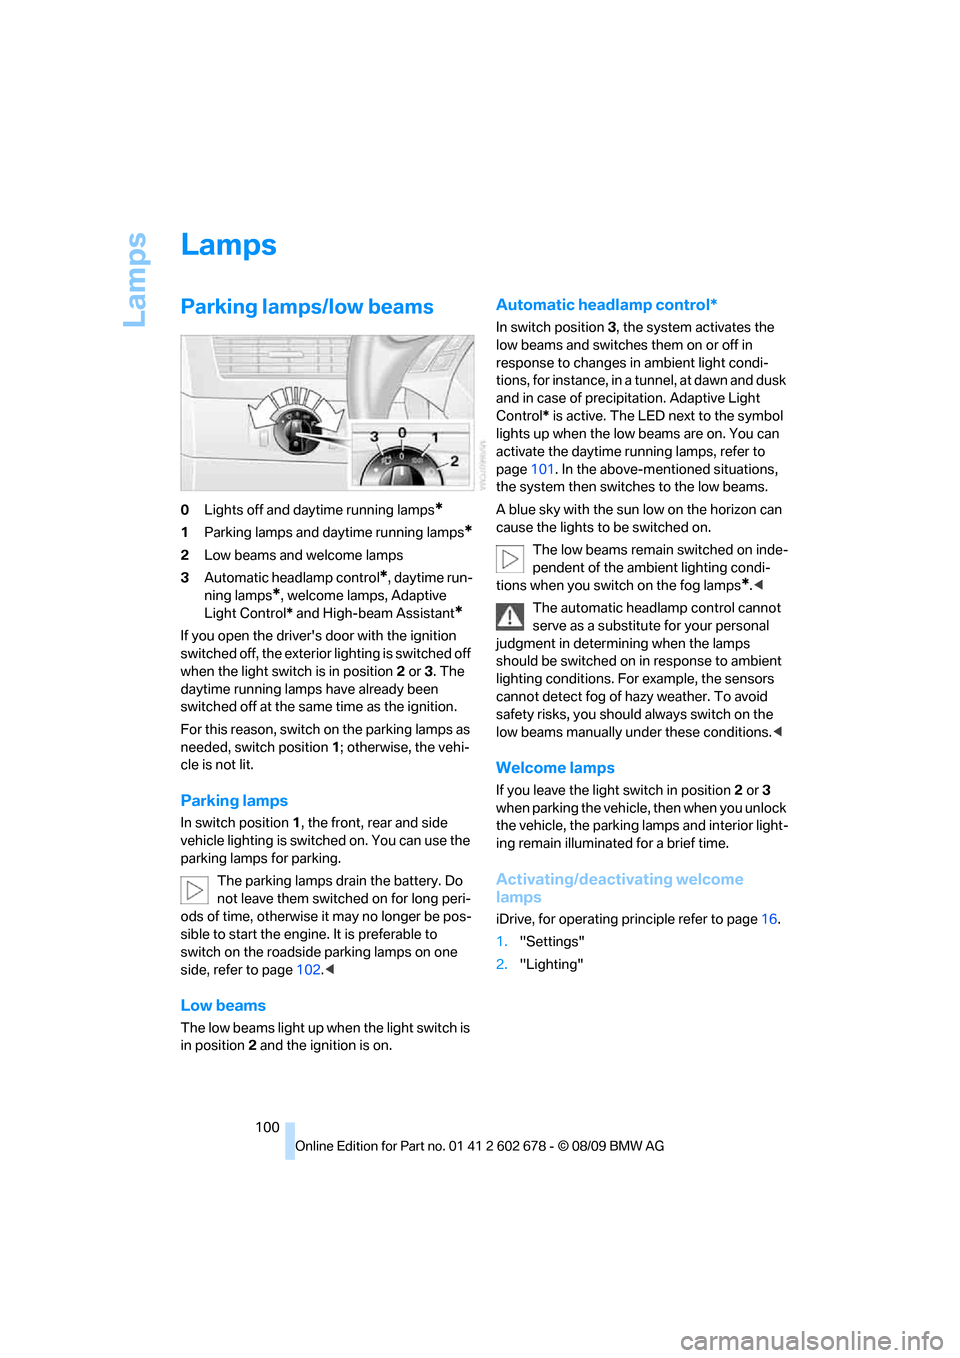
0Lights off and daytime running lamps*
1Parking lamps and daytime running lamps*
2Low beams and welcome lamps
3Automatic headlamp control
*, daytime run-
ning lamps
*, welcome lamps, Adaptive
Light Control* and High-beam Assistant
*
If you open the driver's door with the ignition
switched off, the exterior lighting is switched off
when the light switch is in position2 or 3. The
daytime running lamps have already been
switched off at the same time as the ignition.
For this reason, switch on the parking lamps as
needed, switch position1; otherwise, the vehi-
cle is not lit.
Parking lamps
In switch position1, the front, rear and side
vehicle lighting is switched on. You can use the
parking lamps for parking.
The parking lamps drain the battery. Do
not leave them switched on for long peri-
ods of time, otherwise it may no longer be pos-
sible to start the engine. It is preferable to
switch on the roadside parking lamps on one
side, refer to page102.<
Low beams
The low beams light up when the light switch is
in position 2 and the ignition is on.
Automatic headlamp control*
In switch position3, the system activates the
low beams and switches them on or off in
response to changes in ambient light condi-
tions, for instance, in a tunnel, at dawn and dusk
and in case of precipitation. Adaptive Light
Control* is active. The LED next to the symbol
lights up when the low beams are on. You can
activate the daytime running lamps, refer to
page101. In the above-mentioned situations,
the system then switches to the low beams.
A blue sky with the sun low on the horizon can
cause the lights to be switched on.
The low beams remain switched on inde-
pendent of the ambient lighting condi-
tions when you switch on the fog lamps
*.<
The automatic headlamp control cannot
serve as a substitute for your personal
judgment in determining when the lamps
should be switched on in response to ambient
lighting conditions. For example, the sensors
cannot detect fog of hazy weather. To avoid
safety risks, you should always switch on the
low beams manually under these conditions.<
Welcome lamps
If you leave the light switch in position2 or 3
when parking the vehicle, then when you unlock
the vehicle, the parking lamps and interior light-
ing remain illuminated for a brief time.
Activating/deactivating welcome
lamps
iDrive, for operating principle refer to page16.
1."Settings"
2."Lighting"
Page 136 of 271
Destination entry
134 To delete letters:
>To delete individual letters:
Turn the controller to select , and
then press the controller.
>To delete all letters:
Turn the controller to select , and
then press the controller for an extended
period.
To enter spaces:
>Select the symbol.
The list gradually grows smaller each time
you enter a new letter.
3.Move the controller to the right.
4.Select the name of the town/city from the
list.
If there are several towns/cities with the same
name:
1.Change to the list of town/city names.
2.Highlight the town/city: a preview map is
displayed.
3.Select the town/city.
Entering the postal code
1.Select "Town/City/Postal Code" or the dis-
played town/city.
2.Select the symbol.
3.Select the digits.
4.Change to the list of postal codes and
towns/cities.
5.Highlight the postal code: a preview map is
displayed.
6.Select the postal code.
Entering street and intersection
1.Select "Street" or the displayed street.
2.Enter a street and intersection as you would
the town/city.
After the street you can also enter the intersec-
tion or the house number.
If there are several streets with the same name:1.Change to the list of street names.
2.Highlight the street: a preview map is dis-
played.
3.Select the street.
Entering a street without a destination
town/city
You can also enter a street without specifying a
town/city. In this case all streets of the entered
country are offered for selection. The related
town/city is displayed after the street name.
If a town/city has already been entered, you can
undo this entry. This may be practical if the
desired street does not exist in the entered des-
tination, because, for example, it belongs to
another part of the town/city.
1."Navigation"
2."Enter address"
3.Select "Street" or the displayed street.
4.Change to the list of street names.
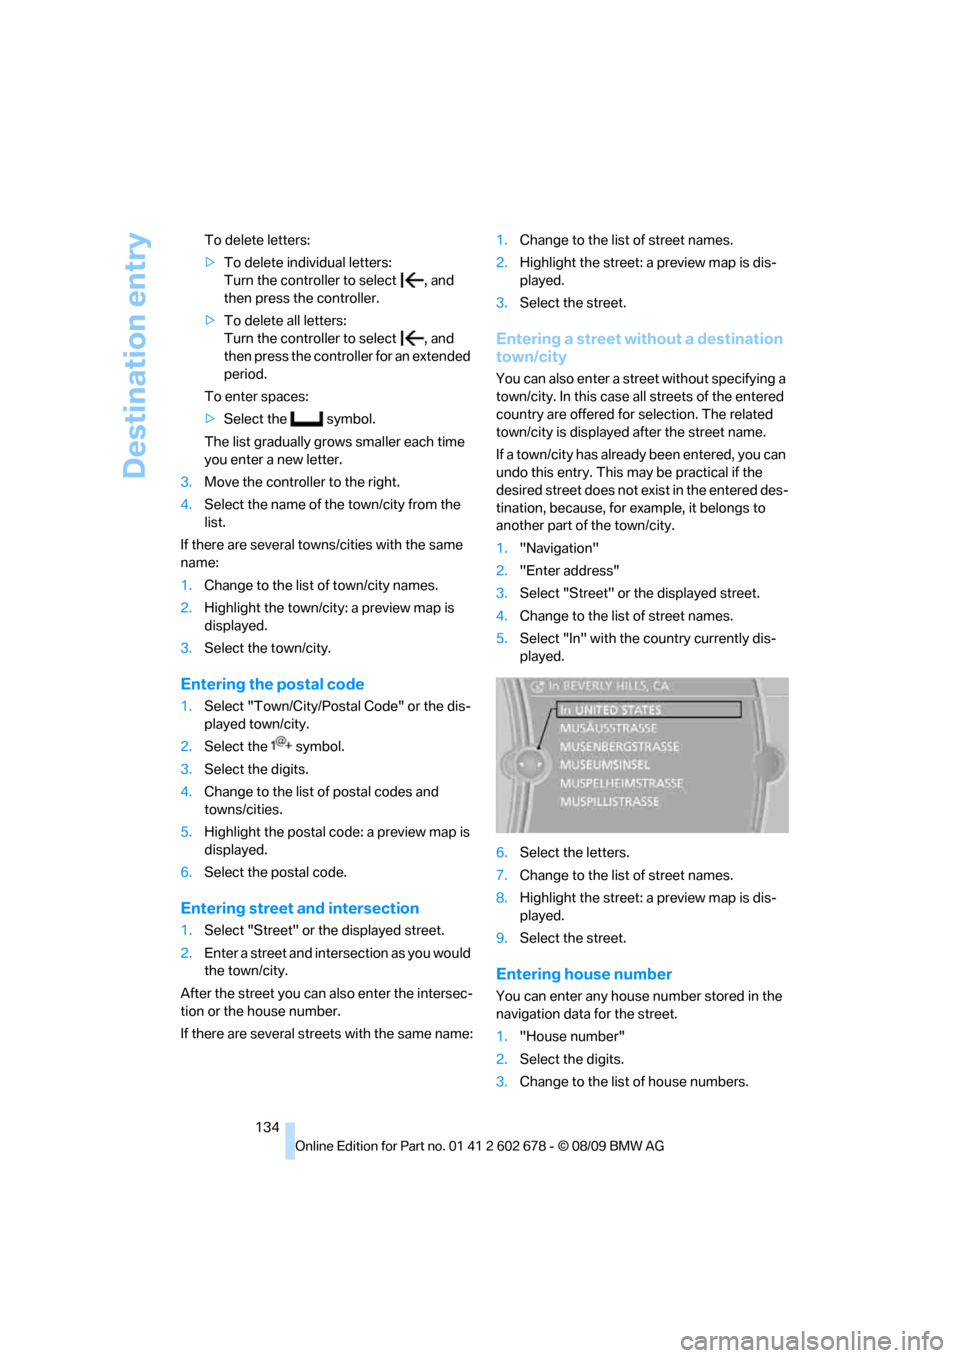
5.Select "In" with the country currently dis-
played.
6.Select the letters.
7.Change to the list of street names.
8.Highlight the street: a preview map is dis-
played.
9.Select the street.
Entering house number
You can enter any house number stored in the
navigation data for the street.
1."House number"
2.Select the digits.
3.Change to the list of house numbers.
Page 139 of 271
Navigation
Driving tips
137Reference
At a glance
Controls
Communications
Entertainment
Mobility
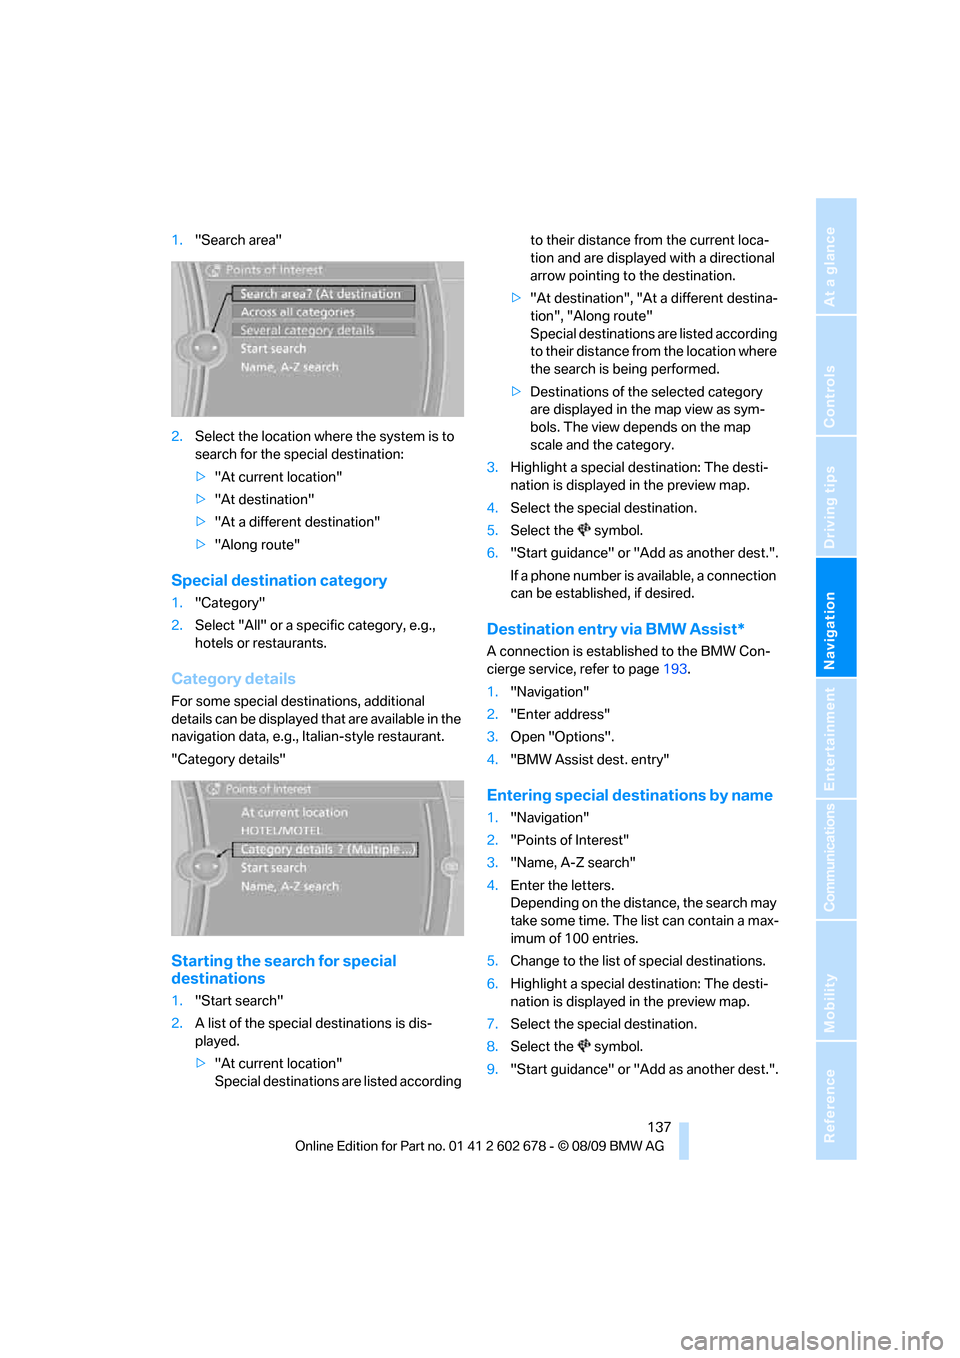
1."Search area"
2.Select the location where the system is to
search for the special destination:
>"At current location"
>"At destination"
>"At a different destination"
>"Along route"
Special destination category
1."Category"
2.Select "All" or a specific category, e.g.,
hotels or restaurants.
Category details
For some special destinations, additional
details can be displayed that are available in the
navigation data, e.g., Italian-style restaurant.
"Category details"
Starting the search for special
destinations
1."Start search"
2.A list of the special destinations is dis-
played.
>"At current location"
Special destinations are listed according to their distance from the current loca-
tion and are displayed with a directional
arrow pointing to the destination.
>"At destination", "At a different destina-
tion", "Along route"
Special destinations are listed according
to their distance from the location where
the search is being performed.
>Destinations of the selected category
are displayed in the map view as sym-
bols. The view depends on the map
scale and the category.
3.Highlight a special destination: The desti-
nation is displayed in the preview map.
4.Select the special destination.
5.Select the symbol.
6."Start guidance" or "Add as another dest.".
If a phone number is available, a connection
can be established, if desired.
Destination entry via BMW Assist*
A connection is established to the BMW Con-
cierge service, refer to page193.
1."Navigation"
2."Enter address"
3.Open "Options".
4."BMW Assist dest. entry"
Entering special destinations by name
1."Navigation"
2."Points of Interest"
3."Name, A-Z search"
4.Enter the letters.
Depending on the distance, the search may
take some time. The list can contain a max-
imum of 100 entries.
5.Change to the list of special destinations.
6.Highlight a special destination: The desti-
nation is displayed in the preview map.
7.Select the special destination.
8.Select the symbol.
9."Start guidance" or "Add as another dest.".
Page 141 of 271
Navigation
Driving tips
139Reference
At a glance
Controls
Communications
Entertainment
Mobility
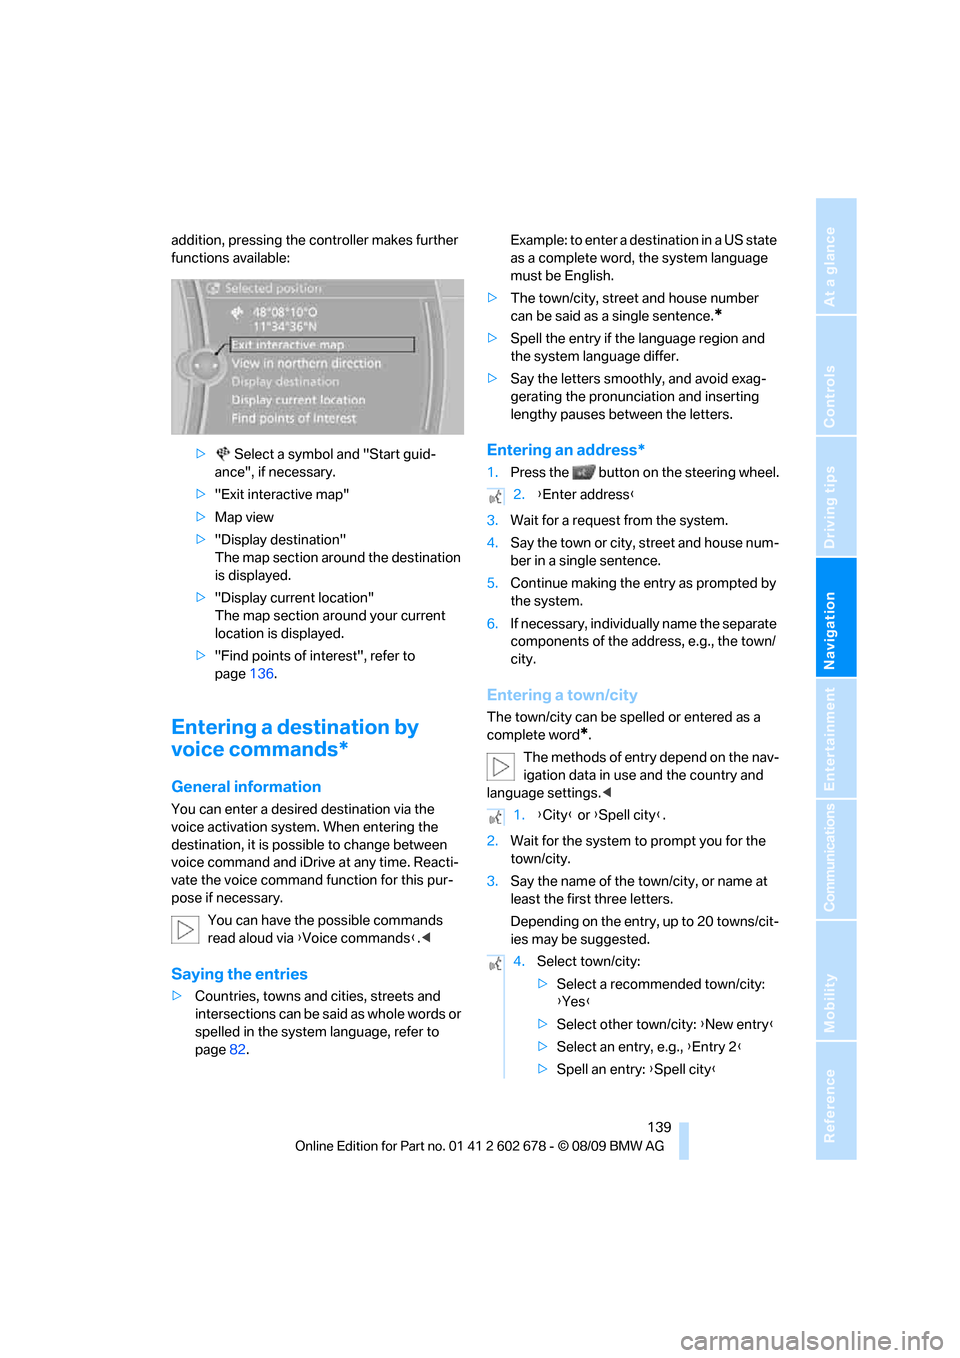
addition, pressing the controller makes further
functions available:
> Select a symbol and "Start guid-
ance", if necessary.
>"Exit interactive map"
>Map view
>"Display destination"
The map section around the destination
is displayed.
>"Display current location"
The map section around your current
location is displayed.
>"Find points of interest", refer to
page136.
Entering a destination by
voice commands*
General information
You can enter a desired destination via the
voice activation system. When entering the
destination, it is possible to change between
voice command and iDrive at any time. Reacti-
vate the voice command function for this pur-
pose if necessary.
You can have the possible commands
read aloud via {Voice commands}.<
Saying the entries
>Countries, towns and cities, streets and
intersections can be said as whole words or
spelled in the system language, refer to
page82.Example: to enter a destination in a US state
as a complete word, the system language
must be English.
>The town/city, street and house number
can be said as a single sentence.
*
>Spell the entry if the language region and
the system language differ.
>Say the letters smoothly, and avoid exag-
gerating the pronunciation and inserting
lengthy pauses between the letters.
Entering an address*
1.Press the button on the steering wheel.
3.Wait for a request from the system.
4.Say the town or city, street and house num-
ber in a single sentence.
5.Continue making the entry as prompted by
the system.
6.If necessary, individually name the separate
components of the address, e.g., the town/
city.
Entering a town/city
The town/city can be spelled or entered as a
complete word
*.
The methods of entry depend on the nav-
igation data in use and the country and
language settings.<
2.Wait for the system to prompt you for the
town/city.
3.Say the name of the town/city, or name at
least the first three letters.
Depending on the entry, up to 20 towns/cit-
ies may be suggested.
2.{Enter address}
1.{City} or {Spell city}.
4.Select town/city:
>Select a recommended town/city:
{Yes}
>Select other town/city: {New entry}
>Select an entry, e.g., {Entry 2}
>Spell an entry: {Spell city}
Page 144 of 271
Destination guidance
142
Destination guidance
Starting destination
guidance
1."Navigation"
2."Enter address"
3.Select the destination.
4."Accept destination"
5."Start guidance"
The route is displayed on the Control Display
after it is calculated.
Terminating destination
guidance
1."Navigation"
2."Map"
3.Select the symbol.
4."Stop guidance"
Continuing destination
guidance
If the destination was not reached during the
last trip, destination guidance can be resumed.
"Resume guidance"
Route criteria
General information
You can influence the calculated route by
choosing certain route criteria. You can change
the route criteria as often as you like while
entering the destination and whenever the des-
tination guidance is active.
The route is planned according to fixed rules.
The type of road is taken into account, e.g.,
whether it is a highway or a winding road. As a
result, the routes recommended by the naviga-
tion system may not always be the same ones that you would choose based on personal expe-
rience.
The settings are stored for the remote control
currently in use.
Changing route criteria
1."Navigation"
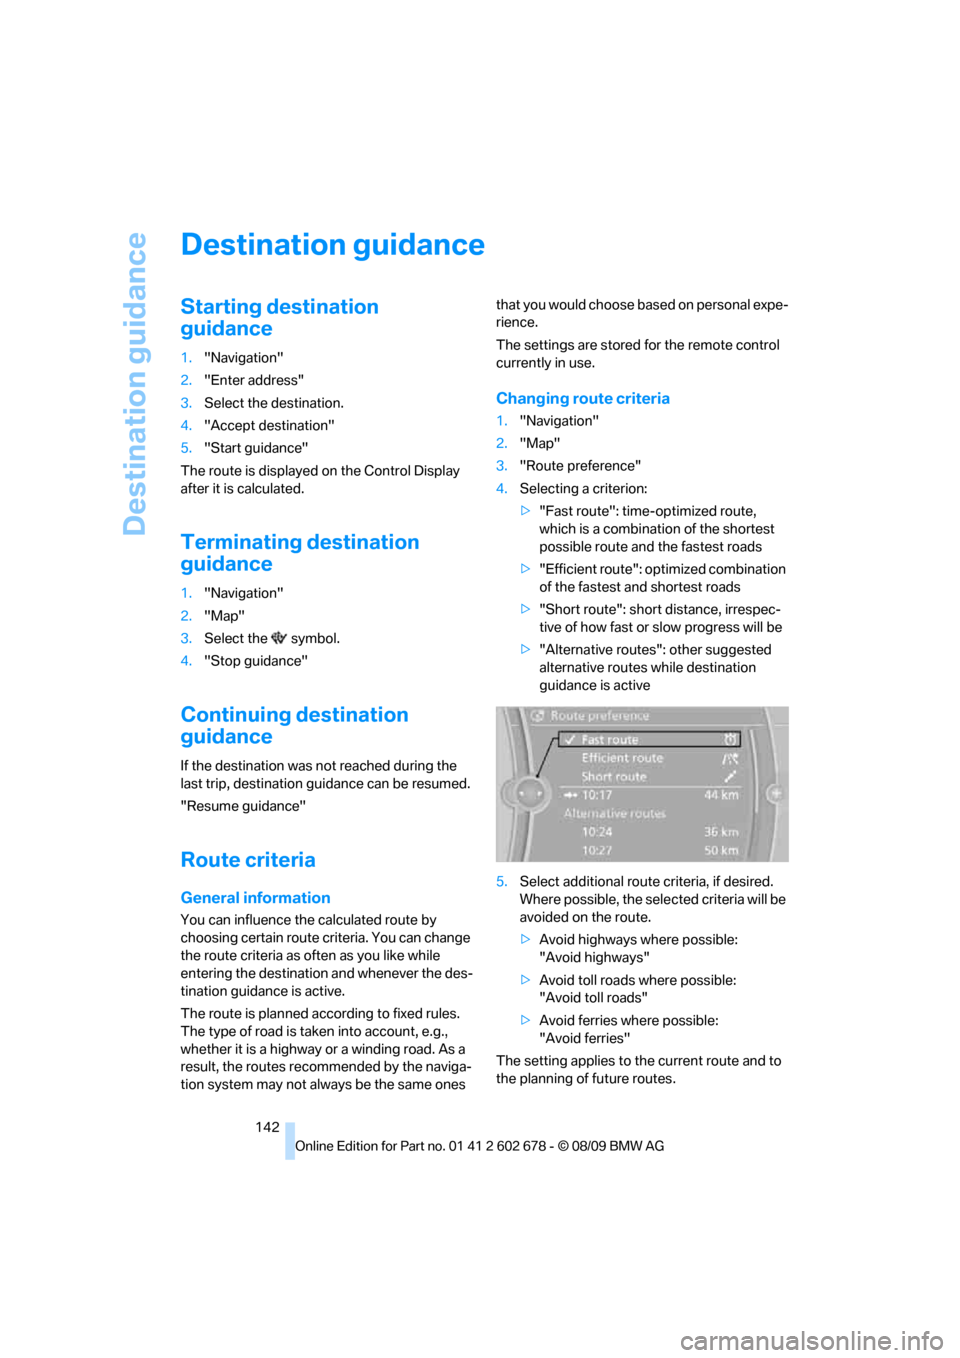
2."Map"
3."Route preference"
4.Selecting a criterion:
>"Fast route": time-optimized route,
which is a combination of the shortest
possible route and the fastest roads
>"Efficient route": optimized combination
of the fastest and shortest roads
>"Short route": short distance, irrespec-
tive of how fast or slow progress will be
>"Alternative routes": other suggested
alternative routes while destination
guidance is active
5.Select additional route criteria, if desired.
Where possible, the selected criteria will be
avoided on the route.
>Avoid highways where possible:
"Avoid highways"
>Avoid toll roads where possible:
"Avoid toll roads"
>Avoid ferries where possible:
"Avoid ferries"
The setting applies to the current route and to
the planning of future routes.
Page 154 of 271
On/off and tone
152
On/off and tone
The following audio and video sources share
the same control elements and adjustments:
>Radio
>CD/DVD player
>CD changer
*
>Video*
>External devices, e.g., MP3 player
Controls
The audio and video sources can be controlled
using the:
>Buttons in the area of the CD/DVD player
>iDrive
>Buttons on the steering wheel; refer to
page11
>Programmable memory buttons, refer to
page20
>Voice activation system
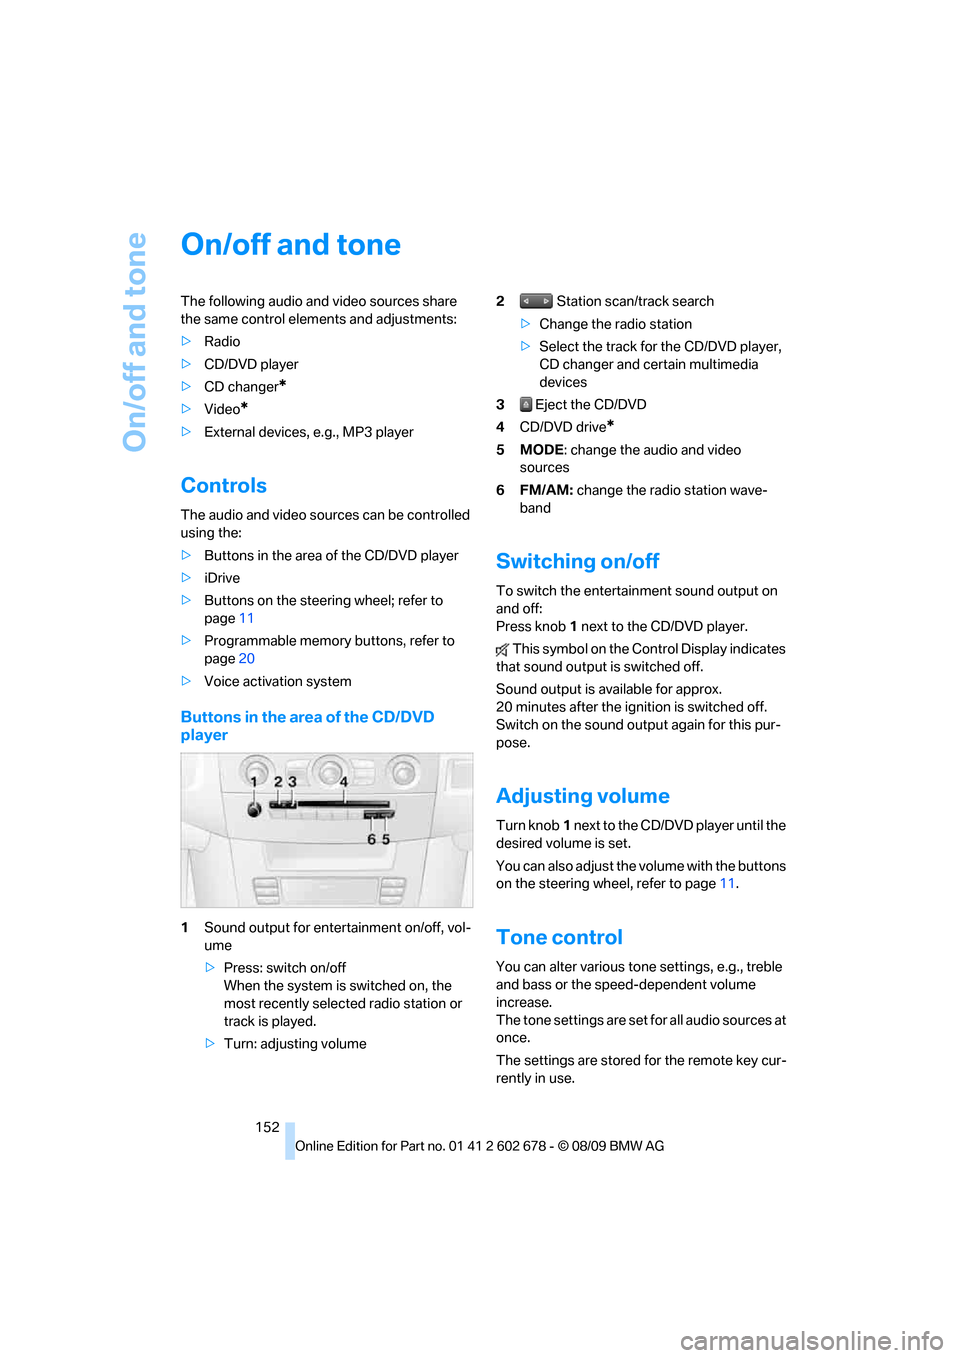
Buttons in the area of the CD/DVD
player
1Sound output for entertainment on/off, vol-
ume
>Press: switch on/off
When the system is switched on, the
most recently selected radio station or
track is played.
>Turn: adjusting volume2 Station scan/track search
>Change the radio station
>Select the track for the CD/DVD player,
CD changer and certain multimedia
devices
3 Eject the CD/DVD
4CD/DVD drive
*
5MODE: change the audio and video
sources
6FM/AM: change the radio station wave-
band
Switching on/off
To switch the entertainment sound output on
and off:
Press knob1 next to the CD/DVD player.
This symbol on the Control Display indicates
that sound output is switched off.
Sound output is available for approx.
20 minutes after the ignition is switched off.
Switch on the sound output again for this pur-
pose.
Adjusting volume
Turn knob1 next to the CD/DVD player until the
desired volume is set.
You can also adjust the volume with the buttons
on the steering wheel, refer to page11.
Tone control
You can alter various tone settings, e.g., treble
and bass or the speed-dependent volume
increase.
The tone settings are set for all audio sources at
once.
The settings are stored for the remote key cur-
rently in use.
Page 161 of 271
Navigation
Entertainment
Driving tips
159Reference
At a glance
Controls
Communications
Mobility
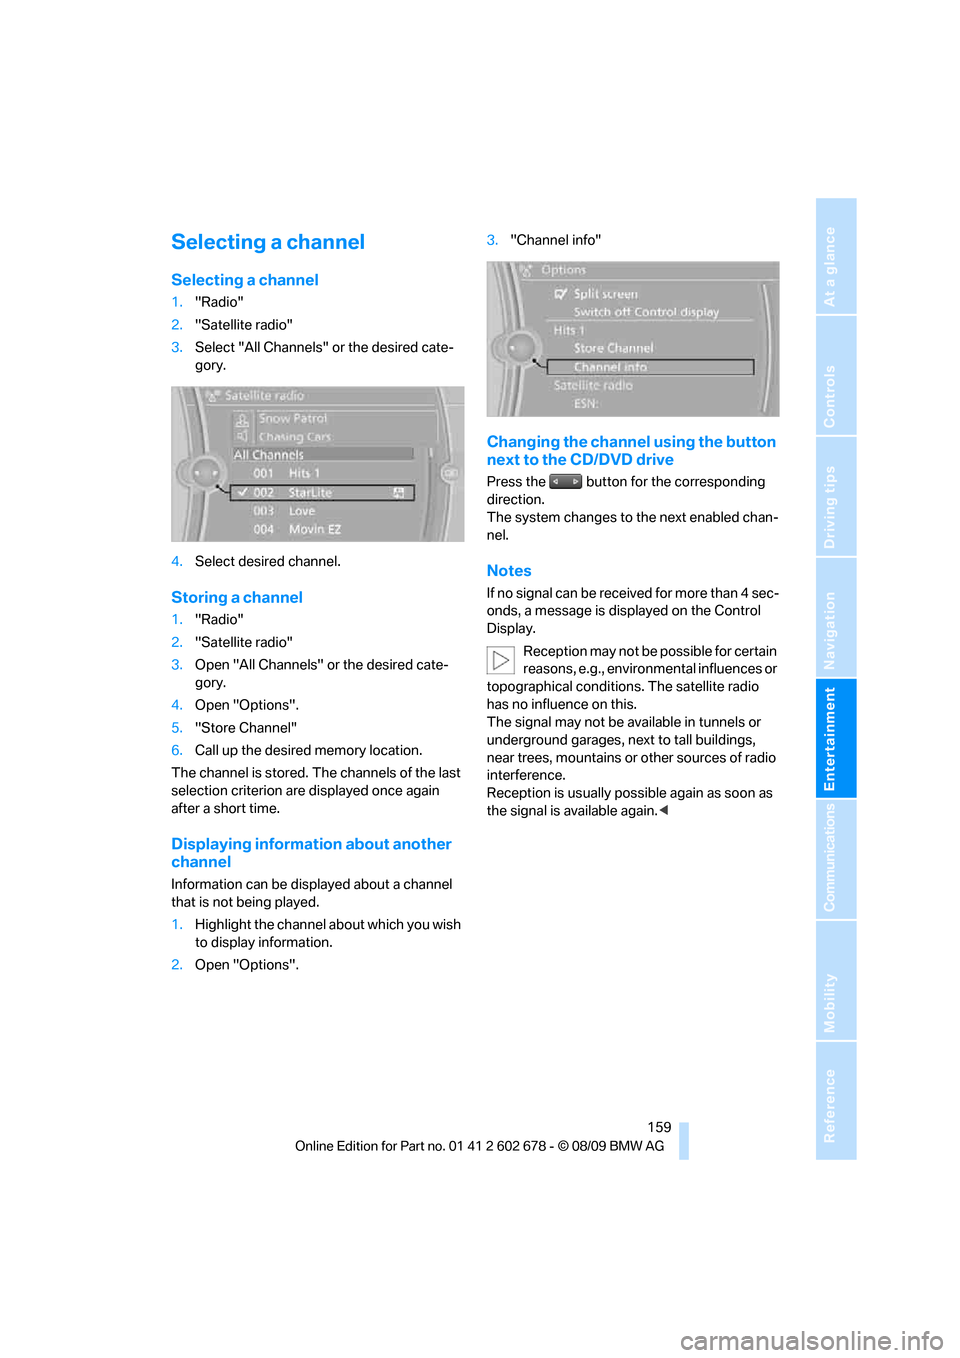
Selecting a channel
Selecting a channel
1."Radio"
2."Satellite radio"
3.Select "All Channels" or the desired cate-
gory.
4.Select desired channel.
Storing a channel
1."Radio"
2."Satellite radio"
3.Open "All Channels" or the desired cate-
gory.
4.Open "Options".
5."Store Channel"
6.Call up the desired memory location.
The channel is stored. The channels of the last
selection criterion are displayed once again
after a short time.
Displaying information about another
channel
Information can be displayed about a channel
that is not being played.
1.Highlight the channel about which you wish
to display information.
2.Open "Options".3."Channel info"
Changing the channel using the button
next to the CD/DVD drive
Press the button for the corresponding
direction.
The system changes to the next enabled chan-
nel.
Notes
If no signal can be received for more than 4 sec-
onds, a message is displayed on the Control
Display.
Reception may not be possible for certain
reasons, e.g., environmental influences or
topographical conditions. The satellite radio
has no influence on this.
The signal may not be available in tunnels or
underground garages, next to tall buildings,
near trees, mountains or other sources of radio
interference.
Reception is usually possible again as soon as
the signal is available again.<