2010 BMW 528I XDRIVE SEDAN page 51
[x] Cancel search: page 51Page 69 of 271
Controls
67Reference
At a glance
Driving tips
Communications
Navigation
Entertainment
Mobility
follow this action within the given scope and
can also accelerate from a complete stop if the
vehicle ahead of you drives off again shortly
thereafter. During braking, your vehicle brake
lamps will automatically illuminate to alert a fol-
lowing driver to take action. In addition, it may
be necessary for your vehicle to downshift the
automatic transmission to maintain the dis-
tance setting selected. As soon as the road in
front of you has no moving vehicles, the system
will accelerate to your desired speed. This set
speed is also maintained on downhill grades,
however the vehicle speed can drop below the
set speed when driving uphill if the engine out-
put is not sufficient.
Active cruise control cannot detect stop
signs, red lights, or any object that is
stopped or is blocking the road.
Active cruise control is not and must not be
used as a collision avoidance/warning system.
Since this active cruise control system is a new
technology and operates differently from con-
ventional cruise control systems which you may
be accustomed to, it is necessary that you read
all of the pages relating to this system before
use. Carefully read and observe the information
on the system limitations beginning on page71
to obtain a good command of the system and its
range of applications.<
Brake pedal feel
When the system brakes and you also depress
the brake pedal, a somewhat different braking
feel results.
Professional* navigation system
If a navigation DVD is in the drive, refer to
page132, within limits the system adjusts the
accelerating and braking behavior of the vehicle
to the road you are driving on.
To ensure that the system is informed of
the current course of the road, always use
the latest navigation DVD if possible.<
When the vehicle position is unknown, e. g.
when you leave the map area, this influence of
the navigation system is not available.
Applications
Please try the system first during sparse traffic
and clear road conditions so that you can get
used to the system. After you have experience
and understand the system, only then use it
during normal traffic.
As with conventional cruise control systems,
active cruise control in no way reduces or sub-
stitutes for the driver's own personal experi-
ence, responsibility, alertness and awareness in
adjusting speed, braking or otherwise control-
ling the vehicle. The driver should decide when
to use the system on the basis of road, traffic,
visibility, and weather conditions. Active cruise
control is intended for use on highway-type
roadways where traffic is moving relatively
smoothly as well as in slow-moving traffic. Do
not use the system in city driving; in complex
driving situations; heavy traffic such as during
rush hour; on curvy, winding roads, slippery
roads or roads with sharp curves such as high-
way off-ramps; during inclement weather such
as snow, strong rain or fog; or when entering
interchanges, service/parking areas or toll
booths. It is also important to regulate your
vehicle's speed and distance setting within
applicable legal limits. Always be ready to take
action or apply the brakes if necessary, espe-
cially when the system is actively following a
vehicle in front of you. Otherwise, driving condi-
tions can result which lead to a violation of the
law or elevated risk of an accident.
The minimum initial activation speed is 20 mph/
30 km/h, and the maximum speed is 110 mph/
180 km/h. However, you can also activate the
system while stopped, refer to While stopped,
page69.
Page 70 of 271
Driving
68
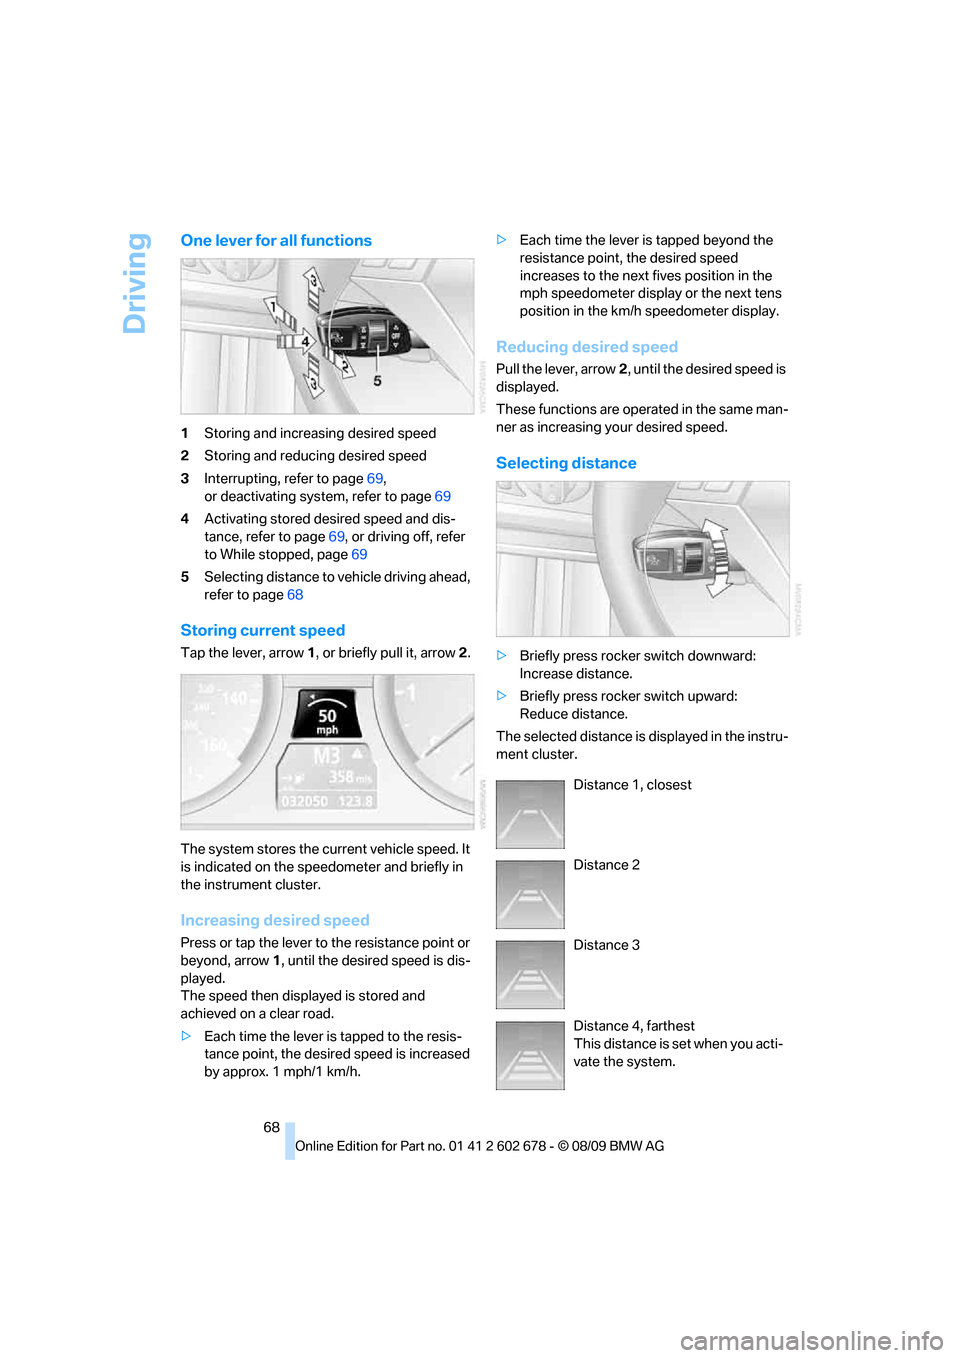
One lever for all functions
1Storing and increasing desired speed
2Storing and reducing desired speed
3Interrupting, refer to page69,
or deactivating system, refer to page69
4Activating stored desired speed and dis-
tance, refer to page69, or driving off, refer
to While stopped, page69
5Selecting distance to vehicle driving ahead,
refer to page68
Storing current speed
Tap the lever, arrow1, or briefly pull it, arrow2.
The system stores the current vehicle speed. It
is indicated on the speedometer and briefly in
the instrument cluster.
Increasing desired speed
Press or tap the lever to the resistance point or
beyond, arrow1, until the desired speed is dis-
played.
The speed then displayed is stored and
achieved on a clear road.
>Each time the lever is tapped to the resis-
tance point, the desired speed is increased
by approx. 1 mph/1 km/h.>Each time the lever is tapped beyond the
resistance point, the desired speed
increases to the next fives position in the
mph speedometer display or the next tens
position in the km/h speedometer display.
Reducing desired speed
Pull the lever, arrow2, until the desired speed is
displayed.
These functions are operated in the same man-
ner as increasing your desired speed.
Selecting distance
>Briefly press rocker switch downward:
Increase distance.
>Briefly press rocker switch upward:
Reduce distance.
The selected distance is displayed in the instru-
ment cluster.
Distance 1, closest
Distance 2
Distance 3
Distance 4, farthest
This distance is set when you acti-
vate the system.
Page 71 of 271

Controls
69Reference
At a glance
Driving tips
Communications
Navigation
Entertainment
Mobility
Use good judgment to select the appro-
priate following distance, given road con-
ditions, traffic, applicable laws and state driving
recommendations for safe following distance.
Otherwise, a violation of the law or risk of an
accident could result.<
Interrupting cruise control
Press the lever upward or downward, and with
the vehicle stopped also depress the brake
pedal. The marking in the speedometer
changes color and the distance indicator goes
out.
In addition, the system is automatically inter-
rupted:
>when you apply the vehicle brakes
>when you shift the transmission
>when DTC is activated or DSC is deacti-
vated
>when DSC comes on
>when you apply the parking brake
>when you release the safety belt and open
the driver's door with the vehicle stopped
>when the system does not recognize any
objects for an extended period of time, e. g.
on infrequently traveled roads without a
shoulder or guard rails, or if the radar sensor
is covered with dirt, refer to page70
If the system is interrupted, then it is nec-
essary for the driver to actively intervene
by braking and steering. Otherwise, there is a
risk of an accident.<
Resuming stored desired speed and
distance
While driving
Press button4.
The displays appear in the instrument cluster.
While stopped
Before leaving the vehicle with the engine
running, engage position P of the auto-
matic transmission and apply the parking brake.
Otherwise the vehicle can roll.<
If a detected vehicle in front of you brakes to a
complete stop and your vehicle has also been
braked to a complete stop by the system:
>If the vehicle in front of you drives off while
the marking1 for the desired speed in the
speedometer is green, your vehicle will
accelerate without you having to do any-
thing.
>If the vehicle in front of you drives off while
the marking1 is orange, you briefly depress
the accelerator pedal or press button4.
Rolling bars in the distance indicator3
mean that the vehicle in front of you has
driven off.
If you are stopped behind a vehicle with the
brake pedal depressed and the system is inter-
rupted or deactivated:
1.Press button4 to activate a stored desired
speed or select a desired speed with the
lever, arrow1 or arrow2.
2.Release the brake pedal.
3.If the vehicle in front of you drives off, briefly
depress the accelerator pedal or press
button4.
Deactivating system
>Press the lever upward or downward twice
while driving.
>When stopped, do the same with the brake
pedal depressed.
>Switch off the ignition.
The displays turn off, and the stored desired
speed and distance are deleted.
Page 76 of 271

Controls Overview
74
Controls Overview
Odometer, outside
temperature display, clock,
date
1Time, outside temperature and date
2Odometer and trip odometer
3Press button:
>with ignition switched on, trip odometer
is reset
>with ignition switched off, time, outside
temperature, and odometer are briefly
displayed.
From radio readiness the outside temperature
and the time are displayed.
Date retrieval:
Press CHECK button on turn signal lever, refer
to page81.
Time and date setting, refer to page78.
You can set the unit of measure 7 or 6 on the
Control Display, refer to Units of measure on
page76.
Outside temperature warning
If the display drops to +377/+36, a signal
sounds and a warning lamp lights up. A mes-
sage appears on the Control Display. There is
an increased danger of ice.
Even at temperatures above +377/
+36 ice can form. Therefore, drive care-
fully, e.g., on bridges and sections of road in the
shade, otherwise there is an increased accident
risk.<
Tachometer
Avoid engine speeds in the white-striped
advance warning field, arrow1, if possible.
Never force the engine speed up into the red
warning field, see arrow2. Never operate the
engine with the needle in the red overspeed
z o n e o f t h e g a u g e . A t h i g h r e v s i n t h i s r a n g e , t h e
flow of fuel is interrupted to protect the engine.
Coolant temperature
Should the coolant, and with it the engine
become too hot, a warning lamp lights up. In
addition, a message appears on the Control
Display.
Checking coolant level, refer to page214.
Page 77 of 271
Controls
75Reference
At a glance
Driving tips
Communications
Navigation
Entertainment
Mobility
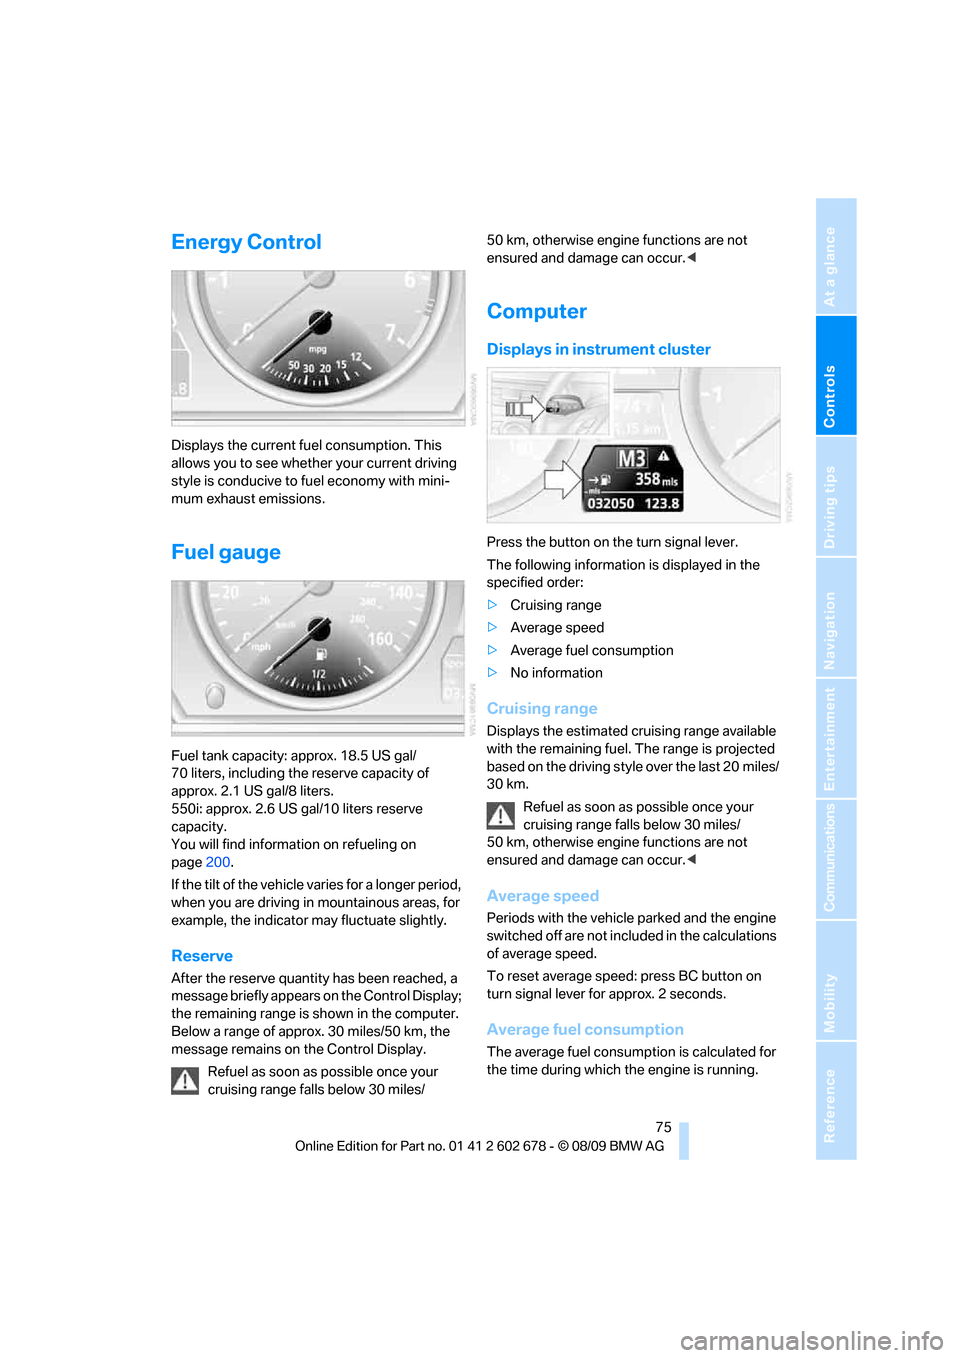
Energy Control
Displays the current fuel consumption. This
allows you to see whether your current driving
style is conducive to fuel economy with mini-
mum exhaust emissions.
Fuel gauge
Fuel tank capacity: approx. 18.5 US gal/
70 liters, including the reserve capacity of
approx. 2.1 US gal/8 liters.
550i: approx. 2.6 US gal/10 liters reserve
capacity.
You will find information on refueling on
page200.
If the tilt of the vehicle varies for a longer period,
when you are driving in mountainous areas, for
example, the indicator may fluctuate slightly.
Reserve
After the reserve quantity has been reached, a
message briefly appears on the Control Display;
the remaining range is shown in the computer.
Below a range of approx. 30 miles/50 km, the
message remains on the Control Display.
Refuel as soon as possible once your
cruising range falls below 30 miles/50 km, otherwise engine functions are not
ensured and damage can occur.<
Computer
Displays in instrument cluster
Press the button on the turn signal lever.
The following information is displayed in the
specified order:
>Cruising range
>Average speed
>Average fuel consumption
>No information
Cruising range
Displays the estimated cruising range available
with the remaining fuel. The range is projected
based on the driving style over the last 20 miles/
30 km.
Refuel as soon as possible once your
cruising range falls below 30 miles/
50 km, otherwise engine functions are not
ensured and damage can occur.<
Average speed
Periods with the vehicle parked and the engine
switched off are not included in the calculations
of average speed.
To reset average speed: press BC button on
turn signal lever for approx. 2 seconds.
Average fuel consumption
The average fuel consumption is calculated for
the time during which the engine is running.
Page 78 of 271
Controls Overview
76 To reset average fuel consumption: press BC
button on turn signal lever for approx. 2 sec-
onds.
For different routes
You can display the average speed and average
consumption for two different routes on the
Control Display, refer to the following and to
Trip computer
*.
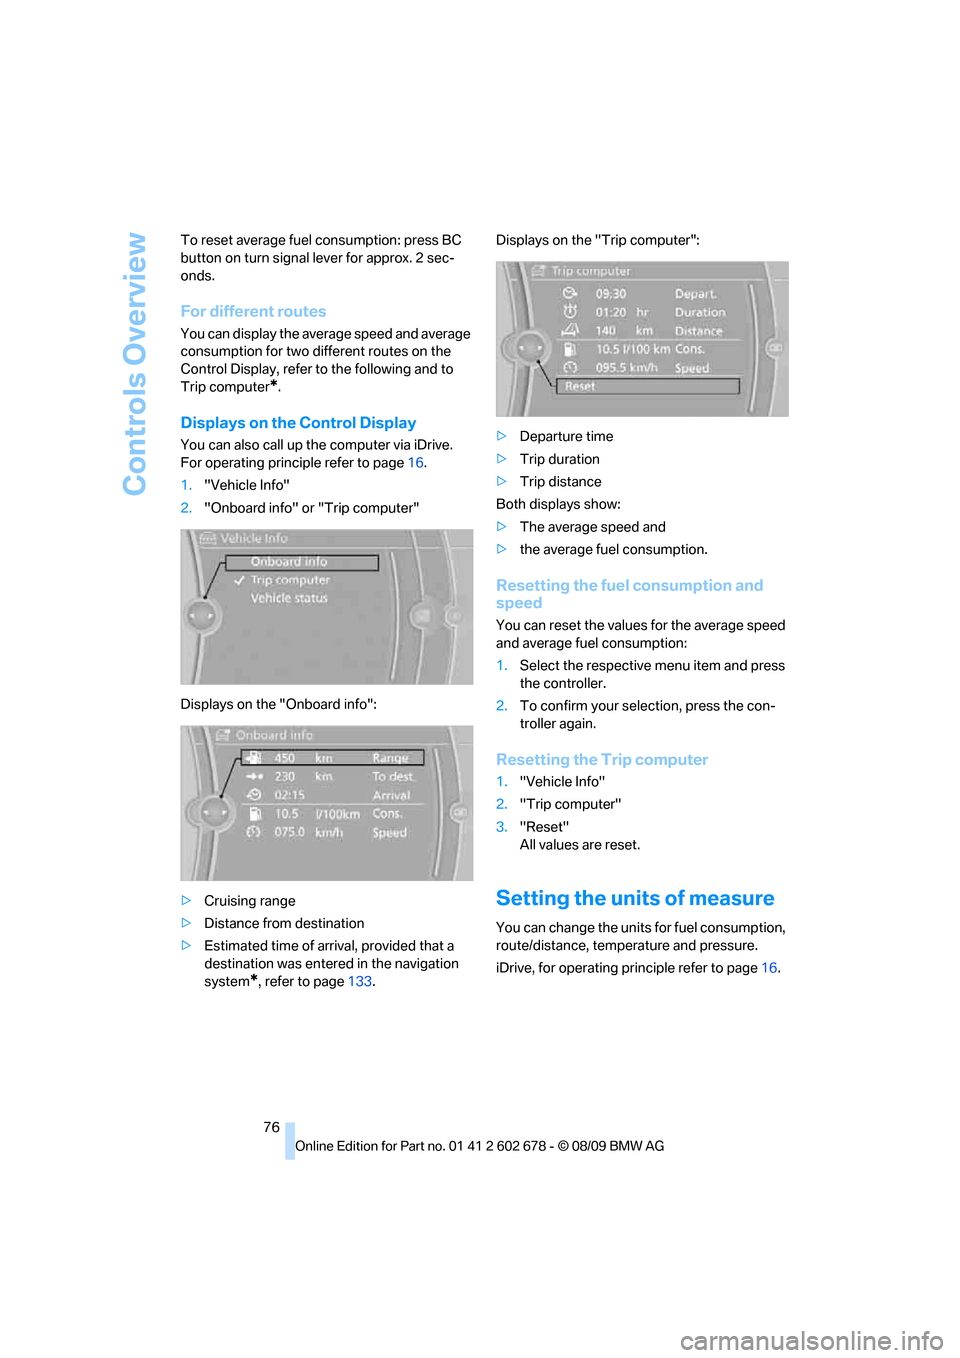
Displays on the Control Display
You can also call up the computer via iDrive.
For operating principle refer to page16.
1."Vehicle Info"
2."Onboard info" or "Trip computer"
Displays on the "Onboard info":
>Cruising range
>Distance from destination
>Estimated time of arrival, provided that a
destination was entered in the navigation
system
*, refer to page133.Displays on the "Trip computer":
>Departure time
>Trip duration
>Trip distance
Both displays show:
>The average speed and
>the average fuel consumption.
Resetting the fuel consumption and
speed
You can reset the values for the average speed
and average fuel consumption:
1.Select the respective menu item and press
the controller.
2.To confirm your selection, press the con-
troller again.
Resetting the Trip computer
1."Vehicle Info"
2."Trip computer"
3."Reset"
All values are reset.
Setting the units of measure
You can change the units for fuel consumption,
route/distance, temperature and pressure.
iDrive, for operating principle refer to page16.
Page 79 of 271
Controls
77Reference
At a glance
Driving tips
Communications
Navigation
Entertainment
Mobility
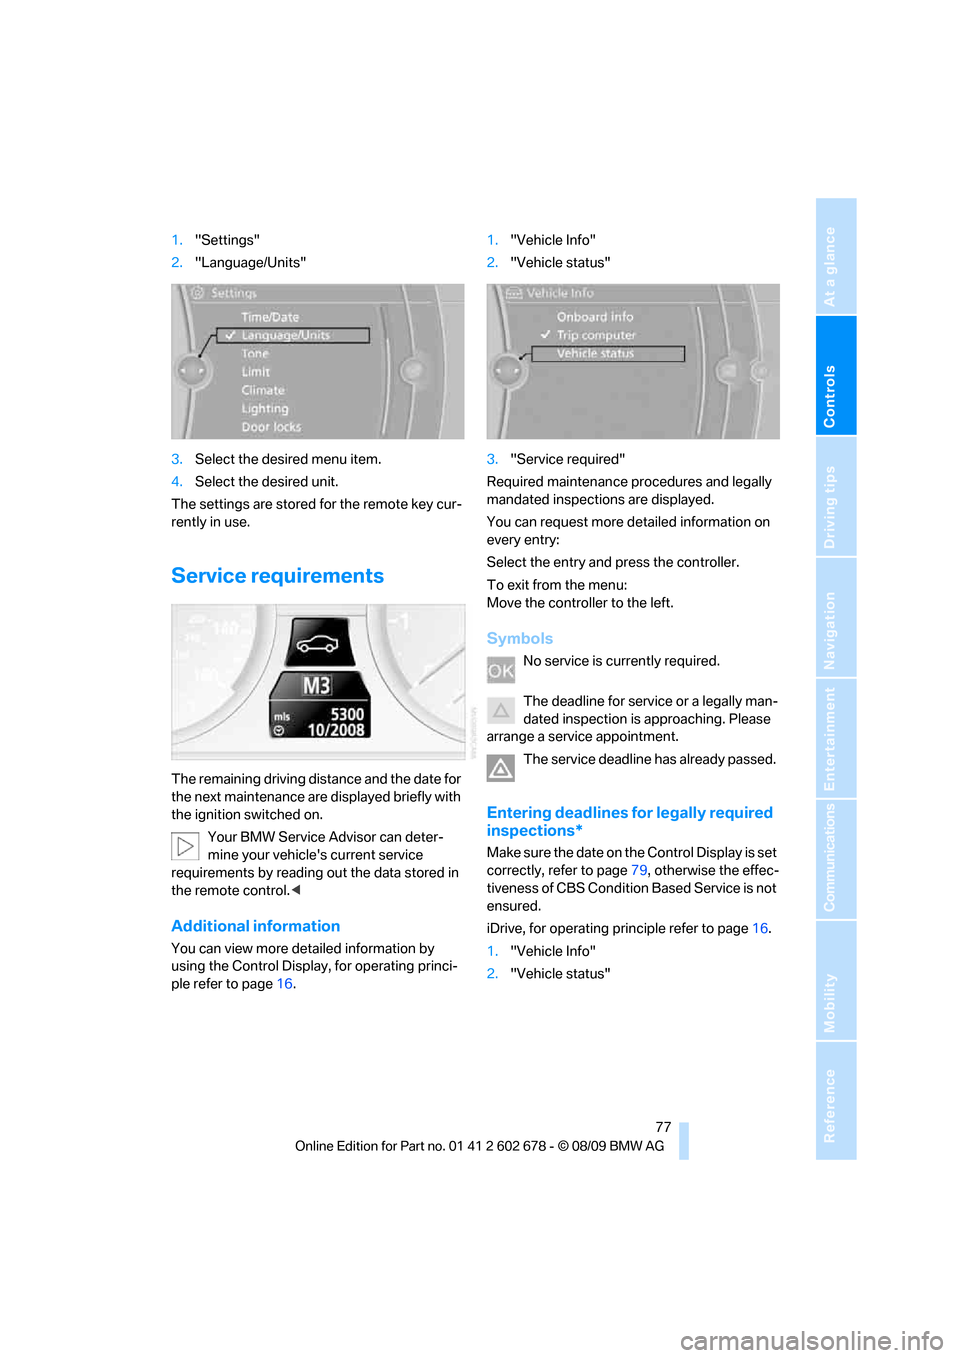
1."Settings"
2."Language/Units"
3.Select the desired menu item.
4.Select the desired unit.
The settings are stored for the remote key cur-
rently in use.
Service requirements
The remaining driving distance and the date for
the next maintenance are displayed briefly with
the ignition switched on.
Your BMW Service Advisor can deter-
mine your vehicle's current service
requirements by reading out the data stored in
the remote control.<
Additional information
You can view more detailed information by
using the Control Display, for operating princi-
ple refer to page16.1."Vehicle Info"
2."Vehicle status"
3."Service required"
Required maintenance procedures and legally
mandated inspections are displayed.
You can request more detailed information on
every entry:
Select the entry and press the controller.
To exit from the menu:
Move the controller to the left.
Symbols
No service is currently required.
The deadline for service or a legally man-
dated inspection is approaching. Please
arrange a service appointment.
The service deadline has already passed.
Entering deadlines for legally required
inspections*
Make sure the date on the Control Display is set
correctly, refer to page79, otherwise the effec-
tiveness of CBS Condition Based Service is not
ensured.
iDrive, for operating principle refer to page16.
1."Vehicle Info"
2."Vehicle status"
Page 80 of 271
Controls Overview
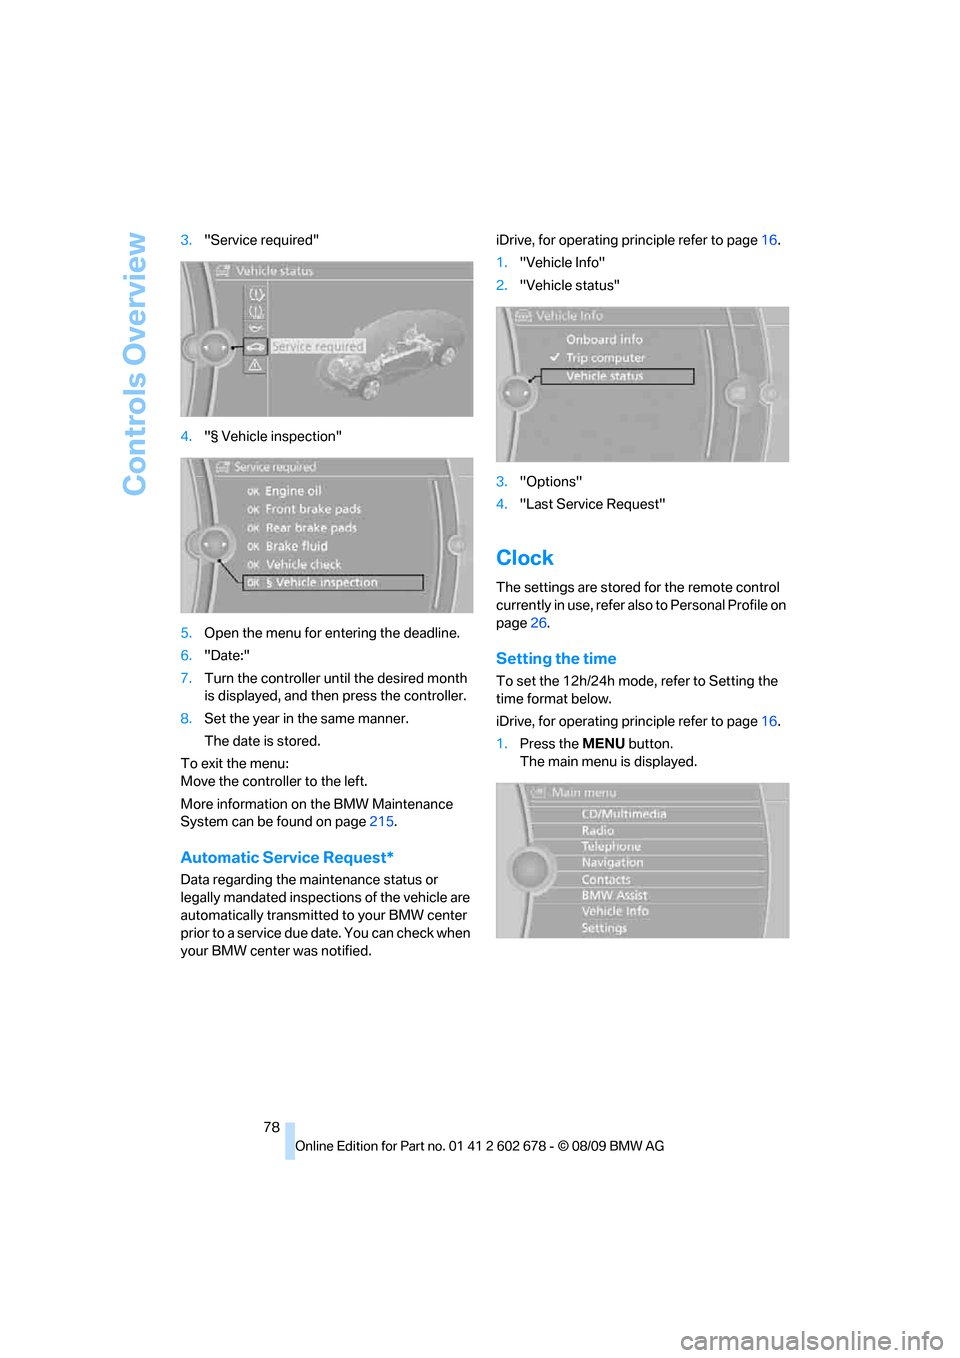
78 3."Service required"
4."§ Vehicle inspection"
5.Open the menu for entering the deadline.
6."Date:"
7.Turn the controller until the desired month
is displayed, and then press the controller.
8.Set the year in the same manner.
The date is stored.
To exit the menu:
Move the controller to the left.
More information on the BMW Maintenance
System can be found on page215.
Automatic Service Request*
Data regarding the maintenance status or
legally mandated inspections of the vehicle are
automatically transmitted to your BMW center
prior to a service due date. You can check when
your BMW center was notified.iDrive, for operating principle refer to page16.
1."Vehicle Info"
2."Vehicle status"
3."Options"
4."Last Service Request"
Clock
The settings are stored for the remote control
currently in use, refer also to Personal Profile on
page26.
Setting the time
To set the 12h/24h mode, refer to Setting the
time format below.
iDrive, for operating principle refer to page16.
1.Press the MENU button.
The main menu is displayed.