2010 BMW 528I XDRIVE SEDAN page 51
[x] Cancel search: page 51Page 112 of 271
Practical interior accessories
110
Practical interior accessories
Integrated universal remote
control*
The concept
The integrated universal remote control can
replace as many as three hand-held transmit-
ters for various remote-controlled accessories,
such as garage and gate or lighting systems.
The integrated universal remote control regis-
ters and stores signals from the original hand-
held transmitters.
The signal of an original hand-held transmitter
can be programmed on one of the three mem-
ory buttons1. After this, the programmed
memory button1 will operate the system in
question. The LED2 flashes to confirm trans-
mission of the signal.
Should you sell your vehicle one day, be sure to
delete the stored programs beforehand for your
safety, refer to page111.
To prevent possible damage or injury,
before programming or using the inte-
grated universal remote control, always inspect
the immediate area to make certain that no peo-
ple, animals or objects are within the travel
range of the device. Also, comply with the
safety precautions of the original hand-held
transmitter.<
Checking compatibility
If you see this symbol on the packaging
or in the manual supplied with the orig-
inal hand-held transmitter, it is safe to
assume that it is compatible with the integrated
universal remote control.
If you have additional questions, please
contact your BMW center or call:
1-800-355-3515.
Information is also provided on the Internet at:
www.bmwusa.com or
www.homelink.com.
HomeLink is a registered trademark of Johnson
Controls, Inc.<
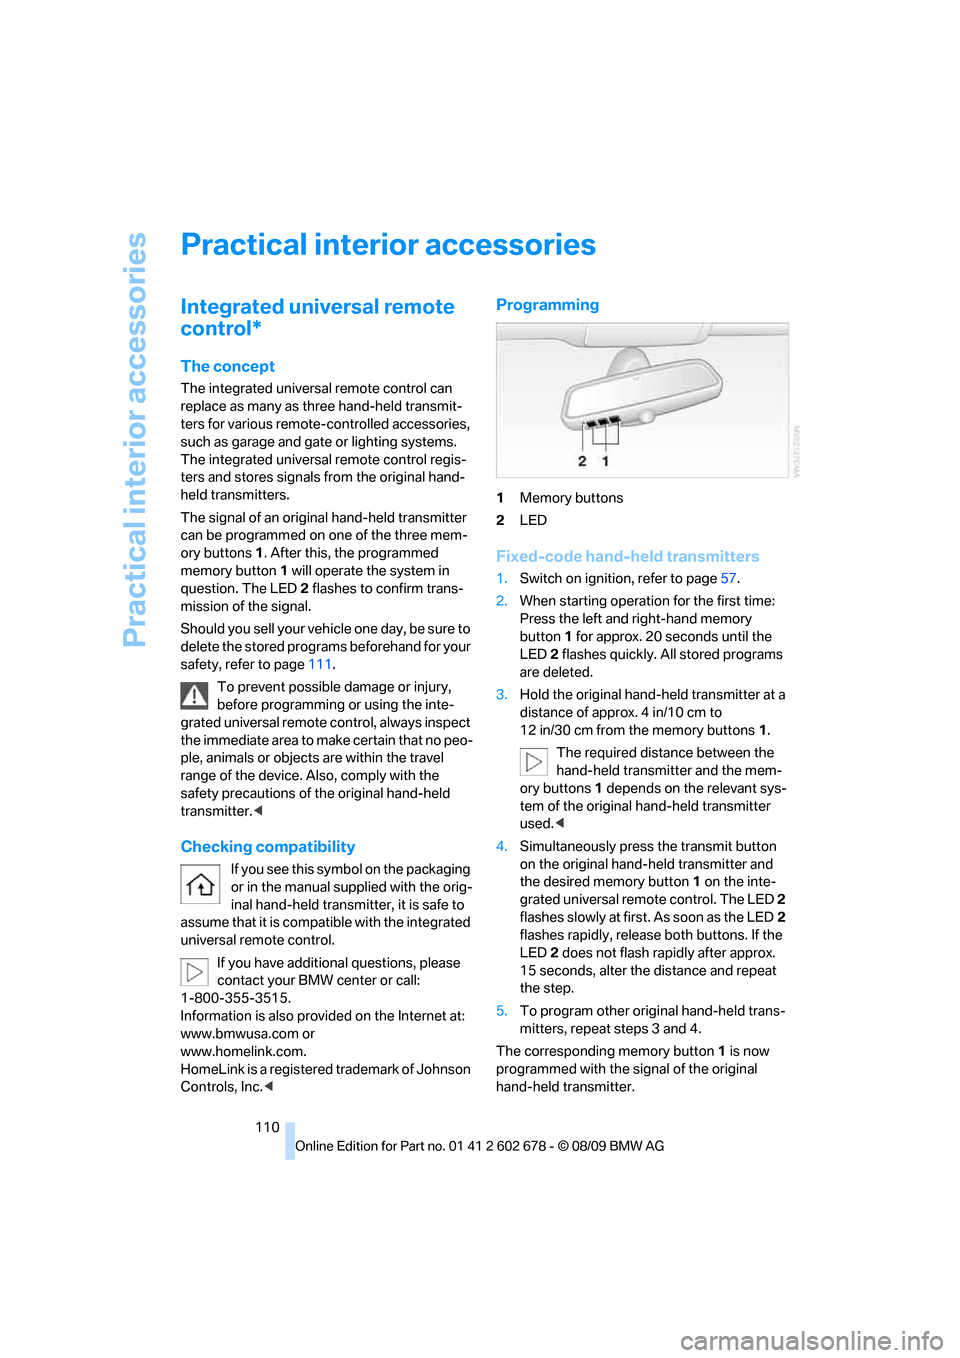
Programming
1Memory buttons
2LED
Fixed-code hand-held transmitters
1.Switch on ignition, refer to page57.
2.When starting operation for the first time:
Press the left and right-hand memory
button1 for approx. 20 seconds until the
LED2 flashes quickly. All stored programs
are deleted.
3.Hold the original hand-held transmitter at a
distance of approx. 4 in/10 cm to
12 in/30 cm from the memory buttons1.
The required distance between the
hand-held transmitter and the mem-
ory buttons1 depends on the relevant sys-
tem of the original hand-held transmitter
used.<
4.Simultaneously press the transmit button
on the original hand-held transmitter and
the desired memory button 1 on the inte-
grated universal remote control. The LED 2
flashes slowly at first. As soon as the LED2
flashes rapidly, release both buttons. If the
LED2 does not flash rapidly after approx.
15 seconds, alter the distance and repeat
the step.
5.To program other original hand-held trans-
mitters, repeat steps 3 and 4.
The corresponding memory button 1 is now
programmed with the signal of the original
hand-held transmitter.
Page 114 of 271
Practical interior accessories
112
Sun blinds for rear side windows
Pull the loop of the roller sun blind and hook
onto bracket.
Do not open the window with the roller
sun blind deployed. Otherwise, there is a
risk of damage and injury at higher speeds.<
Glove compartment
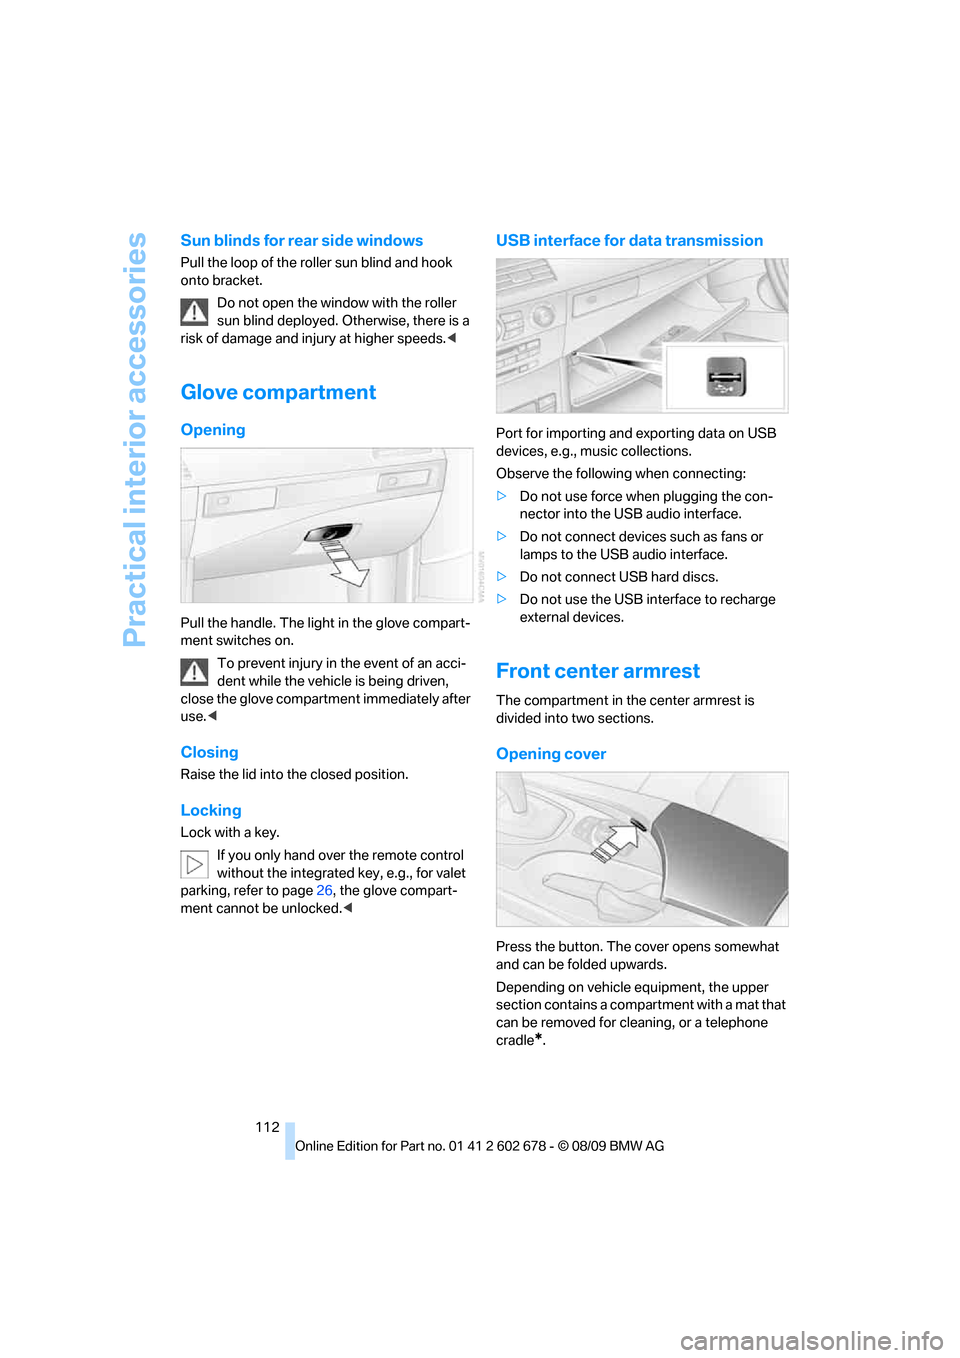
Opening
Pull the handle. The light in the glove compart-
ment switches on.
To prevent injury in the event of an acci-
dent while the vehicle is being driven,
close the glove compartment immediately after
use.<
Closing
Raise the lid into the closed position.
Locking
Lock with a key.
If you only hand over the remote control
without the integrated key, e.g., for valet
parking, refer to page26, the glove compart-
ment cannot be unlocked.<
USB interface for data transmission
Port for importing and exporting data on USB
devices, e.g., music collections.
Observe the following when connecting:
>Do not use force when plugging the con-
nector into the USB audio interface.
>Do not connect devices such as fans or
lamps to the USB audio interface.
>Do not connect USB hard discs.
>Do not use the USB interface to recharge
external devices.
Front center armrest
The compartment in the center armrest is
divided into two sections.
Opening cover
Press the button. The cover opens somewhat
and can be folded upwards.
Depending on vehicle equipment, the upper
section contains a compartment with a mat that
can be removed for cleaning, or a telephone
cradle
*.
Page 115 of 271
Controls
113Reference
At a glance
Driving tips
Communications
Navigation
Entertainment
Mobility
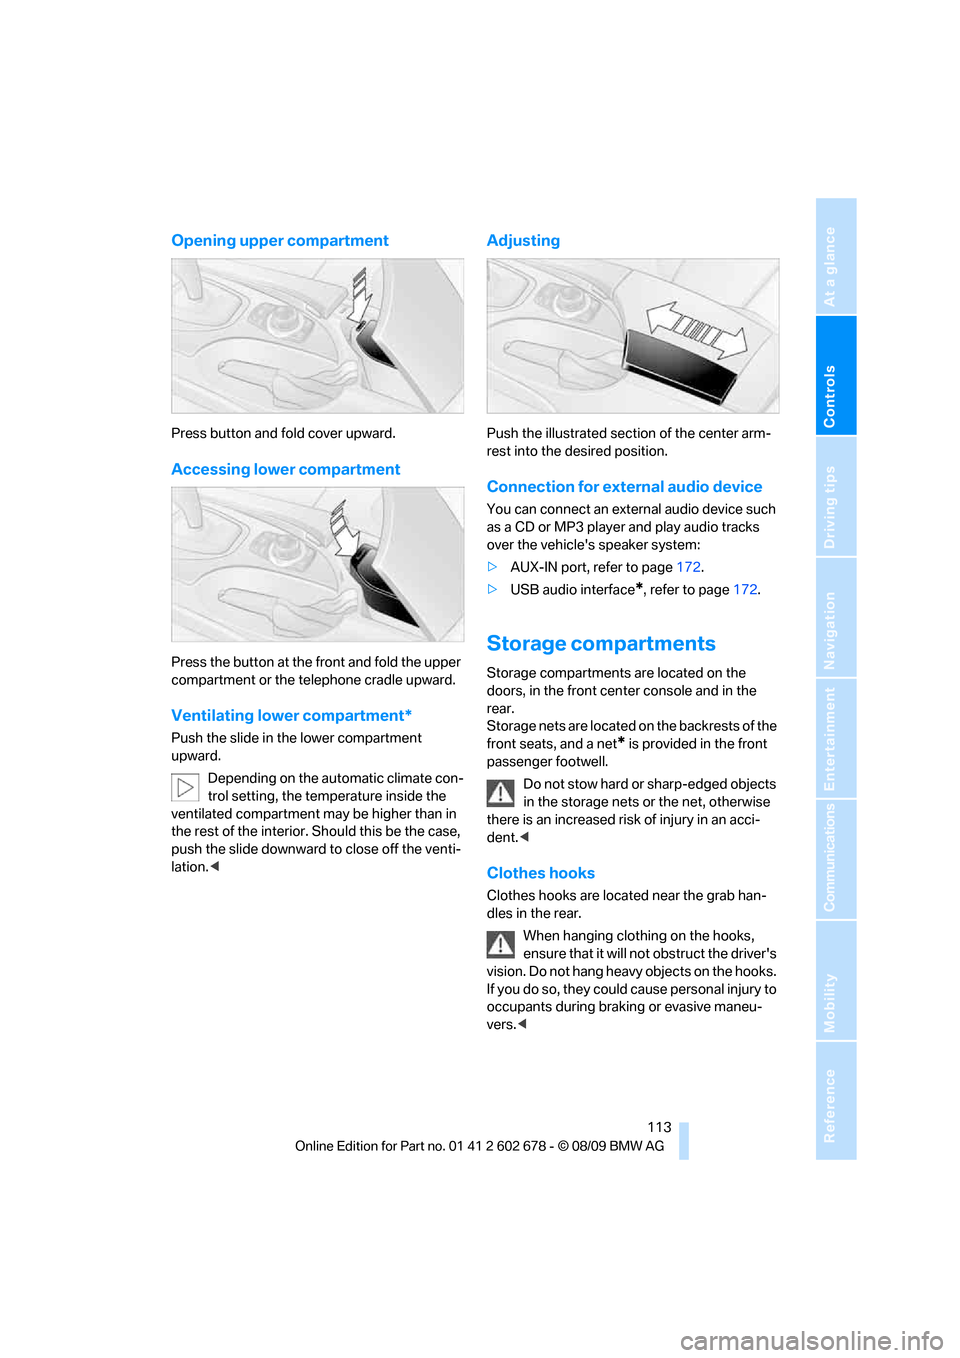
Opening upper compartment
Press button and fold cover upward.
Accessing lower compartment
Press the button at the front and fold the upper
compartment or the telephone cradle upward.
Ventilating lower compartment*
Push the slide in the lower compartment
upward.
Depending on the automatic climate con-
trol setting, the temperature inside the
ventilated compartment may be higher than in
the rest of the interior. Should this be the case,
push the slide downward to close off the venti-
lation.<
Adjusting
Push the illustrated section of the center arm-
rest into the desired position.
Connection for external audio device
You can connect an external audio device such
as a CD or MP3 player and play audio tracks
over the vehicle's speaker system:
>AUX-IN port, refer to page172.
>USB audio interface
*, refer to page172.
Storage compartments
Storage compartments are located on the
doors, in the front center console and in the
rear.
Storage nets are located on the backrests of the
front seats, and a net
* is provided in the front
passenger footwell.
Do not stow hard or sharp-edged objects
in the storage nets or the net, otherwise
there is an increased risk of injury in an acci-
dent.<
Clothes hooks
Clothes hooks are located near the grab han-
dles in the rear.
When hanging clothing on the hooks,
ensure that it will not obstruct the driver's
vision. Do not hang heavy objects on the hooks.
If you do so, they could cause personal injury to
occupants during braking or evasive maneu-
vers.<
Page 118 of 271
Practical interior accessories
116
In rear center console
Depending on the equipment, the sockets in
the rear are covered with caps or equipped with
a lighter. Refer to Cigarette lighter, front,
page114.
Access to socket:
Remove respective cap or lighter.
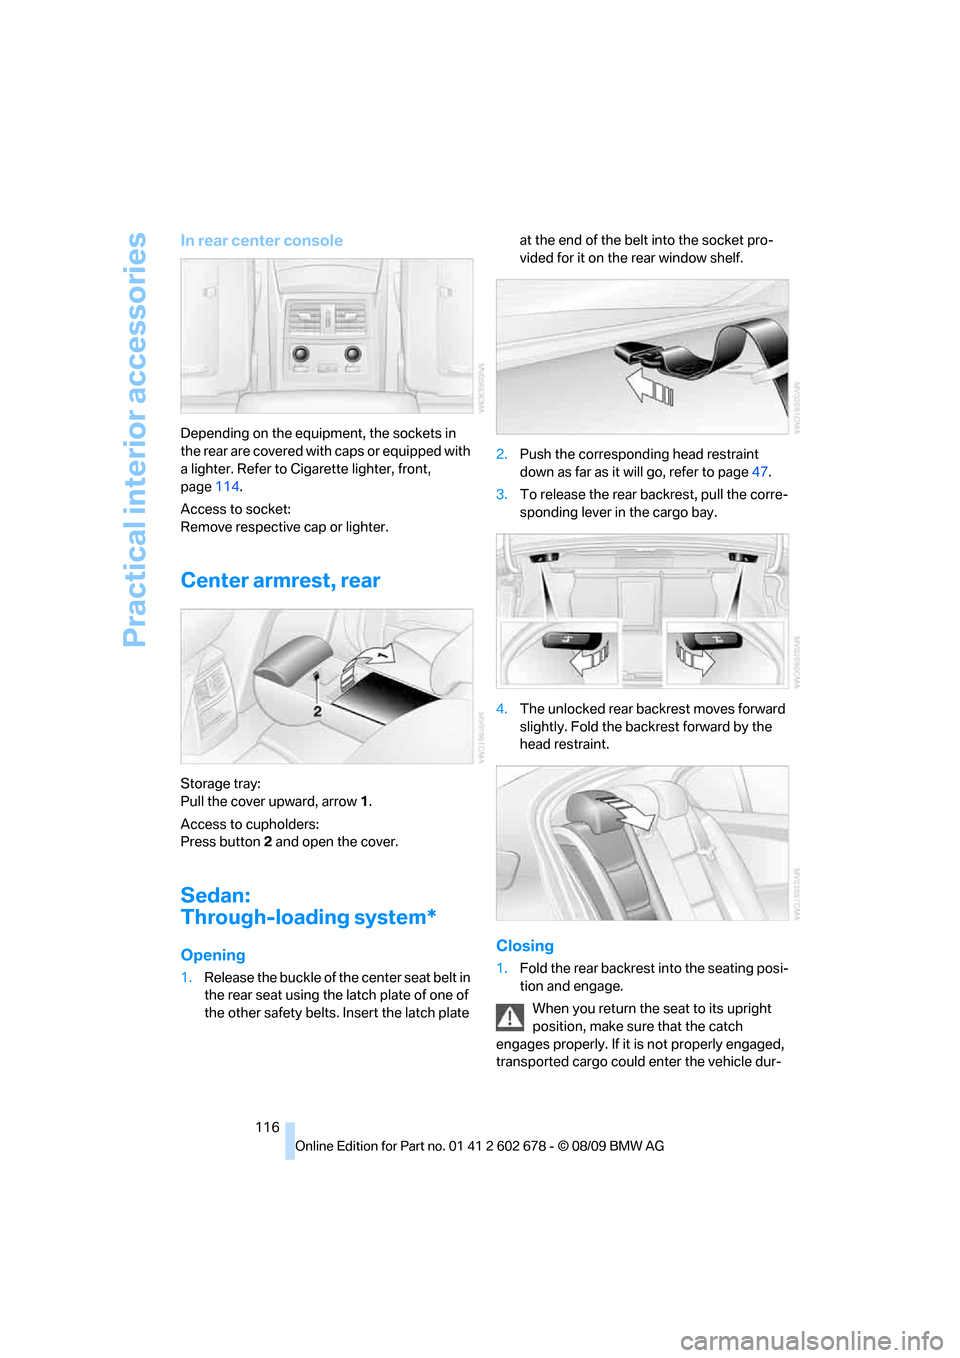
Center armrest, rear
Storage tray:
Pull the cover upward, arrow1.
Access to cupholders:
Press button2 and open the cover.
Sedan:
Through-loading system*
Opening
1.Release the buckle of the center seat belt in
the rear seat using the latch plate of one of
the other safety belts. Insert the latch plate at the end of the belt into the socket pro-
vided for it on the rear window shelf.
2.Push the corresponding head restraint
down as far as it will go, refer to page47.
3.To release the rear backrest, pull the corre-
sponding lever in the cargo bay.
4.The unlocked rear backrest moves forward
slightly. Fold the backrest forward by the
head restraint.
Closing
1.Fold the rear backrest into the seating posi-
tion and engage.
When you return the seat to its upright
position, make sure that the catch
engages properly. If it is not properly engaged,
transported cargo could enter the vehicle dur-
Page 119 of 271
Controls
117Reference
At a glance
Driving tips
Communications
Navigation
Entertainment
Mobility
ing braking or evasive maneuvers and endanger
the vehicle occupants.<
2.Release the latch plate from the bracket on
the rear window shelf and insert it into the
buckle of the center safety belt. Make sure
the latch plate audibly engages.
The lashing eyes in the cargo bay provide you
with a way to attach cargo-bay nets
* or luggage
straps for securing suitcases and luggage, refer
to page128.
Sports Wagon: cargo bay
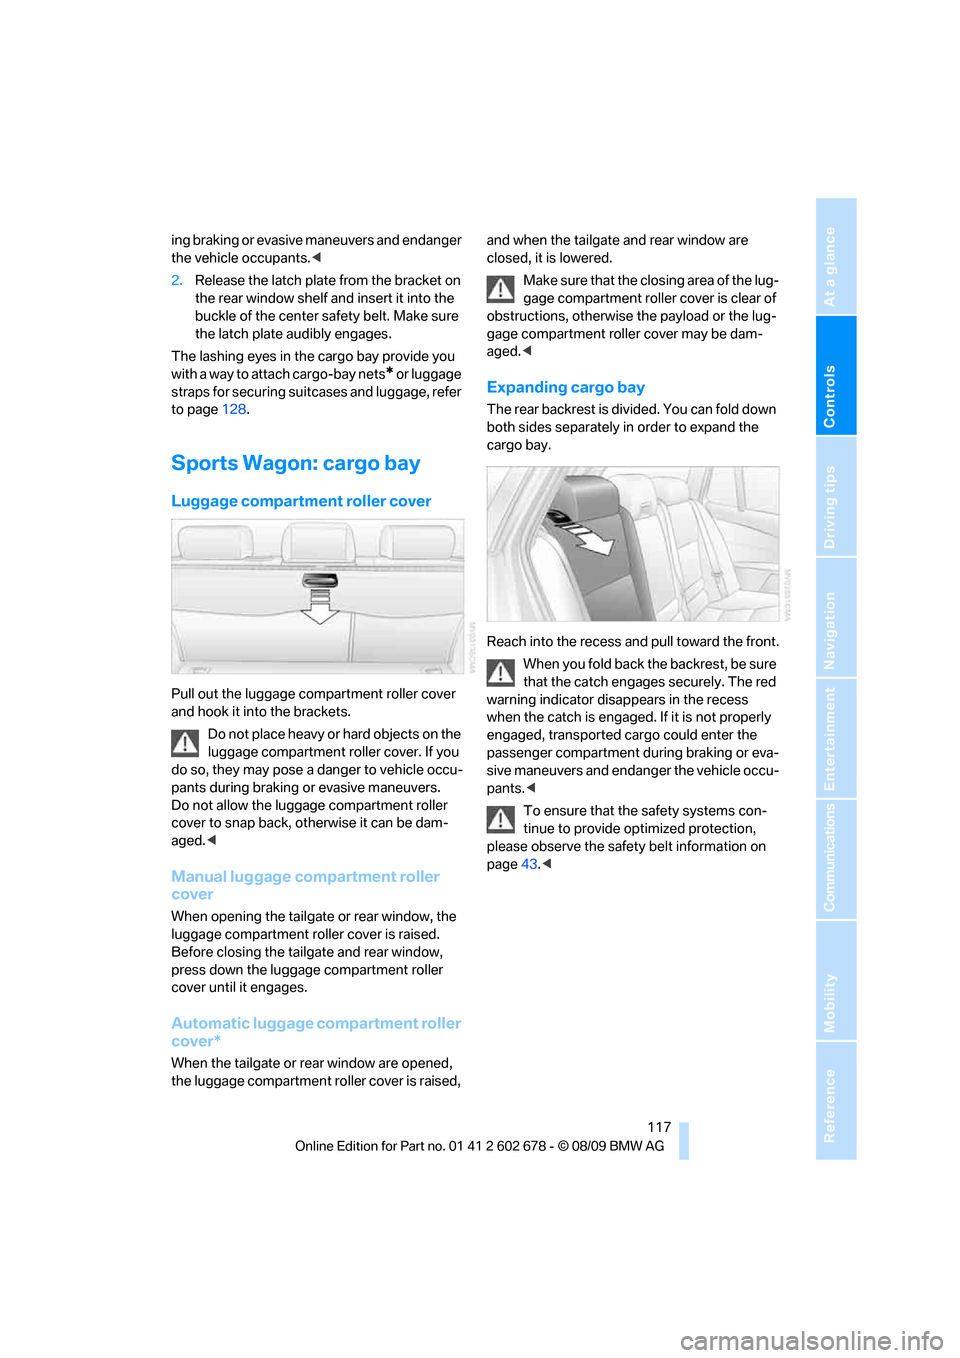
Luggage compartment roller cover
Pull out the luggage compartment roller cover
and hook it into the brackets.
Do not place heavy or hard objects on the
luggage compartment roller cover. If you
do so, they may pose a danger to vehicle occu-
pants during braking or evasive maneuvers.
Do not allow the luggage compartment roller
cover to snap back, otherwise it can be dam-
aged.<
Manual luggage compartment roller
cover
When opening the tailgate or rear window, the
luggage compartment roller cover is raised.
Before closing the tailgate and rear window,
press down the luggage compartment roller
cover until it engages.
Automatic luggage compartment roller
cover*
When the tailgate or rear window are opened,
the luggage compartment roller cover is raised, and when the tailgate and rear window are
closed, it is lowered.
Make sure that the closing area of the lug-
gage compartment roller cover is clear of
obstructions, otherwise the payload or the lug-
gage compartment roller cover may be dam-
aged.<
Expanding cargo bay
The rear backrest is divided. You can fold down
both sides separately in order to expand the
cargo bay.
Reach into the recess and pull toward the front.
When you fold back the backrest, be sure
that the catch engages securely. The red
warning indicator disappears in the recess
when the catch is engaged. If it is not properly
engaged, transported cargo could enter the
passenger compartment during braking or eva-
sive maneuvers and endanger the vehicle occu-
pants.<
To ensure that the safety systems con-
tinue to provide optimized protection,
please observe the safety belt information on
page43.<
Page 121 of 271
Controls
119Reference
At a glance
Driving tips
Communications
Navigation
Entertainment
Mobility
The partitions in the compartment can be rear-
ranged.
Folding up spare tire cover
1.Swing up the cover.
2.Detach the hook from the bracket and hook
into the floor panel flap.
Before swinging down, return the hook to its
original position.
Storage area loading options*
Retaining straps
You can unhook the right-hand retaining strap,
e.g., to open the side panel. To unhook at the
rear end, pull downward; to hook in, press it into
the opening. In addition, it can also be secured
in the center. This makes it possible to secure
objects of different sizes.
Hooks
Two hooks can be used to secure smaller
objects.
Press at bottom and fold out until they lock.
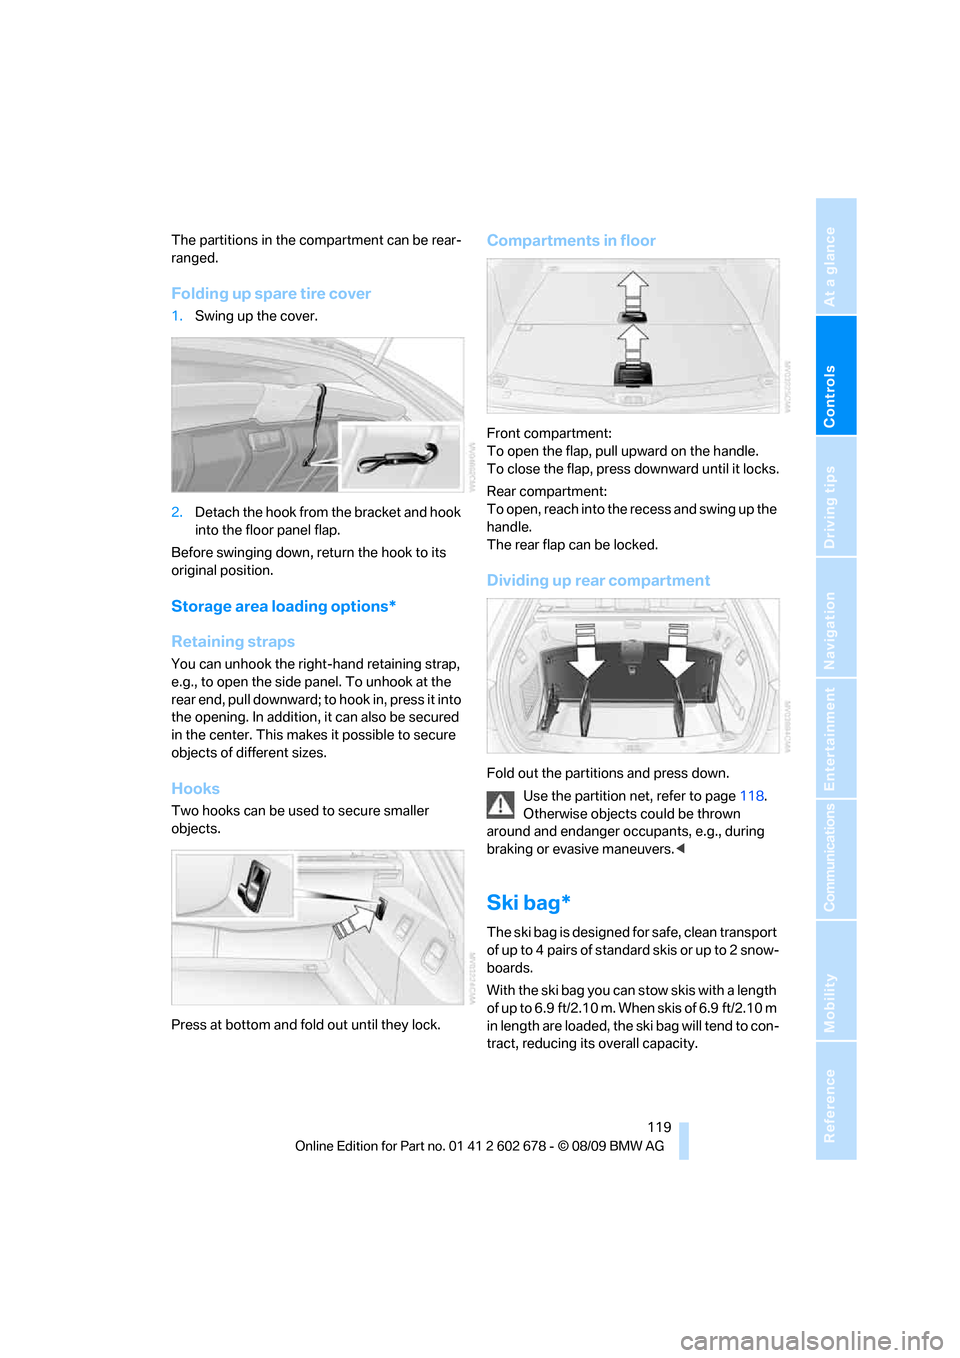
Compartments in floor
Front compartment:
To open the flap, pull upward on the handle.
To close the flap, press downward until it locks.
Rear compartment:
To open, reach into the recess and swing up the
handle.
The rear flap can be locked.
Dividing up rear compartment
Fold out the partitions and press down.
Use the partition net, refer to page118.
Otherwise objects could be thrown
around and endanger occupants, e.g., during
braking or evasive maneuvers.<
Ski bag*
The ski bag is designed for safe, clean transport
of up to 4 pa irs of s tandard s kis or up to 2 snow-
boards.
With the ski bag you can stow skis with a length
o f u p t o 6 . 9 f t / 2 . 1 0 m . W h e n s k i s o f 6 . 9 f t / 2 . 1 0 m
in length are loaded, the ski bag will tend to con-
tract, reducing its overall capacity.
Page 127 of 271
Driving tips
125Reference
At a glance
Controls
Communications
Navigation
Entertainment
Mobility
Thinking ahead when driving
Avoid unnecessary acceleration and braking.
To do so, maintain the appropriate distance
from the vehicle in front of you. An anticipatory
and smooth driving style reduces fuel con-
sumption.
Avoiding high engine speeds
Use 1st gear only for starting off. Accelerate
rapidly in 2nd gear and above. Avoid high
engine speeds in doing so and shift into the
next gear early.
When you have reached the desired speed,
shift into the highest possible gear and drive
with the lowest possible engine speed while
maintaining a constant vehicle speed.
In general: driving at a low engine speed
reduces fuel consumption and minimizes wear.
Taking advantage of coasting
When approaching a red light, let off the gas
and allow the vehicle to coast to a stop in the
highest possible gear.
On steep roadways, let off the gas and allow the
vehicle to roll in the appropriate gear.
The flow of fuel is interrupted when coasting.
Switching off the engine during longer
stops
Switch off the engine at longer stops such as
traffic signals, railroad crossings, or in traffic
jams. Even having the engine switched off for
approx. 4 seconds results in fuel savings.
Switching off functions currently not
required
Functions such as the cooling function of the
automatic climate control, seat heating or rear
window defroster draw large amounts of power
and consume additional fuel. Their influence is
p a r t i c u l a r l y p r o n o u n c e d i n c i t y t r a f f i c a n d s t o p &
go operation. For this reason, it is a good idea to
switch these functions off when they are not
really needed.
Having maintenance carried out
Have the vehicle serviced regularly in order to
achieve the optimum economy and service life
of your vehicle. BMW recommends having the
maintenance performed by a BMW center. Also
please pay attention to the BMW maintenance
system, refer to page215.
General driving notes
Closing luggage compartment lid/
tailgate
Operate the vehicle only when the lug-
gage compartment lid/tailgate is com-
pletely closed. Otherwise, exhaust fumes could
enter the interior of the vehicle.<
If it is absolutely necessary to drive with the lug-
gage compartment lid open:
1.Close all windows and the glass sunroof or
panorama glass sunroof.
2.Increase the air volume of the automatic cli-
mate control to a high level, refer to
page107.
Hot exhaust system
As in all vehicles, extremely high temper-
atures are generated on the exhaust sys-
tem. Do not remove the heat shields installed
adjacent to it, and never apply undercoating to
them. When driving, standing at idle and while
parking take care to avoid possible contact
between the hot exhaust system and any highly
flammable materials such as hay, leaves, grass,
etc. Such contact could lead to a fire, and with it
the risk of serious property damage as well as
personal injury. Do not touch hot exhaust tail
pipes. Otherwise there is a risk of burns.<
Hydroplaning
When driving on wet or slushy roads,
reduce road speed. If you do not, a wedge
of water can form between tires and road sur-
face. This phenomenon is referred to as hydro-
planing, and is characterized by a partial or
complete loss of contact between the tires and
Page 128 of 271
Things to remember when driving
126 the road surface, ultimately undermining your
ability to steer and brake the vehicle.<
The risk of hydroplaning increases as the tread
depth of the tires decreases, refer also to Mini-
mum tire tread on page208.
Driving through water
Do not drive through water on the road if it
is deeper than 1 ft/30 cm, and then only at
walking speed at the most. Otherwise, the vehi-
cle's engine, the electrical systems and the
transmission may be damaged.<
Using parking brake on inclines
On inclines, do not hold the vehicle in
place for a long time by riding the clutch;
use the parking brake. Otherwise greater clutch
wear will result.<
Braking safely
Your BMW is equipped with ABS as a standard
feature. In situations that require it, it is best to
brake with full force. Since the vehicle maintains
steering responsiveness, you can still avoid
possible obstacles with a minimum of steering
effort.
Pulsation of the brake pedal, combined with
sounds from the hydraulic circuits, indicate that
ABS is in its active mode.
Do not drive with your foot resting on the
brake pedal. Even light but consistent
pedal pressure can lead to high temperatures,
brake wear and possibly even brake failure.<
Driving in wet conditions
When roads are wet or there is heavy rain,
briefly exert gentle pressure on the brake pedal
every few miles. Monitor traffic conditions to
ensure that this maneuver does not endanger
other road users. The heat generated in this
process helps dry the pads and rotors to ensure
that full braking efficiency will then be available
when you need it.
Hills
To prevent overheating and the resulting
reduced efficiency of the brake system, drive long or steep downhill gradients in the
gear in which the least braking is required. Even
light but consistent pressure on the brake can
lead to high temperatures, brake wear and pos-
sibly even brake failure.<
The braking effect of the engine can be further
increased by downshifting, if necessary all the
way down into first gear. This strategy helps
you avoid placing excessive loads on the brake
system. For information on downshifting in the
manual mode of the automatic transmission,
refer to page61.
Do not drive with the clutch depressed, in
idle or with the engine switched off, other-
wise there will be no engine braking action or
support of the braking force and steering.
Never allow floor mats, carpets or any other
objects to protrude into the area of movement
of the pedals and impair their operation.<
Corrosion on brake rotors
When the vehicle is driven only occasionally,
during extended periods when the vehicle is not
used at all, and in operating conditions where
brake applications are less frequent, there is an
increased tendency for corrosion to form on
rotors, while contaminants accumulate on the
brake pads. This occurs because the minimum
pressure which must be exerted by the pads
during brake applications to clean the rotors is
not reached.
Should corrosion form on the brake rotors, the
brakes will tend to respond with a pulsating
effect that even extended application will fail to
cure.
When vehicle is parked
Condensation forms in the air conditioner sys-
tem during operation, and then exits under the
vehicle. Traces of condensed water under the
vehicle are therefore normal.
Cargo loading
To avoid loading the tires beyond their
approved carrying capacity, never over-
load the vehicle. Overloading can lead to over-