2010 BMW 528I SEDAN child lock
[x] Cancel search: child lockPage 40 of 271
Opening and closing
38
Replacing battery
If the battery of the remote control is dead, a
message will appear in the Control Display.
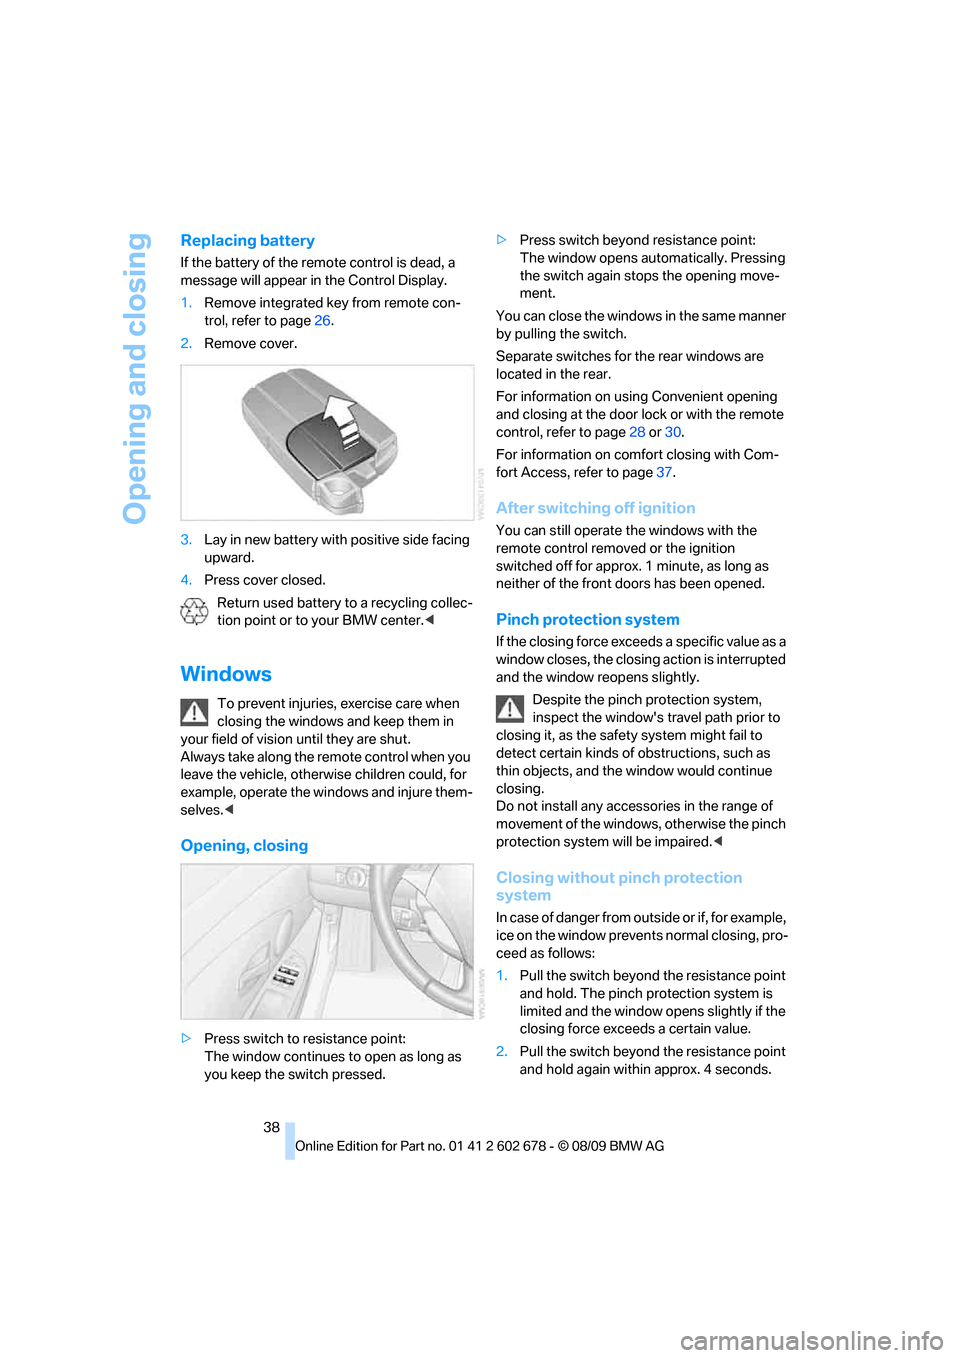
1.Remove integrated key from remote con-
trol, refer to page26.
2.Remove cover.
3.Lay in new battery with positive side facing
upward.
4.Press cover closed.
Return used battery to a recycling collec-
tion point or to your BMW center.<
Windows
To prevent injuries, exercise care when
closing the windows and keep them in
your field of vision until they are shut.
Always take along the remote control when you
leave the vehicle, otherwise children could, for
example, operate the windows and injure them-
selves.<
Opening, closing
>Press switch to resistance point:
The window continues to open as long as
you keep the switch pressed.>Press switch beyond resistance point:
The window opens automatically. Pressing
the switch again stops the opening move-
ment.
You can close the windows in the same manner
by pulling the switch.
Separate switches for the rear windows are
located in the rear.
For information on using Convenient opening
and closing at the door lock or with the remote
control, refer to page28 or30.
For information on comfort closing with Com-
fort Access, refer to page37.
After switching off ignition
You can still operate the windows with the
remote control removed or the ignition
switched off for approx. 1 minute, as long as
neither of the front doors has been opened.
Pinch protection system
If the closing force exceeds a specific value as a
window closes, the closing action is interrupted
and the window reopens slightly.
Despite the pinch protection system,
inspect the window's travel path prior to
closing it, as the safety system might fail to
detect certain kinds of obstructions, such as
thin objects, and the window would continue
closing.
Do not install any accessories in the range of
movement of the windows, otherwise the pinch
protection system will be impaired.<
Closing without pinch protection
system
In case of danger from outside or if, for example,
ice on the window prevents normal closing, pro-
ceed as follows:
1.Pull the switch beyond the resistance point
and hold. The pinch protection system is
limited and the window opens slightly if the
closing force exceeds a certain value.
2.Pull the switch beyond the resistance point
and hold again within approx. 4 seconds.
Page 41 of 271
Controls
39Reference
At a glance
Driving tips
Communications
Navigation
Entertainment
Mobility
The window closes without the pinch pro-
tection system.
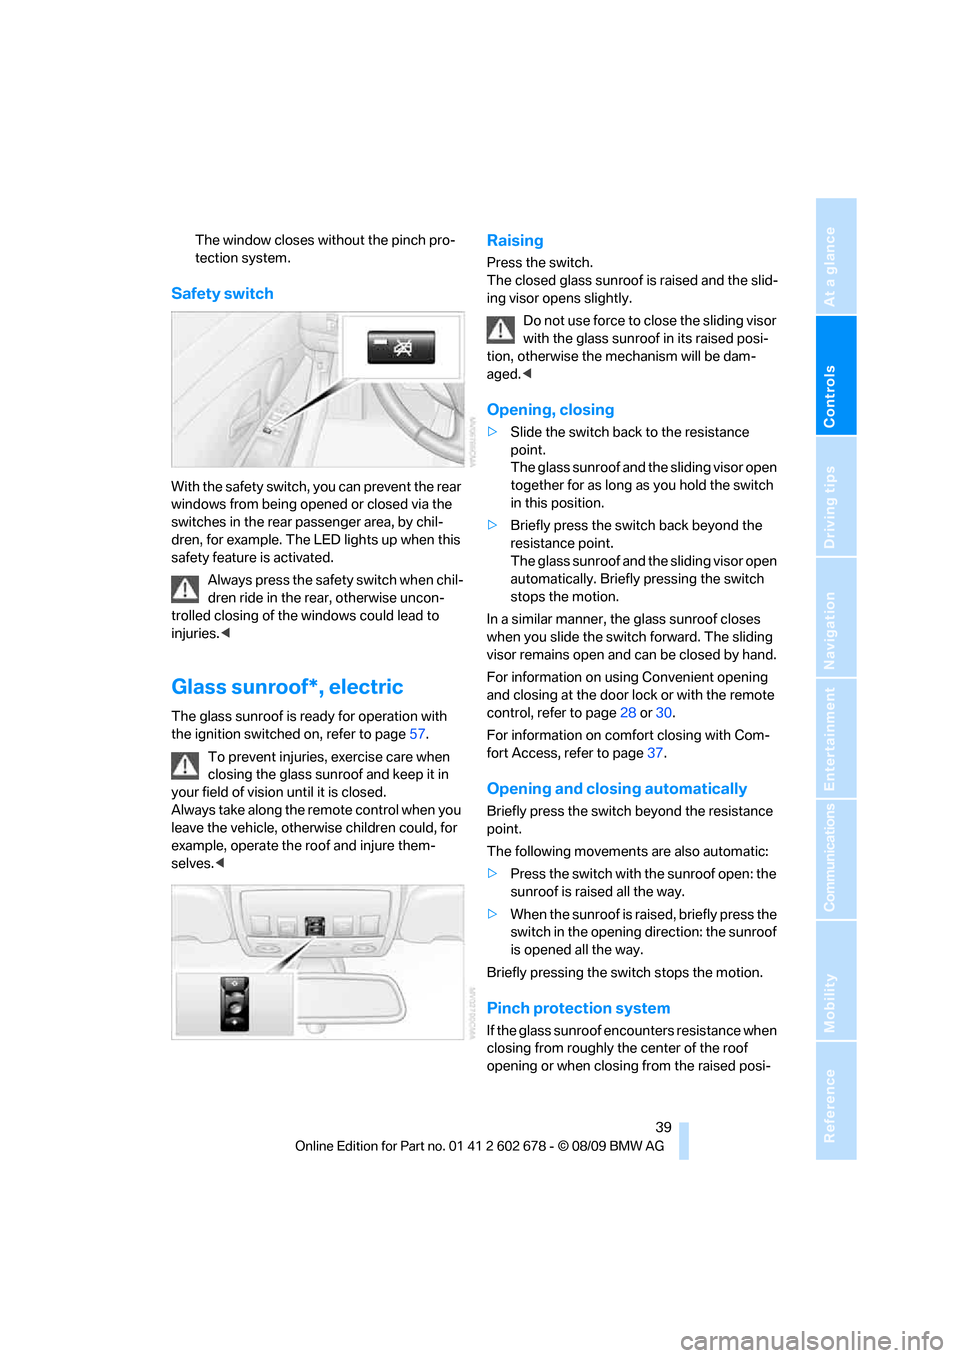
Safety switch
With the safety switch, you can prevent the rear
windows from being opened or closed via the
switches in the rear passenger area, by chil-
dren, for example. The LED lights up when this
safety feature is activated.
Always press the safety switch when chil-
dren ride in the rear, otherwise uncon-
trolled closing of the windows could lead to
injuries.<
Glass sunroof*, electric
The glass sunroof is ready for operation with
the ignition switched on, refer to page57.
To prevent injuries, exercise care when
closing the glass sunroof and keep it in
your field of vision until it is closed.
Always take along the remote control when you
leave the vehicle, otherwise children could, for
example, operate the roof and injure them-
selves.<
Raising
Press the switch.
The closed glass sunroof is raised and the slid-
ing visor opens slightly.
Do not use force to close the sliding visor
with the glass sunroof in its raised posi-
tion, otherwise the mechanism will be dam-
aged.<
Opening, closing
>Slide the switch back to the resistance
point.
The glass sunroof and the sliding visor open
together for as long as you hold the switch
in this position.
>Briefly press the switch back beyond the
resistance point.
The glass sunroof and the sliding visor open
automatically. Briefly pressing the switch
stops the motion.
In a similar manner, the glass sunroof closes
when you slide the switch forward. The sliding
visor remains open and can be closed by hand.
For information on using Convenient opening
and closing at the door lock or with the remote
control, refer to page28 or30.
For information on comfort closing with Com-
fort Access, refer to page37.
Opening and closing automatically
Briefly press the switch beyond the resistance
point.
The following movements are also automatic:
>Press the switch with the sunroof open: the
sunroof is raised all the way.
>When the sunroof is raised, briefly press the
switch in the opening direction: the sunroof
is opened all the way.
Briefly pressing the switch stops the motion.
Pinch protection system
If the glass sunroof encounters resistance when
closing from roughly the center of the roof
opening or when closing from the raised posi-
Page 45 of 271
Controls
43Reference
At a glance
Driving tips
Communications
Navigation
Entertainment
Mobility
Adjusting
Sitting safely
The ideal sitting position can make a vital con-
tribution to relaxed, fatigue-free driving. In the
interaction with the safety belts, the head
restraints and the airbags, the sitting position
plays an important role in an accident. To
ensure that the safety systems operate with
optimal efficiency, we strongly urge you to
observe the instructions contained in the fol-
lowing section.
For additional information on transporting chil-
dren safely, refer to page53.
Airbags
Always maintain an adequate distance
between yourself and the airbags. Always
hold the steering wheel by its rim with hands at
the 9 o'clock and 3 o'clock positions, to mini-
mize the risk of injuries to your hands and arms
in the event of airbag deployment.
No one and nothing should come between the
airbags and the seat occupant.
Do not use the cover of the front airbag on the
front passenger side as a storage area. Make
sure that the front passenger is sitting correctly
and does not rest feet or legs on the instrument
panel, otherwise leg injuries can occur if the
front airbags are triggered.
Make sure that occupants do not rest their head
on the side or head airbags, otherwise injuries
can occur if the airbags are triggered.<
Even if you adhere to all the instructions, inju-
ries resulting from contact with airbags cannot
be fully excluded, depending on the circum-
stances. The ignition and inflation noise may
provoke a mild hearing loss in extremely sensi-
tive individuals. This effect is usually only tem-
porary.
For airbag locations and additional information
on airbags, refer to page93.
Head restraints
A correctly adjusted head restraint reduces the
risk of spinal injury in the event of an accident.
Adjust the head restraint so that its center
is approx. at ear level. Otherwise there is
increased danger of injury in the event of an
accident.<
Head restraints, refer to page46.
Safety belts
Before every drive, make sure that safety belts
are being worn at all of the occupied seats. Air-
bags complement the safety belt as an addi-
tional safety device, but they do not represent a
substitute.
Your vehicle is provided with five seats, which
are all equipped with a safety belt.
Never allow more than one person to
wear a single safety belt. Never allow
infants or small children to ride in a passenger's
lap. Make sure that the belt lies low around the
hips in the lap area and does not press on the
abdomen. The safety belt must not lie across
the neck, rub against sharp edges, be routed
over solid or breakable objects or be pinched.
Wear the safety belt without twisting, snugly
across the lap and shoulders, as close to the
body as possible. Otherwise the belt can slip
over the hips in the lap area in a frontal impact
and injure the abdomen. Avoid wearing clothing
that prevents the belt from fitting properly and
pull the belt in the upper body area periodically
to readjust the tension, in order to avoid a
reduction in the restraint of the safety belt.
Sports Wagon: if the center safety belt in the
rear is used, the larger backrest half must be
locked, refer to page117, otherwise the middle
safety belt has no restraining action.<
Safety belts, refer to page48.
Page 50 of 271
Adjusting
48
Safety belts
To ensure that the safety systems con-
tinue to provide optimized protection,
please observe the adjustment instructions on
page43.<
Before every drive, make sure that safety belts
are being worn at all of the occupied seats. Air-
bags complement the safety belt as an addi-
tional safety device, but they do not represent a
substitute.
Fastening
Make sure you hear the latch plate engage in
the belt buckle.
Safety belt reminder for driver's seat
and passenger seat*
The indicator lamp lights up and a sig-
nal sounds. A message also appears on
the Control Display. Please check
whether the safety belt is correctly positioned.
The safety belt reminder is operative at speeds
above approx. 5 mph/8 km/h. It can also be acti-
vated if objects are placed on the passenger
seat.
Releasing
1.Grasp the belt firmly.
2.Press the red button in the buckle.
3.Guide the belt into its reel.
The shoulder strap's anchorage point will be
correct for adult seat occupants of every build if
the seat is correctly adjusted, refer to page44.
The two rear safety belt buckles integrated into
the rear seat are for passengers sitting on the
left and right. The belt buckle embossed with
the word CENTER is intended exclusively for
use by passengers riding in the center position.
Damage to safety belts
When subjected to strain due to an acci-
dent or in the event of damage, replace
the safety belts, the belt tensioners, and any
child restraint systems and have the belt anchor
points checked. Only have this work carried out
at a BMW center or at a workshop that works
according to BMW repair procedures with cor-
respondingly trained personnel. Otherwise cor-
rect operation of this safety equipment is not
guaranteed.<
Rear center safety belt
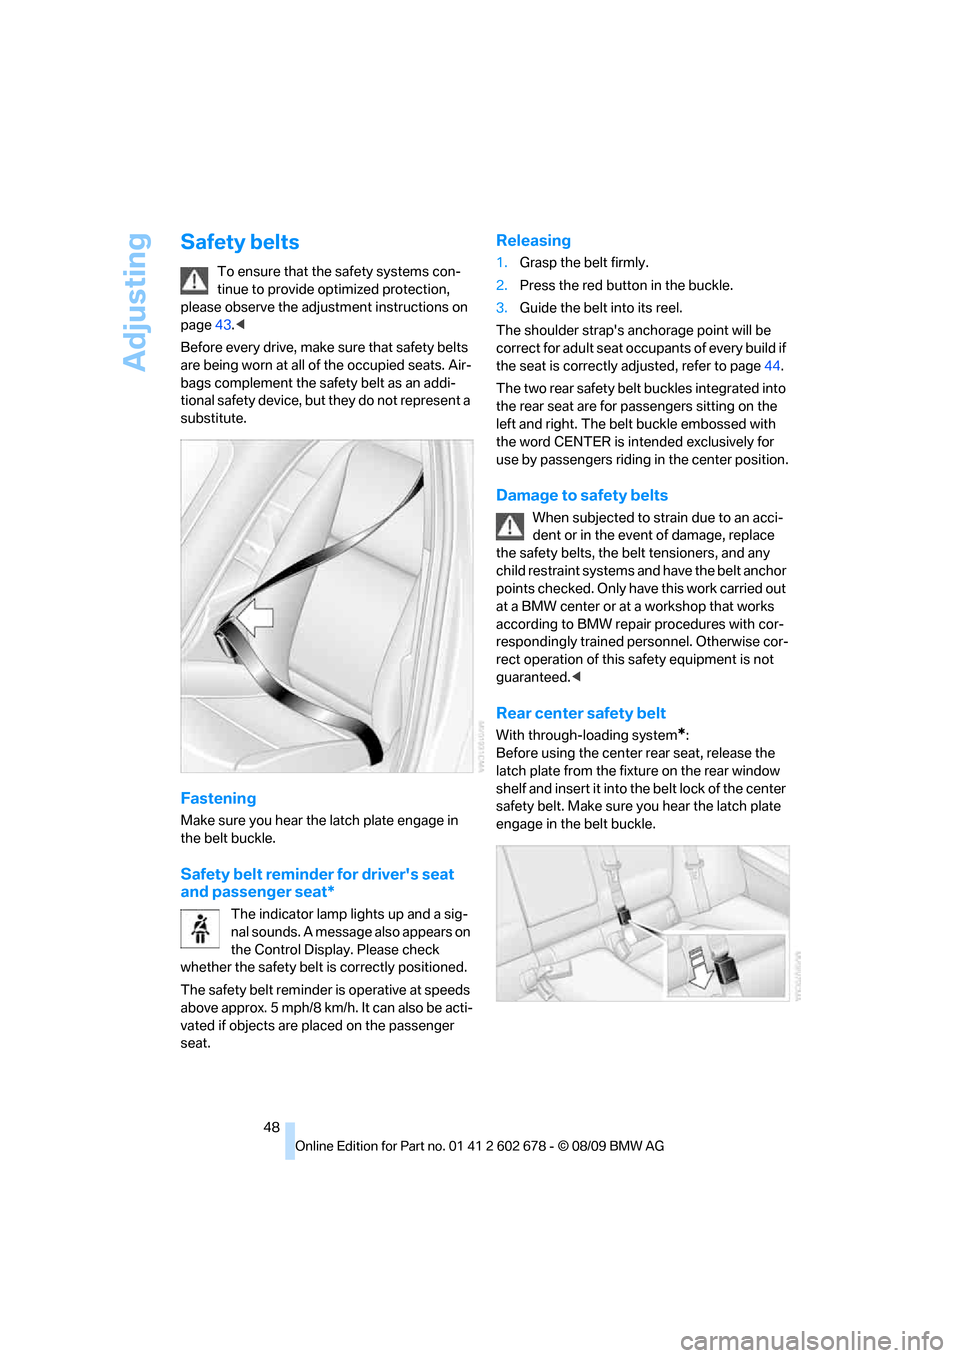
With through-loading system*:
Before using the center rear seat, release the
latch plate from the fixture on the rear window
shelf and insert it into the belt lock of the center
safety belt. Make sure you hear the latch plate
engage in the belt buckle.
Page 55 of 271
Controls
53Reference
At a glance
Driving tips
Communications
Navigation
Entertainment
Mobility
Transporting children safely
The right place for children
Do not leave children unattended in the
vehicle, otherwise they could endanger
themselves and other persons, e.g., by opening
the doors.<
Children always in the rear
Accident research shows that the safest place
for children is on the rear seat.
Children younger than 13 years of age or
with a height under 5 ft/150 cm may only
be transported in the rear in child restraint sys-
tems which correspond to the age, weight and
height of the child. Otherwise there is an
increased danger of injury in an accident.<
Children 13 years of age or older must wear a
safety belt as soon as a suitable child restraint
system can no longer be used due to their age,
size and weight.
Exception for front passenger seat
Should it be necessary to use a child
restraint system on the front passenger
seat, the front and side airbags for the front pas-
senger must be deactivated. Otherwise, a child
traveling on that seat will face a significant risk
of injury if the airbags are deployed, even with a
child restraint system.
Before installing a child restraint system, move
the front passenger seat as far back and up as
possible to obtain the best possible position for
the belt. Do not change the seat position after
this.<
For more information on automatic deactivation
of the front passenger airbags, refer to page94.
Installing child restraint
systems
Observe the child restraint system manu-
facturer's instructions for selection,
installation and use of the child restraint sys-tems. Otherwise the degree of protection may
be reduced.<
On front passenger seat
After mounting a child restraint system on
the front passenger seat, make sure that
the front and side airbags on the front passen-
ger side are deactivated, as otherwise there is
an increased risk of injury if the airbags are trig-
gered.<
Seat position
Before installing a child restraint system, move
the front passenger seat as far back and up as
possible to obtain the best possible position for
the belt. Do not change the seat position after
this.
Backrest width* on front passenger
seat
Open the backrest width setting of the
front passenger seat all the way. After
mounting the child seat, deactivate the active
backrest width adjustment and do not call up
any memory position. Otherwise this limits the
stability of the child seat on the front passenger
seat.<
1.After unlocking the vehicle, sit on the front
passenger seat and close the door to call up
the memory position.
2.Completely open the backrest width adjust-
ment, refer to page44.
3.Deactivate active backrest width adjust-
ment, refer to page45.
4.Install child seat.
Page 56 of 271
Transporting children safely
54
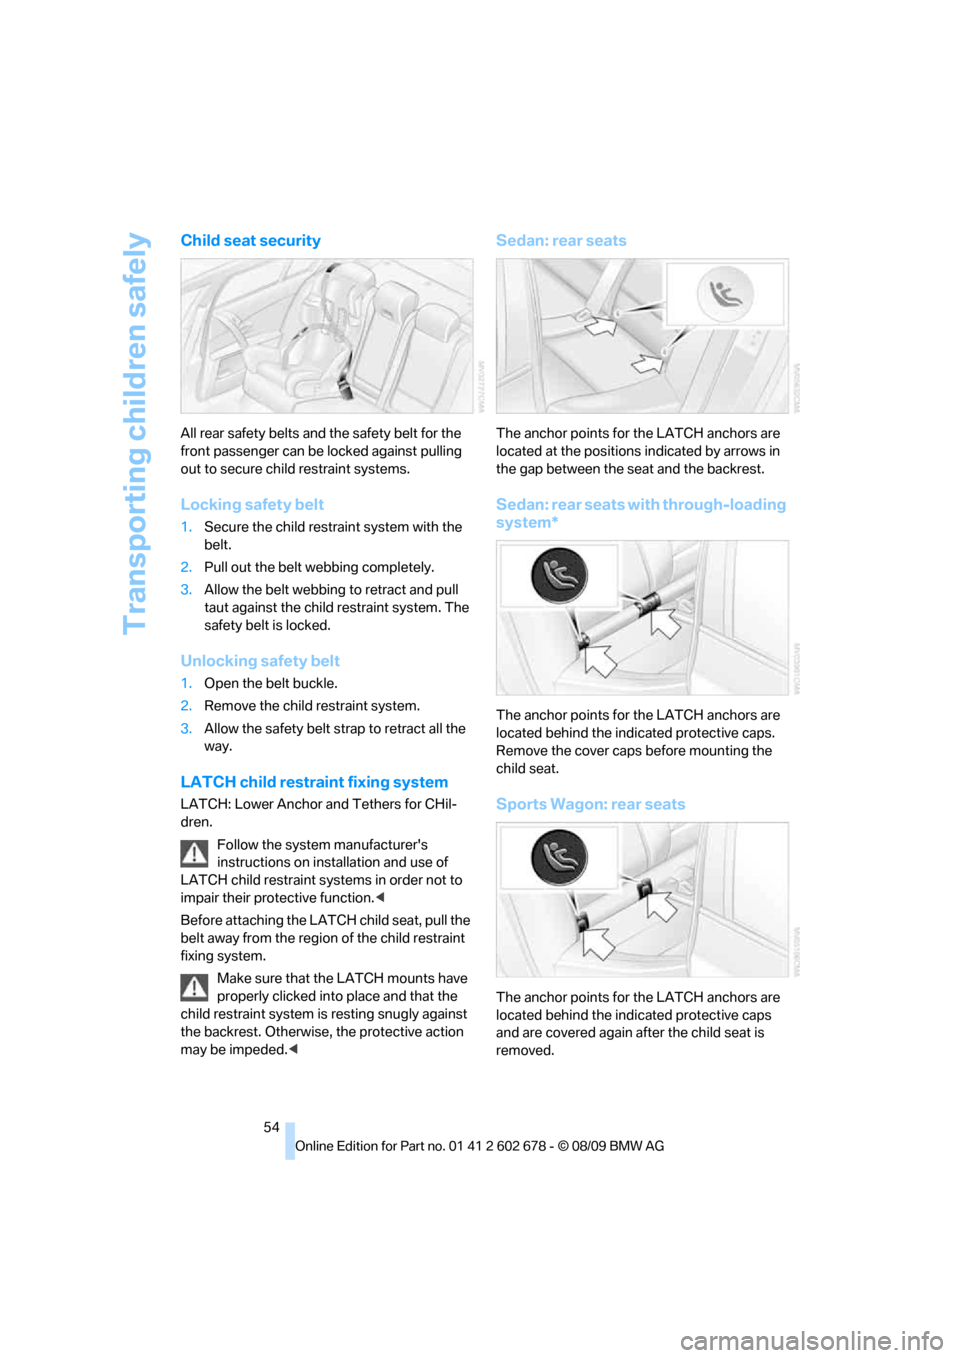
Child seat security
All rear safety belts and the safety belt for the
front passenger can be locked against pulling
out to secure child restraint systems.
Locking safety belt
1.Secure the child restraint system with the
belt.
2.Pull out the belt webbing completely.
3.Allow the belt webbing to retract and pull
taut against the child restraint system. The
safety belt is locked.
Unlocking safety belt
1.Open the belt buckle.
2.Remove the child restraint system.
3.Allow the safety belt strap to retract all the
way.
LATCH child restraint fixing system
LATCH: Lower Anchor and Tethers for CHil-
dren.
Follow the system manufacturer's
instructions on installation and use of
LATCH child restraint systems in order not to
impair their protective function.<
Before attaching the LATCH child seat, pull the
belt away from the region of the child restraint
fixing system.
Make sure that the LATCH mounts have
properly clicked into place and that the
child restraint system is resting snugly against
the backrest. Otherwise, the protective action
may be impeded.<
Sedan: rear seats
The anchor points for the LATCH anchors are
located at the positions indicated by arrows in
the gap between the seat and the backrest.
Sedan: rear seats with through-loading
system*
The anchor points for the LATCH anchors are
located behind the indicated protective caps.
Remove the cover caps before mounting the
child seat.
Sports Wagon: rear seats
The anchor points for the LATCH anchors are
located behind the indicated protective caps
and are covered again after the child seat is
removed.
Page 58 of 271
Transporting children safely
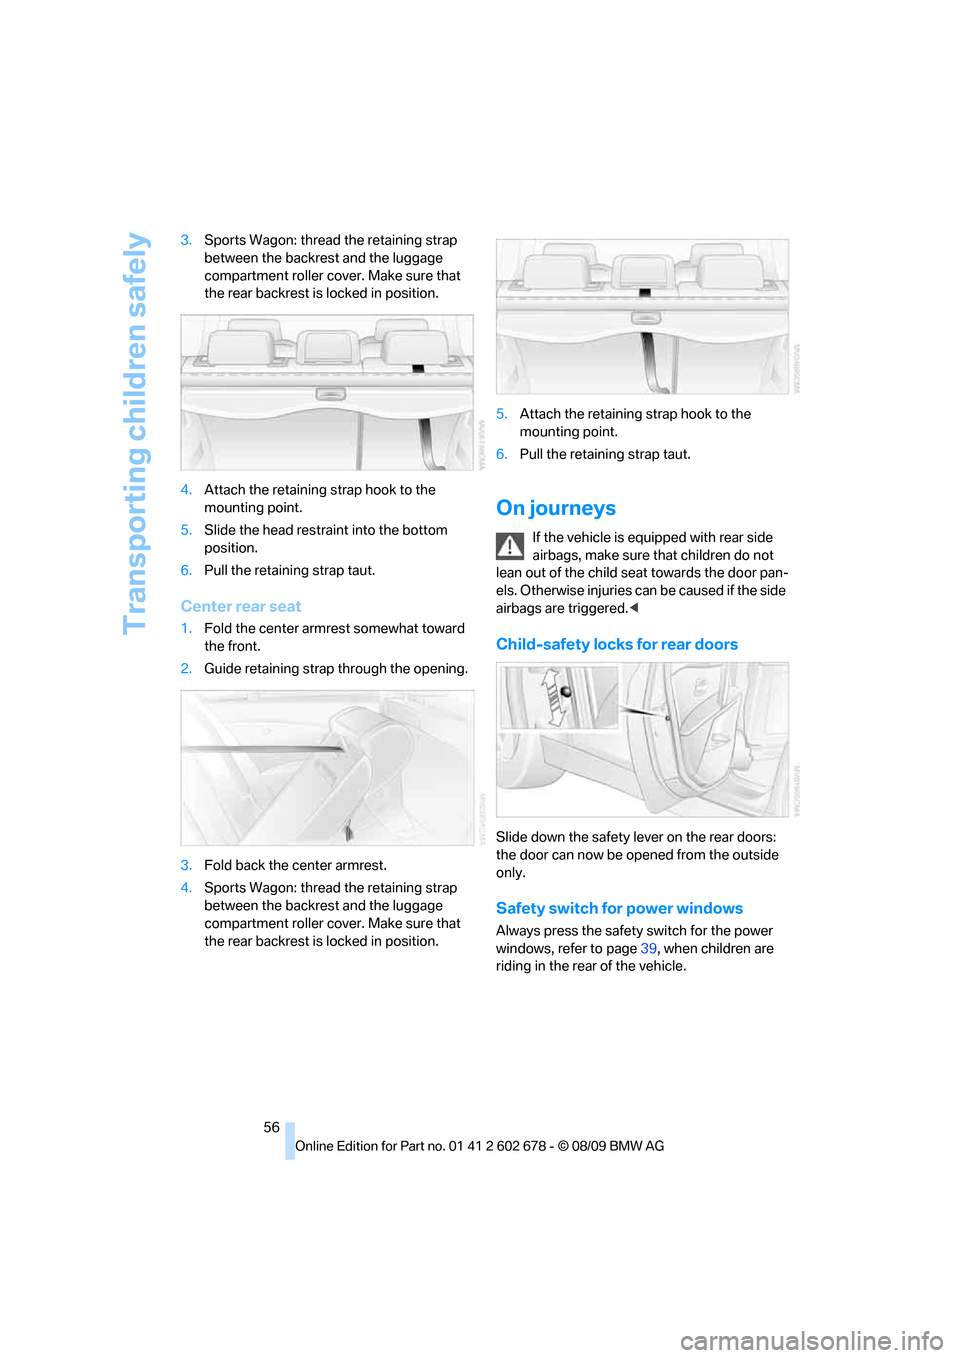
56 3.Sports Wagon: thread the retaining strap
between the backrest and the luggage
compartment roller cover. Make sure that
the rear backrest is locked in position.
4.Attach the retaining strap hook to the
mounting point.
5.Slide the head restraint into the bottom
position.
6.Pull the retaining strap taut.
Center rear seat
1.Fold the center armrest somewhat toward
the front.
2.Guide retaining strap through the opening.
3.Fold back the center armrest.
4.Sports Wagon: thread the retaining strap
between the backrest and the luggage
compartment roller cover. Make sure that
the rear backrest is locked in position.5.Attach the retaining strap hook to the
mounting point.
6.Pull the retaining strap taut.
On journeys
If the vehicle is equipped with rear side
airbags, make sure that children do not
lean out of the child seat towards the door pan-
els. Otherwise injuries can be caused if the side
airbags are triggered.<
Child-safety locks for rear doors
Slide down the safety lever on the rear doors:
the door can now be opened from the outside
only.
Safety switch for power windows
Always press the safety switch for the power
windows, refer to page39, when children are
riding in the rear of the vehicle.
Page 255 of 271
Reference 253
At a glance
Controls
Driving tips
Communications
Navigation
Entertainment
Mobility
CD changer160,164
– controls152
– fast forward/reverse162
– filling or emptying the
magazine164
– random sequence161
– selecting a track160
– switching on/off152
– tone control152
– volume152
CD player160
– controls152
– fast forward/reverse162
– random sequence161
– selecting a track160
– switching on/off152
– tone control152
– volume152
Center armrest
– front112
– rear116
Center brake lamp225
Center console14
Central locking
– from inside30
– from outside28
Central locking system27
– Comfort Access36
Changes, technical, refer to
For your own safety5
Changes, technical, refer to
Parts and accessories6
Changing language on
Control Display82
Changing scale for
navigation145
Changing trips141
Changing units of measure on
Control Display76
Changing wheels208,226
CHECK button80
Check Control79
Check Gas Cap201
Checking the air pressure,
refer to Tire inflation
pressure202
Child restraint fixing system
LATCH54
Child restraints53Child restraint systems53
Child-safety lock56
Child seats, refer to
Transporting children
safely53
Chime, refer to Check
Control
79
Chock227
Chrome-plated parts219
Chrome polish219
Cigarette lighter114
Cigarette lighter socket, refer
to Connecting electrical
devices115
Cleaning your BMW, refer to
Care217
Clock74
– 12h/24h format79
– setting time78
– setting time and date79
Closing
– from inside30
– from outside28
Closing fuel filler cap201
Clothes hooks113
Cockpit10
Cold start, refer to Engine,
starting58
Combination instrument, refer
to Instrument cluster12
Comfort Access36
Comfort access
– observe in car wash37
– replacing battery, remote
control38
Comfort area, refer to Around
the center console14
Comfort seat44
Compact wheel
– inflation pressure203
– wheel change228
Compartment for remote
control, refer to Ignition
lock57Compartments
– in cargo bay, Sports
Wagon118
– refer to Storage area loading
options, Sports Wagon119
– refer to Storage
compartments113
Computer75
– displays on Control
Display76
Concierge service193
Condensation, refer to When
vehicle is parked126
Condition Based Service
CBS215
Confirmation signals for
locking and unlocking29
Connecting car vacuum
cleaner, refer to Connecting
electrical devices115
Consumption, refer to
Average consumption75
Consumption indicator
– Energy Control75
Consumption statistics, refer
to Average fuel
consumption75
Contacts
– creating190
Control Center, refer to
iDrive16
Control Display, refer to
iDrive16
– setting brightness83
– switching off/on19
Controller, refer to iDrive16
Controls, refer to Cockpit10
Convenient opening and
closing
– glass sunroof28
– windows28
– windows and glass sunroof
with Comfort Access37
Coolant214
– checking level214
– temperature74
Cooling, maximum107
Cooling fluid, refer to
Coolant214