2010 BMW 335I CONVERTIBLE four wheel drive
[x] Cancel search: four wheel drivePage 44 of 266

Adjustments
42
Adjustments
Sitting safely
The ideal sitting position can make a vital con-
tribution to relaxed, fatigue-free driving. In con-
junction with the safety belts, the head
restraints and the airbags, the seated position
has a major influence on your safety in the event
of an accident. To ensure that the safety sys-
tems operate with optimal efficiency, we
strongly urge you to observe the instructions
contained in the following section.
For additional information on transporting chil-
dren safely, refer to page52.
Airbags
Always maintain an adequate distance
between yourself and the airbags. Always
grip the steering wheel on the rim, with your
hands in the 3 o'clock and 9 o'clock positions,
to minimize the risk of injury to the hands or
arms in the event of the airbag being triggered
off.
No one and nothing should come between the
airbags and the seat occupant.
Do not use the cover of the front airbag on the
front passenger side as a storage area. Make
sure that the front passenger is sitting correctly,
e.g. not resting feet or legs on the dashboard;
otherwise, leg injuries can occur if the front air-
bag deploys.
Make sure that passengers keep their heads
away from the side airbag and do not lean
against the cover of the head airbag; otherwise,
serious injuries can result if the airbag
deploys.<
Even if you follow all the instructions, injuries
resulting from contact with airbags cannot be
fully excluded, depending on the circum-
stances. The ignition and inflation noise may
provoke a mild hearing loss in extremely sensi-
tive individuals. This effect is usually only tem-
porary.
For airbag locations and additional information
on airbags, refer to page90.
Head restraint
A correctly adjusted head restraint reduces the
risk of neck injury in the event of an accident.
Adjust the head restraint in such a way
that its center is at approx. ear level. Oth-
erwise, there is an increased risk of injury in the
event of an accident.<
Head restraints, refer to page44.
Safety belt
Before every drive, make sure that all occupants
wear their safety belts. Airbags complement the
safety belt as an additional safety device, but
they do not represent a substitute.
Your vehicle has four seats, each of which is
equipped with a safety belt.
Never allow more than one person to
wear a single safety belt. Never allow
infants or small children to ride in a passenger's
lap. Make sure that the belt in the lap area sits
low across the hips and does not press against
the abdomen.
The safety belt must not rest against the throat,
run across sharp edges, pass over hard or frag-
ile objects or be pinched. Fasten the safety belt
so that it sits as snugly as possible against the
lap and shoulder without being twisted. Other-
wise, the belt could slide over your hips and
injure your abdomen in the event of a frontal
collision.
Avoid wearing bulky clothing and regularly pull
the belt in the upper-body area taut; otherwise,
its restraining effect could be impaired.<
Safety belts, refer to page48.
Seats
Note before adjusting
Never attempt to adjust your seat while
the vehicle is moving. The seat could
respond with unexpected movement, and the
ensuing loss of vehicle control could lead to an
Page 85 of 266
Controls
83Reference
At a glance
Driving tips
Communications
Navigation
Entertainment
Mobility
e.g. unplowed snow-covered roads. The sys-
tem assures the maximal drive output, but with
reduced driving stability. It is therefore neces-
sary to drive with appropriate caution.
You may find it useful to briefly activate DTC
under the following special circumstances:
>When driving uphill on snow-covered roads,
in slush or on unplowed, snow-covered
roads
>When rocking a stuck vehicle free or start-
ing off in deep snow or on loose ground
>When driving with snow chains
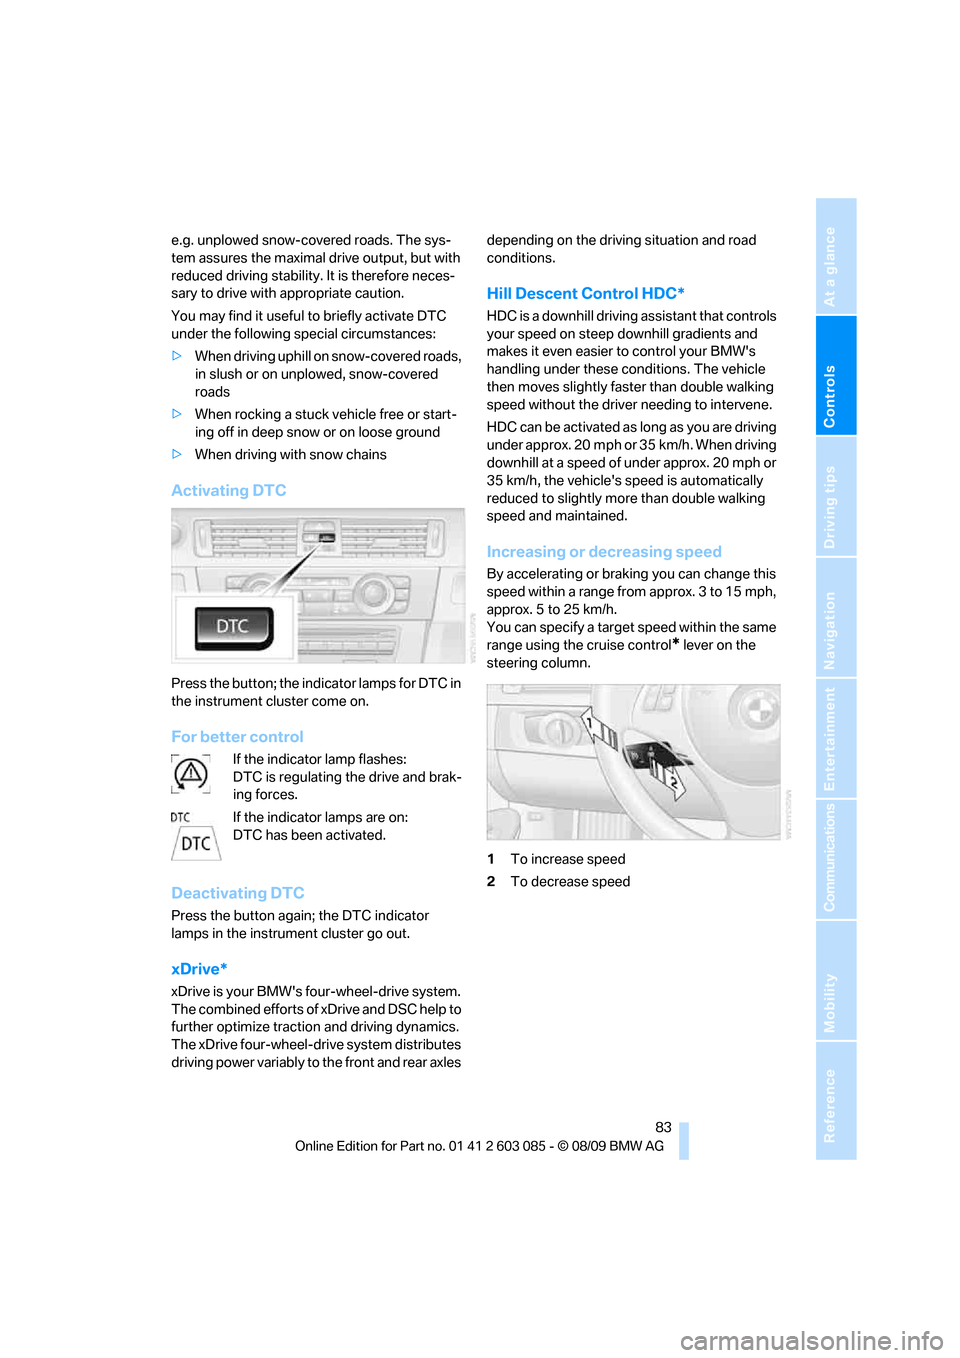
Activating DTC
Press the button; the indicator lamps for DTC in
the instrument cluster come on.
For better control
If the indicator lamp flashes:
DTC is regulating the drive and brak-
ing forces.
If the indicator lamps are on:
DTC has been activated.
Deactivating DTC
Press the button again; the DTC indicator
lamps in the instrument cluster go out.
xDrive*
xDrive is your BMW's four-wheel-drive system.
The combined efforts of xDrive and DSC help to
further optimize traction and driving dynamics.
The xDrive four-wheel-drive system distributes
driving power variably to the front and rear axles depending on the driving situation and road
conditions.
Hill Descent Control HDC*
HDC is a downhill driving assistant that controls
your speed on steep downhill gradients and
makes it even easier to control your BMW's
handling under these conditions. The vehicle
then moves slightly faster than double walking
speed without the driver needing to intervene.
HDC can be activated as long as you are driving
under approx. 20 mph or 35 km/h. When driving
downhill at a speed of under approx. 20 mph or
35 km/h, the vehicle's speed is automatically
reduced to slightly more than double walking
speed and maintained.
Increasing or decreasing speed
By accelerating or braking you can change this
speed within a range from approx. 3 to 15 mph,
approx. 5 to 25 km/h.
You can specify a target speed within the same
range using the cruise control
* lever on the
steering column.
1To increase speed
2To decrease speed
Page 86 of 266
Technology for driving comfort and safety
84
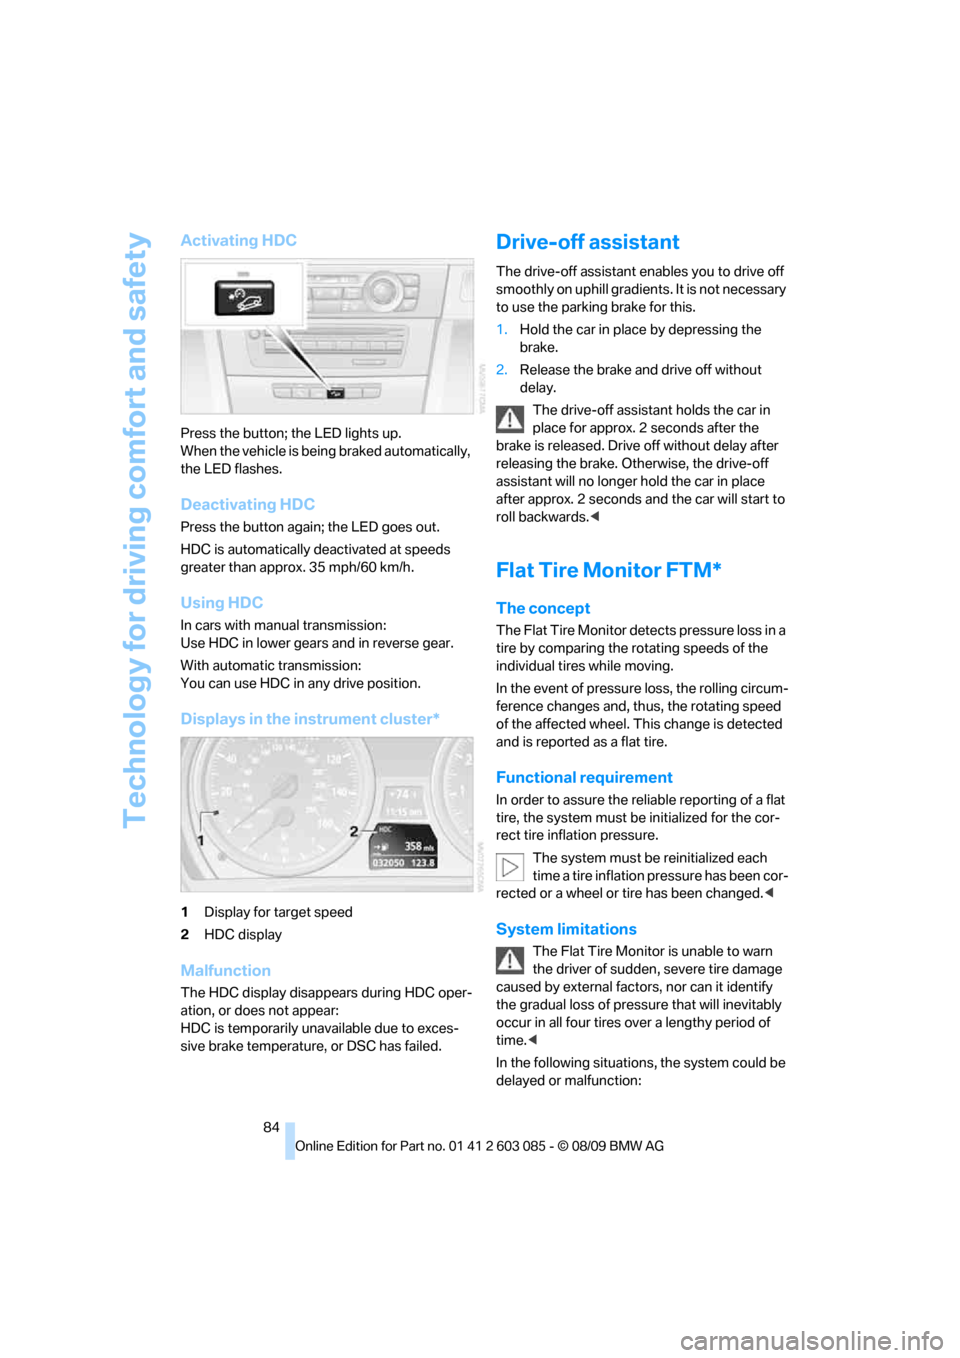
Activating HDC
Press the button; the LED lights up.
When the vehicle is being braked automatically,
the LED flashes.
Deactivating HDC
Press the button again; the LED goes out.
HDC is automatically deactivated at speeds
greater than approx. 35 mph/60 km/h.
Using HDC
In cars with manual transmission:
Use HDC in lower gears and in reverse gear.
With automatic transmission:
You can use HDC in any drive position.
Displays in the instrument cluster*
1Display for target speed
2HDC display
Malfunction
The HDC display disappears during HDC oper-
ation, or does not appear:
HDC is temporarily unavailable due to exces-
sive brake temperature, or DSC has failed.
Drive-off assistant
The drive-off assistant enables you to drive off
smoothly on uphill gradients. It is not necessary
to use the parking brake for this.
1.Hold the car in place by depressing the
brake.
2.Release the brake and drive off without
delay.
The drive-off assistant holds the car in
place for approx. 2 seconds after the
brake is released. Drive off without delay after
releasing the brake. Otherwise, the drive-off
assistant will no longer hold the car in place
after approx. 2 seconds and the car will start to
roll backwards.<
Flat Tire Monitor FTM*
The concept
The Flat Tire Monitor detects pressure loss in a
tire by comparing the rotating speeds of the
individual tires while moving.
In the event of pressure loss, the rolling circum-
ference changes and, thus, the rotating speed
of the affected wheel. This change is detected
and is reported as a flat tire.
Functional requirement
In order to assure the reliable reporting of a flat
tire, the system must be initialized for the cor-
rect tire inflation pressure.
The system must be reinitialized each
time a tire inflation pressure has been cor-
rected or a wheel or tire has been changed.<
System limitations
The Flat Tire Monitor is unable to warn
the driver of sudden, severe tire damage
caused by external factors, nor can it identify
the gradual loss of pressure that will inevitably
occur in all four tires over a lengthy period of
time.<
In the following situations, the system could be
delayed or malfunction:
Page 87 of 266
Controls
85Reference
At a glance
Driving tips
Communications
Navigation
Entertainment
Mobility
>System has not been initialized
>Driving on snowy or slippery road surface
>Performance-oriented style of driving: slip
in the drive wheels, high lateral acceleration
>Snow chains are attached
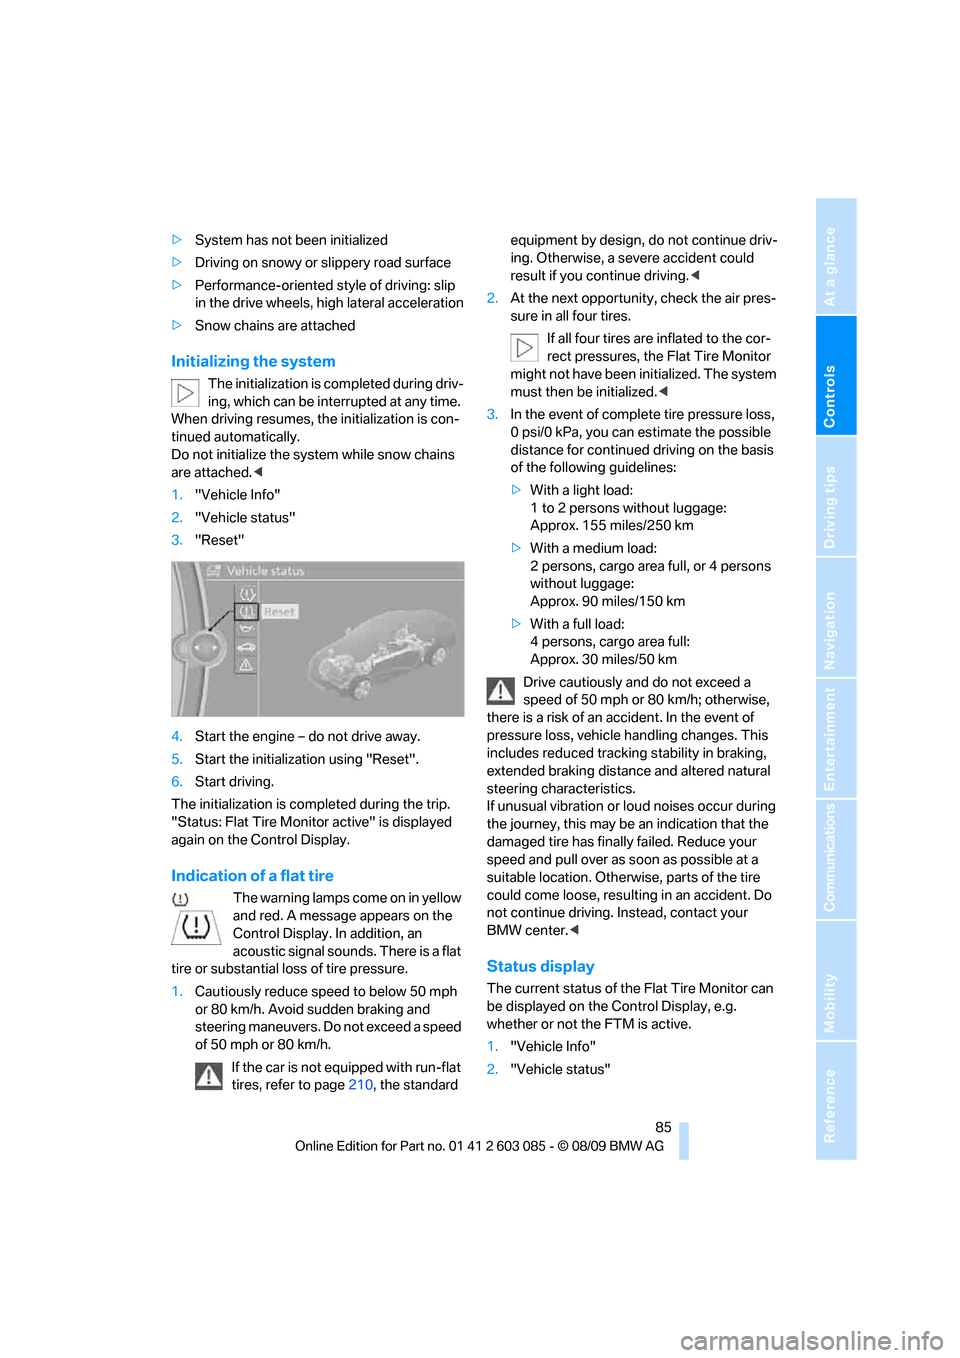
Initializing the system
The initialization is completed during driv-
ing, which can be interrupted at any time.
When driving resumes, the initialization is con-
tinued automatically.
Do not initialize the system while snow chains
are attached.<
1."Vehicle Info"
2."Vehicle status"
3."Reset"
4.Start the engine – do not drive away.
5.Start the initialization using "Reset".
6.Start driving.
The initialization is completed during the trip.
"Status: Flat Tire Monitor active" is displayed
again on the Control Display.
Indication of a flat tire
The warning lamps come on in yellow
and red. A message appears on the
Control Display. In addition, an
acoustic signal sounds. There is a flat
tire or substantial loss of tire pressure.
1.Cautiously reduce speed to below 50 mph
or 80 km/h. Avoid sudden braking and
steering maneuvers. Do not exceed a speed
of 50 mph or 80 km/h.
If the car is not equipped with run-flat
tires, refer to page210, the standard equipment by design, do not continue driv-
ing. Otherwise, a severe accident could
result if you continue driving.<
2.At the next opportunity, check the air pres-
sure in all four tires.
If all four tires are inflated to the cor-
rect pressures, the Flat Tire Monitor
might not have been initialized. The system
must then be initialized.<
3.In the event of complete tire pressure loss,
0 psi/0 kPa, you can estimate the possible
distance for continued driving on the basis
of the following guidelines:
>With a light load:
1 to 2 persons without luggage:
Approx. 155 miles/250 km
>With a medium load:
2 persons, cargo area full, or 4 persons
without luggage:
Approx. 90 miles/150 km
>With a full load:
4 persons, cargo area full:
Approx. 30 miles/50 km
Drive cautiously and do not exceed a
speed of 50 mph or 80 km/h; otherwise,
there is a risk of an accident. In the event of
pressure loss, vehicle handling changes. This
includes reduced tracking stability in braking,
extended braking distance and altered natural
steering characteristics.
If unusual vibration or loud noises occur during
the journey, this may be an indication that the
damaged tire has finally failed. Reduce your
speed and pull over as soon as possible at a
suitable location. Otherwise, parts of the tire
could come loose, resulting in an accident. Do
not continue driving. Instead, contact your
BMW center.<
Status display
The current status of the Flat Tire Monitor can
be displayed on the Control Display, e.g.
whether or not the FTM is active.
1."Vehicle Info"
2."Vehicle status"
Page 88 of 266
Technology for driving comfort and safety
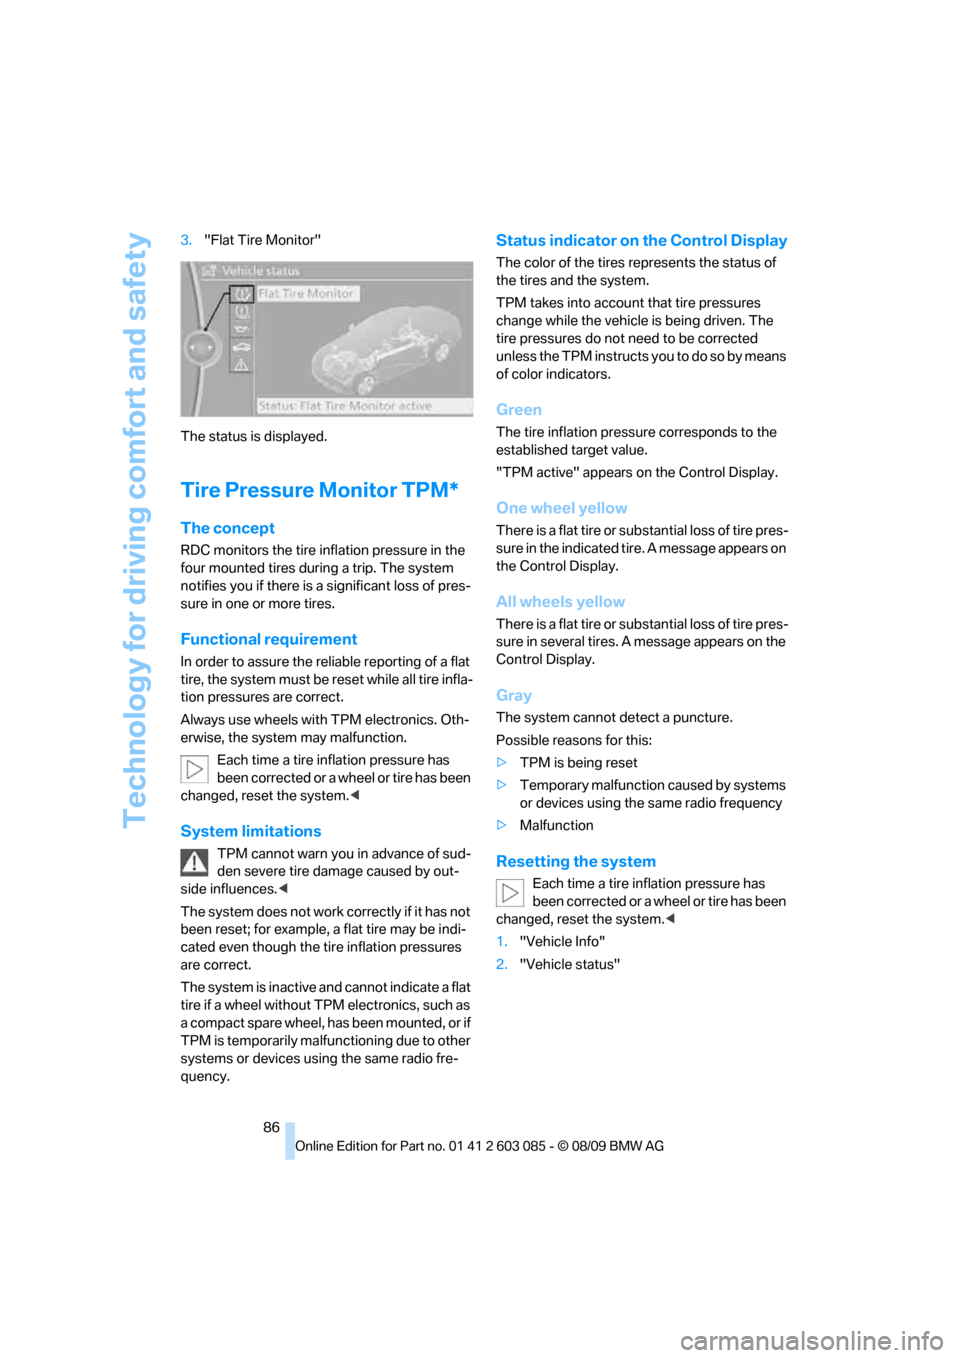
86 3."Flat Tire Monitor"
The status is displayed.
Tire Pressure Monitor TPM*
The concept
RDC monitors the tire inflation pressure in the
four mounted tires during a trip. The system
notifies you if there is a significant loss of pres-
sure in one or more tires.
Functional requirement
In order to assure the reliable reporting of a flat
tire, the system must be reset while all tire infla-
tion pressures are correct.
Always use wheels with TPM electronics. Oth-
erwise, the system may malfunction.
Each time a tire inflation pressure has
been corrected or a wheel or tire has been
changed, reset the system.<
System limitations
TPM cannot warn you in advance of sud-
den severe tire damage caused by out-
side influences.<
The system does not work correctly if it has not
been reset; for example, a flat tire may be indi-
cated even though the tire inflation pressures
are correct.
The system is inactive and cannot indicate a flat
tire if a wheel without TPM electronics, such as
a compact spare wheel, has been mounted, or if
TPM is temporarily malfunctioning due to other
systems or devices using the same radio fre-
quency.
Status indicator on the Control Display
The color of the tires represents the status of
the tires and the system.
TPM takes into account that tire pressures
change while the vehicle is being driven. The
tire pressures do not need to be corrected
unless the TPM instructs you to do so by means
of color indicators.
Green
The tire inflation pressure corresponds to the
established target value.
"TPM active" appears on the Control Display.
One wheel yellow
There is a flat tire or substantial loss of tire pres-
sure in the indicated tire. A message appears on
the Control Display.
All wheels yellow
There is a flat tire or substantial loss of tire pres-
sure in several tires. A message appears on the
Control Display.
Gray
The system cannot detect a puncture.
Possible reasons for this:
>TPM is being reset
>Temporary malfunction caused by systems
or devices using the same radio frequency
>Malfunction
Resetting the system
Each time a tire inflation pressure has
been corrected or a wheel or tire has been
changed, reset the system.<
1."Vehicle Info"
2."Vehicle status"
Page 178 of 266
Telephone
176
Telephone
The concept
Your BMW is equipped with a full preparation
package mobile phone. After pairing a suitable
mobile phone with the vehicle once, you can
operate the mobile phone via the iDrive, the
buttons on the steering wheel or using voice
commands
*.
Once a mobile phone has been paired with your
vehicle, it is automatically recognized as soon
as it is inside the vehicle while the engine is run-
ning or the ignition is switched on. You can
store the pairing data for up to four mobile
phones simultaneously. If several mobile
phones are detected at the same time, the
mobile phone last paired can be operated via
the vehicle.
Using the telephone inside
the vehicle
Using the snap-in adapter*
The so-called snap-in adapter, a holder for
mobile phones, allows you to charge the mobile
phone's battery and connect the mobile phone
to your vehicle's outside antenna. This ensures
better network reception and consistent repro-
duction quality. Please contact your
BMW center to find out for which mobile
phones there are snap-in adapters available.
For your safety
A car phone makes life more convenient in
many ways, and can even save lives in an emer-
gency. While you should consult your mobile
phone's separate operating instructions for a
detailed description of safety precautions and
information, we request that you direct your
particular attention to the following:
Only make entries when the traffic situa-
tion allows you to do so. Do not hold the
mobile phone in your hand while you are driving;
use the hands-free system instead. If you do not observe this precaution, your being dis-
tracted can endanger vehicle occupants and
other road users.<
Suitable mobile phones
Please ask your BMW center which mobile
phones with Bluetooth interface are supported
by the mobile phone preparation package and
which mobile phones are compatible with the
snap-in adapter. By virtue of their particular
software versions, these mobile phones sup-
port the functions described in this Owner's
Manual. Malfunctions may occur with other
mobile phones.
Operating options
You can operate the mobile phone using:
>Buttons on the steering wheel, refer to
page10
>iDrive, refer to page16
>Voice commands
*, refer to page183
>Programmable memory keys, refer to
page20
Avoid operating a mobile phone recognized by
the vehicle via the mobile phone's keypad; oth-
erwise, malfunctions may result.
Start-up
Pairing the mobile phone with the
vehicle
The following prerequisites must be met:
>Compatible mobile phone: the mobile
phone is supported by the full preparation
package mobile phone. You can obtain
information on the Internet at:
www.bmw.com/bluetooth
>The mobile phone is ready to operate.
*
Page 255 of 266

Reference 253
At a glance
Controls
Driving tips
Communications
Navigation
Entertainment
Mobility
ESP Electronic Stability
Program, refer to Dynamic
Stability Control DSC82
Event data recorders218
Exhaust system, refer to Hot
exhaust system119
Extended connectivity of the
music player in the mobile
phone169
Exterior mirrors50
– adjusting50
– automatic dimming
feature51
– automatic heating50
– folding in and out50
External audio device107
External devices
– random sequence171
Eyes
– for tow-starting and towing
away233
– for tying down loads122
F
Failure messages, refer to
Check Control77
Failure of an electrical
consumer228
False alarm
– avoiding unintentional
alarm33
– switching off an alarm32
Fastening safety belts, refer to
Safety belts48
Fastest route for
navigation136
Fast forward
– CD changer159
– CD player159
Filter
– refer to Microfilter/activated-
charcoal filter for automatic
climate control101
First aid pouch230
Fixture for remote control,
refer to Ignition lock55
Flash when locking/
unlocking29Flat tire
– run-flat tires210
– Tire Pressure Monitor
TPM86
Flat Tire Monitor FTM84
– indicating a flat tire85
– indicator/warning lamp85
– initializing the system85
– snow chains84,211
– system limits84
Flat tires, refer to Tire
condition209
Fluid reservoir, refer to
Washer fluid reservoir61
FM, waveband149
Fog lamps96
– indicator lamp13,96
Folding up the floor panel112
Footbrake, refer to Braking
safely120
Footwell lamps, refer to
Interior lamps97
For your own safety5
Four-wheel drive, refer to
xDrive83
Free memory capacity, music
collection167
Front airbags90
FTM, refer to Flat Tire
Monitor84
Fuel199
– average consumption71
– gauge70
– high-quality brands199
– quality199
– specifications199
– tank contents, refer to
Capacities241
Fuel clock, refer to Fuel
gauge70
Fuel display, refer to Fuel
gauge70
Fuel filler flap198
– releasing in the event of
electrical malfunction198
Fuses228
G
Garage door opener, refer to
Integrated universal remote
control103
Gasoline
– refer to Average
consumption71
Gasoline, refer to Required
fuel199
Gasoline display, refer to Fuel
gauge70
Gas station
recommendations137
Gear indicator, automatic
transmission with
Steptronic57
Gearshift lever
– automatic transmission with
Steptronic58
– manual transmission57
Gearshifts
– automatic transmission with
Steptronic58
– manual transmission57
General driving notes119
Glass roof, electric36
– closing after electrical
malfunction37
– Convenient operation28,30
– initializing37
– opening, closing37
– operation with Comfort
Access34
– pinch protection system37
– power failure37
– raising36
– remote control28
Glove compartment106
GPS navigation, refer to
Navigation system126
Grills98
Gross vehicle weight, refer to
Weights241
H
Handbrake, refer to Parking
brake56