2010 BMW 335I CONVERTIBLE convertible top
[x] Cancel search: convertible topPage 108 of 266

Practical interior accessories
106 >The compass direction shown does not
change although the direction of travel
does.
>Not all compass directions are shown.
Procedure
1.Make sure that no large metal objects or
overhead power lines are in the vicinity of
your vehicle and that you have enough
space to drive in a circle.
2.Set the currently valid compass zone.
3.Convertible: ensure that the retractable
hardtop is fully closed.
4.Press the adjustment button for approx.
6-7 seconds to call up C. Then drive in at
least one full circle at a speed of no more
than 4mph or 7km/h.
If calibration is successful, the display
changes from C to a compass direction.
5.Convertible: open the retractable hardtop
fully and repeat step 4.
Setting right-hand/left-hand steering
Your digital compass is factory-set to right-
hand or left-hand steering, in accordance with
your vehicle.
Set the language
You can set the language of the display:
Press the adjustment button for approx.
12-13 seconds. Briefly press the adjustment
button again to switch between English, "E",
and German, "O".
The setting is automatically saved after approx.
10 seconds.
Coupe:
Roller sun blind*
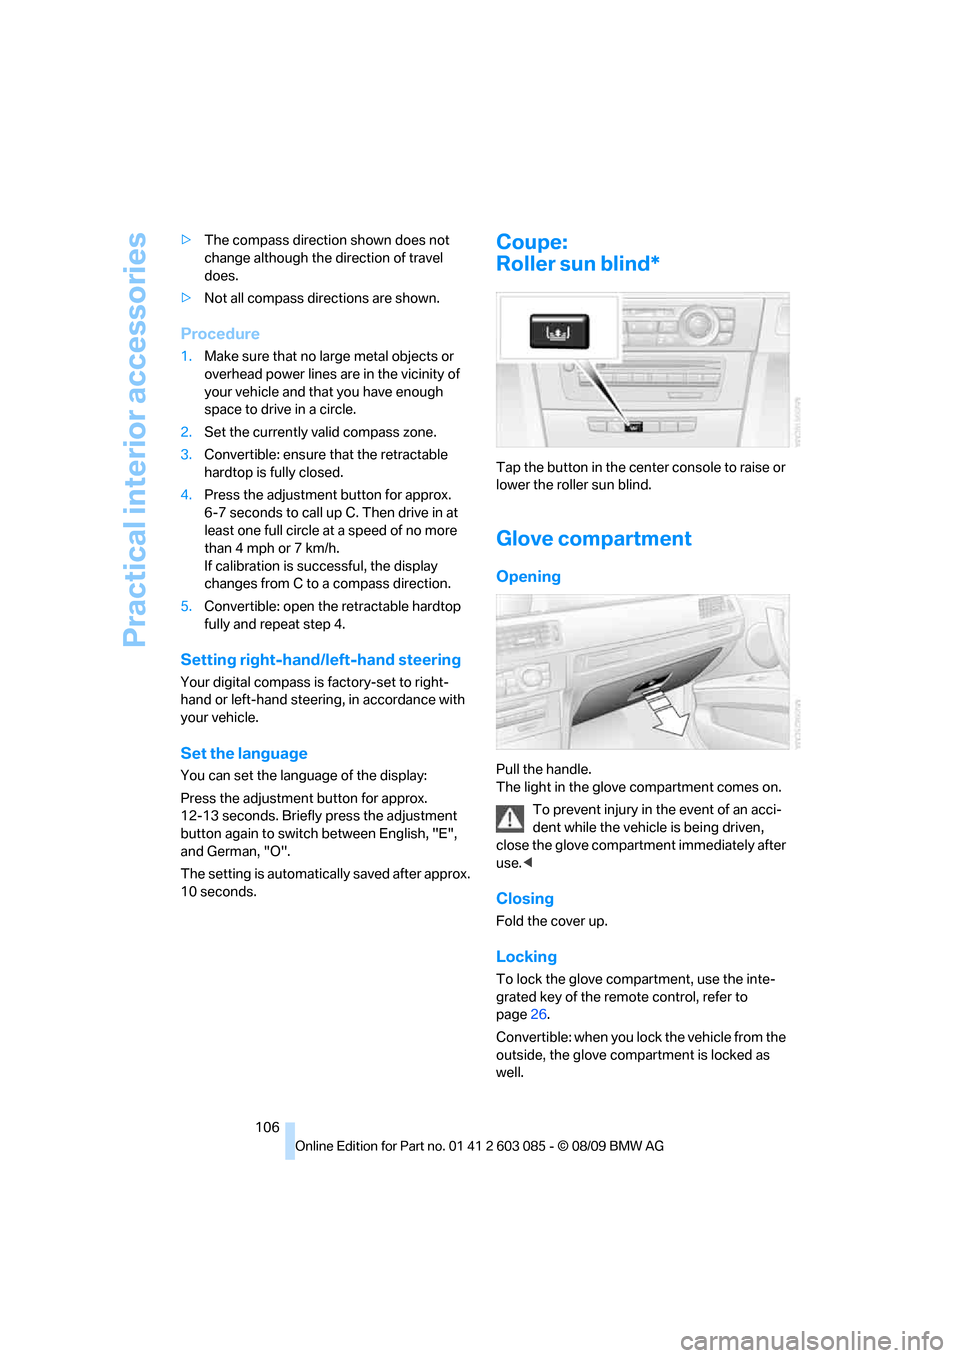
Tap the button in the center console to raise or
lower the roller sun blind.
Glove compartment
Opening
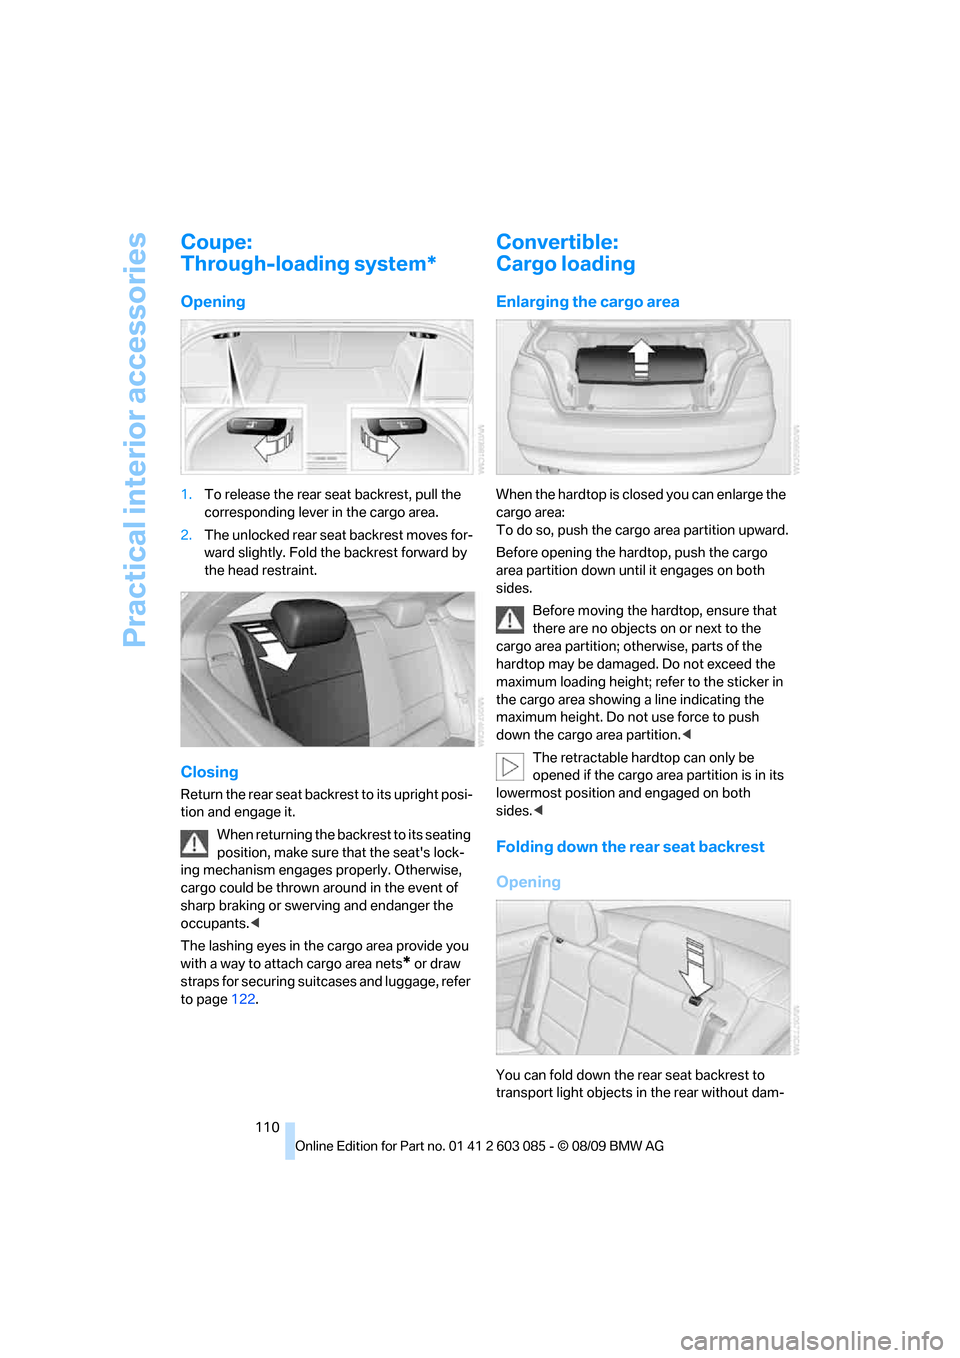
Pull the handle.
The light in the glove compartment comes on.
To prevent injury in the event of an acci-
dent while the vehicle is being driven,
close the glove compartment immediately after
use.<
Closing
Fold the cover up.
Locking
To lock the glove compartment, use the inte-
grated key of the remote control, refer to
page26.
Convertible: when you lock the vehicle from the
outside, the glove compartment is locked as
well.
Page 112 of 266

Practical interior accessories
110
Coupe:
Through-loading system*
Opening
1.To release the rear seat backrest, pull the
corresponding lever in the cargo area.
2.The unlocked rear seat backrest moves for-
ward slightly. Fold the backrest forward by
the head restraint.
Closing
Return the rear seat backrest to its upright posi-
tion and engage it.
When returning the backrest to its seating
position, make sure that the seat's lock-
ing mechanism engages properly. Otherwise,
cargo could be thrown around in the event of
sharp braking or swerving and endanger the
occupants.<
The lashing eyes in the cargo area provide you
with a way to attach cargo area nets
* or draw
straps for securing suitcases and luggage, refer
to page122.
Convertible:
Cargo loading
Enlarging the cargo area
When the hardtop is closed you can enlarge the
cargo area:
To do so, push the cargo area partition upward.
Before opening the hardtop, push the cargo
area partition down until it engages on both
sides.
Before moving the hardtop, ensure that
there are no objects on or next to the
cargo area partition; otherwise, parts of the
hardtop may be damaged. Do not exceed the
maximum loading height; refer to the sticker in
the cargo area showing a line indicating the
maximum height. Do not use force to push
down the cargo area partition.<
The retractable hardtop can only be
opened if the cargo area partition is in its
lowermost position and engaged on both
sides.<
Folding down the rear seat backrest
Opening
You can fold down the rear seat backrest to
transport light objects in the rear without dam-
Page 124 of 266

Things to remember when driving
122
Convertible
Securing cargo
Coupe
Convertible
>Secure smaller and lighter items using
retaining straps, a cargo area net
* or draw
straps
*.
>Heavy-duty cargo straps
* for securing
larger and heavier objects are available at
your BMW center. Four lashing eyes are
provided for attaching the cargo straps.
Two are located on the cargo area
sidewalls1, two more are on the rear cargo
area panel2.
Please comply with the information sup-
plied with the cargo straps.Convertible: before opening the hardtop,
fold down the cargo area partition. Make
sure the cargo area is loaded correctly; other-
wise parts of the hardtop can be damaged, refer
to page110.<
Always position and secure the cargo as
described above, so that it cannot endan-
ger the car's occupants, for example if sudden
braking or swerving is necessary.
Never exceed either the approved gross vehicle
weight or either of the approved axle loads, refer
to page241, as excessive loads can pose a
safety hazard, and may also place you in viola-
tion of traffic safety laws.
Heavy or hard objects should not be carried
loose inside the car, since they could be thrown
around, for example as a result of heavy braking,
sudden swerves, etc., and endanger the occu-
pants.
Only attach the cargo straps using the lashing
eyes shown in the illustration. Do not secure
cargo with the anchors for tether straps, refer to
page53; otherwise, these could be damaged.<
Coupe: roof-mounted
luggage rack*
A special rack system is available as an option
f o r y o u r B M W . C o m p l y w i t h t h e d i r e c t i o n s g i v e n
in the installation instructions.
Mounting points
The mounting points are located in the roof.
Loading roof-mounted luggage rack
Because roof racks raise the vehicle's center of
gravity when loaded, they have a major effect on
Page 188 of 266

Telephone
186
Selecting an entry
The connection to the phone number of the
selected entry is established.
Notes
Notes on Emergency Requests
Do not use the voice activation system to ini-
tiate an Emergency Request. In stressful situa-
tions, the voice and vocal pitch can change.
This can unnecessarily delay the establishment
of a telephone connection. Use the SOS but-
ton
* instead, refer to page230.
Important for voice commands
For voice commands, bear in mind the follow-
ing:
>Say the commands, numbers and letters
smoothly and with normal volume, empha-
sis and speed.
>Always say commands in the language of
the voice activation system.
>Keep the doors, windows, glass roof
* or
convertible top
* closed to prevent interfer-
ence from outside noise.
>Avoid ambient noise in the vehicle while
speaking.
Inserting/removing the snap-
in adapter*
1.Press button1 and remove the cover.
2.Insert the snap-in adapter in the front and
press it downward until it engages.
To remove the snap-in adapter:
Press button 1.
Inserting mobile phone
1.If applicable, remove the protective cap
from the mobile phone's antenna connector
so that the mobile phone can engage in the
snap-in adapter.
2.With its buttons facing upward, slide the
mobile phone up towards the electrical con- 1.{Dial name}.
The dialog for selecting an entry is
opened.
2.Say the name when prompted.
3.Confirm the query with {Yes}.
Page 200 of 266

Refueling
198
Refueling
Always switch off the engine before refu-
eling; otherwise, fuel cannot be added to
the tank and a message will be displayed.<
Take all precautionary measures and
observe all applicable regulations when
handling fuel. Do not carry any spare fuel con-
tainers in your vehicle. They can develop a leak
and cause an explosion or cause a fire in the
event of an accident.<
Fuel filler flap
Opening
1.Open the fuel filler flap. To do so, lightly
press the rear edge.
2.Turn the gas cap counterclockwise.
3.Place the gas cap in the bracket attached to
the fuel filler flap.
Closing
Fit the cap and turn it clockwise until you clearly
hear a click.
Do not pinch the band attached to the
cap; otherwise, the cap cannot be closed
properly and fuel vapors can escape. A mes-
sage will be displayed if the gas cap is loose or
missing.<
Manually releasing the fuel filler flap
In the event of a malfunction, you can release
the fuel filler flap manually:
Coupe
1.Remove the cover from the right-hand side-
wall of the cargo area.
2.Pull the knob with the fuel pump symbol.
The fuel filler flap is released.
Convertible
1.Loosen the right-hand cargo area trim panel
by turning the screws by 90°, see arrow.
2.Slightly lift the top section of the panel. It is
not necessary to remove the entire panel.
3.Pull the knob with the fuel pump symbol.
The fuel filler flap is released.
Observe the following when refueling
When handling fuels, follow the safety
instructions provided at filling stations;
otherwise, there is a risk of personal injury or
property damage.<
When refueling, insert the filler nozzle com-
pletely into the filler pipe. Avoid lifting the filler
nozzle while filling the tank, as that would lead
to
>Premature pump shutoff
Page 222 of 266

Care
220 water penetration. Follow the operating instruc-
tions of the high-pressure washer.<
When using high-pressure washers, do
not spray against the sensors and cam-
eras, e.g. of the Park Distance Control or Rear
View Camera, for an extended period and main-
tain a distance of at least 1 ft/30 cm.<
Manual car wash
When washing the vehicle by hand, use large
quantities of water and car shampoo if neces-
sary. Clean the vehicle with a sponge or wash-
ing brush, applying light pressure only.
Before cleaning the windshield, deacti-
vate the rain sensor or switch off the igni-
tion to prevent unintentional activation of the
wipers.<
Observe local regulations pertaining to
washing vehicles by hand.<
Headlamps
Do not rub them dry and do not use abrasive or
corrosive cleaning agents.
Loosen dirt, e.g. insects, with shampoo or
insect remover and wash away with copious
quantities of water.
Thaw ice with a windshield deicer and do not
use an ice scraper.
Windows
Clean the inside and outside surfaces of the
windows and the mirrors with window cleaner.
Do not clean the mirrors with cleaners
containing quartz.<
Convertible: retractable hardtop
Proceed as you would in a normal car wash.
When you open a wet hardtop, water
drops may run into the cargo area. If nec-
essary, remove items from the cargo area
beforehand to avoid water stains or soiling.<
Paintwork care
Regular care contributes to value retention and
protects the paintwork against the long-term
effects of damaging substances.
Region-specific environmental influences can
damage the vehicle paintwork. Therefore, it is
important to adapt the frequency and scope of
car care accordingly.
Immediately remove aggressive materials such
as spilled fuel, oil, grease, brake fluid, tree sap or
bird droppings to prevent damage to the paint-
work.
Repairing paintwork damage
Immediately repair scratches or similar
damage, such as that caused by stones
hitting the vehicle, where necessary to prevent
rusting.<
BMW recommends having paintwork damage
repaired by a professional paint repair work-
shop according to BMW specifications using
original BMW paint materials.
Preservation
A preservation treatment is necessary when
water no longer beads off the clean paintwork
surface. Only use products for paintwork pres-
ervation that contain carnauba or synthetic
waxes.
Rubber seals
Treat only with water or rubber care products.
Do not use silicon-containing care prod-
ucts on rubber seals; otherwise, noise
and damage could occur.<
Chrome parts
Carefully clean vehicle parts such as the radia-
tor grill, door handles or window frames with
copious quantities of water and a shampoo
additive, especially when roads are treated with
deicing salt. For additional treatment, use a
chrome polish.
Page 253 of 266

Reference 251
At a glance
Controls
Driving tips
Communications
Navigation
Entertainment
Mobility
Configuring settings, refer to
Personal Profile26
Confirmation signals for
locking/unlocking the
vehicle29
Congestion
– refer to Route, bypassing
sections137
Connecting vacuum cleaner,
refer to Connecting
electrical appliances109
Consumption, refer to
Average consumption71
Consumption display
– average consumption71
Contacts
– creating188
Control Center, refer to
iDrive16
Control Display, refer to
iDrive16
– adjusting brightness80
– switching on/off19
Controller, refer to iDrive16
Controls and displays10
Control unit, refer to iDrive16
Convenient loading in
Convertible28
Convenient operation
– glass roof28
– glass roof with Comfort
Access34
– retractable hardtop28
– windows28
– windows with Comfort
Access34
Convertible
– bag holder111
– Convenient loading28
– enlarging cargo area110
– folding down rear
backrest110
– retractable hardtop38
– rollover protection
system92
– securing cargo122
– stowing cargo121
Coolant215
– checking level215Coolant temperature70
Cooling, maximum99
Cooling fluid, refer to
Coolant215
Cooling system, refer to
Coolant215
Copyright2
Corner-illuminating lamps
– replacing bulbs224
Corner-illuminating lamps,
refer to Adaptive light
control94
Cornering lamps, refer to
Adaptive light control94
Correct tires210
Country codes DVD159
Courtesy lamps, refer to
Interior lamps97
Criteria for route136
Cross-hairs in navigation132
Cruise control61
– active63
– malfunction63
Cruising range70
Cupholders108
Curb weight, refer to
Weights241
Current playback
– external devices171
– of music collection166
Customer Relations193
D
Dashboard, refer to
Cockpit10
Dashboard, refer to
Instrument cluster12
Dashboard lighting, refer to
Instrument lighting96
Data, technical238
– capacities241
– dimensions239
– engine238
– weights241
Data transfer194
Date
– date format77
– setting76Daytime running lights94
– replacing bulbs224
DBC Dynamic Brake
Control82
Deactivating front passenger
airbags90
Deadlocking, refer to
Locking28
Defect
– door lock30
– fuel filler flap198
– glass roof37
Destination, entering by town/
city name127
Destination address
– entering127,133
Destination entry via BMW
Assist131
Destination for navigation
– entering by voice133
– entering via map132
– entry127
– home address130
– manual entry127
Destination guidance136
– bypassing a route
section137
– changing specified
route136
– continuing136
– starting136
– voice instructions137
– volume of voice
instructions138
Digital clock69
Digital compass105
Digital radio, refer to HD
Radio150
Dimensions239
Directional indicators, refer to
Turn signals59
Direction instructions, refer to
Voice instructions137
Directory for navigation, refer
to Address book
129
Displacement, refer to Engine
data238
Display, refer to iDrive
controls16
Page 260 of 266

Everything from A - Z
258 Releasing
– hood212
Remaining distance, refer to
Cruising range70
Remote control26
– battery renewal35
– Comfort Access33
– garage door opener103
– malfunction29,34
– removing from the ignition
lock55
– service data217
– trunk lid28
Replacement fuses, refer to
Fuses228
Replacement remote
control26
Replacing bulbs, refer to
Lamps and bulbs223
Replacing tires210
Replacing tires, refer to New
wheels and tires210
Reporting safety defects6
Reserve warning, refer to Fuel
gauge70
Reset, refer to Resetting tone
settings148
Restraint systems
– for children52
– refer to Safety belts48
Retractable hardtop38
– care, refer to Caring for your
vehicle brochure
– Convenient operation28
– opening and closing39
– remote control28
Reverse
– CD changer159
– CD player159
Reverse gear
– automatic transmission with
Steptronic58
– manual transmission57
Road map138
Roadside
Assistance191,230
Roadside parking lamps95
– replacing bulbs224Roadworthiness test, refer to
Service requirements73
Roller sun blinds106
Rollover protection system,
Convertible92
– resetting92
Roof load capacity241
Roof-mounted luggage
rack122
Rope, refer to Tow-starting,
towing away233
Rotary/pushbutton, refer to
iDrive16
Route136,137
– bypassing sections137
– changing136,137
– changing criteria136
– displaying streets or towns/
cities137
– map view138
– selecting136
Route instructions, refer to
Destination guidance
through voice
instructions137
Route map, refer to Map
view138
Route section, changing137
Route selection136
RSC Runflat System
Component, refer to Run-
flat tires210
Runflat System Component
RSC, refer to Run-flat
tires210
Run-flat tires210
– continuing driving with a
damaged tire85
– flat tire85
– Flat Tire Monitor85
– new tires210
– replacing210
– tire inflation pressure200
– winter tires211
S
Safety-belt height
adjustment49Safety belts48
– belt hand-over49
– damage49
– indicator/warning lamp49
– reminder49
– sitting safely42
Safety systems
– airbags90
– Antilock Brake System
ABS82
– brake system82
– driving stability control
systems82
– Dynamic Stability Control
DSC82
– rollover protection system,
Convertible92
– safety belts48
Safety tires, refer to Run-flat
tires210
Satellite radio152
– enabling or unsubscribing
from a channel152
– favorites154
– selecting channel153
– storing channel153
– timeshift154
– Traffic Jump155
Saving fuel118
Screen, refer to iDrive
controls16
Screw thread for tow
fitting233
SDARS, refer to Satellite
radio152
Seat adjustment
– electric43
– mechanical43
Seat and mirror memory47
Seat belt reminder, refer to
"Fasten safety belts"
reminder49
Seat heating47