Page 64 of 92
EAU23111
Checking and lubricating the
throttle grip and cable
The operation of the throttle grip
should be checked before each ride.
In addition, the cable should be lubri-
cated at the intervals specified in the
periodic maintenance chart.
EAU23172
Lubricating the front and
rear brake levers
The pivoting points of the front and
rear brake levers must be lubricated
at the intervals specified in the perio-
dic maintenance and lubrication
chart.
EAU23213
Checking and lubricating the
centerstand and sidestand
1. Sidestand
1. Centerstand
1
ZAUM0668
ZAUM0667
1
Recommended lubricant:
Silicone grease
ZAUM0061
PERIODIC MAINTENANCE AND ADJUSTMENT
6-22
6
1B9-F8199-E3.QXD 21/10/08 13:43 Página 64
Page 65 of 92

The operation of the centerstand and
sidestand should be checked before
each ride, and the pivots and metal-
to-metal contact surfaces should be
lubricated if necessary.
EWA10741
s s
WARNING
If the centerstand or sidestand
does not move up and down smo-
othly, have a Yamaha dealer check
or repair it. Otherwise, the centers-
tand or sidestand could contact the
ground and distract the operator,
resulting in a possible loss of con-
trol.
EAU23272
Checking the front fork
The condition and operation of the
front fork must be checked as follows
at the intervals specified in the perio-
dic maintenance and lubrication
chart.
To check the condition
1. Check the inner tubes for scrat-
ches, damage and excessive oil
leakage.
To check the operation
1. Place the vehicle on a level surfa-
ce and hold it in an upright posi-
tion. WARNING! To avoid injury,
securely support the vehicle so
there is no danger of it falling
over.
[EWA10751]
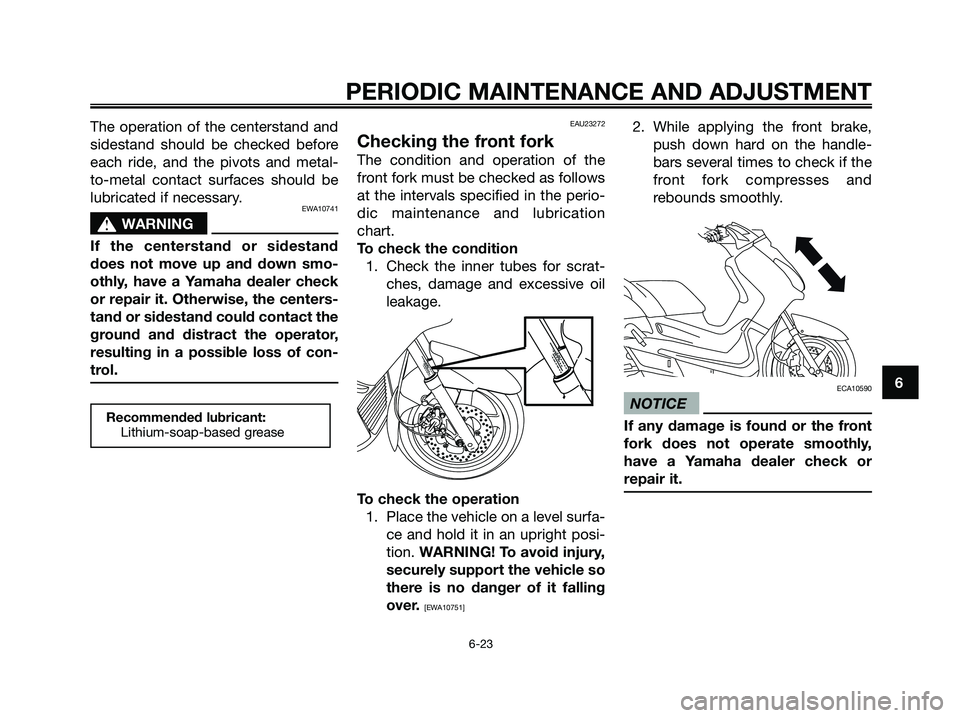
2. While applying the front brake,
push down hard on the handle-
bars several times to check if the
front fork compresses and
rebounds smoothly.
ECA10590
NOTICE
If any damage is found or the front
fork does not operate smoothly,
have a Yamaha dealer check or
repair it.Recommended lubricant:
Lithium-soap-based grease
PERIODIC MAINTENANCE AND ADJUSTMENT
6-23
6
1B9-F8199-E3.QXD 21/10/08 13:43 Página 65
Page 66 of 92

EAU45511
Checking the steering
Worn or loose steering bearings may
cause danger. Therefore, the opera-
tion of the steering must be checked
as follows at the intervals specified in
the periodic maintenance and lubrica-
tion chart.
1. Place the vehicle on the centers-
tand. WARNING! To avoid
injury, securely support the
vehicle so there is no danger of
it falling over.
[EWA10751]
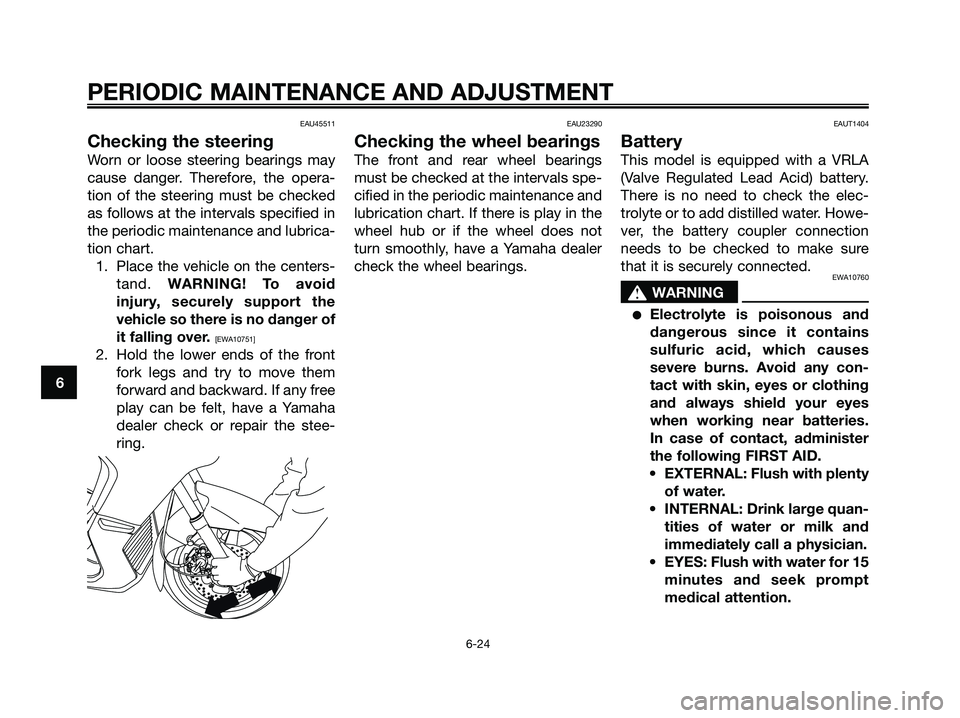
2. Hold the lower ends of the front
fork legs and try to move them
forward and backward. If any free
play can be felt, have a Yamaha
dealer check or repair the stee-
ring.
EAU23290
Checking the wheel bearings
The front and rear wheel bearings
must be checked at the intervals spe-
cified in the periodic maintenance and
lubrication chart. If there is play in the
wheel hub or if the wheel does not
turn smoothly, have a Yamaha dealer
check the wheel bearings.
EAUT1404
Battery
This model is equipped with a VRLA
(Valve Regulated Lead Acid) battery.
There is no need to check the elec-
trolyte or to add distilled water. Howe-
ver, the battery coupler connection
needs to be checked to make sure
that it is securely connected.
EWA10760
s s
WARNING
●Electrolyte is poisonous and
dangerous since it contains
sulfuric acid, which causes
severe burns. Avoid any con-
tact with skin, eyes or clothing
and always shield your eyes
when working near batteries.
In case of contact, administer
the following FIRST AID.
• EXTERNAL: Flush with plenty
of water.
• INTERNAL: Drink large quan-
tities of water or milk and
immediately call a physician.
• EYES: Flush with water for 15
minutes and seek prompt
medical attention.
PERIODIC MAINTENANCE AND ADJUSTMENT
6-24
6
1B9-F8199-E3.QXD 21/10/08 13:43 Página 66
Page 67 of 92

●Batteries produce explosive
hydrogen gas. Therefore, keep
sparks, flames, cigarettes, etc.,
away from the battery and pro-
vide sufficient ventilation when
charging it in an enclosed spa-
ce.
●KEEP THIS AND ALL BATTE-
RIES OUT OF THE REACH OF
CHILDREN.
To charge the battery
Have a Yamaha dealer charge the
battery as soon as possible if it seems
to have discharged. Keep in mind that
the battery tends to discharge more
quickly if the vehicle is equipped with
optional electrical accessories.
ECA16520
NOTICE
To charge a VRLA (Valve Regulated
Lead Acid) battery, a special (cons-
tant-voltage) battery charger is
required. Using a conventional bat-
tery charger will damage the bat-
tery. If you do not have access to a
constant-voltage battery charger,have a Yamaha dealer charge your
battery.
To store the battery
1. If the vehicle will not be used for
more than one month, remove
the battery, fully charge it, and
then place it in a cool, dry place.
NOTICE: When removing the
battery, be sure the key is tur-
ned to “OFF” before discon-
necting the couplers.
[ECA16510]
2. If the battery will be stored for
more than two months, check it
at least once a month and fully
charge it if necessary.
To remove the battery
1. Open de storage compartment.
(See page 3-16)
2. Remove the panel by removing
the screw.
1. Screw
3. Remove the battery holder brac-
ket by removing the bolt.
1. Holder
2. Battery
3. Bolt
PERIODIC MAINTENANCE AND ADJUSTMENT
6-25
6
1B9-F8199-E3.QXD 21/10/08 13:43 Página 67
Page 68 of 92

4. Pull the battery out from the bat-
tery box, and then disconnect the
battery couplers.
1. Negative battery lead
2. Positive battery lead (red)
To install the battery
1. Connect the battery couplers,
and then place the battery in the
original position.
2. Install the battery holder bracket
by installing the bolt.
3. Install the panel by installing the
screw.
4. Close the storage compartment.
5. Fully charge the battery before
installation.
ECA16530
NOTICE
Always keep the battery charged.
Storing a discharged battery can
cause permanent battery damage.
EAU23526
Replacing the fuses
1. Fuse box
2. Fuse tongs
3. Main fuse
4. Spare main fuse
The main fuse and the fuse box,
which contains the fuses for the indi-
vidual circuits, are located behind
panel B. (See page 6-6).
If a fuse is blown, replace it as
follows.
1. Turn the key to “OFF” and turn off
the electrical circuit in question.
2. Remove the blown fuse, and then
install a new fuse of the specified
amperage. WARNING! Do not
use a fuse of a higher ampera-
ge rating than recommended
PERIODIC MAINTENANCE AND ADJUSTMENT
6-26
6
1B9-F8199-E3.QXD 21/10/08 13:43 Página 68
Page 69 of 92
to avoid causing extensive
damage to the electrical sys-
tem and possibly a fire.
[EWA15131]
1. Signaling system fuse
2. Hazard fuse
3. Radiator fan fuse
4. ECU (Electronic Control Unit) fuse
5. Ignition fuse
6. Backup fuse
7. Spare fuse
8. Spare fuse
9. Spare fuse
3. Turn the key to “ON” and turn on
the electrical circuit in question to
check if the device operates.
4. If the fuse immediately blows
again, have a Yamaha dealer
check the electrical system.
Specified fuses:
Main fuse:
30.0 A
ECU (Electronic Control Unit)
fuse:
5.0 A
Signaling system fuse:
15.0 A
Ignition fuse:
5.0 A
Headlight fuse:
15.0 A
Backup fuse:
5.0 A
Radiator fan fuse:
10.0 A
PERIODIC MAINTENANCE AND ADJUSTMENT
6-27
6
1B9-F8199-E3.QXD 21/10/08 13:43 Página 69
Page 70 of 92

EAU23911
Replacing a headlight bulb
This model is equipped with quartz
bulb headlights. If a headlight bulb
burns out, replace it as follows.
ECA10660
NOTICE
Do not touch the glass part of the
headlight bulb to keep it free from
oil, otherwise the transparency of
the glass, the luminosity of the
bulb, and the bulb life will be adver-
sely affected. Thoroughly clean off
any dirt and fingerprints on the
headlight bulb using a cloth mois-
tened with alcohol or thinner.
1. Do not touch the glass part of the bulb.
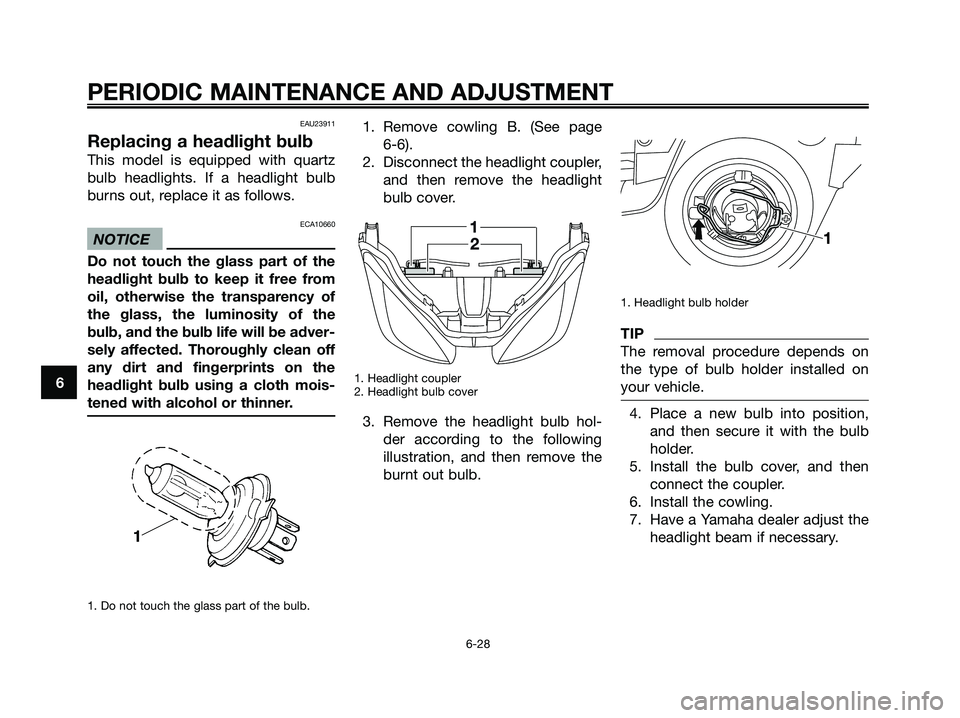
1. Remove cowling B. (See page
6-6).
2. Disconnect the headlight coupler,
and then remove the headlight
bulb cover.
1. Headlight coupler
2. Headlight bulb cover
3. Remove the headlight bulb hol-
der according to the following
illustration, and then remove the
burnt out bulb.
1. Headlight bulb holder
TIP
The removal procedure depends on
the type of bulb holder installed on
your vehicle.
4. Place a new bulb into position,
and then secure it with the bulb
holder.
5. Install the bulb cover, and then
connect the coupler.
6. Install the cowling.
7. Have a Yamaha dealer adjust the
headlight beam if necessary.
PERIODIC MAINTENANCE AND ADJUSTMENT
6-28
6
1B9-F8199-E3.QXD 21/10/08 13:43 Página 70
Page 71 of 92

EAUT1261
Replacing a front turn signal
light bulb
ECA10670
NOTICE
It is advisable to have a Yamaha
dealer perform this job.
1. Place the scooter on the centers-
tand.
2. Remove cowling A. (See page
6-6).
3. Remove the socket (together
with the bulb) by turning it coun-
terclockwise.
1. Turn signal light bulb socket
4. Remove the burnt out bulb by
pushing it in and turning it coun-
terclockwise.5. Insert a new bulb into the socket,
push it in, and then turn it clock-
wise until it stops.
6. Install the socket (together with
the bulb) by turning it clockwise.
7. Install the cowling.
EAUS1442
Replacing a tail/brake light
bulb or a rear turn signal
light bulb
1. Place the scooter on the centers-
tand.
2. Open the seat, and then remove
the rear storage compartment.
(See page 3-17).
1. Rear storage compartment
2. Bolt
3. Remove the tail/brake light and
turn signal light bulb holder by
pulling it outward.
PERIODIC MAINTENANCE AND ADJUSTMENT
6-29
6
1B9-F8199-E3.QXD 21/10/08 13:43 Página 71