Page 26 of 128
4-7
4
�Always be sure you have released the park-
ing brake before you begin to ride. The brake
could overheat if you ride the ATV without re-
leasing the parking brake. You could lose
braking performance which could cause an
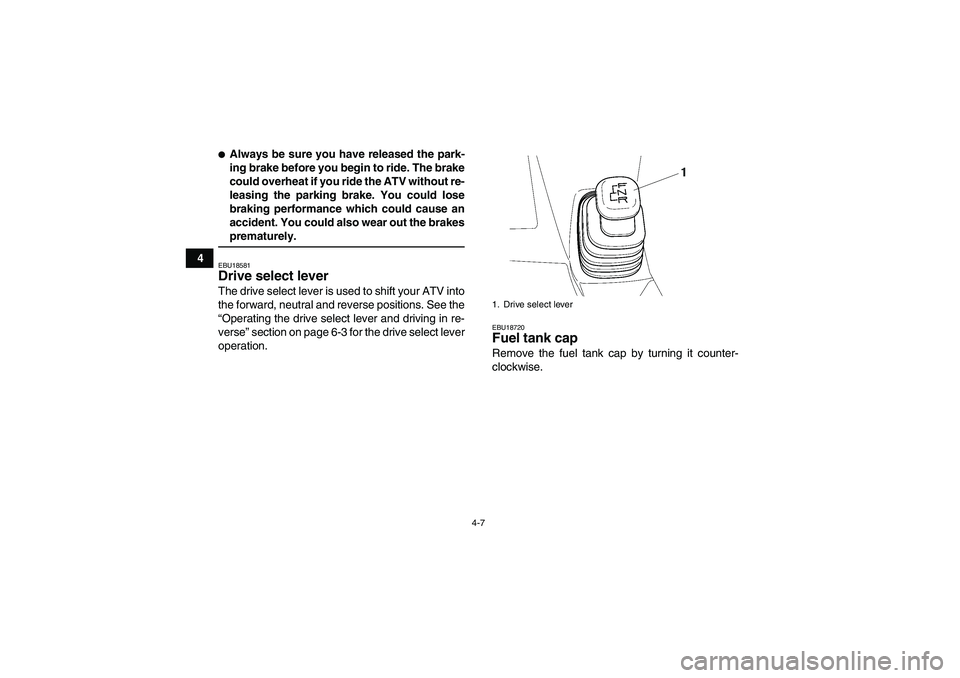
accident. You could also wear out the brakesprematurely.EBU18581Drive select lever The drive select lever is used to shift your ATV into
the forward, neutral and reverse positions. See the
“Operating the drive select lever and driving in re-
verse” section on page 6-3 for the drive select lever
operation.
EBU18720Fuel tank cap Remove the fuel tank cap by turning it counter-
clockwise.1. Drive select lever
U3D563E0.book Page 7 Monday, May 12, 2008 11:12 AM
Page 35 of 128

5-1
5
EBU19200
PRE-OPERATION CHECKS
EBU19223Pre-operation check list Before operating this ATV, be sure to check the items listed in the following table.
WARNING
EWB00480Always inspect your ATV each time you use it to make sure it is in safe operating condition.
Always follow the inspection and maintenance procedures and schedules described in the Owner’sManual. Failure to inspect increases the possibility of an accident or equipment damage.TIPThe maintenance of some items in the table has to be performed by a Yamaha dealer. Refer to the periodicmaintenance charts on page 8-3 to determine which service should be performed by a Yamaha dealer.
ITEM ROUTINE PAGE
FuelCheck fuel level in fuel tank, and add recommended fuel if neces-
sary.
Check fuel line for leakage. Correct if necessary.4-8, 5-3
Engine oilCheck oil level in engine, and add recommended oil to specified lev-
el if necessary.
Check ATV for oil leakage. Correct if necessary.5-3, 8-10
Final gear oilCheck ATV for oil leakage. Correct if necessary. 5-3, 8-14
Front brakeCheck operation. If soft or spongy, have Yamaha dealer bleed hy-
draulic system.
Check brake pads for wear, and replace if necessary.
Check brake fluid level in reservoir, and add recommended brake
fluid to specified level if necessary.
Check hydraulic system for leakage. Correct if necessary.5-3, 8-25, 8-26, 8-28
U3D563E0.book Page 1 Monday, May 12, 2008 11:12 AM
Page 36 of 128

5-2
5
Rear brakeCheck operation, and correct if necessary.
Lubricate cables if necessary.
Check lever and pedal free play, and adjust if necessary.5-3, 8-25, 8-28
Throttle leverMake sure that operation is smooth. Lubricate cable and lever hous-
ing if necessary.
Check cable free play, and adjust if necessary.5-4, 8-24
Control cablesMake sure that operation is smooth. Lubricate if necessary. 8-32
Wheels and tiresCheck wheel condition, and replace if damaged.
Check tire condition and tread depth. Replace if necessary.
Check air pressure. Correct if necessary.5-4, 5-5, 5-6
Brake pedal Make sure that operation is smooth. Lubricate pedal pivoting point if
necessary.8-33
Brake leversMake sure that operation is smooth. Lubricate lever pivoting points if
necessary.8-33
Axle bootsCheck for cracks or damage, and replace if necessary. 8-32
Chassis fastenersMake sure that all nuts, bolts and screws are properly tightened. 5-6
Instruments, lights and
switchesCheck operation, and correct if necessary. 5-6 ITEM ROUTINE PAGEU3D563E0.book Page 2 Monday, May 12, 2008 11:12 AM
Page 37 of 128

WARNING
EWB00520�Do not overfill the fuel tank. Fuel expands
when it heats up. If the fuel tank is overfilled,
f")
5-3
5
EBU19540Fuel Make sure that there is sufficient fuel in the tank.
(See page 4-8.)
WARNING
EWB00520�Do not overfill the fuel tank. Fuel expands
when it heats up. If the fuel tank is overfilled,
fuel could spill out due to heat from the en-
gine or the sun.�Be careful not to spill fuel, especially on the
engine or exhaust pipe which can cause a
fire and severe injury. Wipe up any spilled
fuel immediately.�Do not refuel right after the engine has been
running and is still very hot.�Be sure the fuel tank cap is closed securely.EBU19560Engine oil Make sure that the engine oil is at the specified lev-
el. Add oil as necessary. (See page 8-10.)EBU19590Final gear oil Make sure that the final gear oil is at the specified
level. Add oil as necessary. (See page 8-14.)
EBU27670Front and rear brakes Brake levers and brake pedal�Check that there is no free play in the front brake
lever. If there is free play, have a Yamaha dealer
check the brake system.�Check for correct free play in the rear brake lever
and brake pedal. If the free play is incorrect, ad-
just it. (See page 8-28.)�Check operation of the levers and pedal. They
should move smoothly and there should be a
firm feeling when the brake is applied. If not,
have a Yamaha dealer check them.
Brake fluid level (front brake)
Check the brake fluid level. Add fluid if necessary.
(See page 8-26.)
Brake fluid leakage (front brake)
Check to see if any brake fluid is leaking out of the
hose, joint or brake fluid reservoir of the front
brake. Apply the brake firmly for one minute. If theRecommended brake fluid:
DOT 4
U3D563E0.book Page 3 Monday, May 12, 2008 11:12 AM
Page 38 of 128

5-4
5lever moves slowly inward, there may be a leak in
the brake system. If there is any leakage, the brake
system should be checked by a Yamaha dealer.
Brake operation
Test the brakes at slow speed after starting out to
make sure they are working properly. If the brakes
do not provide proper braking performance, check
the brake pads and shoes for wear. (See page
8-25.)
WARNING
EWB00580Always check the brakes at the start of every
ride. Do not ride the ATV if you find any prob-
lem with the brakes or you could lose braking
ability, which could lead to an accident. If a
problem cannot be corrected by the adjust-
ment procedures provided in this manual, havea Yamaha dealer check for the cause.EBU19761Throttle lever Check the operation of the throttle lever. It must
open smoothly and spring back to the idle position
when released. Have a Yamaha dealer correct if
necessary.
EBU19812Tires
WARNING
EWB00592Use of improper tires on this ATV, or operation
of this ATV with improper or uneven tire pres-
sure, may cause loss of control, increasing
your risk of accident.
Pay attention to the following.�The tires listed below have been approved
by Yamaha Motor Manufacturing Corpora-
tion of America for this model. Other tire
combinations are not recommended.
Front:
Manufacturer/model:
MAXXIS/M937
Size:
AT23 x 8-12
Type:
Tubeless
Rear:
Manufacturer/model:
MAXXIS/M938
Size:
AT23 x 10-12
Type:
Tubeless
U3D563E0.book Page 4 Monday, May 12, 2008 11:12 AM
Page 41 of 128

6-1
6
EBU19880
OPERATION
EBU19900Read the Owner’s Manual carefully before riding
the ATV.
WARNING
EWB00630Read the Owner’s Manual carefully to become
familiar with all controls in order to help pre-
vent any loss of control, which could cause an
accident or injury. If there is a control or func-
tion you do not understand, ask your Yamahadealer.EBU26950Starting a cold engine
WARNING
EWB00640Always make sure all control cables work
smoothly before you begin riding in cold
weather. If the control cables are frozen or do
not work smoothly, you could be unable to
control the ATV, which could lead to an acci-dent or collision.
NOTICEECB00150See the “Engine break-in” section on page 6-4prior to operating the engine for the first time.
1. Set the parking brake.
2. Turn the fuel cock to “ON”.
3. Turn the main switch to “ON” and the engine
stop switch to“”.
4. Shift the drive select lever into the neutral po-
sition. The neutral indicator light should come
on. If the indicator light does not come on,
have a Yamaha dealer check the electrical cir-
cuit.TIPThe engine can be started under the following con-
ditions:�The drive select lever is in the neutral position.�The rear brake lever is applied with the drive se-
lect lever in any position. However, it is recom-
mended to shift into the neutral position beforestarting the engine.
U3D563E0.book Page 1 Monday, May 12, 2008 11:12 AM
Page 43 of 128
6-3
6
TIPThe engine is warm when it responds normally tothe throttle with the starter (choke) turned off.EBU20291Starting a warm engine Follow the same procedure as for starting a cold
engine, with the exception that the starter (choke)
is not required when the engine is warm. Instead,
start the engine with the throttle slightly open.EBU20380Operating the drive select lever and
driving in reverse NOTICEECB00170Before shifting, stop the ATV, otherwise thetransmission may be damaged.
Shifting: Forward
1. Bring the ATV to a complete stop.
2. Shift from neutral to forward and vice versa by
moving the drive select lever along the shift
guide.
TIPMake sure that the drive select lever is completelyshifted into position.
3. Open the throttle lever gradually.
Shifting: Reverse
1. Bring the ATV to a complete stop.
2. Apply the brake pedal.1. Drive select lever
2. F (Forward)
3. N (Neutral)
4. R (Reverse)
U3D563E0.book Page 3 Monday, May 12, 2008 11:12 AM
Page 44 of 128

6-4
63. Shift from neutral to reverse and vice versa by
moving the drive select lever along the shift
guide.
TIPWhen in reverse, the reverse indicator light should
come on. If the indicator light does not come on,have a Yamaha dealer check the electrical circuit.
4. Check behind for people or obstacles, and
then release the brake pedal.5. Open the throttle lever gradually and continue
to watch to the rear while backing.
WARNING
EWB00720Improper operation in reverse could make you
hit an obstacle or even a person behind you,
resulting in serious injury. When you shift into
reverse, make sure there are no people or ob-
stacles behind you. When it is safe to proceed,go slowly.EBU20682Engine break-in TIP�For ATVs equipped with an odometer or an hour
meter, follow the figures given in km (mi) or the
figures given in hours.�For ATVs not equipped with an odometer orhour meter, follow the figures given in hours.
There is never a more important period in the life of
your engine than the first 320 km (200 mi) or 20
hours of riding. For this reason, you should read
the following material carefully.
Since the engine is brand new, do not put an ex-
cessive load on it for the first 320 km (200 mi) or 20
hours. The various parts in the engine wear and
1. Drive select lever
2. F (Forward)
3. N (Neutral)
4. R (Reverse)U3D563E0.book Page 4 Monday, May 12, 2008 11:12 AM
 turned off.EBU20291Starting a warm engine Follow the same procedure as for starting a cold
engine, with th")