Page 65 of 94

PERIODIC MAINTENANCE AND ADJUSTMENT
6-20
2
3
4
5
67
8
9
indicator groove has almost disap-
peared, have a Yamaha dealer replace
the brake pads as a set.
EAU22500
Rear brake pads
Check each rear brake pad for damage
and measure the lining thickness. If a
brake pad is damaged or if the lining
thickness is less than 0.8 mm (0.03 in),
have a Yamaha dealer replace the
brake pads as a set.
EAU38640
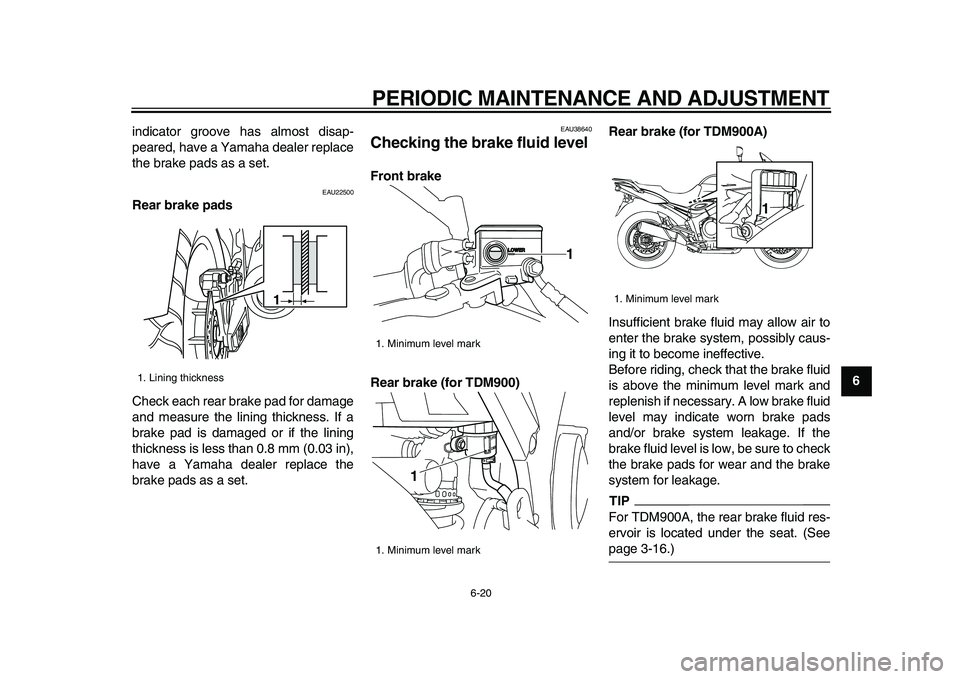
Checking the brake fluid level
Front brake
Rear brake (for TDM900)Rear brake (for TDM900A)
Insufficient brake fluid may allow air to
enter the brake system, possibly caus-
ing it to become ineffective.
Before riding, check that the brake fluid
is above the minimum level mark and
replenish if necessary. A low brake fluid
level may indicate worn brake pads
and/or brake system leakage. If the
brake fluid level is low, be sure to check
the brake pads for wear and the brake
system for leakage.
TIP
For TDM900A, the rear brake fluid res-
ervoir is located under the seat. (See
page 3-16.)
1. Lining thickness
1
1. Minimum level mark
1. Minimum level mark
1
1
1. Minimum level mark
1
Page 74 of 94

PERIODIC MAINTENANCE AND ADJUSTMENT
6-29
1
2
3
4
5
6
7
8
9For TDM900A
The main fuse and the fuse box, which
contains the fuses for the individual cir-
cuits, are located under the seat. (See
page 3-16.)
If a fuse is blown, replace it as follows.
1. Turn the key to “OFF” and turn offthe electrical circuit in question.
2. Remove the blown fuse, and then
install a new fuse of the specified
amperage.
WARNING! Do not
use a fuse of a higher amperage
rating than recommended to
avoid causing extensive dam-
age to the electrical system and
possibly a fire.
[EWA15131]
3. Turn the key to “ON” and turn on
the electrical circuit in question to
check if the device operates.
4. If the fuse immediately blows
again, have a Yamaha dealer
check the electrical system.
1. Backup fuse (for odometer and clock)
2. Radiator fan fuse
3. Turn signal light and hazard fuse
4. Ignition fuse
5. Signaling system fuse
6. Headlight fuse
7. ABS motor fuse
8. ABS motor spare fuse
9. Main fuse
10. Spare fuse
11. Fuel injection system fuse
12. ABS control unit fuse
12 34 5 6 7 8 911 12
10
Specified fuses:
Main fuse:
40.0 A
Headlight fuse:
TDM900 15.0 A
TDM900A 20.0 A
Radiator fan fuse:
20.0 A
Ignition fuse:
10.0 A
Signaling system fuse:
10.0 A
Backup fuse:
TDM900 5.0 A
TDM900A 10.0 A
Fuel injection system fuse:
10.0 A
Turn signal light and hazard fuse:
10.0 A
ABS motor fuse:
TDM900A 30.0 A
ABS control unit fuse:
TDM900A 10.0 A
Page 76 of 94
PERIODIC MAINTENANCE AND ADJUSTMENT
6-31
1
2
3
4
5
6
7
8
9
EAU24081
Replacing the tail/brake light
bulb
1. Remove the seat. (See
page 3-16.)
2. Remove the socket (together with
the bulb) by turning it counter-
clockwise.
3. Remove the burnt out bulb by
pushing it in and turning it counter-
clockwise.
4. Insert a new bulb into the socket,
push it in, and then turn it clock-
wise until it stops.
5. Install the socket (together with the
bulb) by turning it clockwise.
6. Install the seat.
EAU24204
Replacing a turn signal light
bulb
1. Remove the turn signal light lens
by removing the screw.
2. Remove the burnt-out bulb by
pushing it in and turning it counter-
clockwise.3. Insert a new bulb into the socket,
push it in, and then turn it clock-
wise until it stops.
4. Install the lens by installing the
screw.
NOTICE:
Do not over-
tighten the screw, otherwise the
lens may break.
[ECA11191]
1. Socket
1
1. Screw
2. Turn signal light lens
12
1. Turn signal light bulb
1