Page 33 of 130

5-1
1
2
3
45
6
7
8
9
10
11
EBU19200
PRE-OPERATION CHECKS
EBU19222
Pre-operation check list
Before operating this ATV, be sure to check the items listed in the following table.
WARNING
EWB00480
Always inspect your ATV each time you use it to make sure it is in safe operating condition.
Always follow the inspection and maintenance procedures and schedules described in the Owner’s
Manual. Failure to inspect increases the possibility of an accident or equipment damage.
TIP
The maintenance of some items in the table has to be performed by a Yamaha dealer. Refer to the periodic
maintenance charts on page 8-3 to determine which service should be performed by a Yamaha dealer.
ITEM ROUTINE PAGE
Fuel
�
Check fuel level in fuel tank, and add recommended fuel if neces-
sary.
�
Check fuel line for leakage. Correct if necessary.4-6, 5-3
Engine oil
�
Check oil level in engine, and add recommended oil to specified
level if necessary.
�
Check ATV for oil leakage. Correct if necessary.5-3, 8-9
Transmission oil
�
Check oil level in transmission case, and add recommended oil to
specified level if necessary.
�
Check ATV for oil leakage. Correct if necessary.5-3, 8-12
Front brake
�
Check operation, and correct if necessary.
�
Lubricate cable if necessary.
�
Check lever free play, and adjust if necessary.5-3, 8-24, 8-25
Page 34 of 130

5-2
1
2
3
45
6
7
8
9
10
11
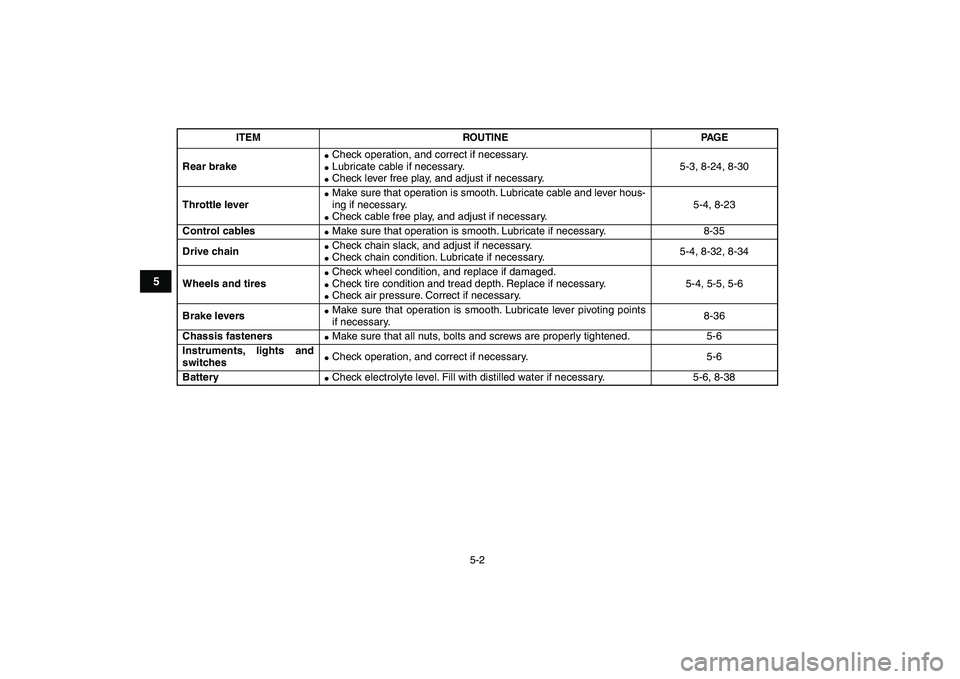
Rear brake
�
Check operation, and correct if necessary.
�
Lubricate cable if necessary.
�
Check lever free play, and adjust if necessary.5-3, 8-24, 8-30
Throttle lever
�
Make sure that operation is smooth. Lubricate cable and lever hous-
ing if necessary.
�
Check cable free play, and adjust if necessary.5-4, 8-23
Control cables
�
Make sure that operation is smooth. Lubricate if necessary. 8-35
Drive chain
�
Check chain slack, and adjust if necessary.
�
Check chain condition. Lubricate if necessary.5-4, 8-32, 8-34
Wheels and tires
�
Check wheel condition, and replace if damaged.
�
Check tire condition and tread depth. Replace if necessary.
�
Check air pressure. Correct if necessary.5-4, 5-5, 5-6
Brake levers
�
Make sure that operation is smooth. Lubricate lever pivoting points
if necessary.8-36
Chassis fasteners
�
Make sure that all nuts, bolts and screws are properly tightened. 5-6
Instruments, lights and
switches
�
Check operation, and correct if necessary. 5-6
Battery
�
Check electrolyte level. Fill with distilled water if necessary. 5-6, 8-38
ITEM ROUTINE PAGE
Page 35 of 130

5-3
1
2
3
45
6
7
8
9
10
11
EBU19540
Fuel
Make sure that there is sufficient fuel in the tank.
(See page 4-6.)
WARNING
EWB00520
�
Do not overfill the fuel tank. Fuel expands
when it heats up. If the fuel tank is overfilled,
fuel could spill out due to heat from the en-
gine or the sun.
�
Be careful not to spill fuel, especially on the
engine or exhaust pipe which can cause a
fire and severe injury. Wipe up any spilled
fuel immediately.
�
Do not refuel right after the engine has been
running and is still very hot.
�
Be sure the fuel tank cap is closed securely.
EBU19560
Engine oil
Make sure that the engine oil is at the specified lev-
el. Add oil as necessary. (See page 8-9.)
EBU19580
Transmission oil
Make sure that the transmission oil is at the speci-
fied level. Add oil as necessary. (See page 8-12.)
EBU19650
Front and rear brakes
Brake levers
�
Check for correct free play in the brake levers. If
the free play is incorrect, adjust it. (See pages
8-25 and 8-30.)
�
Check operation of the levers. They should
move smoothly and there should be a firm feel-
ing when the brake is applied. If not, have the
ATV checked by a Yamaha dealer.
Brake operation
Test the brakes at slow speed after starting out to
make sure they are working properly. If the brakes
do not provide proper braking performance, check
the brakes for wear. (See page 8-24.)
WARNING
EWB00570
Always check the brakes at the start of every
ride. Do not ride the ATV if you find any prob-
lem with the brakes or you could lose braking
ability, which could lead to an accident. If a
problem cannot be corrected by the adjust-
ment procedures provided in this manual, have
the ATV checked by a Yamaha dealer.
Page 39 of 130

6-1
1
2
3
4
56
7
8
9
10
11
EBU19880
OPERATION
EBU19900
Read the Owner’s Manual carefully before riding
the ATV.
WARNING
EWB00630
Read the Owner’s Manual carefully to become
familiar with all controls in order to help pre-
vent any loss of control, which could cause an
accident or injury. If there is a control or func-
tion you do not understand, ask your Yamaha
dealer.
EBU20071
Starting a cold engine
WARNING
EWB00640
Always make sure all control cables work
smoothly before you begin riding in cold
weather. If the control cables are frozen or do
not work smoothly, you could be unable to
control the ATV, which could lead to an acci-
dent or collision.NOTICE
ECB00150
See the “Engine break-in” section on page 6-4
prior to operating the engine for the first time.
1. Set the parking brake.
2. Turn the fuel cock to “ON”.
3. Turn the main switch to “ON” and the engine
stop switch to “RUN”.
4. Shift the drive select lever into the neutral po-
sition. The neutral indicator light should come
on. If the indicator light does not come on,
have a Yamaha dealer check the electrical cir-
cuit.
TIP
The engine can be started only when the drive se-
lect lever is in the neutral position.
5. Use the starter (choke) in reference to the fig-
ure:
Position (1):
�
Cold engine start with ambient temperature be-
low 5 °C (40 °F).
Page 41 of 130

6-3
1
2
3
4
56
7
8
9
10
11
EBU20291
Starting a warm engine
Follow the same procedure as for starting a cold
engine, with the exception that the starter (choke)
is not required when the engine is warm. Instead,
start the engine with the throttle slightly open.
EBU20360
Operating the drive select lever and
driving in reverse
NOTICE
ECB00170
Before shifting, stop the ATV, otherwise the
transmission may be damaged.
Shifting: Forward
1. Bring the ATV to a complete stop.
2. Shift from neutral to forward and vice versa by
moving the drive select lever along the shift
guide.
TIP
Make sure that the drive select lever is completely
shifted into position.3. Open the throttle lever gradually.
Shifting: Reverse
1. Bring the ATV to a complete stop.
2. Apply the parking brake.
3. Shift from neutral to reverse and vice versa by
moving the drive select lever along the shift
guide.
TIP
When in reverse, the reverse indicator light should
1. Neutral “N”
2. Forward “F”
3. Reverse “R”
4. Drive select lever
1
2
3
4
Page 42 of 130

6-4
1
2
3
4
56
7
8
9
10
11
come on. If the indicator light does not come on,
have a Yamaha dealer check the electrical circuit.
4. Check behind for people or obstacles, and
then release the parking brake.
5. Open the throttle lever gradually and continue
to watch to the rear while backing.
TIP
If the drive select lever is shifted into reverse while
the engine is running, the engine will stop unless
the rear brake lever or parking brake is applied.
WARNING
EWB00720
Improper operation in reverse could make you
hit an obstacle or even a person behind you,
resulting in serious injury. When you shift into
reverse, make sure there are no people or ob-
stacles behind you. When it is safe to proceed,
go slowly.
EBU20682
Engine break-in
TIP
�
For ATVs equipped with an odometer or an hour
meter, follow the figures given in km (mi) or thefigures given in hours.
�
For ATVs not equipped with an odometer or
hour meter, follow the figures given in hours.
There is never a more important period in the life of
your engine than the first 320 km (200 mi) or 20
hours of riding. For this reason, you should read
the following material carefully.
Since the engine is brand new, do not put an ex-
cessive load on it for the first 320 km (200 mi) or 20
hours. The various parts in the engine wear and
polish themselves to the correct operating clear-
ances. During this period, prolonged full-throttle
operation or any condition that might result in en-
gine overheating must be avoided.
0–160 km (0–100 mi) or 0–10 hours
Avoid prolonged operation above 1/2 throttle. Vary
the speed of the ATV regularly. Do not operate it at
one set throttle position.
160–320 km (100–200 mi) or 10–20 hours
Avoid prolonged operation above 3/4 throttle. Rev
the engine freely, but do not use full throttle at any
time.
Page 43 of 130

6-5
1
2
3
4
56
7
8
9
10
11
320 km (200 mi) or 20 hours and beyond
The ATV can now be operated normally.
NOTICE
ECB00220
If any engine trouble should occur during the
engine break-in period, immediately have a
Yamaha dealer check the ATV.
EBU20700
Parking
When parking the ATV, stop the engine, shift the
drive select lever into the forward position, apply
the parking brake, and then turn the fuel cock to
“OFF”.
EBU20740
Parking on a slope
WARNING
EWB00830
Avoid parking on hills or other inclines. Park-
ing on a hill or other incline could cause the
ATV to roll out of control, increasing the
chance of an accident. If you must park on an
incline, place the ATV transversely across the
incline, shift the drive select lever to the for-
ward position, stop the engine, apply the park-
ing brake, and then block the front and rear
wheels with rocks or other objects.
Do not park the ATV at all on hills that are so
steep you could not walk up them easily.
1. Bring the ATV to a stop by applying the brakes
in the forward position.
2. Stop the engine.
3. With the rear brake applied, apply the parking
brake.
1. Locked position
1
Page 57 of 130

7-12
1
2
3
4
5
67
8
9
10
11
WARNING
EWB01550
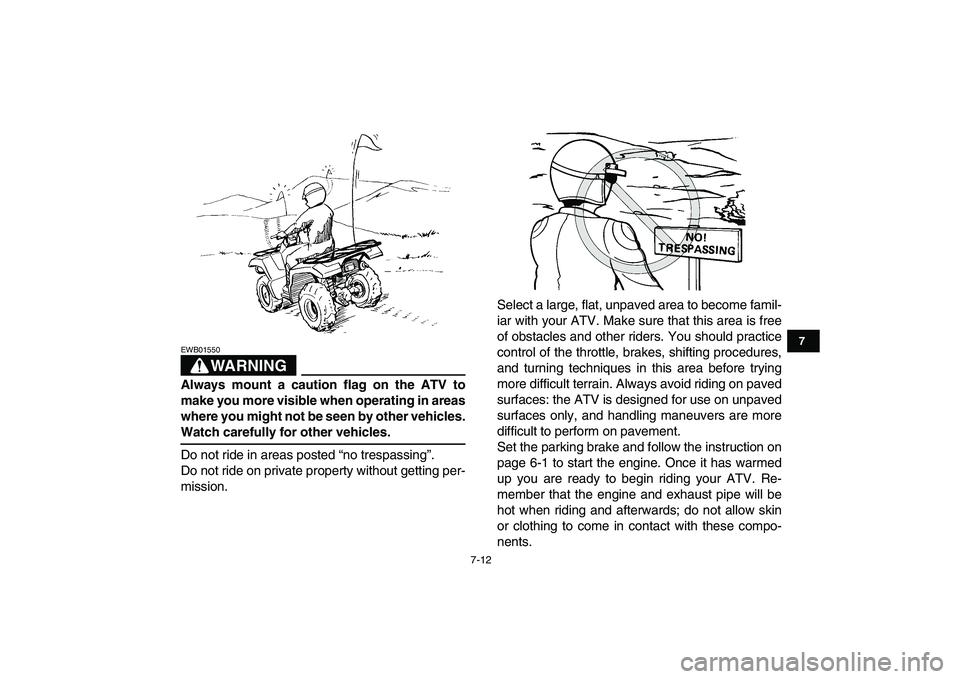
Always mount a caution flag on the ATV to
make you more visible when operating in areas
where you might not be seen by other vehicles.
Watch carefully for other vehicles.
Do not ride in areas posted “no trespassing”.
Do not ride on private property without getting per-
mission.Select a large, flat, unpaved area to become famil-
iar with your ATV. Make sure that this area is free
of obstacles and other riders. You should practice
control of the throttle, brakes, shifting procedures,
and turning techniques in this area before trying
more difficult terrain. Always avoid riding on paved
surfaces: the ATV is designed for use on unpaved
surfaces only, and handling maneuvers are more
difficult to perform on pavement.
Set the parking brake and follow the instruction on
page 6-1 to start the engine. Once it has warmed
up you are ready to begin riding your ATV. Re-
member that the engine and exhaust pipe will be
hot when riding and afterwards; do not allow skin
or clothing to come in contact with these compo-
nents.