Page 28 of 68

OPERATION AND IMPORTANT RIDING POINTS
5-1
5
EAU15951
Read the Owner’s Manual carefully to
become familiar with all controls. If
there is a control or function you do not
understand, ask your Yamaha dealer.
WARNING
EWA10271
Failure to familiarize yourself with
the controls can lead to loss of con-
trol, which could cause an accidentor injury.
EAU16562
Starting a cold engine NOTICE
ECA10250
See page 5-3 for engine break-in in-
structions prior to operating the ve-hicle for the first time.
1. Turn the key to“”, and when the
oil level warning light comes on,
turn it to“”.NOTICE
ECA10240
If the oil level warning light does not
come on, have a Yamaha dealercheck the electrical circuit.
2. Close the throttle completely.3. While applying the front or rear
brake, start the engine by pushing
the start switch or by pushing the
kickstarter lever down. NOTICE:
For maximum engine life, never
accelerate hard when the en-
gine is cold!
[ECA11041]
If the engine fails to start by push-
ing the start switch, release the
switch, wait a few seconds, and
then try again. Each starting at-
tempt should be as short as possi-
ble to preserve the battery. Do not
crank the engine more than 5 sec-
onds on any one attempt. If the en-
gine does not start with the starter
motor, try using the kickstarter.
PUSHOPEN
ZAUM0253
ZAUM0367
U3C6E1E0.book Page 1 Friday, August 8, 2008 10:09 AM
Page 30 of 68

OPERATION AND IMPORTANT RIDING POINTS
5-3
5
EAU16820
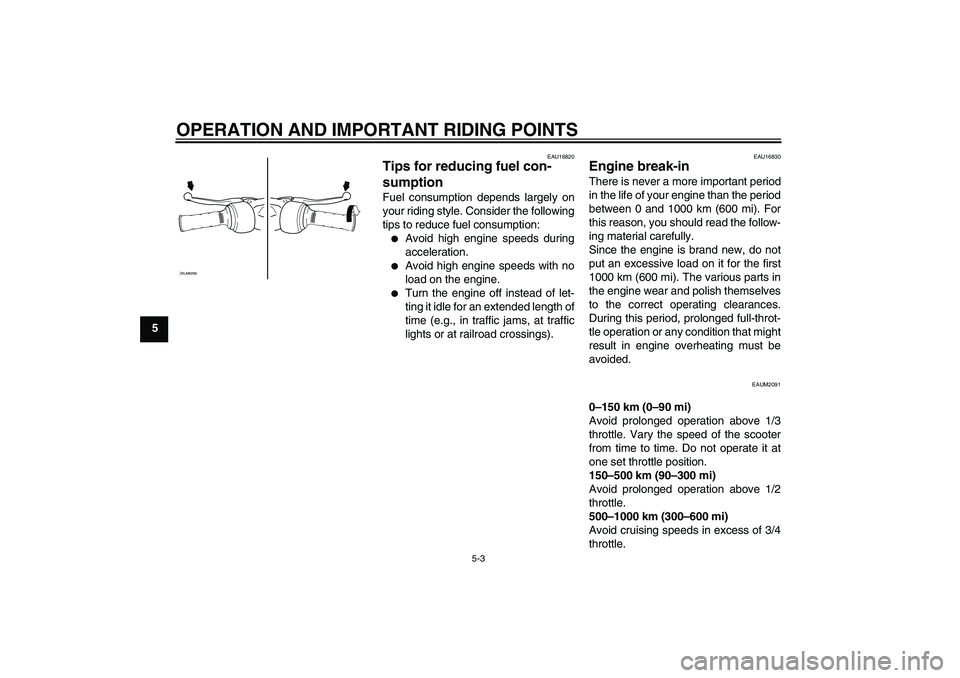
Tips for reducing fuel con-
sumption Fuel consumption depends largely on
your riding style. Consider the following
tips to reduce fuel consumption:�
Avoid high engine speeds during
acceleration.
�
Avoid high engine speeds with no
load on the engine.
�
Turn the engine off instead of let-
ting it idle for an extended length of
time (e.g., in traffic jams, at traffic
lights or at railroad crossings).
EAU16830
Engine break-in There is never a more important period
in the life of your engine than the period
between 0 and 1000 km (600 mi). For
this reason, you should read the follow-
ing material carefully.
Since the engine is brand new, do not
put an excessive load on it for the first
1000 km (600 mi). The various parts in
the engine wear and polish themselves
to the correct operating clearances.
During this period, prolonged full-throt-
tle operation or any condition that might
result in engine overheating must be
avoided.
EAUM2091
0–150 km (0–90 mi)
Avoid prolonged operation above 1/3
throttle. Vary the speed of the scooter
from time to time. Do not operate it at
one set throttle position.
150–500 km (90–300 mi)
Avoid prolonged operation above 1/2
throttle.
500–1000 km (300–600 mi)
Avoid cruising speeds in excess of 3/4
throttle.
ZAUM0269
U3C6E1E0.book Page 3 Friday, August 8, 2008 10:09 AM
Page 35 of 68

PERIODIC MAINTENANCE AND ADJUSTMENT
6-4
6
EAUM2070
TIP�
The air filter needs more frequent service if you are riding in unusually wet or dusty areas.
18*CarburetorAdjust engine idling speed.√√√√√√
19*Autolube pumpCheck operation.
Bleed if necessary.√√√√
20*Cooling systemCheck coolant level and vehicle
for coolant leakage.√√√√√
Change. Every 3 years
21Final transmission
oilCheck vehicle for oil leakage.√√ √
Change.√√√
22*V- b e l tReplace. Every 10000 km (6000 mi)
23*Front and rear brake
switchesCheck operation.√√√√√√
24Moving parts and
cablesLubricate.√√√√√
25*Throttle grip hous-
ing and cableCheck operation and free play.
Adjust the throttle cable free play
if necessary.
Lubricate the throttle grip housing
and cable.√√√√√
26*Lights, signals and
switchesCheck operation.
Adjust headlight beam.√√√√√√ NO. ITEM CHECK OR MAINTENANCE JOBODOMETER READING
ANNUAL
CHECK 1000 km
(600 mi)6000 km
(3500 mi)12000 km
(7000 mi)18000 km
(10500 mi)24000 km
(14000 mi)
U3C6E1E0.book Page 4 Friday, August 8, 2008 10:09 AM
Page 38 of 68

PERIODIC MAINTENANCE AND ADJUSTMENT
6-7
6
EAU19622
Checking the spark plug The spark plug is an important engine
component, which should be checked
periodically, preferably by a Yamaha
dealer. Since heat and deposits will
cause any spark plug to slowly erode, it
should be removed and checked in ac-
cordance with the periodic mainte-
nance and lubrication chart. In addition,
the condition of the spark plug can re-
veal the condition of the engine.
The porcelain insulator around the cen-
ter electrode of the spark plug should
be a medium-to-light tan (the ideal color
when the vehicle is ridden normally). If
the spark plug shows a distinctly differ-
ent color, the engine could be operating
improperly. Do not attempt to diagnose
such problems yourself. Instead, have
a Yamaha dealer check the vehicle.
If the spark plug shows signs of elec-
trode erosion and excessive carbon or
other deposits, it should be replaced.Before installing a spark plug, the spark
plug gap should be measured with a
wire thickness gauge and, if necessary,
adjusted to specification.
Clean the surface of the spark plug
gasket and its mating surface, and then
wipe off any grime from the spark plug
threads.
TIPIf a torque wrench is not available when
installing a spark plug, a good estimate
of the correct torque is 1/4–1/2 turn
past finger tight. However, the spark
plug should be tightened to the speci-fied torque as soon as possible.
Specified spark plug:
NGK/BR8HS
1. Spark plug gapSpark plug gap:
0.6–0.7 mm (0.024–0.028 in)
Tightening torque:
Spark plug:
20 Nm (2.0 m·kgf, 14 ft·lbf)
1
ZAUM0037
U3C6E1E0.book Page 7 Friday, August 8, 2008 10:09 AM
Page 40 of 68

PERIODIC MAINTENANCE AND ADJUSTMENT
6-9
6
EAU20070
Coolant The coolant level should be checked
before each ride. In addition, the cool-
ant must be changed at the intervals
specified in the periodic maintenance
and lubrication chart.
EAUM2102
To check the coolant level
1. Place the vehicle on a level sur-
face and hold it in an upright posi-
tion.TIP�
The coolant level must be checked
on a cold engine since the level
varies with engine temperature.
�
Make sure that the vehicle is posi-
tioned straight up when checking
the coolant level. A slight tilt to theside can result in a false reading.
2. Check the coolant level through
the check window.
TIPThe coolant should be between theminimum and maximum level marks.3. If the coolant is at or below the
minimum level mark, remove the
cowling A. (See page 6-6.)
4. Open the reservoir cap, and then
add coolant to the maximum level
mark. WARNING! Remove only
the coolant reservoir cap. Never
attempt to remove the radiator
cap when the engine is hot.
[EWA15161]
NOTICE: If coolant is not
available, use distilled water or
soft tap water instead. Do not
use hard water or salt water
since it is harmful to the engine.
If water has been used instead
of coolant, replace it with cool-
ant as soon as possible, other-wise the cooling system will not
be protected against frost and
corrosion. If water has been
added to the coolant, have a
Yamaha dealer check the anti-
freeze content of the coolant as
soon as possible, otherwise the
effectiveness of the coolant will
be reduced.
[ECA10472]
5. Close the reservoir cap, and then
install the cowling.
1. Maximum level mark
2. Minimum level mark
1
2
ZAUM0591
1. Coolant reservoir capCoolant reservoir capacity:
0.25 L (0.26 US qt, 0.22 Imp.qt)1ZAUM0274
U3C6E1E0.book Page 9 Friday, August 8, 2008 10:09 AM
Page 52 of 68
PERIODIC MAINTENANCE AND ADJUSTMENT
6-21
63. Turn the key to“” and turn on
the electrical circuits to check if the
devices operate.
4. If the fuse immediately blows
again, have a Yamaha dealer
check the electrical system.
EAUM2111
Replacing the headlight bulb If the headlight bulb burns out, replace
it as follows.NOTICE
ECA10670
It is advisable to have a Yamahadealer perform this job.
1. Remove cowling A. (See page
6-6.)
2. Disconnect the headlight coupler.
3. Remove the headlight bulb holder
by turning it counterclockwise, and
then remove the burnt out bulb.
4. Place a new headlight bulb into po-
sition, and then secure it with the
bulb holder.
5. Connect the coupler.6. Install the cowling.
7. Have a Yamaha dealer adjust the
headlight beam if necessary.
Specified fuse:
7.5 A
1. Headlight bulb holder
1
ZAUM0283
U3C6E1E0.book Page 21 Friday, August 8, 2008 10:09 AM
Page 53 of 68
PERIODIC MAINTENANCE AND ADJUSTMENT
6-22
6
EAU24133
Replacing the tail/brake light
bulb 1. Remove the tail/brake light lens by
removing the screws.
2. Remove the burnt-out bulb by
pushing it in and turning it counter-
clockwise.
3. Insert a new bulb into the socket,
push it in, and then turn it clock-
wise until it stops.
4. Install the lens by installing the
screws. NOTICE: Do not over-
tighten the screws, otherwise
the lens may break.
[ECA10681]EAU24204
Replacing a turn signal light
bulb 1. Remove the turn signal light lens
by removing the screw.
2. Remove the burnt-out bulb by
pushing it in and turning it counter-
clockwise.3. Insert a new bulb into the socket,
push it in, and then turn it clock-
wise until it stops.
4. Install the lens by installing the
screw. NOTICE: Do not over-
tighten the screw, otherwise the
lens may break.
[ECA11191]
ZAUM0284
ZAUM0285ZAUM0286
U3C6E1E0.book Page 22 Friday, August 8, 2008 10:09 AM
Page 54 of 68

PERIODIC MAINTENANCE AND ADJUSTMENT
6-23
6
EAU25881
Troubleshooting Although Yamaha scooters receive a
thorough inspection before shipment
from the factory, trouble may occur dur-
ing operation. Any problem in the fuel,
compression, or ignition systems, for
example, can cause poor starting and
loss of power.
The following troubleshooting charts
represent quick and easy procedures
for checking these vital systems your-
self. However, should your scooter re-
quire any repair, take it to a Yamaha
dealer, whose skilled technicians have
the necessary tools, experience, and
know-how to service the scooter prop-
erly.
Use only genuine Yamaha replace-
ment parts. Imitation parts may look like
Yamaha parts, but they are often inferi-
or, have a shorter service life and can
lead to expensive repair bills.
WARNING
EWA15141
When checking the fuel system, do
not smoke, and make sure there are
no open flames or sparks in the ar-
ea, including pilot lights from waterheaters or furnaces. Gasoline or
gasoline vapors can ignite or ex-
plode, causing severe injury or
property damage.
U3C6E1E0.book Page 23 Friday, August 8, 2008 10:09 AM