Page 137 of 516
21 or the power locking buttons 22 are pushed repeatedly in quick succes
sion , the power locking system is switched off for a
br i
ef period to help keep it from being overloaded.
Mechanical key
Fig. 17 Mechanical key.
tory information and heed the WARNon page 36.
The vehicle is then unlocked for about secon ds. Unless a door or the rear hatch is opened in this
span of lime , th e vehicle is automatically locked af-
leiWards.
The vehicle key set may also include a mechanical
key 17 .
Use the mechanical key for:
locking and unlocking the vehicle
Starting the engine
light in the remote control vehicle
key .
Please first read and note the introductory information and heed the WARNon page 36.
Before driving
the indicator light 18 (arrow )
repeatedly .
the indicator light in the remote control vehicle
key does not come on whe n the button is pressed,
t he battery inside
the key mus t be rep laced
293.
Page 141 of 516

Automatic locking (Auto Lock)
The vehicle locks au tomatically when it reaches a
speed of about 10 mph (15 km/h) . When the vehi
cle is locked , the indicator light comes on in the
power lock ing button
a door once.
-
a door once.
- Lock the vehicle with the remote control vehicle key.
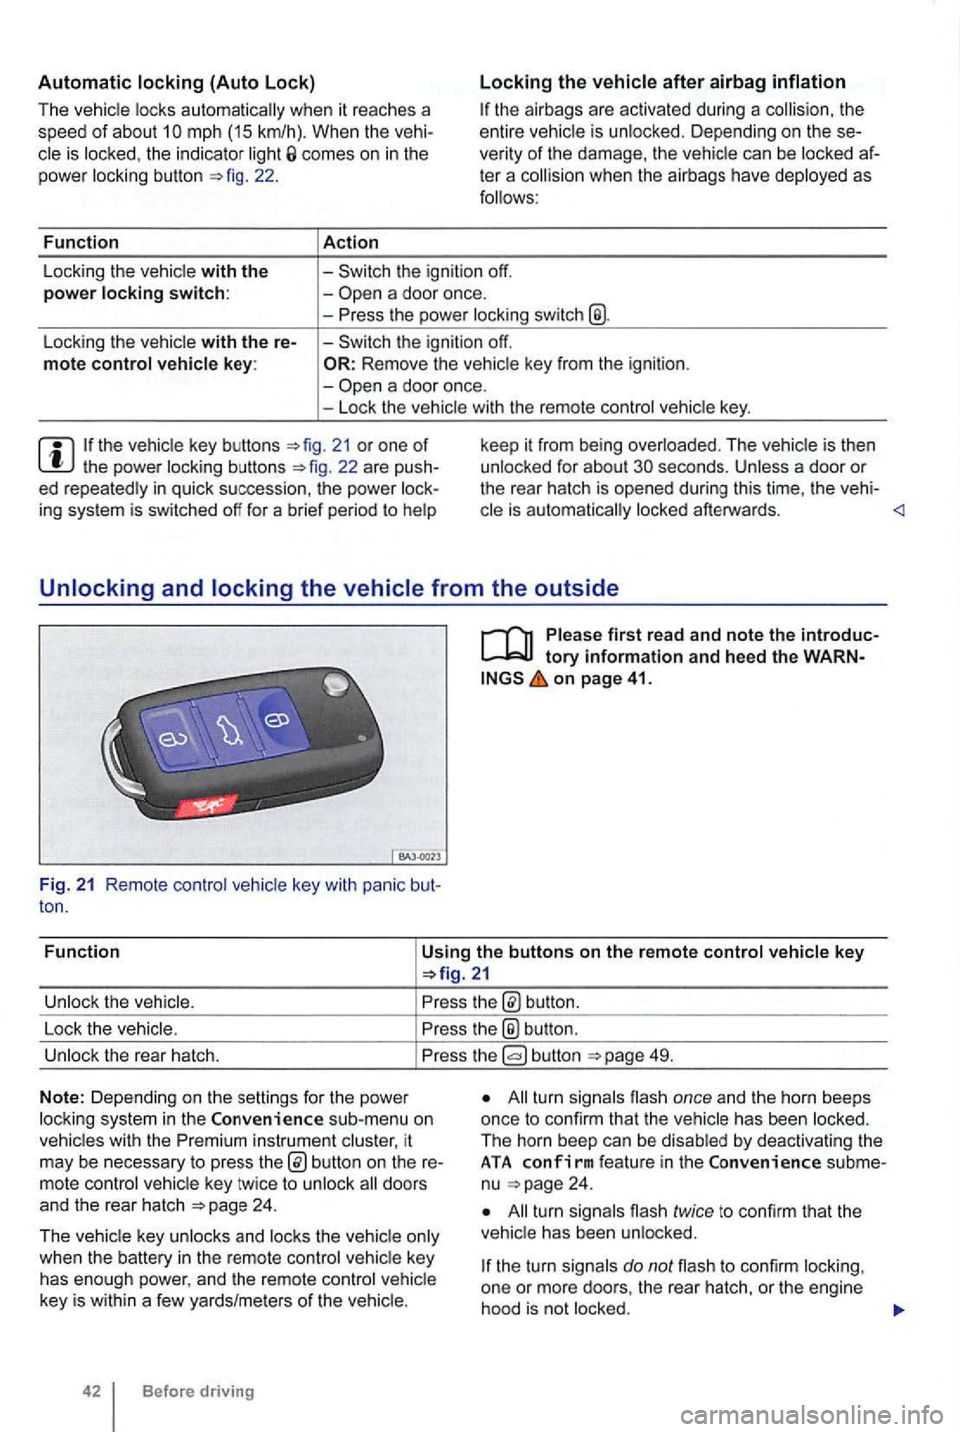
21 or one of th e power locking buttons
on page 41.
Fun c
tion
Using the buttons on the remote control vehicle key
button.
Lock the vehic le.
the® button .
Unlock the rear hatch. button 49.
N o
te: Depending on the settin gs for the power
l ock ing system in the sub-menu on
vehicles with the instrument cluster, it
may be necessary to press
24 .
T he vehicle key unlocks and locks the vehicle only
when the battery
in the remote control vehicle key
has enough power, and the remote control vehicle
key is wi
thin a few yards/me ters of the vehicle.
42 Before driving
All turn signals flash once and the horn beeps
once to confirm that the vehic le has been locked.
The horn beep can be disabled
by deactivating the ATA co nfirm feat ure in the subme
nu 24 .
All turn signals flash twice to confirm that the
vehicle has been unlocked.
the turn signals do not flash to confirm lock ing,
one or mor e doors , the rear hatch, or the engine
hood is not
locked.
Page 226 of 516
first read and note the introductory information and heed the on
is
the doors . They
compartment
The compartments may have that come on automatically when they are
opened and go off when they are
Background
When the ignition and are switched on,
the roof buttons up. There
may
be
go out when you the or a few minutes after
you remove the to prevent unnecessary drain on the battery .
Lights and vision
Page 309 of 516

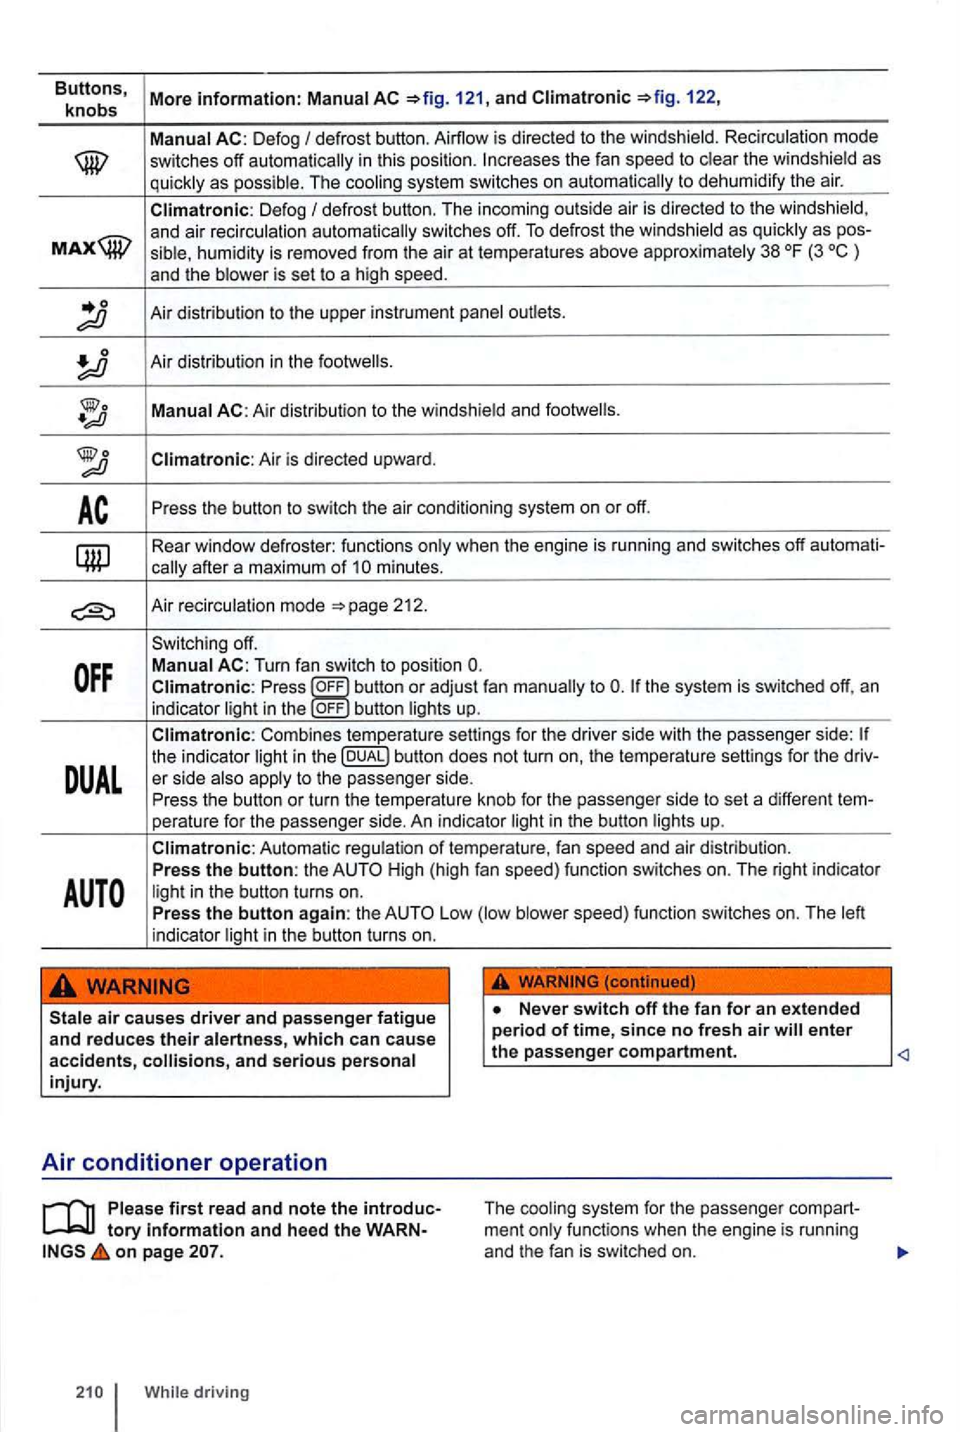
Buttons, More information: AC 121, and 122,
knobs
defrost button. Airflow is direc ted to the windshield. Recirc u lation mode switches off autom atically in thi s position. th e w indshie ld as q u ick ly as possib le. The coolin g sys te m sw itc hes on automat ica lly to dehu mid ify th e a ir.
Climatronic: D efog de frost button. The incom ing outside air i s d irected to th e w inds hie ld, a nd a ir rec irc ulatio n aut omat ically switches off. To defrost th e winds hie ld as quickly as pos -humi dity is removed from the air at temperatu res above approximately 38 °F (3 is set to a hig h speed .
Air dist ribution to th e upper instrument panel outlets.
Air di strib ution in th e
Climatronic: Air is d irected upward.
Press the bu tton to switch the air conditioni ng system on or off.
Rea r wi ndow defroster: fu nc tions
A ir reci rculat io n m od e 212.
Sw it c hing off.
Climatronic: Pr ess to bu tton lights up.
Combines te mperat ure settings for the driver side with the passenger side:
DUAL
th e in di cato r
High (h igh fan speed) fu nc tion switches on. The right indicator
ligh t in th e button turns on.
Pre ss the button again: the Low blower speed) fu nction switches on. The
Ne ver switch off the fa n for an extended period of time, since no fres h a ir ente r
__
Air conditioner operation
Please first read and note the introduc tory information and heed the WARNon page
While d rivi ng T
h e coo ling system for the passenger compart
ment
Page 396 of 516
Do it
Practical tips
you suspect a ma lfunction or the Facility. addition,
the keyword entries cons ide rations " or may
Description r e m edy
e rs
too 214.
- Battery in the remo te
-the battery in the remote con-
trot
t o using - Synchronize -Buttons pressed outside oper-
-Lock or
entry in the index .
Assistance systems activated. Check the "Assi stance systems " entry in the index. driving behavior Direct Gearbox too
is unl ocked.
Front seats cannot
be ad-238.
justed wi
th power Fuse if necessary 317.
Features do not work as de-
Volkswagen 24.
- Have the
the road as they
Charge
consumers do not Remaining too
3
17 .
tip s 297
Page 417 of 516

Fuses in the vehicle
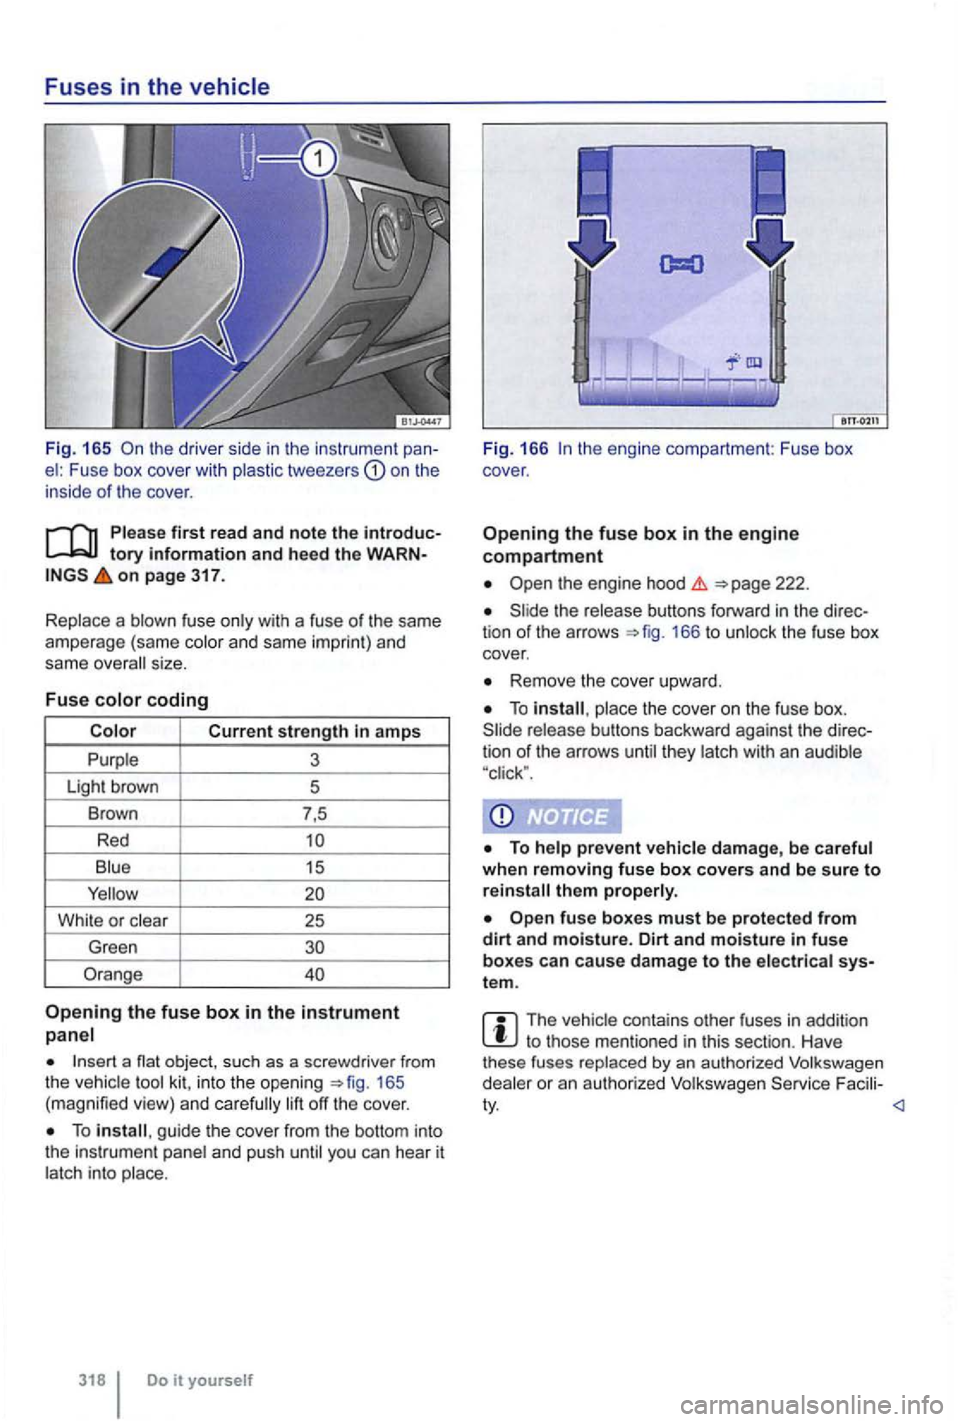
Fig. 165 th e drive r side in the instrument el : Fuse box cove r with plastic tweeze rs on the
inside of t he cover .
on page 317.
Replace a blown fuse only with a fuse
of the same
ampe rage (same color and same impri nt) and
same overa ll size .
Fu
se colo r coding
Blu e
15
Whi te or c lear
25
Green
Orange
Opening the fuse box in t h e instrument
panel
1 65
( m agnified view) and care fully lift off the cover .
To guide the cover from the bottom into
the instrument panel and push until you can hear it
latch int o place .
318 Do it you rself Fi
g. 166
the release buttons forward in the 166 to unlock the fuse box
cover.
Remove the cover upward.
To place the cover on the fuse box.
th em p rope rly.
fuse boxes must be protecte d from dirt an d moisture. Dirt an d moisture in fu se
boxes can cause damage to the elect rica l tem .
The vehic le con tai ns other fu ses in add it ion to those mentioned in this section . H av e
these fuses replaced by an autho rized Volkswage n
dealer or an autho rized Volkswagen Facili -
Page 459 of 516
Arrow buttons
-Radio operation modes, briefly press to cha nge the station or band Nav
igati on
Naviga tion
Touch scree n.
® or DVD eject button .
Press the device button to adapt the to the
Adjustment knob: The function depends on the ope ratin g mode .
-Tum to program stations in Navigation chapter Radio Mode.
-Navigation
Page 460 of 516
Accessing stations stored on station preset buttons
Fig. 5 Main
the played station is save d to a station preset
button, the station preset number is displayed after
the frequ ency
in the main 5.
(Supp l
ement)-Technical changes
main menu.
Press the statio n preset button in the main RAmenu for the station that you wish to display .
Memory is displayed top left , the saved
stations can also be selected using the arrow but
tons
(Radio settings chapter Menu and Settings
(SETUP)) .
Changing to saved stations can also be selected
across frequency bands.
A s tored station can only then
be played if it can
still be received at the current location .