Page 32 of 516
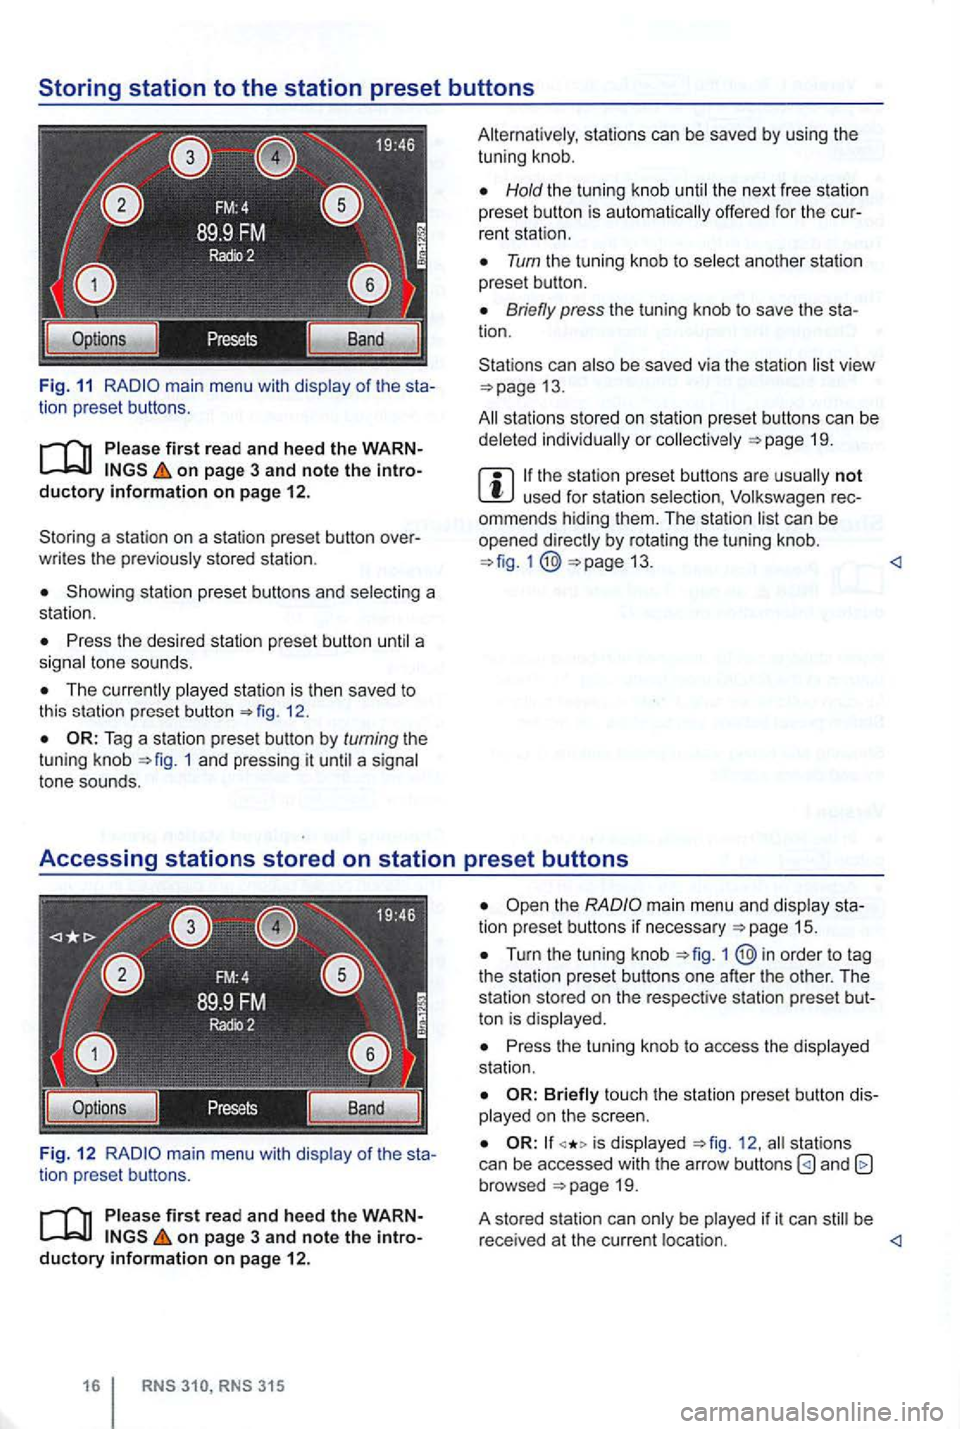
Fig. 11 main menu with of the sta
tion preset button s.
on page 3 and note the introductory information on pag e 12.
Storin g a sta ti o n on a station preset button over
w rit es the
stored statio n .
Showing station preset buttons and
Press the desi red stat ion pres et button
Th e 12.
1 and pressing it a tone sounds.
Fig. 12
of the sta
tion prese t buttons.
firs t r ead a nd heed the WARN on page 3 and note the introductory information on page 12 .
Hold the tun ing knob the next free statio n
preset button is offe red for the cur
rent stati on .
Turn the tu ning kn ob to
Briefly press the tuning knob to save the sta
tion.
Stations can
view 13.
sta tions stored on station preset butto ns can be or 19.
not used for station rec
ommends hiding them. T he station by rotating the tun ing knob. 13.
the main me nu an d station preset buttons if necessary 15.
Turn the tuning knob 1
Press the tuning knob to access the station .
touch the station preset b utton diso n the scree n.
is 12 . stat ion s
can be accessed with the arrow buttons and browsed
be be
r ece ived at the cu rrent
Page 34 of 516
The method for stor ing and accessing preset stations is the same as in Radi o mode 12.
Changing
on page 3 and note the introductory information on page 12.
Changing stations using the arrow buttons
Press one of the arrow buttons on the device 1 switch to the next station in the se
lected category .
is displayed , only the stations saved on the
station preset buttons are browsed through
16.
Configuring station selection options
Press the options 14.
Activate the Presets
1
Chan nel List
315
The radio stations are respo nsible for
Fig. 15 Sta tion list of
stations from the station list
19.
Browse the list and tag the desired station by turning the tuning knob. Then press the tuning
knob to access the station.
Press 1 ® button to close the sta
tion list.
T he list
close automat ically after a pe riod of in
activity .
The method for starting and ending 12 .
Page 35 of 516
Fig. 16 selection options.
on page 3 and note the
Press the !categories) function button 15.
no multimedia interface is connected,
the of categories can be accessed
from the Satellite Radio main menu .
Touch the !Options) function button and the !Category) function button in th e pop-up window 16 .
Radio settings menu (SETUP)
on page 3 and note the
a category .
the 17.
the desi red category by turn in g and
pressing the tuning knob or pressing the screen.
The station
corre sponding to the chosen be opened . ed category
All Categories) is selected, stat ions of ries 15.
Press the button to a
The
the
Keys): the statio n selectio n for arrow buttons
!station List): stations within reach in the frequ ency band can be browsed using the
the stored stations can be browsed using the arrow buttons 12).
Tum the frequency knob 1 @,to the stored stations one after the other, and
press to
17.
Press
1
Audio mode
Page 52 of 516
External CD changer with magazine can be found
i n the right-hand side of the luggage compartment or beneath the passenger seat, depending on the
vehicle .
Removing and inserting the magazine
Slide the magazi ne cover =>fig. 37 pletely open in order to expose th e m agazine.
Press the for magazine removal and
remove the magazine ®.
order to insert the again , insert
and push the magazine as far as it
facing upwards and in the direction of the arrows
Close the magazine cover comple tely in
on page 3 and note the ductory
the Media Selection Menu and select the
39.
back of the last played CD is contin ued with the
las t played track.
F urther operation of the CD i s ca rried out similarly
to the operation
of an audio CD loaded into the
RNS RNS 315
Loading and removing
Hold the CD magazine with the label
facing upwards 38.
Hold the CD by the center hole or the outer
edge with the printed side facing up.
To remove turn the CD magazine over
and rotate the release lever® against the spring
force .
in the direc tion of the row through the opening in the rear of the mag a-
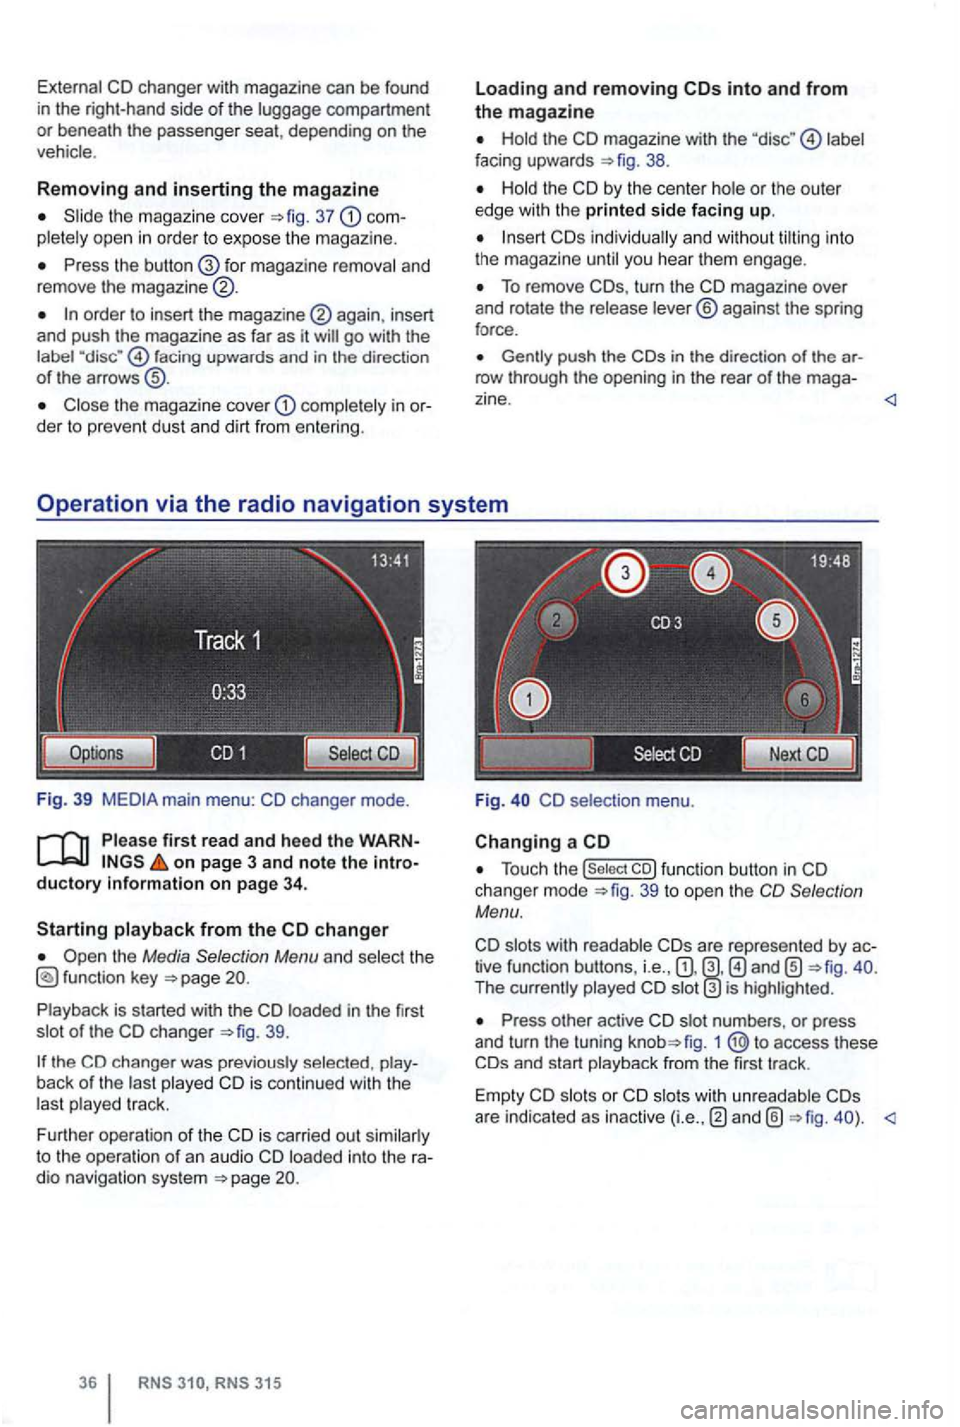
Fig. CD selectio n menu .
Changing a CD
Touch the 39 to open the Selection
Menu.
slots with readab le tive function buttons, i.e. , The currently played is highlighted.
Press other active CD slot numbe rs , or press
and turn the tuning fig. 1 access these
are indicated as inactive
Page 58 of 516
Destination input
this section
a destination address or intersection . . . . . . . . . . . . . . . . . . . . . . . . . . . 43
a point of interest . . . . . . . . . . . . . . . 44 view of a dest ination . . . . . . . . . . . . . 45
315: Saving .
on page 3 an d note t he
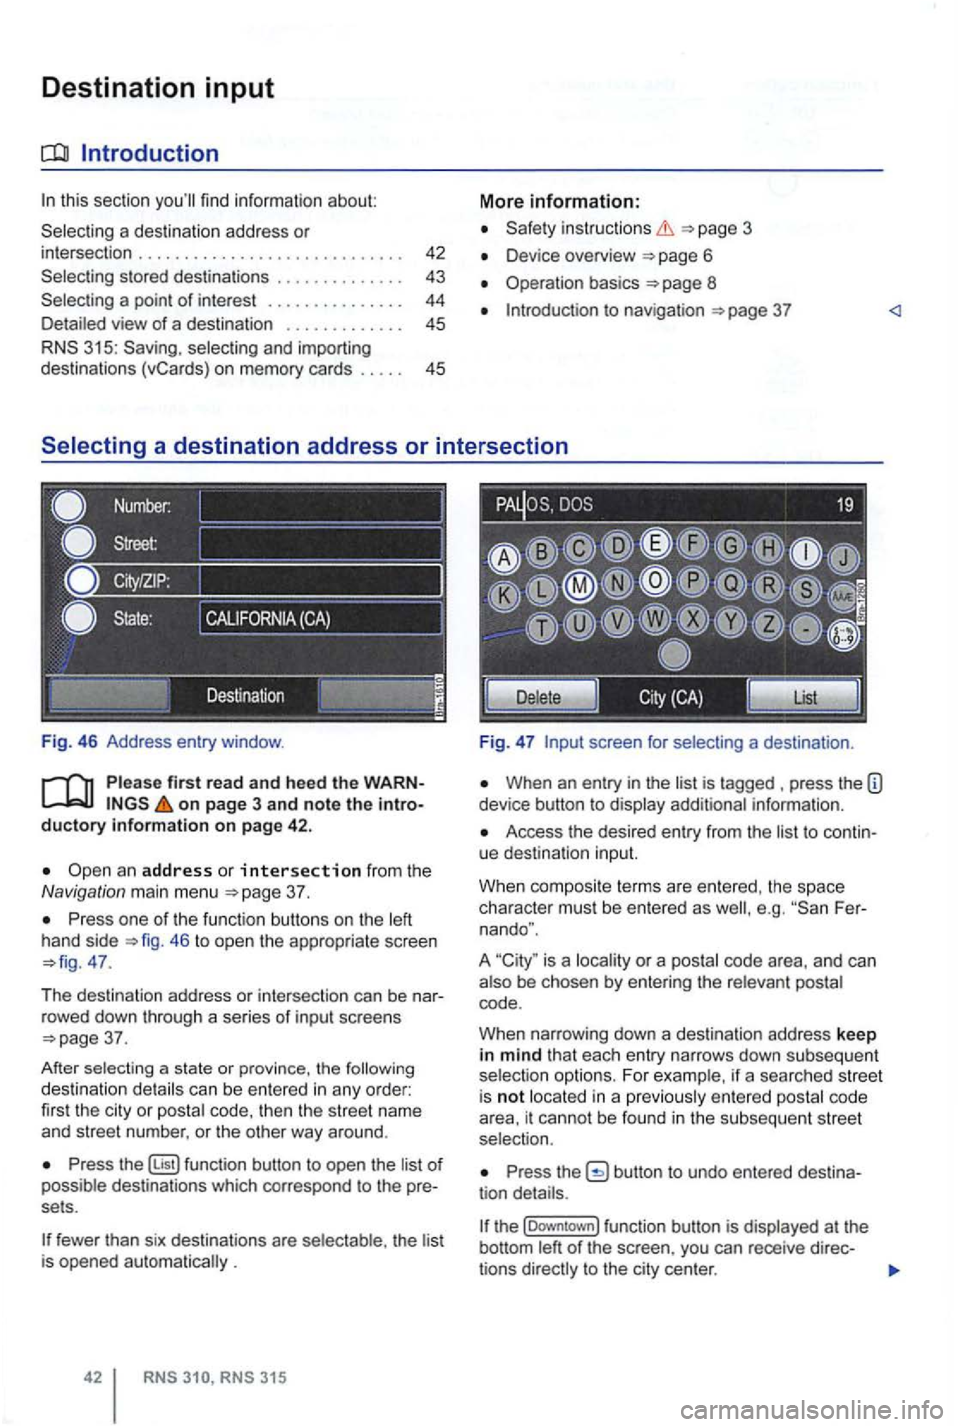
37 .
one of the functi on buttons on the 46 to open the appropriate screen 47.
T he destina tion address or intersec tion can be nar
r owed down throug h a se
ries of i nput screens 37.
After sel
ecting a state or province, the can be entered in any order:
fir st the cit y or code, then the str ee t name
and street number. or the oth er way around .
function button to open the of destinations which corres pond to the pre
sets .
fewer than six destinations are th e lis t is opened .
in structio ns
Device overview 6
Operation basics 8
to nav igation
screen for
When an entry in the is tagged press the information .
Access the desired entry from the to continue destinatio n input.
W hen composi te terms are entered . t
he space
character must be ente red as Fer
nando ".
A
is a or a
code .
W hen narrow ing down a
destination address keep in mind that each entry narrows down sub seq uent
ente red cod e
area, it cannot be found in the subsequent stree t
selection.
the
t he (Downtown] function button is
Page 63 of 516
Destination memory
tn this section
. . . . . . . . . . . . . . 48
Deleting or renamin g dest inations
in the
destination memory . . . . . . . . . 48
Disp laying the
The destination memory is used for saving destinations.
Function buttons to save a trip destination are only
active and accessible if the destination has been
sufficiently defined.
Device overview
Operation basics
Introduction to navigation
Destination input
Pl ease first read and heed the WARNon pag e 3 and note the introductory information on page 47.
Destinations which were entered for route guid
anc e ar e
automatically sav ed in the Last Destinations list 53 .
the Last Destinations list via the Navigation main menu
Turn the tuning knob to tag 53a destination in the list, and press the tun
ing knob to start route guidance .
Press the function button to open the
dest ination in the Detai ls view
Press the function button to store the des-
tination in the Dest. memory 48.
Navigat io n
Page 69 of 516
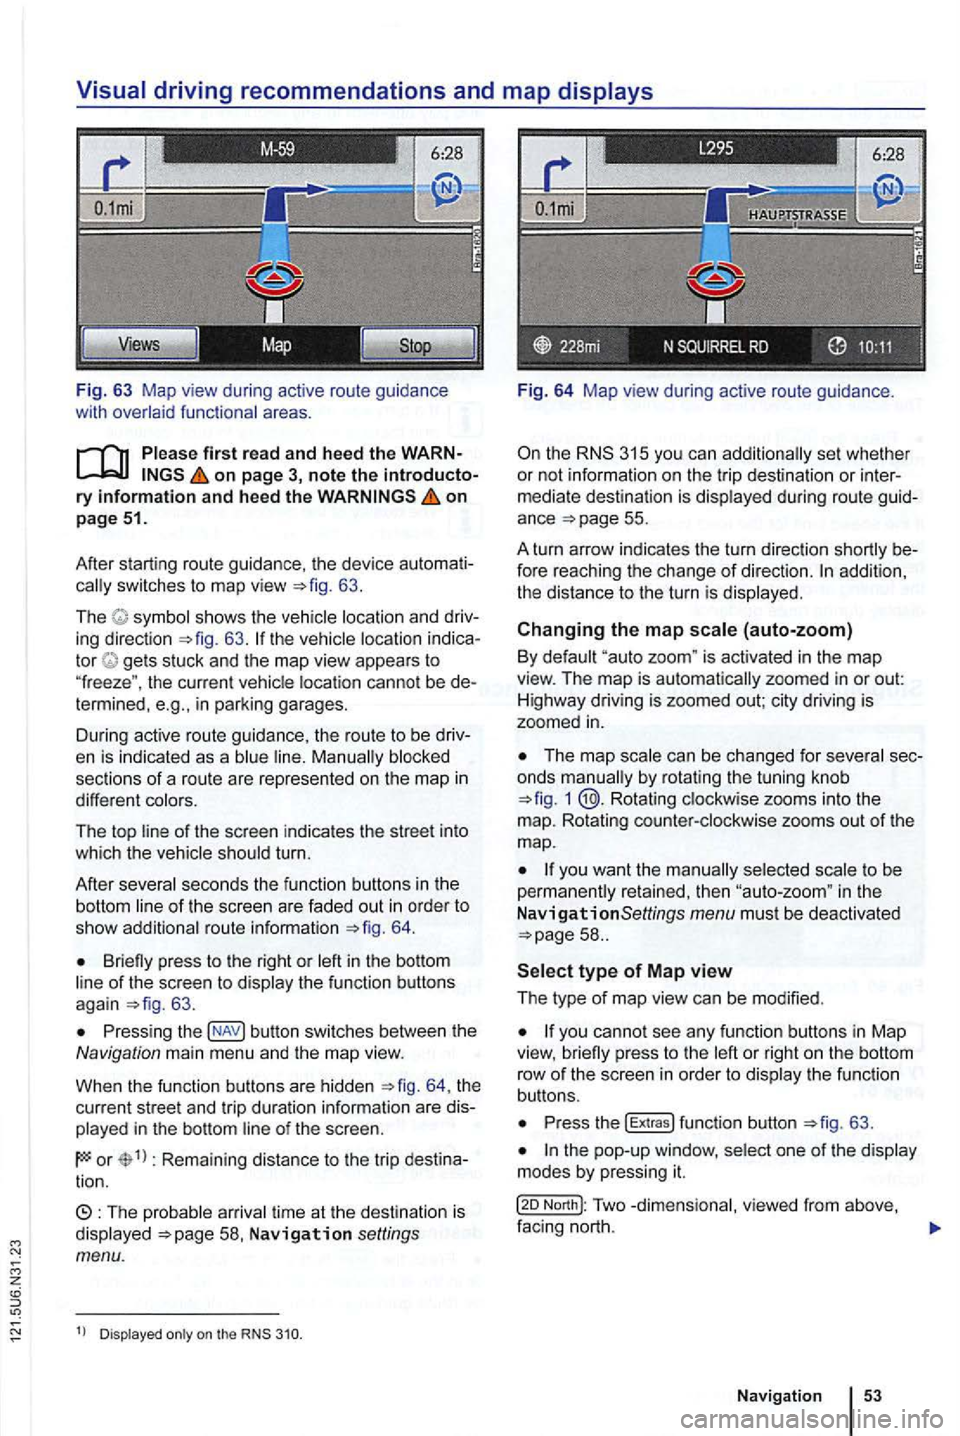
Fig. 63 Map view during active route guidance
with
on page 3, note the introductory information and heed the on page 51.
After starting route guidance. the device
switches to map view 63.
The sh ows the ing direction 63. tor gets stuck and the map view appears to
" freeze ". the current cannot be in parking garages.
During active route guidance , the route to
be
sections of a ro ute are represented on the map in
different
of the screen indicates the street into
which the turn.
After
seco nds the function buttons in th e
bottom
route informa tion 64.
Briefly press to the right or of the screen to 63 .
Press ing button switches between the Navigation main men u and the map view.
When the func tion buttons are hidden
th e
current street and trip duratio n info rmation are
in the bottom
or Rema ining distance to the trip tion.
time at th e destinat ion is Navigation settings menu.
Dis played on the
Fig. 64 Map view during active route guidance .
the RNS 315 you can additio nally set whethe r
or not inform ation on the trip dest ina tion or
ance =>page 55.
A turn arrow indicates the turn direction
fore reaching the change of direction. addition,
th e distance to the turn is
Changing the map (auto-zoom)
By "auto zoom " is activated in the map
view. The map is automatically zoomed in or out:
H ighwa y driving is zoomed out; city driving is
zoomed
in.
The map by rotat ing the tuning knob 1 @.Rotating zooms into the
m ap. Rotating
to be
perma nen tly retained, then in the
N avigationSettings menu must be deactivated
or right on the bottom
row of th e sc ree n in orde r to th e fu n ct io n
buttons.
Press the !Extras ! function button =>fig. 63 .
North!: Two facing nort h.
N avi gation
Page 79 of 516
z
Pairing and connecting
There can be up to four one can be connected to the rad io -navigation system at any one time.
When the radio navigation system
is switched on,
it
connect
ed.
attempt to connect to
t h e next phone on the of paired devices.
T
he maximum reception distance for a connection is con
nection be interru pted if this distance is ex- ceeded
. The connection
as soon as a paired device is within range again.
four one is to be connected , one
Press button .
Press the (Biuetooth settings)1l function button.
Press the (Paired device lis t) function bu tto n.
of paired devices, tag the phon e to be
Connecting the
Please first read and note the introductory information and heed the WARNon page 59.
is connected , via the radio naviga
tion system.
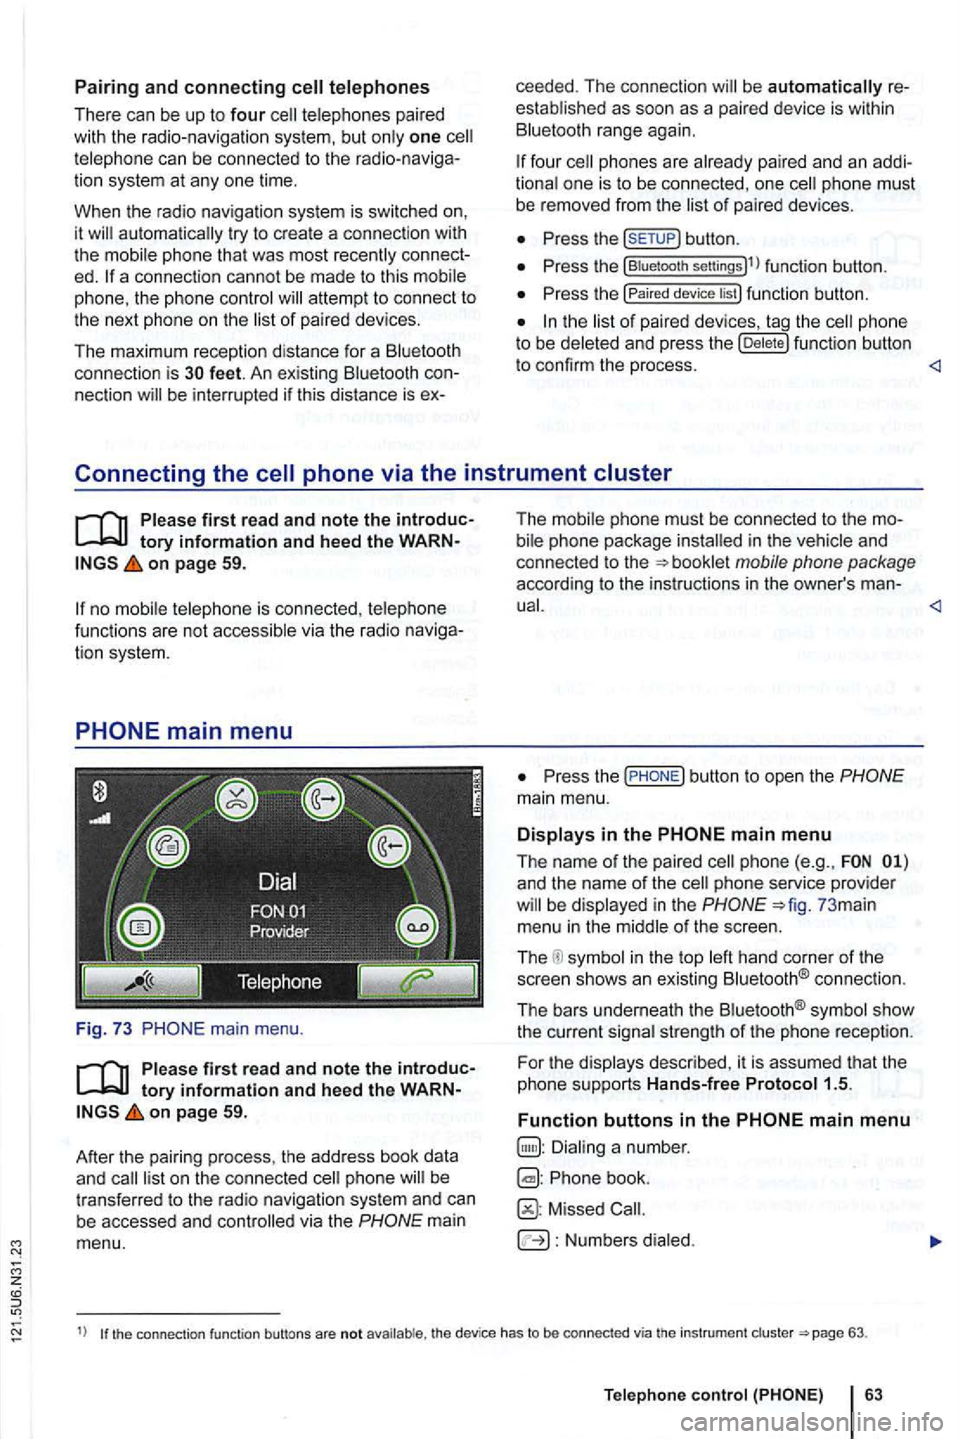
main menu.
first read and note the introductory information and heed the WARNon page 59.
After
the pair ing process , the address book data
and
mai n
menu. T
he i
n the and
co nnected to the
P ress the
and the name of the phone service provider in the 73 mai n
menu in the
in the top connect io n .
The bars underneath the
strength of the phone reception.
F or th e
Phone book.
Missed
Numbers
1) the connection function buttons are not the device has to be connected via th e instrument 63.
Telep hone