Page 31 of 556

31
1-2. Opening, closing and locking the doors
1
Before driving
L/C200_U (OM60D97U)
■
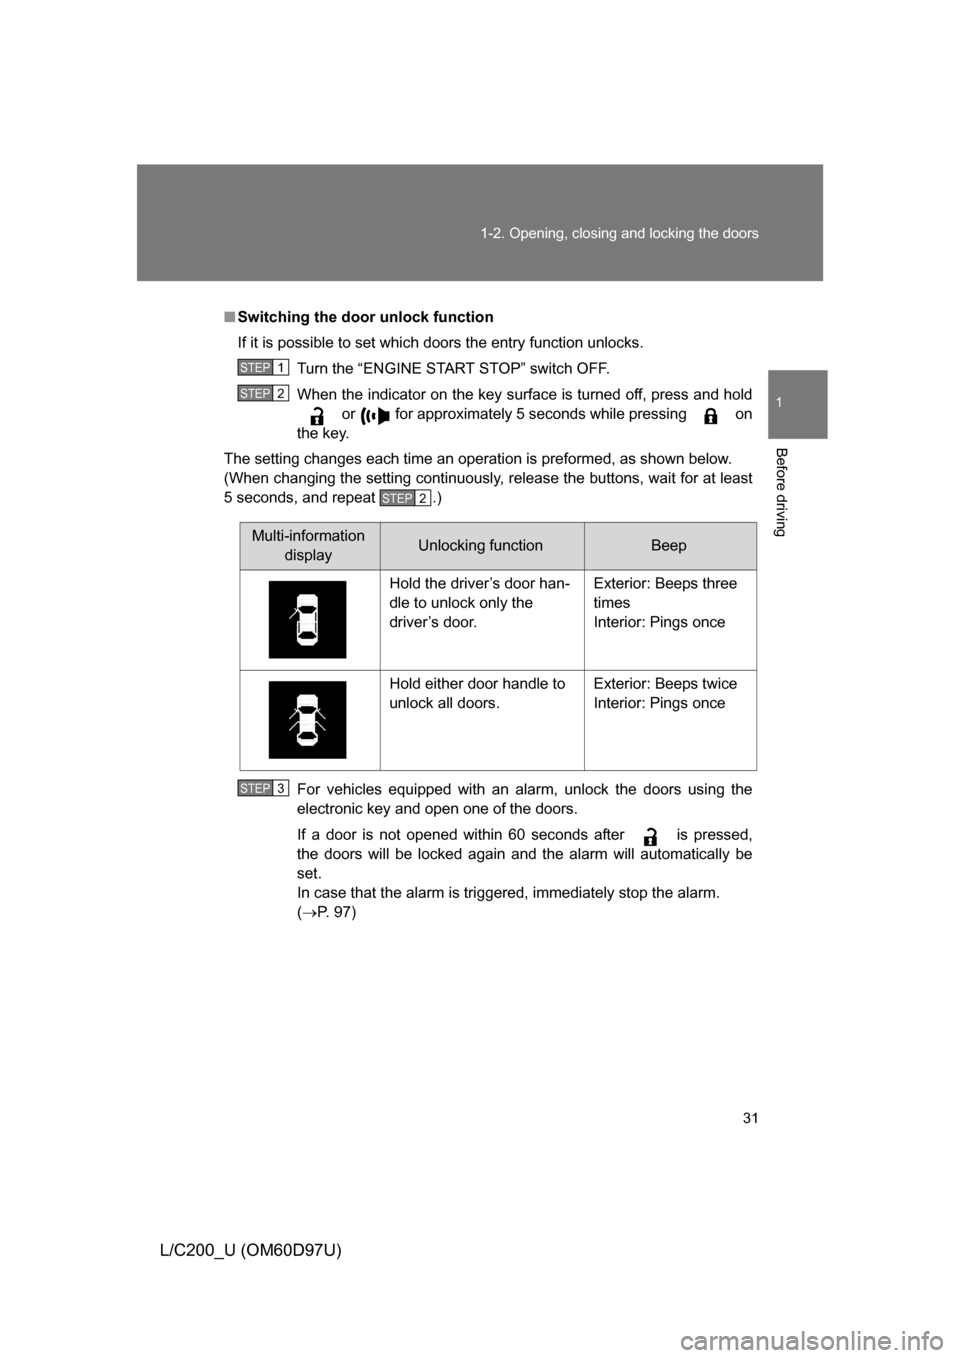
Switching the door unlock function
If it is possible to set which doors the entry function unlocks.
Turn the “ENGINE START STOP” switch OFF.
When the indicator on the key surface is turned off, press and hold or for approximately 5 seconds while pressing on
the key.
The setting changes each time an operation is preformed, as shown below.
(When changing the setting continuously, release the buttons, wait for at least
5 seconds, and repeat .)
For vehicles equipped with an alarm, unlock the doors using the
electronic key and open one of the doors.
If a door is not opened within 60 seconds after is pressed,
the doors will be locked again and the alarm will automatically be
set.
In case that the alarm is triggered, immediately stop the alarm.
(P. 97)
STEP1
STEP2
STEP2
Multi-information
displayUnlocking functionBeep
Hold the driver’s door han-
dle to unlock only the
driver’s door. Exterior: Beeps three
times
Interior: Pings once
Hold either door handle to
unlock all doors. Exterior: Beeps twice
Interior: Pings once
STEP3
Page 43 of 556
43
1
1-2. Opening, closing and locking the doors
Before driving
L/C200_U (OM60D97U)
Side doors
The vehicle can be locked and unlocked using the smart key system,
wireless remote control or door lock switch.
■ Entry function
P. 2 6
■ Wireless remote control
P. 4 0
■ Door lock switch
Locks all doors
Unlocks all doors
■ Inside lock button
Locks the door
Unlocks the door
The front doors can be opened
by pulling the inside handles
even if the lock buttons are in
the lock position.
Page 127 of 556
127
1
1-7. Safety information
Before driving
L/C200_U (OM60D97U)
Installing child restraints
Follow the child restraint system manufacturer’s instructions. Firmly
secure the child restraints using the LATCH anchors or a seat belt.
Attach the top tether strap when installing a child restraint.
The lap/shoulder belt can be used if your child restraint system is
not compatible with the LATCH (Low er Anchors and Tethers for Chil-
dren) system.
Child restraint LATCH anchors
LATCH anchors are provided
for the outside second seat.
(Buttons displaying the loca-
tion of the anchors are
attached to the seats.)
Seat belts equipped with a
child restraint locking mecha-
nism (ALR/ELR belts except
driver’s seat belt) ( P. 70)
Anchor bracket (for top tether
strap)
Anchor brackets are provided
for all second seats.
ITO17C154
Page 272 of 556
272
3-2. Using the audio system
L/C200_U (OM60D97U)
Using the radio
Press or to choose either an AM or FM band.
LOAD
TYPE·DISCSEEK·TRACK
AM·SATFMDISC·AUXTRAF
12 34 5 6
TUNE·FILE
PUSHAUDIO CONTROL
PWR·VOL
TEXT
SCAN
RAND RPT
1234 56DISCASLSCAN ADS FLD FILE TR TRAFST MSG
ART
FORDER
PWR·VOLSCANPWR·VOLSCAN
ITY32C005
Scanning for receivable stations
Seeking the frequencyStation selector
AM/FM mode buttons Changing the program typeAdjusting the frequency
Power Volume
Page 299 of 556
299
3-3. Using the rear seat entertainment system
3
Interior features
L/C200_U (OM60D97U)
Rear seat entertainment system controller
To use the buttons under the
cover, slide the cover down.
Opening and closing the display■ Opening and closing the display
●Open
Press , , ,
or .
●Close
Press or .
If the display is closed with an
image shown, the image will auto-
matically turn off. (The sound will
not be turned off.)
Opening and closing operations can
be performed from the front seat.
( ”Navigation System Owner’s
Manual”)
Page 366 of 556
366
3-6. Other interior features
L/C200_U (OM60D97U)
Garage door opener
The garage door opener (HomeLink Universal Transceiver) is manufac-
tured under license from HomeLink.
Programming HomeLink (for U.S.A. owners)
The HomeLink
compatible transceiver in your vehicle has 3 buttons
which can be programmed to operate 3 different devices. Refer to the
programming method below appropriate for the device.
Buttons
Indicator
The garage door opener can be programmed to operate garage
doors, gates, entry doors, door locks, hom e lighting systems, secu-
rity systems, and other devices.
ITY35C029
Page 367 of 556
367
3-6. Other interior features
3
Interior features
L/C200_U (OM60D97U)
■
Programming HomeLink
Point the remote control trans-
mitter for the device 1 to 3 in. (25
to 75 mm) from the HomeLink
buttons.
Keep the HomeLink indicator
light in view while programming.
Press and hold one of the
HomeLink buttons and the
transmitter button. When the
HomeLink
indicator light
changes from a slow to a rapid
flash, you can release both but-
tons.
If the HomeLink indicator light
comes on but does not flash,
flashes rapidly for 2 seconds and
remains lit, the HomeLink
button
is already programmed. Use the
other buttons or follow the
“Reprogramming a HomeLink
button” instructions. ( P. 371)
ITY35C030
STEP1
ITY35C031
STEP2
Page 368 of 556
368 3-6. Other interior features
L/C200_U (OM60D97U)Test the HomeLink
operation
by pressing the newly pro-
grammed button.
If a HomeLink button has been
programmed for a garage door,
check to see if the garage door
opens and closes. If the garage
door does not operate, see if your
remote control transmitter is of
the rolling code type. Press and
hold the programmed HomeLink
button. The remote control trans-
mitter is of the rolling code type if
the HomeLink
indicator light
flashes rapidly for 2 seconds and
then remains lit. If your transmit-
ter is of the rolling code type, pro-
ceed to the heading
“Programming a rolling code sys-
tem”.
Repeat the steps above to program another device for each of
the remaining HomeLink buttons.
ITY35C032
STEP3
STEP4