Page 84 of 274
ADVANCED FUNCTIONS
104
DISPLAYING NAMES OF AREAS TO BE
AVOIDED
The name of an area to be avoided that
may be displayed on the map can be set.
To show the name, touch “ON” on the
“Edit Area to Avoid” screen. To not
show it, touch “OFF”.
�To change “Location”
1. Touch “Location” on the “Edit Area
to Avoid” screen.
2. Touch the eight directional touch�
screen button to move the cursor
to
the desired point on the map.
3. Touch “Enter”.
The previous screen will be displayed.
Page 85 of 274
ADVANCED FUNCTIONS
105
�
To change “Area Size”
1. Touch “Area Size” on the “Edit Area
to Avoid” screen.
2. Touch either or to
change the size of the area to be
avoided.
3. Touch “OK”.
The previous screen will be displayed. 1. Push the “MENU” button.
2. Touch “My Places” on the “Menu”
screen.3. Touch “Delete”.
4. Touch the touch�screen button to
be deleted.
“Delete
All”: To delete all registered areas
to avoid in the system.
5. To delete the area, touch “Yes”. To
cancel the deletion, touch “No”.
— Deleting area to avoid
Page 86 of 274
ADVANCED FUNCTIONS
106
The previous destination can be deleted.
1. Push the “MENU” button.
2. Touch “My Places” on the “Menu”
screen.
3. Touch “Delete Previous Points”.
4. Touch the touch�screen button you
want to delete.
“Delete All”: To delete all previous points
in the system.
5. To delete the point, touch “Yes”. To
cancel the deletion, touch “No”. Setting the items shown on the “Setup”
screen can be done. (See page 87.)
1. Push the “MENU” button.
2. Touch “Setup”.
3. Touch the items to be set.
4. Touch “OK”.
The previous screen will be displayed.
INFORMATION
To reset all setup items, touch “De-
fault”.
— Deleting previous pointsSetup
Page 88 of 274
ADVANCED FUNCTIONS
108
INFORMATION
�The displayed time to the destina-
tion is the approximate driving time
that is calculated based on the se-
lected speeds and the actual posi-
tion along the guidance route.
� The time shown on the screen may
vary greatly depending on prog-
ress along the route, which may be
affected by road conditions such
as traffic jams, and construction
work.
� It is possible to display up to 99
hours 59 minutes.
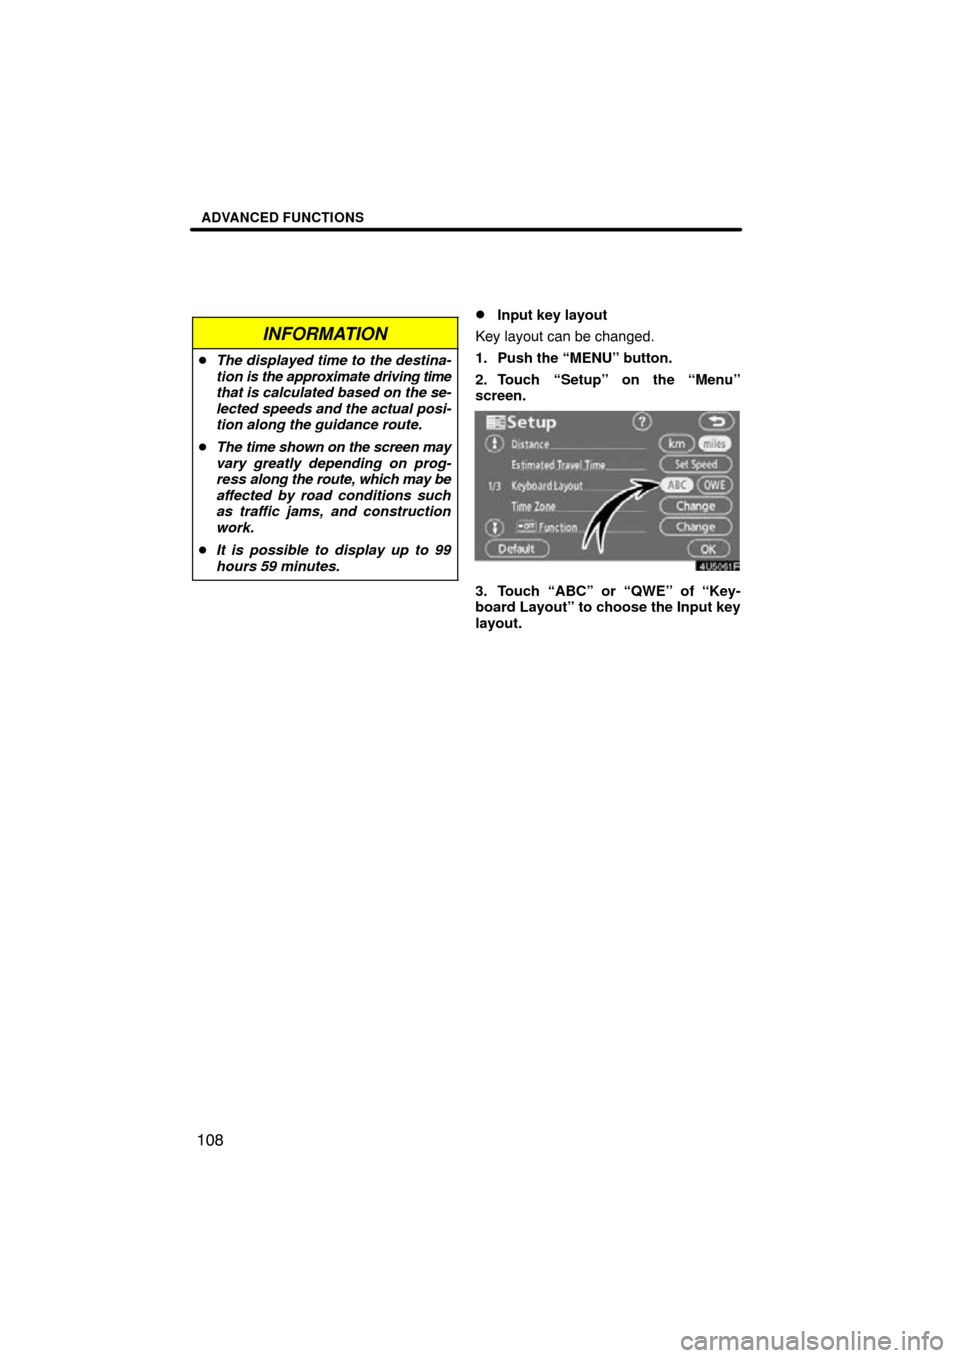
�Input key layout
Key layout can be changed.
1. Push the “MENU” button.
2. Touch “Setup” on the “Menu”
screen.
3. Touch “ABC” or “QWE” of “Key-
board Layout” to choose the Input key
layout.
Page 89 of 274
ADVANCED FUNCTIONS
109
LAYOUT TYPE
�“ABC” type
�“QWE” type
The selected button is highlighted.
4. Touch “OK”.
�Time zone
Time zone can be changed.
1. Push the “MENU” button.
2. Touch “Setup” on the “Menu”
screen.
3. Touch “Change” of “Time Zone”.
The “Adjust Time Zone” s creen will be dis-
played on the display.
4. Touch the desired time zone.
The selected button is highlighted.
“Daylight Saving Time”: Daylight saving
time can be set or cancelled.
To set daylight saving time, touch “ON”,
and to cancel it, touch “OFF” .
5. Touch “OK”.
Page 90 of 274
ADVANCED FUNCTIONS
11 0
�
Screen layout function ( Func-
tion)
Each touch−screen button and current
street name on the map screen can be dis-
played or hidden.
1. Push the “MENU” button.
2. Touch “Setup” on the “Menu”
screen.
3. Touch “Change” of “ Function”.
4. Touch the touch�screen button to
be turned off. The button becomes dim-
med.
To set the default, touch “Default”.
5. Touch “OK”.
�POI category change
(Display POI Icons)
Select from among the 6 icons displayed
on the “Display POI Icons” top screen, so
that setting of the icons to be displayed on
the map screen can be done easily.
1. Push the “MENU” button.
2. Touch “Setup” on the “Menu”
screen.
Then touch
to display page 2 of the
“Setup” screen.
3. Touch “Change” of “Display POI
Icons”.
4. Touch the category button to be
changed.
Page 91 of 274
ADVANCED FUNCTIONS
111
5. Touch the category button to be dis-
played on the “Display POI Icons” top
screen.
6. Touch “OK”.
�Display of building shape
When the “Display Building Shapes” fea-
ture is turned on, the system will display the
building shape on the map screen using a
scale of 150 feet (50 m) to 300 feet (100 m).
To turn the “Display Building Shapes” on:
1. Push the “MENU” button.
2. Touch “Setup” on the “Menu”
screen.
Then touch
to display page 2 of the
“Setup” screen.
3. Touch “ON” of “Display Building
Shapes”.
The selected button is highlighted.
4. Touch “OK”.
Page 92 of 274
ADVANCED FUNCTIONS
11 2
�
Notifying traffic restriction
When the “Traffic Restrict. Notification”
feature is turned on, the system notifies
you of traffic or seasonal restrictions.
To turn the “Traffic Restrict. Notification”
on:
1. Push the “MENU” button.
2. Touch “Setup” on the “Menu”
screen.
Then touch
to display page 2 of the
“Setup” screen.
3. Touch “ON” of “Traffic Restrict. No-
tification”.
The selected button is highlighted.
4. Touch “OK”.
�Voice recognition guidance
When the “Voice Recognition Guidance”
feature is turned on, the voice recognition
guidance can be heard automatically.
To turn the “Voice Recognition Guidance”
on:
1. Push the “MENU” button.
2. Touch “Setup” on the “Menu”
screen.
Then touch
to display page 2 of the
“Setup” screen.
3. Touch “ON” of “Voice Recognition
Guidance”.
The selected button is highlighted.
4. Touch “OK”.