Page 336 of 432
336 4-3. Do-it-yourself maintenance
●Removing the back-up, stop/tail and rear side marker and rear turn
signal light bulbs
Open the back door and remove
the cover.
Using a flathead screwdriver or
equivalent which is wrapped with
a cloth.
Turn the bulb bases counter-
clockwise.Back-up light
Stop/tail and rear side marker
lights
Rear turn signal light
Remove the light bulb. Back-up light
Stop/tail and rear side marker
lights
Rear turn signal light12
3
1
3
2
Page 338 of 432

338 4-3. Do-it-yourself maintenance
■Condensation build-up on th e inside of the lens
Contact your Toyota dealer for more information in the following situations.
Temporary condensation build-up on the inside of the headlight lens does
not indicate a malfunction.
● Large drops of water are built up on the inside of the lens.
● Water has built up inside the headlight.
■ LED high mounted stoplight
The high mounted stoplight consists of a number of LEDs. If any of the LEDs
burn out, take your vehicle to your Toyota dealer to have the light replaced.
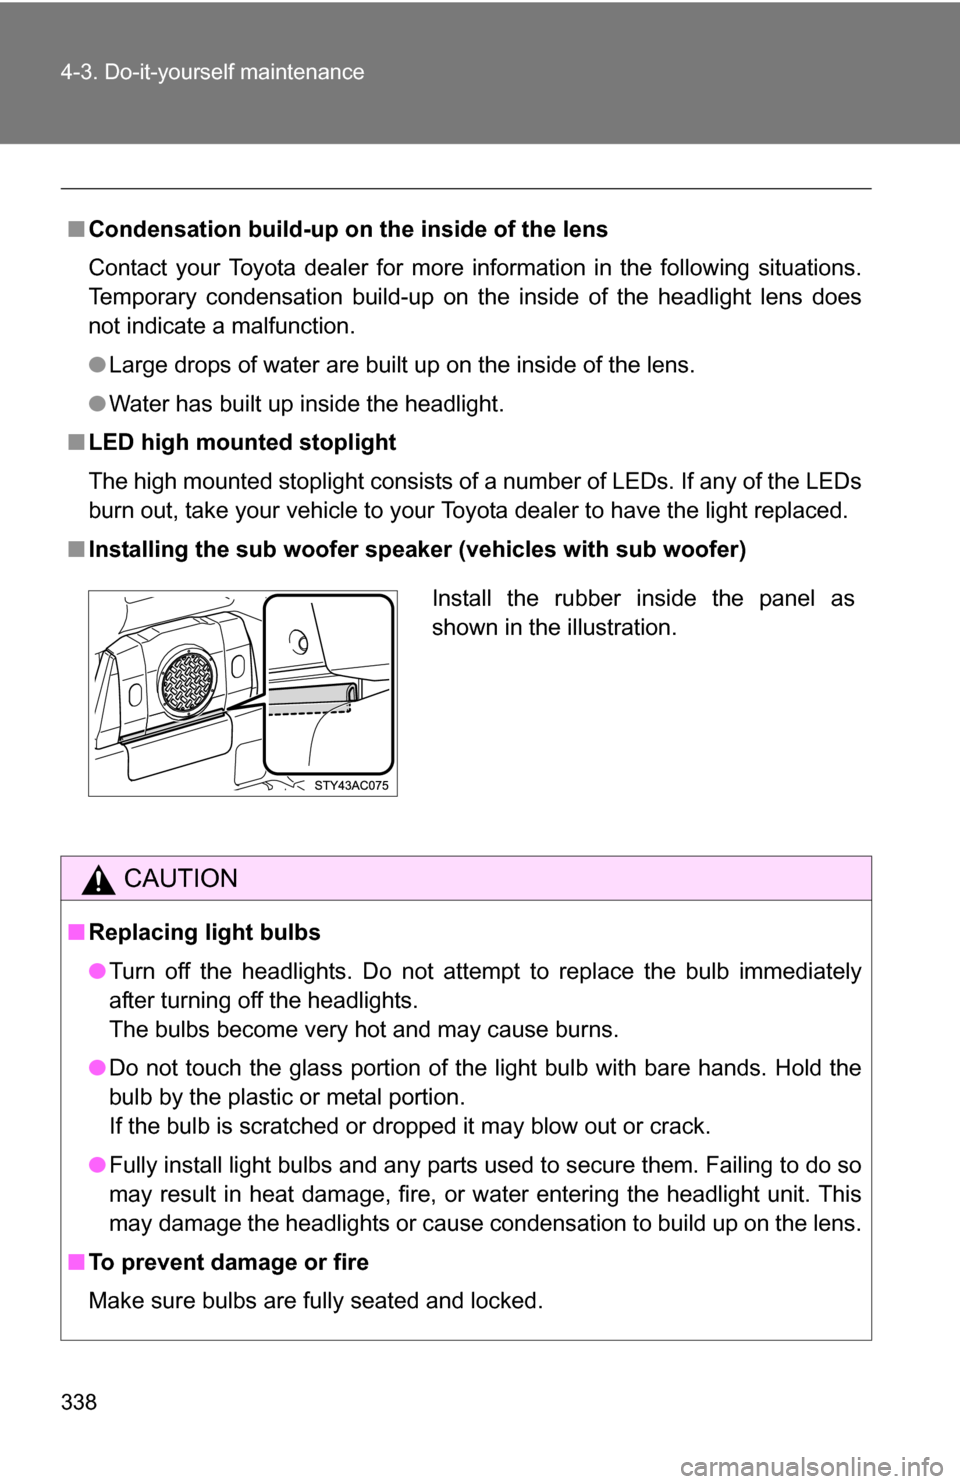
■ Installing the sub woofer speaker (vehicles with sub woofer)
CAUTION
■Replacing light bulbs
●Turn off the headlights. Do not attempt to replace the bulb immediately
after turning off the headlights.
The bulbs become very hot and may cause burns.
● Do not touch the glass portion of the light bulb with bare hands. Hold the
bulb by the plastic or metal portion.
If the bulb is scratched or dropped it may blow out or crack.
● Fully install light bulbs and any parts used to secure them. Failing to do so
may result in heat damage, fire, or water entering the headlight unit. This
may damage the headlights or cause condensation to build up on the lens.
■ To prevent damage or fire
Make sure bulbs are fully seated and locked.
Install the rubber inside the panel as
shown in the illustration.
Page 342 of 432

342 5-1. Essential information
■Emergency towin g procedure
The engine switch must be in the ACC (engine off) or the ON
(engine running) position.
4WD models with an automatic transmission: Shift the front-wheel
drive control lever in H2.
4WD models with a manual transmission: Unlock the center differ-
ential.
Put the shift lever in N.
Release the parking brake.
CAUTION
■ Caution while towing
●Use extreme caution when towing the vehicle.
Avoid sudden starts or erratic driving maneuvers which place excessive
stress on the emergency towing eyelet and the cables or chains.
● If the engine is not running, the power assist for the brakes and steering
will not function, making steering and braking more difficult.
NOTICE
■To prevent causing serious dama ge to the transmission
(vehicles with an automatic transmission)
Never tow this vehicle from the rear with the four wheels on the ground.
This may cause serious damage to the transmission.
■ Emergency towing eyelet precautions
● Before emergency towing, check that the eyelet is not broken or damaged.
● Fasten the towing cable or chain securely to the eyelet.
● Do not jerk the eyelet. Apply steady and even force.
● To avoid damaging the eyelet, do not pull from the side or at a vertical
angle. Always pull straight ahead.
Page 344 of 432
344 5-1. Essential information
Towing with a wheel lift-type truck from the rear2WD models Turn the engine switch to the
ACC position.
4WD models Vehicles with a manual transmis-
sion: Use a towing dolly under
the front wheels.
Vehicles with an automatic trans-
mission: When not using a tow-
ing dolly, turn the engine switch
to the ACC position, shift the
shift lever to N and shift the front-
wheel drive control lever in H2.
NOTICE
■To prevent causing serious damage to the transmission (4WD models)
Never tow this vehicle wheels on the ground.
■ To prevent damaging the vehicle
●Do not tow the vehicle with the key removed or in the LOCK position.
The steering lock mechanism is not strong enough to hold the front wheel
straight.
● When raising the vehicle, ensure adequate ground clearance for towing at
the opposite end of the raised vehicle. Without adequate clearance, the
vehicle could be damaged while being towed.
Page 347 of 432
5
When trouble arises
347
5-1. Essential information
Fuel pump shut off system
Follow the procedure below to restart the engine after the system is
activated.Turn the engine switch to the ACC or LOCK position.
Restart the engine.
NOTICE
■Before starting the engine
Inspect the ground under the vehicle.
If you find that fuel has leaked onto the ground, the fuel system has been
damaged and is in need of repair. Do not restart the engine.
To minimize the risk of fuel leakage when the engine stalls or an air-
bag inflates upon collision, the fu el pump shut off system stops sup-
plying fuel to the engine.
Page 355 of 432

5
When trouble arises
355
5-2. Steps to take in an emergency
■
Key reminder buzzer
The buzzer indicates that the key has not been removed (with the engine
switch in the ACC or LOCK position and the driver’s door opened).
■ If the malfunction indicator lamp comes on while driving
First check the following:
● Is your vehicle low on gas?
If it is, refuel the vehicle immediately.
● Is the fuel tank cap loose?
If it is, tighten it securely.
The light will go off after taking several driving trips.
If the light does not go off even after several trips, contact your Toyota dealer
as soon as possible.
■ Front passenger detection sensor and passenger seat belt reminder
If luggage or other load is placed on the front passenger seat, depending on
its weight, the reminder light to flash and buzzer to sound.
■
When the tire pressure warning light comes on
Check the tire inflation pressure and adjust to the appropriate level.
■The tire pressure warning light may turn on due to natural causes
The tire pressure warning light may turn on due to natural causes such
as natural air leaks or tire inflation pressure changes caused by temper-
ature. In this case, adjusting the ti re inflation pressure will turn off the
warning light after (a few minutes).
■When a tire is replaced with a spare tire
The spare tire is also equipped with the tire pressure warning valve and
transmitter. The tire pressure warning li ght will turn on if the tire inflation
pressure of the spare tire is low. If a tire goes flat, even though the flat
tire is replaced with the spare tire, the warning light does not turn off.
Replace the spare tire with the repair ed tire and adjust the proper tire
inflation pressure. The ti re pressure warning light will turn off after a few
minutes.
Page 362 of 432
362 5-2. Steps to take in an emergency
Turn the hold-down nuts counter-
clockwise with the wheel nut
wrench and remove them.
Taking out the spare tire (vehicles with rear view monitor system)
Remove the bolt cover. Bolt cover
Remove the bolt which fixes the
spare wheel cover using the
wrench in the tool bag
( P. 360).
Page 363 of 432
5
When trouble arises
363
5-2. Steps to take in an emergency
Remove the spare wheel cover.
Turn the hold-down nuts counter-
clockwise with the wheel nut
wrench and remove them.