Page 6 of 444
6
Headlights (low beam) P. 149
Pictorial indexExterior
Turn signal/parking lights
P. 137, 149
Hood P. 288
Windshield wipers P. 153
Outside rear view
mirrors
P. 71
Headlights (high beam) P. 149Moon roof ∗ P. 75
Side marker light P. 149
Page 69 of 444
69
1
1-4. Adjustable components (seats, mirrors, steering wheel)
Before driving
Anti-glare inside rear view mirror
Glare from the headlights of vehicles behind can be reduced by
using the following functions.
Manual anti-glare inside rear view mirror
Normal position
Anti-glare position
Auto anti-glare inside rear view mirror
In automatic mode, sensors are used to detect the headlights of
vehicles behind and the reflecte d light is automatically reduced.
Turns automatic mode on/off
The indicator comes on when
automatic mode is turned on.
The mirror will revert to the
automatic mode each time the
“POWER” switch is turned to
ON mode.
Page 149 of 444
149
2
When driving
2-3. Operating the lights and wipers
Headlight switch
The headlights can be operated manually or automatically.
For U.S.A.
The headlights and
parking lights turn on
and off automatically.
(When the “POWER”
switch is in ON mode)
The side marker, park-
ing, tail, license plate
and instrument panel
lights turn on.
The headlights and all
lights listed above turn
on.
Daytime running light
system is off.
Page 150 of 444
150 2-3. Operating the lights and wipers
Turning on the high beam headlightsWith the headlights on, push
the lever forward to turn on the
high beams.
Pull the lever back to the center
position to turn the high beams
off.
Pull the lever toward you to
turn on the high beams.
Release the lever to turn them off.
You can flash the high beams
with the headlights on or off.
For Canada The side marker, park-
ing, tail, license plate
and instrument panel
lights turn on.
The headlights and all
lights listed above turn
on.
The headlights and
parking lights turn on
and off automatically.
(When the “POWER”
switch is in ON mode)
Page 151 of 444

151
2-3. Operating the lights and wipers
2
When driving
■
Daytime running light system
To make your vehicle more visible to other drivers, the headlights turn on
automatically (at a reduced intensity) whenever the hybrid system is started
and the parking brake is released. Da ytime running lights are not designed
for use at night.
For U.S.A.: Daytime running lights can be turned off by operating the switch.
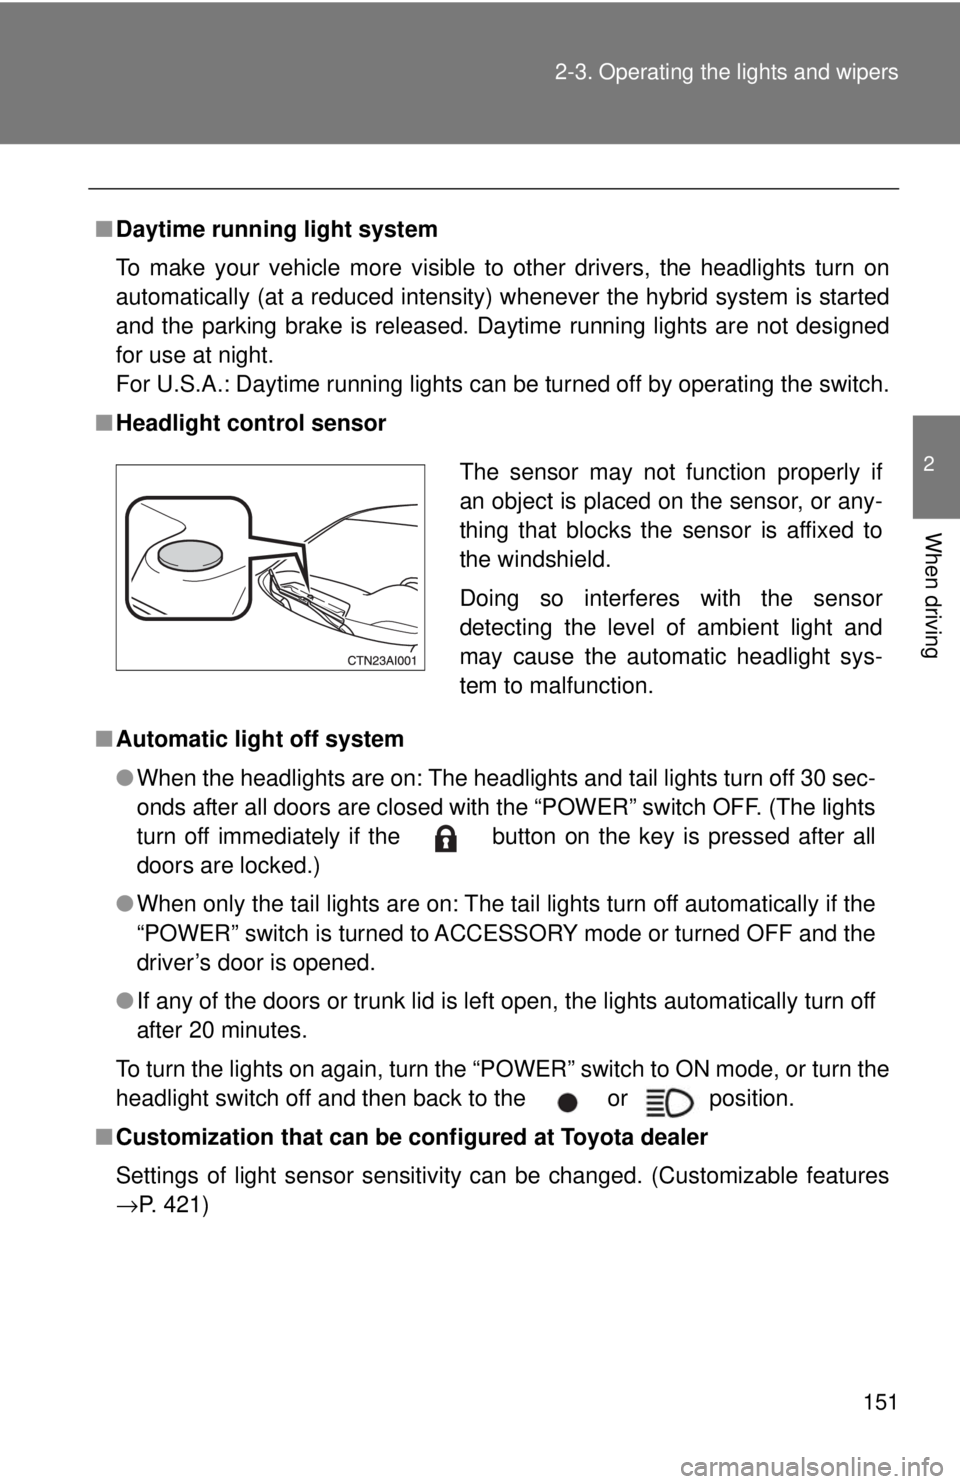
■ Headlight control sensor
■ Automatic light off system
●When the headlights are on: The headlights and tail lights turn off 30 sec-
onds after all doors are closed with the “POWER” switch OFF. (The lights
turn off immediately if the button on the key is pressed after all
doors are locked.)
● When only the tail lights are on: The tail lights turn off automatically if the
“POWER” switch is turned to ACCESSORY mode or turned OFF and the
driver’s door is opened.
● If any of the doors or trunk lid is left open, the lights automatically turn off
after 20 minutes.
To turn the lights on again, turn the “POWER” switch to ON mode, or turn the
headlight switch off and then back to the or position.
■ Customization that can be co nfigured at Toyota dealer
Settings of light sensor sensitivity can be changed. (Customizable features
→P. 421)
The sensor may not function properly if
an object is placed on the sensor, or any-
thing that blocks the sensor is affixed to
the windshield.
Doing so interferes with the sensor
detecting the level of ambient light and
may cause the automatic headlight sys-
tem to malfunction.
Page 340 of 444
340 4-3. Do-it-yourself maintenance
CAUTION
■Replacing light bulbs
●Turn off the headlights. Do not attempt to replace the bulb immediately
after turning off the headlights.
The bulbs become very hot and may cause burns.
● Do not touch the glass portion of the light bulb with bare hands. Hold the
bulb by the plastic or metal portion.
If the bulb is scratched or dropped it may blow out or crack.
● Fully install light bulbs and any parts used to secure them. Failing to do so
may result in heat damage, fire, or water entering the headlight unit. This
may damage the headlights or cause condensation to build up on the lens.
■ To prevent damage or fire
Make sure bulbs are fully seated and locked.
Page 379 of 444

5
When trouble arises
379
5-2. Steps to take in an emergency
Emergency start function
When the hybrid system does not
start, the following steps can be
used as an interim measure to start the hybrid system if the
“POWER” switch is functioning normally.
Set the parking brake.
Shift the shift lever to P.
Turn the “POWER” switch to ACCESSORY mode.
Press and hold the “POWER” switch for about 15 seconds
while depressing the brake pedal firmly.
Even if the hybrid sy stem can be started usi ng the above steps, the
system may be malfunctioning. Ha ve the vehicle checked by your
Toyota dealer.
■ The interior lights and headlights do not turn on, or the horn
does not sound.
One of the following may be the cause of the problem.
●One or both of the 12-volt ba ttery terminals may be discon-
nected.
● The 12-volt battery may be discharged. ( →P. 385)
● There may be a malfunction in the steering lock system.
Contact your Toyota dealer if the problem cannot be repaired, or if
repair procedures are unknown.
STEP1
STEP2
STEP3
STEP4
Page 386 of 444

386 5-2. Steps to take in an emergency
■Avoiding a discharged 12-volt battery
●Turn off the headlights and the audio system while the hybrid system is
turned off.
● Turn off any unnecessary electrical components when the vehicle is run-
ning at a low speed for an extended period, such as in heavy traffic, etc.
■ When the 12-volt battery is removed or discharged
●The hybrid system may not start. ( →P. 301)
● The tire pressure warning system must be initialized. ( →P. 305)
■ Starting the hybrid system when the 12-volt battery is discharged
The hybrid system cannot be started by push-starting.
Start the engine of the second vehicle. Increase the gaso-
line engine speed slightly and maintain at that level for
approximately 5 minutes to recharge the 12-volt battery of
your vehicle.
Open and close any of the doors with the “POWER” switch
OFF.
Maintain the engine speed of the second vehicle and turn
the “POWER” switch to ON mode, then start the hybrid sys-
tem.
Make sure the “READY” indicator comes on. If the indicator
does not comes on, contact your Toyota dealer.
Once the hybrid system has started, remove the jumper
cables in the exact reverse order in which they were con-
nected.
Once the hybrid system starts, ha ve the vehicle checked at your
Toyota dealer as soon as possible.STEP3
STEP4
STEP5
STEP6