2009 SUBARU OUTBACK display
[x] Cancel search: displayPage 164 of 447

Clock (vehicle without genu-
ine SUBARU navigation sys-tem) NOTE .If your vehicle is a 2.5 L non-turbo
model equipped with the genuine
SUBARU navigation system, refer to
the Owner ’s Manual supplement for the
navigation system.. If your vehicle is a turbo model or a
3.0 L model equipped with the genuine
SUBARU navigation system, refer tothe “Clock (vehicle with genuine
SUBARU navigation system) ”in the
multi-information display (vehicle with
SI-DRIVE) section in this chapter.The clock shows the time while the
ignition switch is in the “Acc ”or “ON ”
position.
To adjust the time shown by the clock,
press the “+ ” button or the “� ” button. The
indicated time will change in one-minute
increments. If you keep the button
pressed, the rate at which the indicated
time changes will speed up.
To reset the minutes to “00 ”with a radio
time signal, push the “SET ”button. Information display (2.5 L
non-turbo model without
genuine SUBARU navigationsystem) NOTE
If your vehicle is a 2.5 L non-turbo
model equipped with the genuine
SUBARU navigation system, refer to
the Owner
’s Manual supplement for the
monitor system.
With the ignition switch in the “ON ”
position, each successive push of the “ DISP ”button toggles the display in the
following sequence: Instruments and controls
3-41
– CONTINUED –
Page 166 of 447

378F(3 8C) or lower, the temperature
indication flashes to show that the road
surface may be frozen.
If the outside temperature drops to 37 8F
(3 8C) or lower while the display is giving
an indication other than the outside
temperature, the display switches to the
outside temperature indication and flashes
for 5 seconds before returning to its
original indication.
If the display is already indicating an
outside temperature of 37 8F(3 8C) or lower
when the ignition switch is turned to the“ ON ”position, the indication does not
flash.
NOTE
The outside temperature indication
may differ from the actual outside
temperature. The road surface freeze
warning indication should be treated
only as a guide. Be sure to check the
condition of the road surface beforedriving. &
Current fuel consumption
U.S.-spec. models
Canada-spec. models
This indication shows the rate of fuel
consumption at the present moment. &
Average fuel consumption
U.S.-spec. models
Canada-spec. models
This indication shows the average rate of
fuel consumption since the trip meter was Instruments and controls
3-43
– CONTINUED –
Page 167 of 447
3-44Instruments and controls
last reset.
Pressing the trip knob toggles the indica-
tion between the average fuel consump-
tion corresponding to the A trip meter
indication and the average fuel consump-
tion corresponding to the B trip meterindication.
When either of the trip meter indications is
reset, the corresponding average fuel
consumption value is also reset. NOTE . The indicated values vary in accor-
dance with changes in the vehicle ’s
running conditions. Also, the indicated
values may differ slightly from the
actual values and should thus be
treated only as a guide.. When either trip meter indication is
reset, the average fuel consumption
corresponding to that trip meter indica-
tion is not shown until the vehicle has
subsequently covered a distance of 1
mile (or 1 km). &
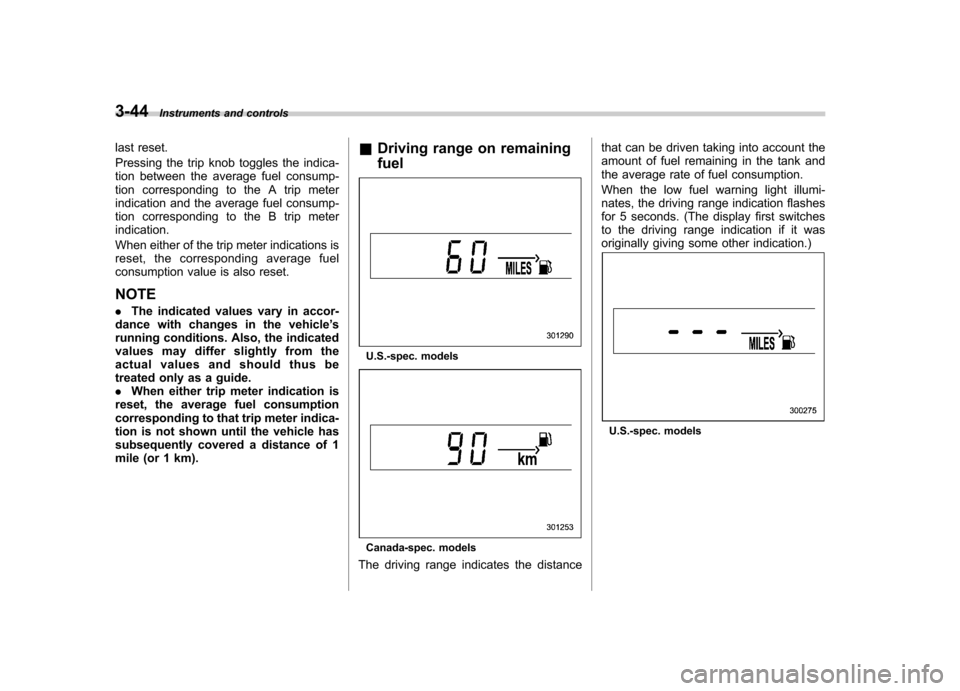
Driving range on remaining fuel
U.S.-spec. models
Canada-spec. models
The driving range indicates the distance that can be driven taking into account the
amount of fuel remaining in the tank and
the average rate of fuel consumption.
When the low fuel warning light illumi-
nates, the driving range indication flashes
for 5 seconds. (The display first switches
to the driving range indication if it was
originally giving some other indication.)
U.S.-spec. models
Page 168 of 447
Canada-spec. models
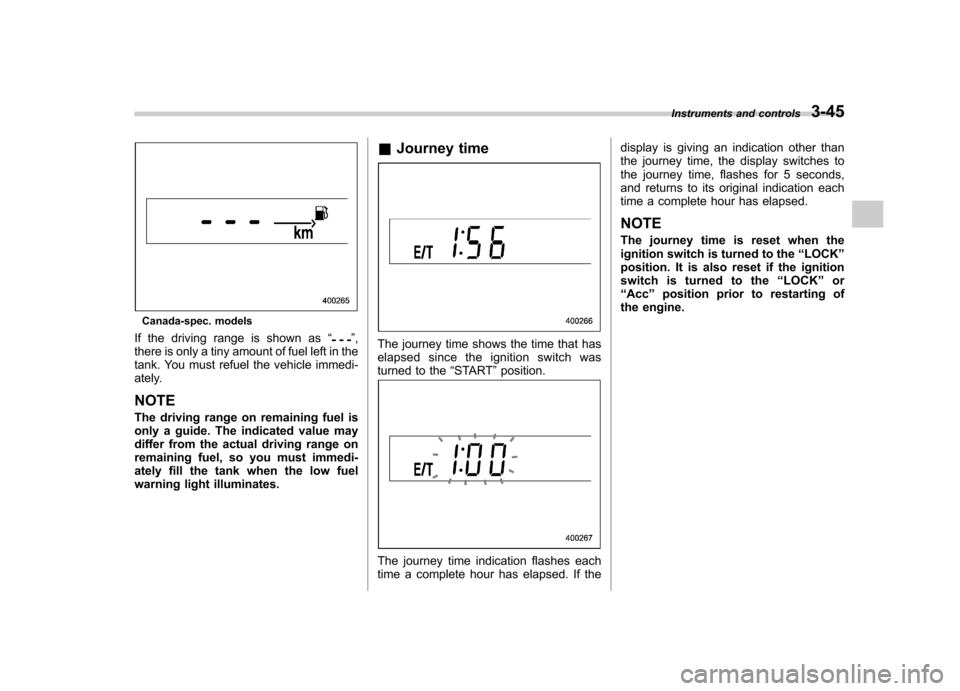
If the driving range is shown as “
”,
there is only a tiny amount of fuel left in the
tank. You must refuel the vehicle immedi-
ately. NOTE
The driving range on remaining fuel is
only a guide. The indicated value may
differ from the actual driving range on
remaining fuel, so you must immedi-
ately fill the tank when the low fuel
warning light illuminates. &
Journey timeThe journey time shows the time that has
elapsed since the ignition switch was
turned to the “START ”position.
The journey time indication flashes each
time a complete hour has elapsed. If the display is giving an indication other than
the journey time, the display switches to
the journey time, flashes for 5 seconds,
and returns to its original indication each
time a complete hour has elapsed. NOTE
The journey time is reset when the
ignition switch is turned to the
“LOCK ”
position. It is also reset if the ignition
switch is turned to the “LOCK ”or
“ Acc ”position prior to restarting of
the engine. Instruments and controls
3-45
Page 171 of 447

3-48Instruments and controls
Illumination brightness con- trol
The brightness of clock display, audio, air
conditioner, information display and meter/
gauge illumination dims when the light
switch is in the “
”or “”position. You
can adjust brightness of the meter/gauge
illumination for better visibility.
For turbo and 3.0 L models, you can also
adjust the brightness of the meter/gauge
illumination when the lighting switch is in
the OFF position.
To brighten, turn the control dial upward.
To darken, turn the control dial downward. NOTE . When the control dial is turned fully
upward, the illumination brightness becomes the maximum and the auto-
matic dimming function does not work
at all..
The brightness setting is not can-
celed even when the ignition switch is
turned to the “LOCK ”position. Parking light switch
The parking light switch operates regard-
less of the ignition switch position.
By pushing the front end of this switch,
following lights will illuminate. –
Parking lights
– Front and rear side marker lights
– Tail lights
– License plate lights
To turn off, push the rear end of the
parking light switch.
Avoid leaving these lights on for a long
time because that will run down the
battery.
Page 179 of 447
3-56Instruments and controls
Mirrors
Always check that the inside and outside
mirrors are properly adjusted before you
start driving. &Inside mirror
The inside mirror has a day and night
position. Pull the tab at the bottom of the
mirror toward you for the night position.
Push it away for the day position. The
night position reduces glare from head-lights. &
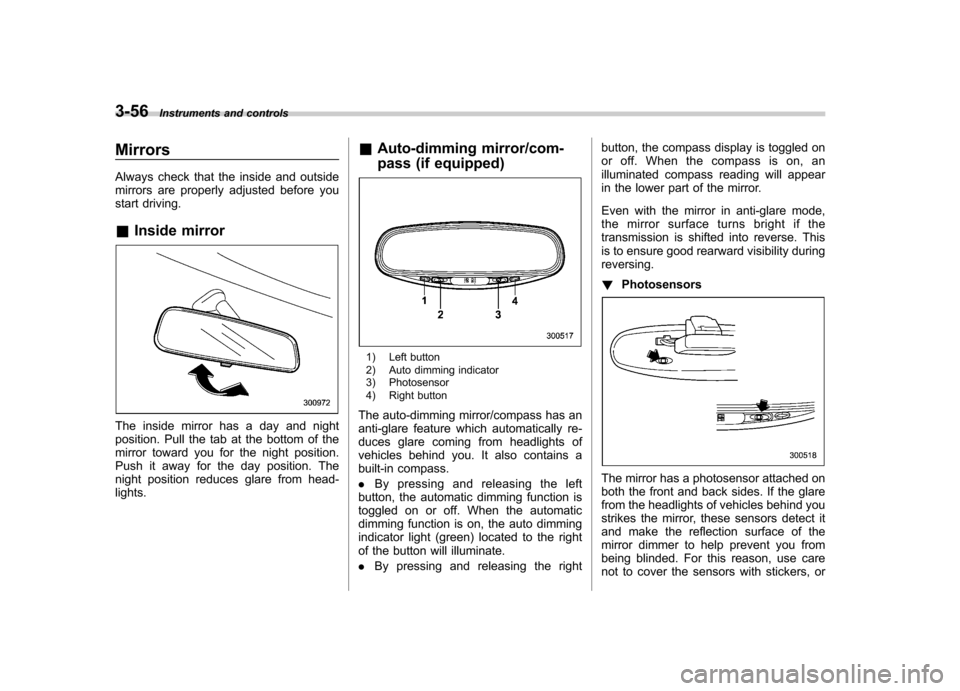
Auto-dimming mirror/com-
pass (if equipped)
1) Left button
2) Auto dimming indicator
3) Photosensor
4) Right button
The auto-dimming mirror/compass has an
anti-glare feature which automatically re-
duces glare coming from headlights of
vehicles behind you. It also contains a
built-in compass. . By pressing and releasing the left
button, the automatic dimming function is
toggled on or off. When the automatic
dimming function is on, the auto dimming
indicator light (green) located to the right
of the button will illuminate. . By pressing and releasing the right button, the compass display is toggled on
or off. When the compass is on, an
illuminated compass reading will appear
in the lower part of the mirror.
Even with the mirror in anti-glare mode,
the mirror surface turns bright if the
transmission is shifted into reverse. This
is to ensure good rearward visibility duringreversing. !
Photosensors
The mirror has a photosensor attached on
both the front and back sides. If the glare
from the headlights of vehicles behind you
strikes the mirror, these sensors detect it
and make the reflection surface of the
mirror dimmer to help prevent you from
being blinded. For this reason, use care
not to cover the sensors with stickers, or
Page 180 of 447
other similar items. Periodically wipe the
sensors clean using a piece of dry soft
cotton cloth or an applicator. !Compass calibration
1. For optimum calibration, switch off all
nonessential electrical accessories (rear
window defogger, heater/air conditioning
system, spotlight, etc.) and ensure all
doors are shut.
2. Drive to an open, level area away from
large metallic objects or structures and
make certain the ignition switch is in the“ ON ”position.
3. Press and hold the left button for 3
seconds then release, and the compass
will enter the calibration mode. “CAL ”and
direction will be displayed.
4. Drive slowly in a circle until “CAL ”
disappears from the display (approxi-
mately two or three circles). The compass
is now calibrated.
5. Further calibration may be necessary
should outside influences cause the mirror
to read inaccurately. You will know that
this has occurred if your compass begins
to read in only limited directions. Should
you encounter this situation, return to step
one of the above procedure and recali-
brate the mirror. !
Compass zone adjustment
1. The zone setting is factory preset to
Zone 8. Refer to the “Compass calibration
zone ”map attached to the end of this
manual to verify that the compass zone
setting is correct for your geographical location.
2. Press and hold the right button for 3
seconds then release, and the word“ ZONE ”will briefly appear and then the
zone number will be displayed.
3. Press the right-hand button repeatedly
to cycle the display through all possible
zone settings. Stop cycling when the
correct zone setting for your location isdisplayed.
4. Releasing the button for 3 seconds will
exit the zone setting mode.
& Outside mirrors
! Convex mirror (passenger side)
WARNING
Objects look smaller in a convex
mirror and farther away than when
viewed in a flat mirror. Do not use
the convex mirror to judge the
distance of vehicles behind you
when changing lanes. Use the inside
mirror (or glance backwards) to determine the actual size and dis-
tance of objects that you view in
convex mirror.
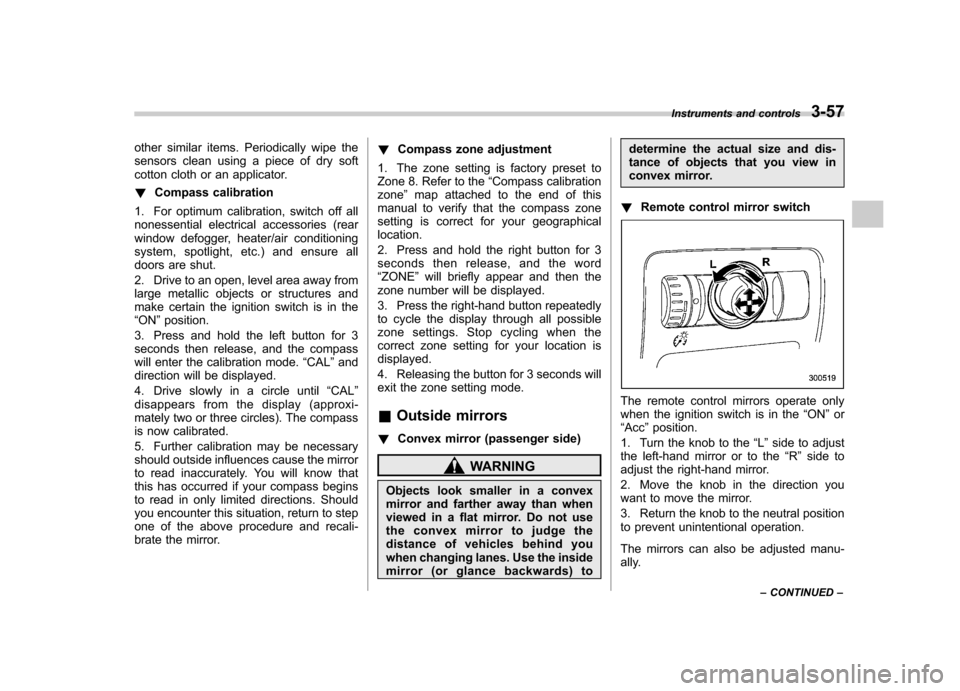
! Remote control mirror switch
The remote control mirrors operate only
when the ignition switch is in the “ON ”or
“ Acc ”position.
1. Turn the knob to the “L ” side to adjust
the left-hand mirror or to the “R ” side to
adjust the right-hand mirror.
2. Move the knob in the direction you
want to move the mirror.
3. Return the knob to the neutral position
to prevent unintentional operation.
The mirrors can also be adjusted manu-
ally. Instruments and controls
3-57
– CONTINUED –
Page 190 of 447
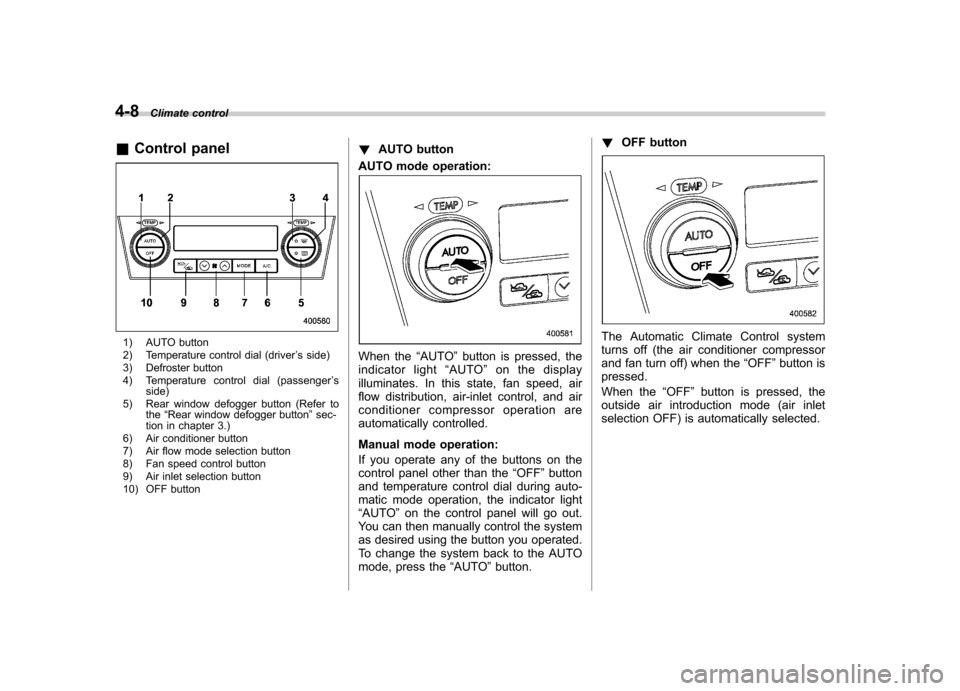
4-8Climate control
& Control panel
1) AUTO button
2) Temperature control dial (driver ’s side)
3) Defroster button
4) Temperature control dial (passenger ’s
side)
5) Rear window defogger button (Refer to the“Rear window defogger button ”sec-
tion in chapter 3.)
6) Air conditioner button
7) Air flow mode selection button
8) Fan speed control button
9) Air inlet selection button
10) OFF button !
AUTO button
AUTO mode operation:
When the “AUTO ”button is pressed, the
indicator light “AUTO ”on the display
illuminates. In this state, fan speed, air
flow distribution, air-inlet control, and air
conditioner compressor operation are
automatically controlled.
Manual mode operation:
If you operate any of the buttons on the
control panel other than the “OFF ”button
and temperature control dial during auto-
matic mode operation, the indicator light“ AUTO ”on the control panel will go out.
You can then manually control the system
as desired using the button you operated.
To change the system back to the AUTO
mode, press the “AUTO ”button. !
OFF button
The Automatic Climate Control system
turns off (the air conditioner compressor
and fan turn off) when the “OFF ”button is
pressed.
When the “OFF ”button is pressed, the
outside air introduction mode (air inlet
selection OFF) is automatically selected.