2009 SUBARU LEGACY change time
[x] Cancel search: change timePage 214 of 447

&Repeating
! To repeat the currently playing
track/file (track)
To repeat a track/file (track), briefly press the“RPT ”button while the track/file (track)
is playing. The display will show “RPT ”,
and the track/file (track) will be repeated.
To cancel the track/file (track) repeat-play
mode, briefly press the “RPT ”button
twice. The “RPT ”indication will go off,
and the normal playback mode will beresumed.
NOTE . Each time you briefly press the
button, the mode will change to the
next one in the following sequence.
If you accidentally press the button and
cancel the track/file (track) repeat-play
mode, press it again to reselect the
repeat-play mode.. The repeat-play mode will be can-
celled if you perform any of the follow-
ing steps:
.Press the “RPT ”button
. Press the “
”button
. Press the disc select button
. Select the radio or AUX mode
. Press the “
”or “”side of the
SEEK/SCAN button on folder re-
peating (MP3 or WMA disc) . Press the “LOAD ”button when
thereisfreespaceintheCD magazine. . Turn off the power of the audio
equipment.. Turn the ignition switch to the
“ LOCK ”position. !
To repeat the currently playing disc/ folder
To repeat the currently playing disc/folder,
press the “RPT ”button twice while a track/
file (track) is playing. The display will show“ D-RPT ”for non-MP3/WMA disc, “F-RPT ”
for MP3/WMA folder. And the disc/folder
will be played repeatedly.
To cancel the disc/folder repeat play
mode, press the “RPT ”button once more.
The “D-RPT ”or “F-RPT ”indication will go
off, and the normal playback mode will beresumed.
NOTE . Each time you briefly press the
button, the mode will change to the
next one in the following sequence. Audio
5-19
– CONTINUED –
Page 215 of 447

5-20Audio
If you accidentally press the button and
cancel the disc/folder repeat-play
mode, press it again to reselect the
disc/folder repeat-play mode..For MP3 and WMA discs, they can
play back repeatedly only for the
currently playing file folder. They can-
not play back the whole disc.. The disc/folder repeat-play mode
will be cancelled if you perform any of
the following steps:
.Press the “RPT ”button
. Press the “
”button
. Press the disc select button
. Select the radio or AUX mode
. Press the “
”or “”side of the
SEEK/SCAN button in the folder
repeating mode “F-RPT ”
. Turn off the power of the audio
equipment. . Turn the ignition switch to the
“ LOCK ”position. &
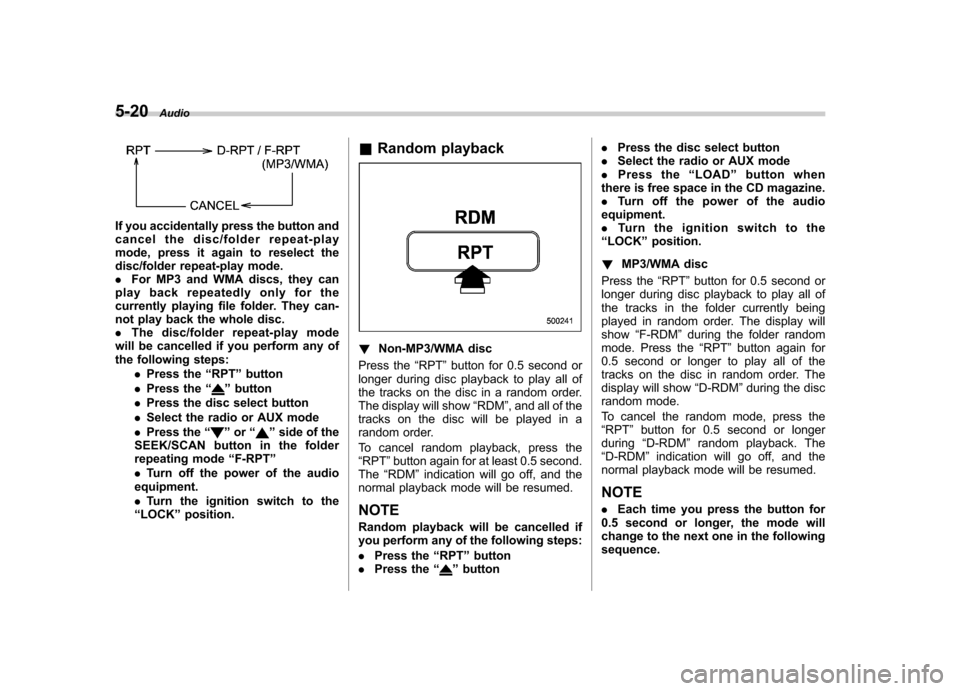
Random playback
! Non-MP3/WMA disc
Press the “RPT ”button for 0.5 second or
longer during disc playback to play all of
the tracks on the disc in a random order.
The display will show “RDM ”, and all of the
tracks on the disc will be played in a
random order.
To cancel random playback, press the “ RPT ”button again for at least 0.5 second.
The “RDM ”indication will go off, and the
normal playback mode will be resumed.
NOTE
Random playback will be cancelled if
you perform any of the following steps: . Press the “RPT ”button
. Press the “
”button .
Press the disc select button
. Select the radio or AUX mode
. Press the “LOAD ”button when
there is free space in the CD magazine. . Turn off the power of the audio
equipment.. Turntheignitionswitchtothe
“ LOCK ”position.
! MP3/WMA disc
Press the “RPT ”button for 0.5 second or
longer during disc playback to play all of
the tracks in the folder currently being
played in random order. The display willshow “F-RDM ”during the folder random
mode. Press the “RPT ”button again for
0.5 second or longer to play all of the
tracks on the disc in random order. The
display will show “D-RDM ”during the disc
random mode.
To cancel the random mode, press the “ RPT ”button for 0.5 second or longer
during “D-RDM ”random playback. The
“ D-RDM ”indication will go off, and the
normal playback mode will be resumed. NOTE . Each time you press the button for
0.5 second or longer, the mode will
change to the next one in the followingsequence.
Page 217 of 447

5-22Audio
& Display selection
If you briefly press the “TEXT ”button
during playback of an MP3/WMA file, the
indication will change to the next one in
the following sequence.
! Page (track/folder title) scroll
If, having pressed the “TEXT ”button to
select FOLDER NAME or TRACK NAME
display, you press the “TEXT ”button
again, the title will be scrolled so you can
see all of it.
NOTE
The display is designed to show titles
for up to three pages (64 characters in
total). However, it may in some cases
show titles for only up to two pages (32
characters in total). &
Folder selectionPress the “”side of the SEEK/SCAN
button briefly to select the next folder.
Press the “
”side of the button briefly to
go back to the previous folder. The folder
title will be shown each time you press
one of the buttons. NOTE . Selecting folders in this way is
possible only within a single disc. . Only MP3/WMA folders are recog-
nized when an attempt to select the
next or previous folder is made. If no
appropriate folder exists on the disc,
pressing the “
”or “”side of the
SEEK/SCAN button starts playback
beginning with the first track/file(track).
Page 221 of 447

5-26Audio
Audio control buttons
(if equipped)
These buttons are located on the spokes
of the steering wheel. They allow the
driver to control audio functions without
taking his/her hands off the steeringwheel. &MODE button
This button is used to select the desired
audio mode. Each time it is pressed, the
mode changes to the next one in the
following sequence:
*1: The frequency last received in the selected
waveband will be displayed.
*2: Only when a CD is in the player.
*3: Only when with an auxiliary audio product is
connected. ! “
”and “”buttons
! With radio mode selected
Press the “
”button or “”button. The
radio will seek the next receivable station
and stop on it.
That station ’s frequency will be shown on
the audio display. ! With CD mode selected
Press the “
”button to skip forward in the
track/file (track) order. Press the “”
button to skip backward in the track/file (track) order.
The track/file (track) number will be shown
on the audio display. !
With SAT mode selected
Press the “
”button to skip forward in the
channel order. Press the “”button to
skip backward in the channel order. The
channel will be shown on the audio
display. ! Volume control buttons
Press the “+ ” button to increase the
volume. Press the “� ” button to reduce
the volume.
A number indicating the volume will be
shown on the audio display.
Page 260 of 447

7-14Starting and operating
feature ON or OFF each time.
7. To exit the remote transmitter and
feature programming mode, turn the igni-
tion switch to the “LOCK ”position, remove
the key from the ignition switch and test
operation of the remote transmitter(s) and
horn confirmation feature. & System maintenance
! Changing the remote control bat- teries
The two 3-volt lithium batteries (model
CR-1220) supplied in your remote control
should last approximately three years,
depending on usage. When the batteries
begin to weaken, you will notice a
decrease in range (distance from the
vehicle that your remote control operates).
Follow the instructions below to change
the remote control batteries.
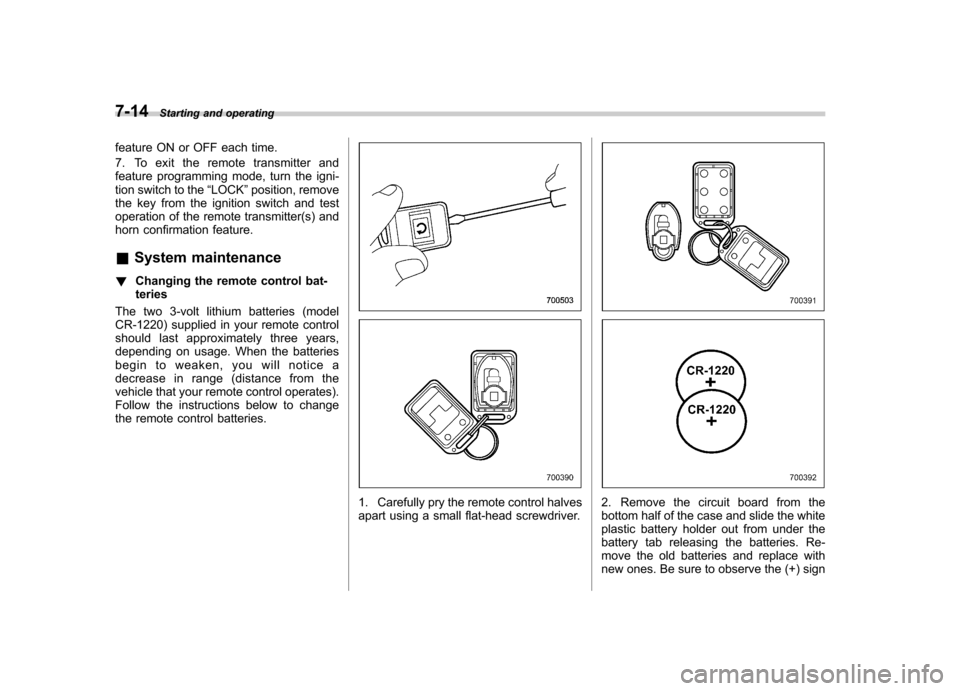
1. Carefully pry the remote control halves
apart using a small flat-head screwdriver.2. Remove the circuit board from the
bottom half of the case and slide the white
plastic battery holder out from under the
battery tab releasing the batteries. Re-
move the old batteries and replace with
new ones. Be sure to observe the (+) sign
Page 274 of 447

7-28Starting and operating
1) Upshift indicator
2) Downshift indicator
3) Gear position indicator
When the manual mode is selected, the
gear position indicator and upshift indica-
tor and/or downshift indicator in the
tachometer illuminate. The gear position
indicator shows the currently selected
gear in the 1st-to-5th-gear range. The
upshift and downshift indicators show
when a gearshift is possible. When the
upshift indicator “
”is on, upshifting is
possible. When the downshift indicator “
” is on, downshifting is possible. When
both indicators are on, upshifting and
downshifting are both possible. When the
vehicle stops (for example, at traffic
signals), the downshift indicator goes off.
Gearshifts can be performed using the selector lever or the paddle shift switch
behind the steering wheel (if equipped).
!
Using the selector lever
Shift to the next-higher gear by briefly
pushing the selector lever toward the “+ ”
end of the manual gate.
Shift to the next-lower gear by briefly
pulling the selector lever toward the “� ”
end of the manual gate. !
Using the paddle shift (if equipped)Pull the “+ ” of the paddle shift to upshift
one level. Also pull the “� ” of the paddle
shift to downshift one level.
To deselect the manual mode, return the
selector lever to the “D ”position from the
manual gate.
While driving, if you change gears by
paddle shifting, the gear position indicator
light illuminates and shows the current
gear condition. At this time, the normal
mode temporarily changes to the manual
mode, and after driving for a short period
of time, the transmission mode returns to
the normal mode. (The timing of the gear
change and return is different, depending
on driving conditions existing when paddleshifting.)
Page 277 of 447

SI-DRIVE (turbo and 3.0 L models)
SI-DRIVE (Subaru Intelligent Drive) works
to maximize engine performance, control
and efficiency.
This system consists of three modes:
Intelligent (I), Sport (S), and Sport Sharp
(S#). By adjusting the SI-DRIVE selector,
the character of the power unit changes.
The multi-information display located in
the tachometer provides the driver with
the ability to monitor both vehicle perfor-
mance and the current SI-DRIVE mode.
To change the multi-information display,
refer to the“Multi-information display
(vehicle with SI-DRIVE) ”in chapter 3. &
Intelligent (I) mode
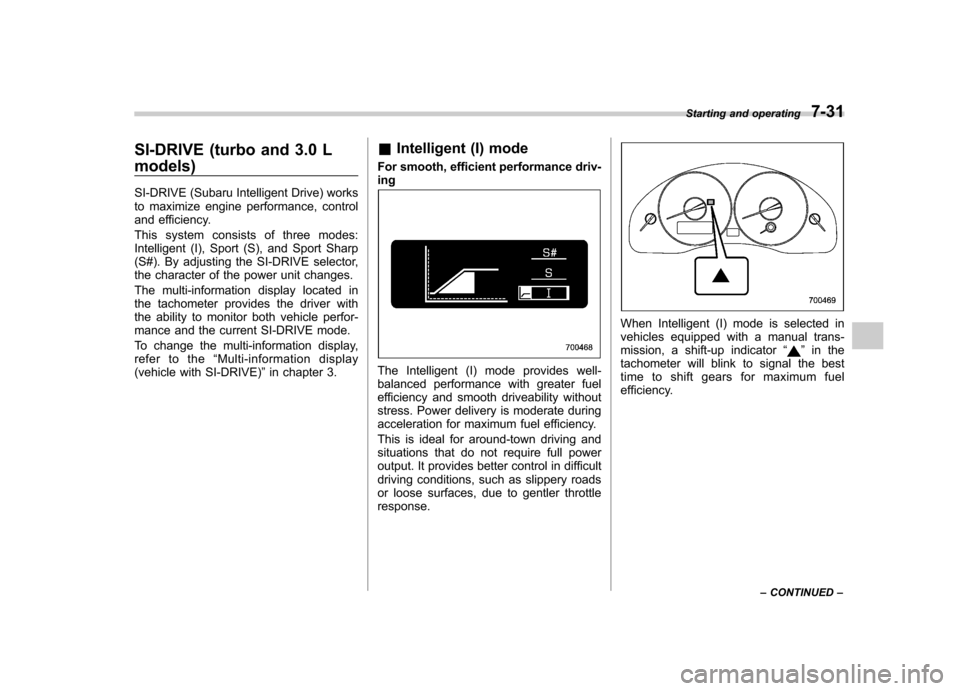
For smooth, efficient performance driv-ing
The Intelligent (I) mode provides well-
balanced performance with greater fuel
efficiency and smooth driveability without
stress. Power delivery is moderate during
acceleration for maximum fuel efficiency.
This is ideal for around-town driving and
situations that do not require full power
output. It provides better control in difficult
driving conditions, such as slippery roads
or loose surfaces, due to gentler throttleresponse.
When Intelligent (I) mode is selected in
vehicles equipped with a manual trans-
mission, a shift-up indicator “
”in the
tachometer will blink to signal the best
time to shift gears for maximum fuel
efficiency. Starting and operating
7-31
– CONTINUED –
Page 278 of 447

7-32Starting and operating
& Sport (S) mode
For all-around performance driving
The Sport (S) mode provides the engine
power desired by those who want to make
the driving experience their own personaladventure.
The linear acceleration characteristic of
this versatile mode is ideal for normal
driving use. &
Sport Sharp (S#) mode
For maximum performance drivingFor sports-minded drivers, the Sport
Sharp (S#) mode offers an exhilarating
level of engine performance and control.
The throttle becomes more responsive
regardless of the engine speed. Delivering
maximum driving enjoyment, this mode is
ideal for tackling twisting roads and for
merging or overtaking other vehicles on
the freeway with confidence. &
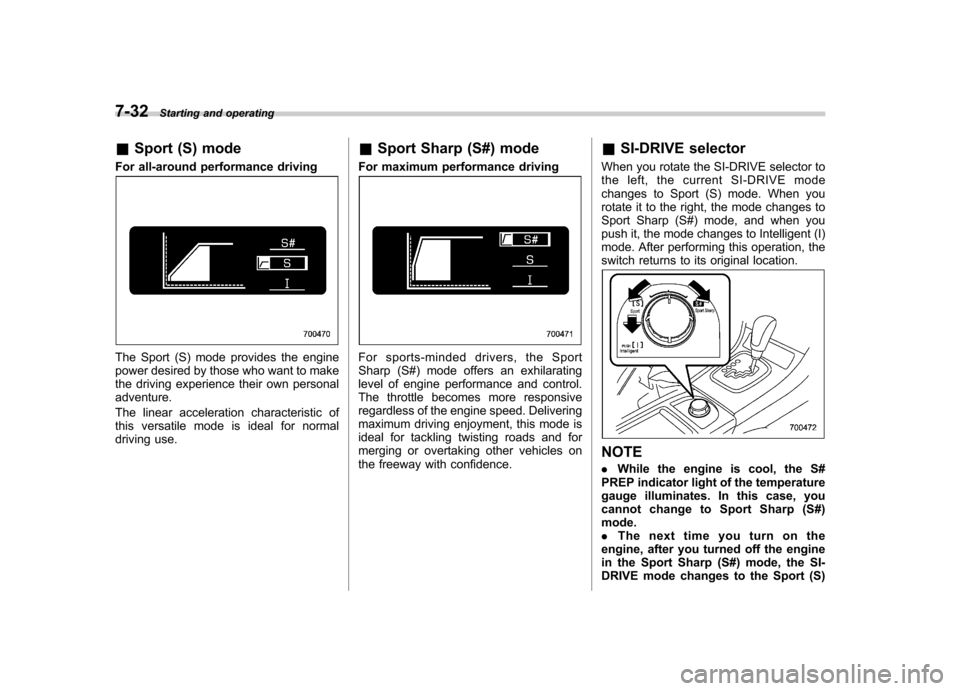
SI-DRIVE selector
When you rotate the SI-DRIVE selector to
the left, the current SI-DRIVE mode
changes to Sport (S) mode. When you
rotate it to the right, the mode changes to
Sport Sharp (S#) mode, and when you
push it, the mode changes to Intelligent (I)
mode. After performing this operation, the
switch returns to its original location.
NOTE . While the engine is cool, the S#
PREP indicator light of the temperature
gauge illuminates. In this case, you
cannot change to Sport Sharp (S#)mode.. Thenexttimeyouturnonthe
engine, after you turned off the engine
in the Sport Sharp (S#) mode, the SI-
DRIVE mode changes to the Sport (S)