2009 SUBARU LEGACY change time
[x] Cancel search: change timePage 131 of 447

3-8Instruments and controls
We recommend that you drive moderately
until the pointer of the temperature gauge
reaches near the middle of the range.
Engine operation is optimum with the
engine coolant at this temperature range.
And high revving operation while the
engine is not warmed up enough should
be avoided.
When the engine is not warmed up
sufficiently, the S# PREP indicator light
turns on. While this indicator light is on,
the SI-DRIVE mode cannot be changed to
the Sport Sharp (S#) mode. For details
about the SI-DRIVE mode, refer to the “SI-
DRIVE (turbo and 3.0 L models) ”section
in chapter 7.
CAUTION
If the pointer exceeds the normal
operating range, safely stop the
vehicle as soon as possible.
Refer to “In case of emergency ”in
chapter 9. &
ECO gauge
The ECO gauge shows the difference
between the average rate of fuel con-
sumption and the current rate of fuel
consumption. Using the average rate of
fuel consumption since the trip meter was
last reset, if the current rate of fuel
consumption is higher than the average
rate of fuel consumption, the indicator
needle points to the “+ ” or right side, and if
the current rate of fuel consumption is
lower than the average rate of fuel
consumption, the indicator needle points
to the “� ” or left side. When the indicator
needle is pointing to the “+ ” or right side, it
indicates fuel-efficient driving. NOTE .
The ECO gauge shows only an
approximate indication. . After resetting the trip meter, the
average rate of fuel consumption is not
shown until driving 0.6 mile (1 km).
Until that time, the ECO gauge does notoperate.
Page 139 of 447

3-16Instruments and controls
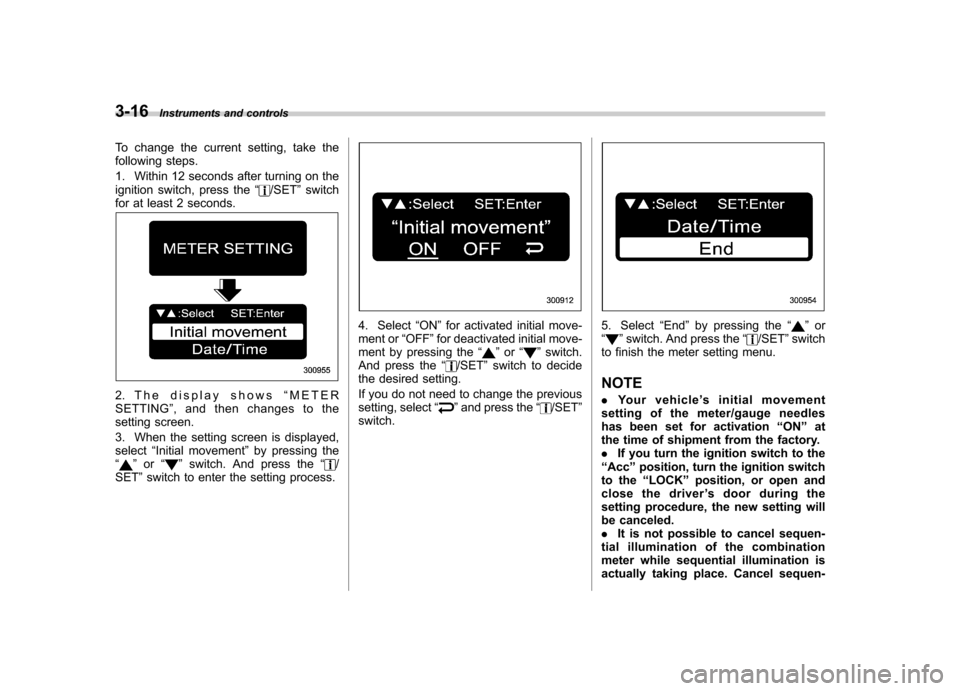
To change the current setting, take the
following steps.
1. Within 12 seconds after turning on the
ignition switch, press the “
/SET”switch
for at least 2 seconds.
2. The display shows “METER
SETTING ”, and then changes to the
setting screen.
3. When the setting screen is displayed, select “Initial movement ”by pressing the
“
” or “”switch. And press the “/
SET ”switch to enter the setting process.
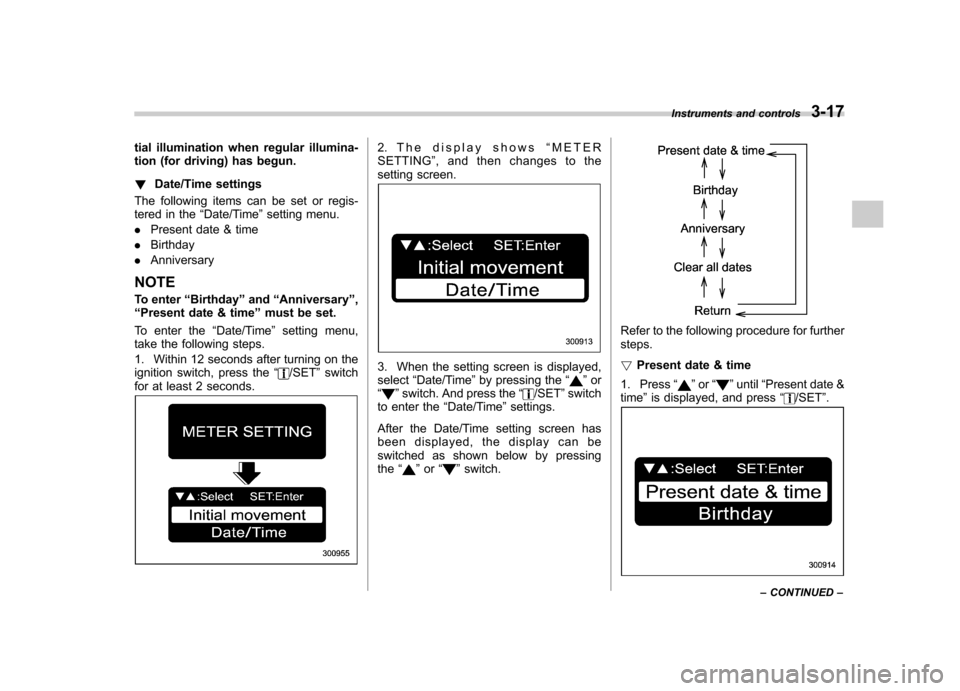
4. Select “ON ”for activated initial move-
ment or “OFF ”for deactivated initial move-
ment by pressing the “
”or “”switch.
And press the “/SET”switch to decide
the desired setting.
If you do not need to change the previous
setting, select “
”and press the “/SET”
switch.
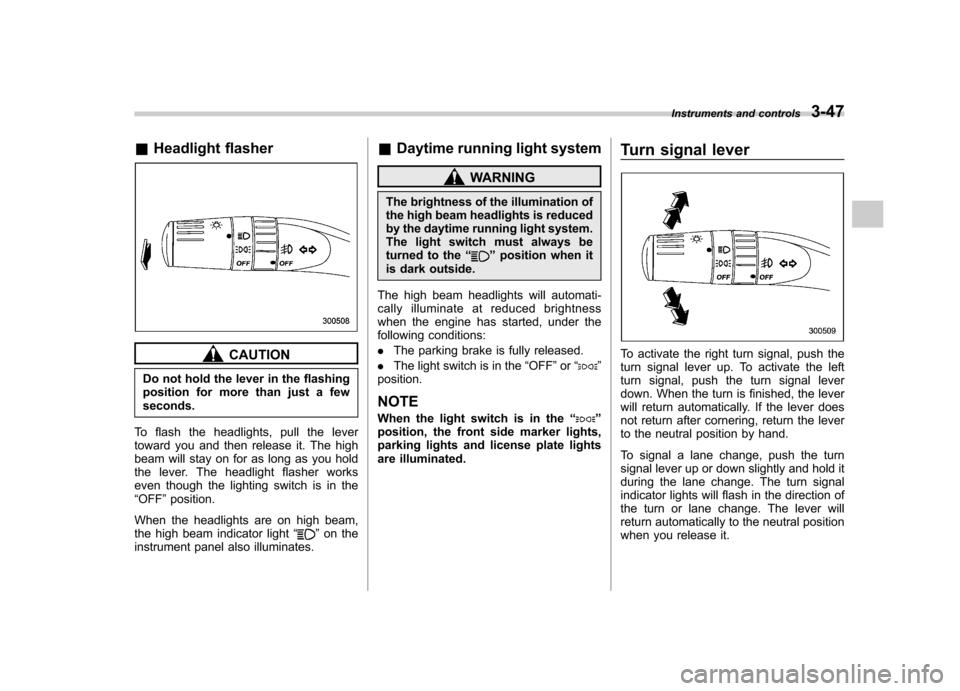
5. Select “End ”by pressing the “”or
“” switch. And press the “/SET”switch
to finish the meter setting menu. NOTE . Your vehicle ’s initial movement
setting of the meter/gauge needles
has been set for activation “ON ”at
the time of shipment from the factory.. If you turn the ignition switch to the
“ Acc ”position, turn the ignition switch
to the “LOCK ”position, or open and
close the driver ’s door during the
setting procedure, the new setting will
be canceled.. It is not possible to cancel sequen-
tial illumination of the combination
meter while sequential illumination is
actually taking place. Cancel sequen-
Page 140 of 447

tial illumination when regular illumina-
tion (for driving) has begun. !Date/Time settings
The following items can be set or regis-
tered in the “Date/Time ”setting menu.
. Present date & time
. Birthday
. Anniversary
NOTE
To enter “Birthday ”and “Anniversary ”,
“ Present date & time ”must be set.
To enter the “Date/Time ”setting menu,
take the following steps.
1. Within 12 seconds after turning on the
ignition switch, press the “
/SET”switch
for at least 2 seconds.
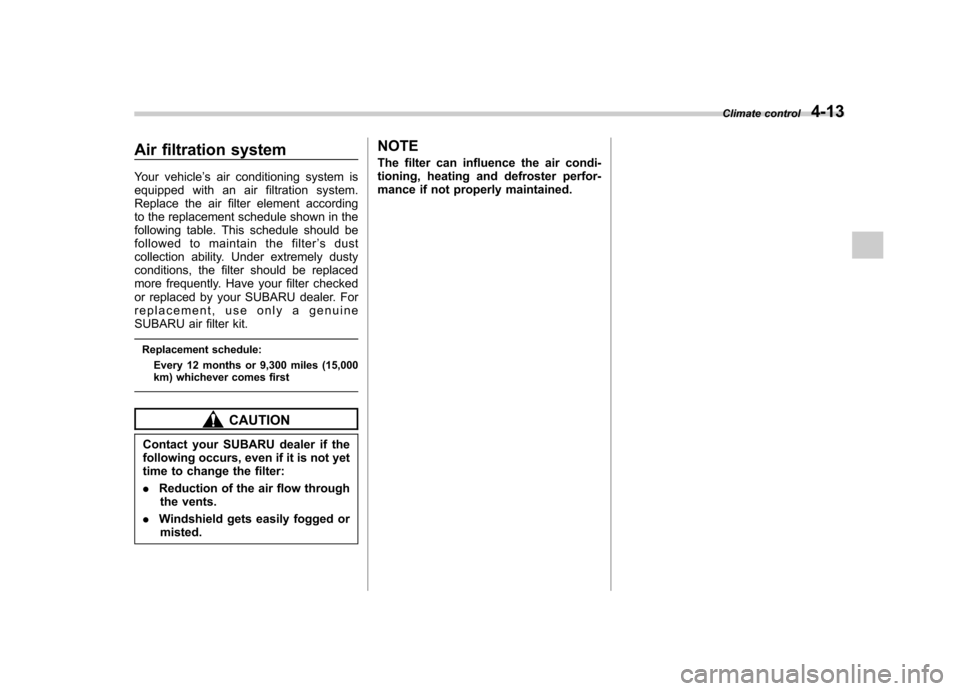
2. The display shows “METER
SETTING ”, and then changes to the
setting screen.
3. When the setting screen is displayed, select “Date/Time ”by pressing the “”or
“” switch. And press the “/SET”switch
to enter the “Date/Time ”settings.
After the Date/Time setting screen has
been displayed, the display can be
switched as shown below by pressingthe “
”or “”switch.
Refer to the following procedure for further steps. ! Present date & time
1. Press “
”or “”until “Present date &
time ”is displayed, and press “/SET”.
Instruments and controls 3-17
– CONTINUED –
Page 164 of 447

Clock (vehicle without genu-
ine SUBARU navigation sys-tem) NOTE .If your vehicle is a 2.5 L non-turbo
model equipped with the genuine
SUBARU navigation system, refer to
the Owner ’s Manual supplement for the
navigation system.. If your vehicle is a turbo model or a
3.0 L model equipped with the genuine
SUBARU navigation system, refer tothe “Clock (vehicle with genuine
SUBARU navigation system) ”in the
multi-information display (vehicle with
SI-DRIVE) section in this chapter.The clock shows the time while the
ignition switch is in the “Acc ”or “ON ”
position.
To adjust the time shown by the clock,
press the “+ ” button or the “� ” button. The
indicated time will change in one-minute
increments. If you keep the button
pressed, the rate at which the indicated
time changes will speed up.
To reset the minutes to “00 ”with a radio
time signal, push the “SET ”button. Information display (2.5 L
non-turbo model without
genuine SUBARU navigationsystem) NOTE
If your vehicle is a 2.5 L non-turbo
model equipped with the genuine
SUBARU navigation system, refer to
the Owner
’s Manual supplement for the
monitor system.
With the ignition switch in the “ON ”
position, each successive push of the “ DISP ”button toggles the display in the
following sequence: Instruments and controls
3-41
– CONTINUED –
Page 170 of 447

&Headlight flasher
CAUTION
Do not hold the lever in the flashing
position for more than just a fewseconds.
To flash the headlights, pull the lever
toward you and then release it. The high
beam will stay on for as long as you hold
the lever. The headlight flasher works
even though the lighting switch is in the“ OFF ”position.
When the headlights are on high beam,
the high beam indicator light “
”on the
instrument panel also illuminates. &
Daytime running light system
WARNING
The brightness of the illumination of
the high beam headlights is reduced
by the daytime running light system.
The light switch must always be
turned to the “
”position when it
is dark outside.
The high beam headlights will automati-
cally illuminate at reduced brightness
when the engine has started, under the
following conditions: . The parking brake is fully released.
. The light switch is in the “OFF ”or “
”
position. NOTE
When the light switch is in the “
”
position, the front side marker lights,
parking lights and license plate lights
are illuminated. Turn signal lever
To activate the right turn signal, push the
turn signal lever up. To activate the left
turn signal, push the turn signal lever
down. When the turn is finished, the lever
will return automatically. If the lever does
not return after cornering, return the lever
to the neutral position by hand.
To signal a lane change, push the turn
signal lever up or down slightly and hold it
during the lane change. The turn signal
indicator lights will flash in the direction of
the turn or lane change. The lever will
return automatically to the neutral position
when you release it.Instruments and controls
3-47
Page 178 of 447

Vehicle with automatic climate control
system
The rear window defogger operates only
when the ignition switch is in the “ON ”
position.
The rear window defogger button is
located on the climate control panel.
To turn on the defogger, push the button.
To turn it off, push the button again.
The indicator light located on the button
lights up while the rear window defogger isoperating.
The defogger will automatically shut off
after approximately 15 minutes. If the
window clears before that time, push the
button to turn it off. It also turns off when
the ignition switch is turned to the “Acc ”or
“ LOCK ”position. If defrosting or defogging is not complete, you have to push the
button to turn it on again.
For the vehicle with the automatic climate
control system, if you wish, you can set
the rear window defogger for continuous
operation as follows. .
Vehicle with genuine SUBARU navi-
gation system:
The rear window defogger setting can be
changed for continuous operation by
means of the monitor. For details, please
refer to the Owner ’s Manual supplement
for the monitor system.
The setting can also be changed by a
SUBARU dealer. Please contact the near-
est SUBARU dealer for details. . Vehicle without genuine SUBARU
navigation system:
The setting can also be changed by a
SUBARU dealer. Please contact the near-
est SUBARU dealer for details.
Once the rear window defogger has been
set for continuous operation, by pushing
the button, the rear window defogger
repeatedly runs according to the following
cycle: operates for 15 minutes, stops for 2
minutes, operates for 15 minutes, stops
for 2 minutes. If the battery voltage drops
below the permissible level, continuous
operation is canceled and the defogger
stops operating.
CAUTION
. Do not use sharp instruments or
window cleaner containing abra-
sives to clean the inner surface
of the rear window. They may
damage the conductors printed
on the window.
. To prevent the battery from being
discharged, do not operate the
defogger continuously for any
longer than necessary.
NOTE
If your vehicle is equipped with the
outside mirror defogger, the outside
mirror defogger operates while the rear
window defogger is operating. Instruments and controls
3-55
Page 195 of 447

Air filtration system
Your vehicle’s air conditioning system is
equipped with an air filtration system.
Replace the air filter element according
to the replacement schedule shown in the
following table. This schedule should be
followed to maintain the filter ’s dust
collection ability. Under extremely dusty
conditions, the filter should be replaced
more frequently. Have your filter checked
or replaced by your SUBARU dealer. For
replacement, use only a genuine
SUBARU air filter kit.
Replacement schedule: Every 12 months or 9,300 miles (15,000
km) whichever comes first
CAUTION
Contact your SUBARU dealer if the
following occurs, even if it is not yet
time to change the filter: . Reduction of the air flow through
the vents.
. Windshield gets easily fogged or
misted. NOTE
The filter can influence the air condi-
tioning, heating and defroster perfor-
mance if not properly maintained.
Climate control
4-13
Page 205 of 447

5-10Audio
FM/AM radio operation &FM/AM selection
Push the “FM AM ”button when the radio
is off to turn on the radio.
Push the “FM AM ”button when the radio
is on to select FM1, FM2 or AM reception.
Each brief press of the “FM AM ”button
changes the radio in the following se-
quence starting from the last radio band
that you selected.
& Tuning
! Manual tuning
Press the “”side of the TUNE/TRACK
button to increase the tuning frequency
and press the tuning button marked “
”
to decrease it.
Each time the button is pressed, the
frequency interval can be changed be-
tween 10 kHz in the AM mode and 0.2
MHz in the FM mode.
If you hold down the “
”side of the
button, the tuning frequency will increase
continuously, and if you hold down the“
” side of the button, the tuning
frequency will decrease continuously. Re-
lease the button when your desired
frequency is reached. NOTE
While you are holding down either side
of the TUNE/TRACK button, the tuning
frequency will not stop changing even
if the frequency of a receivable station
is reached. !
Stereo indicator
The stereo indicator “ST ”will illuminate
when an FM stereo broadcast is received. ! Seek tuning (SEEK)
If you press the “”or “”side of the
SEEK/SCAN button briefly, the radio will
automatically search for a receivable
station and stop at the first one it finds.
This function may not be available, how-
ever, when radio signals are weak. In such
a situation, perform manual tuning to
select the desired station.