Page 66 of 652

10A-60
ENGINE AND CYLINDER BLOCK ASSEMBLY
Oil pressure: Check
D4F or D7F or K9K
10A
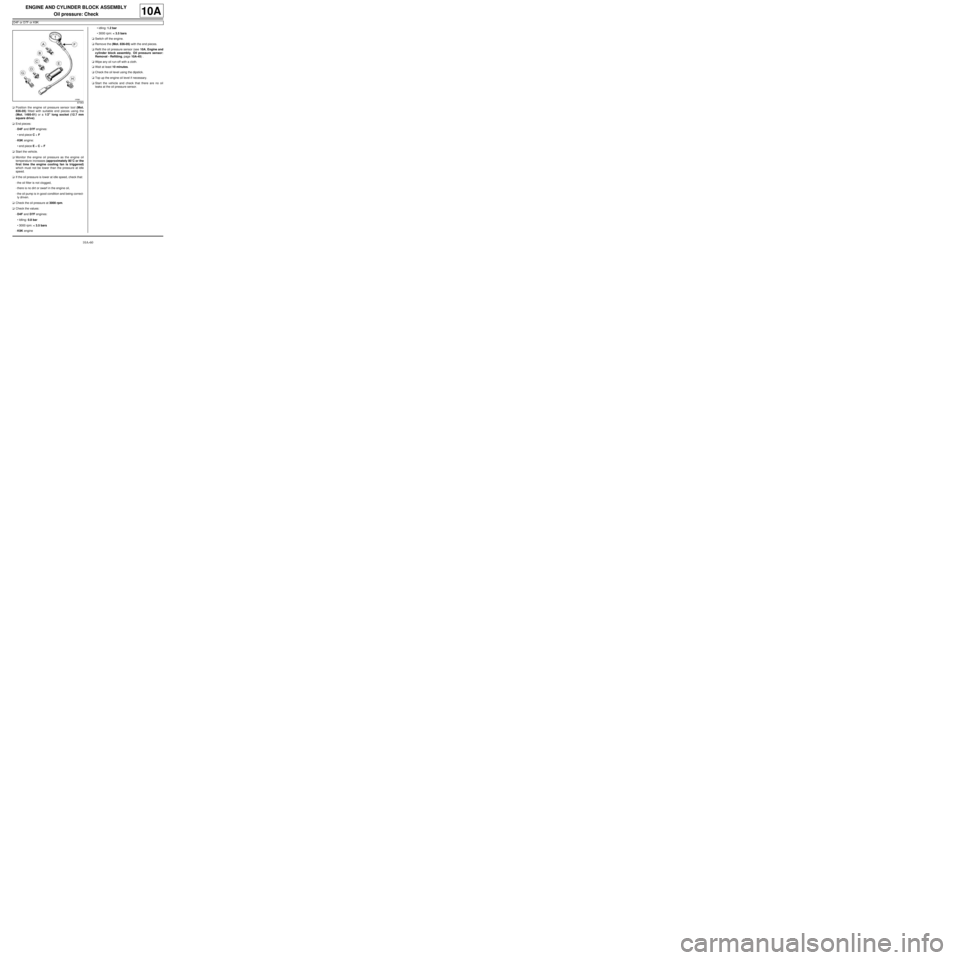
aPosition the engine oil pressure sensor tool (Mot.
836-05) fitted with suitable end pieces using the
(Mot. 1495-01) or a 1/2" long socket (12.7 mm
square drive).
aEnd pieces:
-D4F and D7F engines:
•end piece C + F
-K9K engine:
•end piece E + C + F
aStart the vehicle.
aMonitor the engine oil pressure as the engine oil
temperature increases (approximately 80˚C or the
first time the engine cooling fan is triggered)
which must not be lower than the pressure at idle
speed.
aIf the oil pressure is lower at idle speed, check that:
-the oil filter is not clogged,
-there is no dirt or swarf in the engine oil,
-the oil pump is in good condition and being correct-
ly driven.
aCheck the oil pressure at 3000 rpm.
aCheck the values:
-D4F and D7F engines:
•Idling: 0.8 bar
•3000 rpm: < 3.5 bars
-K9K engine•idling: 1.2 bar
•3000 rpm: < 3.5 bars
aSwitch off the engine.
aRemove the (Mot. 836-05) with the end pieces.
aRefit the oil pressure sensor (see 10A, Engine and
cylinder block assembly, Oil pressure sensor:
Removal - Refitting, page 10A-45) .
aWipe any oil run-off with a cloth.
aWait at least 10 minutes.
aCheck the oil level using the dipstick.
aTop up the engine oil level if necessary.
aStart the vehicle and check that there are no oil
leaks at the oil pressure sensor.
87363
Page 67 of 652

10A-61
ENGINE AND CYLINDER BLOCK ASSEMBLY
Oil pressure: Check
K4M
10A
Oil pressure tables:
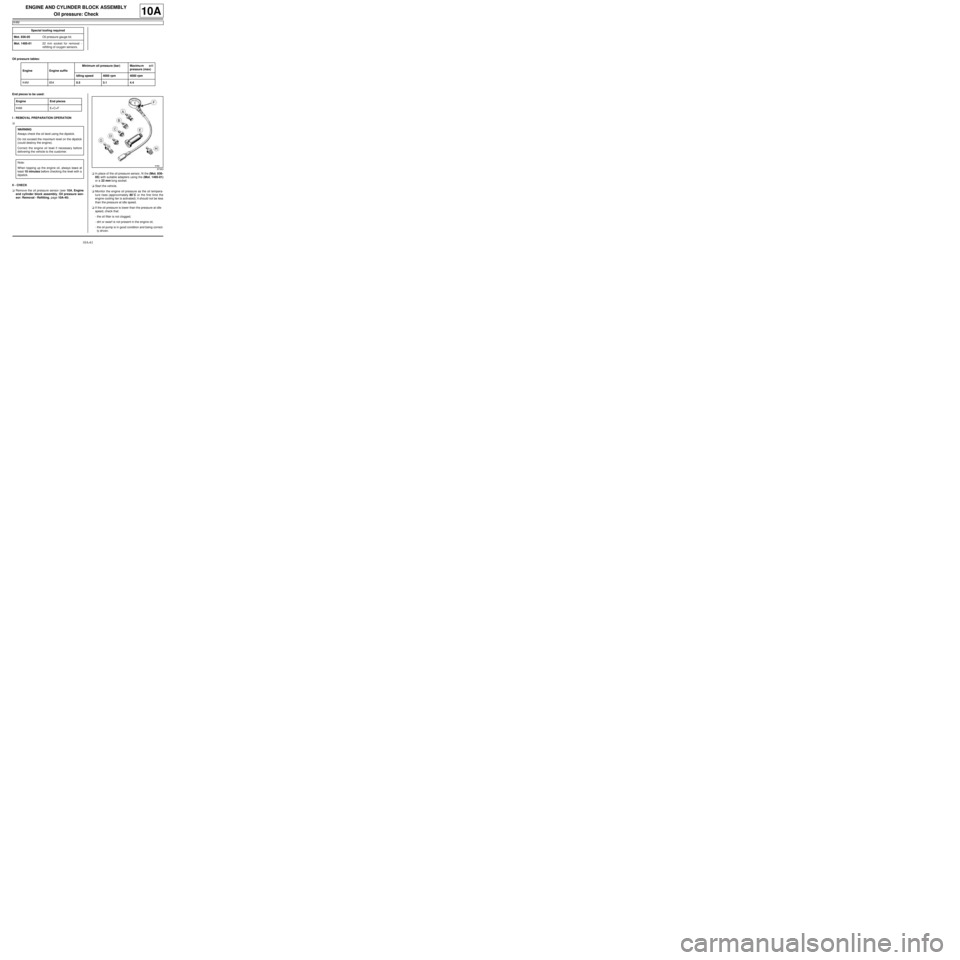
End pieces to be used:
I - REMOVAL PREPARATION OPERATION
a
II - CHECK
aRemove the oil pressure sensor (see 10A, Engine
and cylinder block assembly, Oil pressure sen-
sor: Removal - Refitting, page 10A-45) .aIn place of the oil pressure sensor, fit the (Mot. 836-
05) with suitable adapters using the (Mot. 1495-01)
or a 22 mm long socket.
aStart the vehicle.
aMonitor the engine oil pressure as the oil tempera-
ture rises (approximately 80˚C or the first time the
engine cooling fan is activated); it should not be less
than the pressure at idle speed.
aIf the oil pressure is lower than the pressure at idle
speed, check that:
-the oil filter is not clogged,
-dirt or swarf is not present in the engine oil,
-the oil pump is in good condition and being correct-
ly driven. Special tooling required
Mot. 836-05Oil pressure gauge kit.
Mot. 1495-0122 mm socket for removal -
refitting of oxygen sensors.
Engine Engine suffixMinimum oil pressure (bar) Maximu m o i l
pressure (max)
Idling speed 4000 rpm 4000 rpm
K4M 8540.5 3.1 4.4
Engine End pieces
K4M E+C+F
WARNING
Always check the oil level using the dipstick.
Do not exceed the maximum level on the dipstick
(could destroy the engine).
Correct the engine oil level if necessary before
delivering the vehicle to the customer.
Note:
When topping up the engine oil, always leave at
least 10 minutes before checking the level with a
dipstick.
87363
Page 68 of 652
10A-62
ENGINE AND CYLINDER BLOCK ASSEMBLY
Oil pressure: Check
K4M
10A
aCheck the oil pressure in comparison with the values
given in the table above.
aSwitch off the engine.
aRemove the (Mot. 836-05) with the end pieces.
aRefit the oil pressure sensor (see 10A, Engine and
cylinder block assembly, Oil pressure sensor:
Removal - Refitting, page 10A-45) .
aWipe any oil run-off with a cloth.
aWait at least 10 minutes.
aCheck the oil level using the dipstick.
aTop up the oil level if necessary (see Engine oil:
Specifications) (Technical Note 6013A, 04A, Lubri-
cants).
aStart the vehicle and check that there are no oil
leaks at the oil pressure sensor.
Page 69 of 652

10A-63
ENGINE AND CYLINDER BLOCK ASSEMBLY
Multifunction support: Removal - Refitting
K9K, and AIR CONDITIONING
10A
REMOVAL
I - REMOVAL PREPARATION OPERATION
aPosition the vehicle on a two-post lift ( (see Vehicle:
Towing and lifting) ).
aDisconnect the battery ( (see Battery: Removal -
Refitting) ).
aRemove:
-the engine cover,
-the front wheels, (see Wheel: Removal - Refit-
ting)
-the front wheel arch liners ( (see Front wheel arch
liner: Removal - Refitting) ),
-the front bumper ( (see Front bumper: Removal -
Refitting) ),
-the accessories belt (see 11A, Top and front of
engine, Accessories belt: Removal - Refitting,
page 11A-3) .aDisconnect the clutch connector (1) from the air con-
ditioning compressor.
aRemove the bolts (2) from the air conditioning com-
pressor.
aMove the air conditioning compressor aside. Tightening torquesm
bolts mounting the mul-
tifunction support on the
cylinder block44 N.m
bolt mounting the multi-
function support on the
sump25 N.m
air conditioning com-
pressor bolts21 N.m
108866
Note:
Take care not to constrain the compressor con-
necting pipes to prevent refrigerant leaking.
Note:
This operation does not require the AC system to
be drained.
Page 70 of 652

10A-64
ENGINE AND CYLINDER BLOCK ASSEMBLY
Multifunction support: Removal - Refitting
K9K, and AIR CONDITIONING
10A
II - OPERATION FOR REMOVAL OF PART
CONCERNED
aRemove:
-the multifunction support bolts (3) ,
-the multifunction support.REFITTING
I - REFITTING OPERATION FOR PART
CONCERNED
aRefit the multifunction support.
aFit the multifunction support bolts on the cylinder
block without tightening.
aTighten to torque and in order:
-the bolts mounting the multifunction support
on the cylinder block (44 N.m),
-the bolt mounting the multifunction support on
the sump (25 N.m).
II - FINAL OPERATION
aRefit the air conditioning compressor bolts.
aTorque tighten the air conditioning compressor
bolts (21 N.m).
aConnect the air conditioning compressor clutch con-
nector.
aRefit:
-the accessories belt (see 11A, Top and front of
engine, Accessories belt: Removal - Refitting,
page 11A-3) ,
-the front bumper ( (see Front bumper: Removal -
Refitting) ),
-the front wheel arch liners ( (see Front wheel arch
liner: Removal - Refitting) ),
120315
120315
Page 71 of 652
10A-65
ENGINE AND CYLINDER BLOCK ASSEMBLY
Multifunction support: Removal - Refitting
K9K, and AIR CONDITIONING
10A
-the front wheels (see 35A, Wheels and tyres,
Wheels: Removal - Refitting),
-the engine cover.
aConnect the battery ( (see Battery: Removal - Re-
fitting) ).
Page 72 of 652

10A-66
ENGINE AND CYLINDER BLOCK ASSEMBLY
Multifunction support: Removal - Refitting
D4F, and 772, and STANDARD HEATING – D7F, and STANDARD HEATING
10A
REMOVAL
I - REMOVAL PREPARATION OPERATION
aDisconnect the battery (see Battery: Removal - Re-
fitting) (80A, Battery).
aRemove:
-the accessories belt (see 11A, Top and front of
engine, Accessories belt: Removal - Refitting,
page 11A-3) ,
-the alternator (see 16A, Starting - Charging, Al-
ternator: Removal - Refitting, page 16A-1) .
II - OPERATION FOR REMOVAL OF PART
CONCERNED
aRemove:
-the multifunction support bolts,
-the multifunction support.
REFITTING
I - REFITTING OPERATION FOR PART
CONCERNED
aRefit:
-the multifunction support,
-the multifunction support bolts.
aTorque tighten the multifunction support bolts (50
N.m).
II - FINAL OPERATION
aRefit:
-the alternator (see 16A, Starting - Charging, Al-
ternator: Removal - Refitting, page 16A-1) ,
-the accessories belt (see 11A, Top and front of
engine, Accessories belt: Removal - Refitting,
page 11A-3) .
aConnect the battery (see Battery: Removal - Refit-
ting) (80A, Battery). Tightening torquesm
multifunction support
bolts50 N.m
120410
120410
Page 73 of 652

10A-67
ENGINE AND CYLINDER BLOCK ASSEMBLY
Multifunction support: Removal - Refitting
D4F, and 772, and AIR CONDITIONING – D7F, and AIR CONDITIONING
10A
REMOVAL
I - REMOVAL PREPARATION OPERATION
aPosition the vehicle on a two-post lift (see Vehicle:
Towing and lifting) (02A, Lifting equipment).
aDisconnect the battery (see Battery: Removal - Re-
fitting) (80A, Battery).
aRemove:
-the front right-hand wheel (see Wheel: Removal -
Refitting) (35A, Wheels and tyres),
-the accessories belt (see 11A, Top and front of
engine, Accessories belt: Removal - Refitting,
page 11A-3) ,
-the alternator (see 16A, Starting - Charging, Al-
ternator: Removal - Refitting, page 16A-1) ,
-the air conditioning compressor (see Compressor:
Removal - Refitting) (62A, Air conditioning).
II - OPERATION FOR REMOVAL OF PART
CONCERNED
aRemove:
-the multifunction support bolts,-the coolant pump inlet pipe bolt,
-the multifunction support.
REFITTING
I - REFITTING OPERATION FOR PART
CONCERNED
aRefit:
-the multifunction support,
-the multifunction support bolts.
aTorque tighten the multifunction support bolts (50
N.m).
aRefit the coolant pump inlet pipe bolt.
II - FINAL OPERATION
aRefit:
-the air conditioning compressor (see Compressor:
Removal - Refitting) (62A, Air conditioning),
-the alternator (see 16A, Starting - Charging, Al-
ternator: Removal - Refitting, page 16A-1) ,
-the accessories belt (see 11A, Top and front of
engine, Accessories belt: Removal - Refitting,
page 11A-3) ,
-the front right-hand wheel (see Wheel: Removal -
Refitting) (35A, Wheels and tyres).
aConnect the battery (see Battery: Removal - Refit-
ting) (80A, Battery). Tightening torquesm
multifunction support
bolts50 N.m
120517