Page 49 of 54
87D-49
MR-413-X44-87D000$944_eng.mif
V1
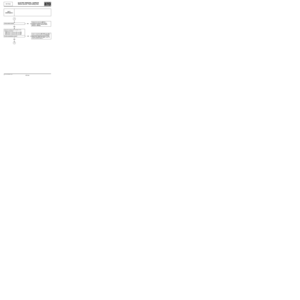
New TwingoELECTRIC WINDOWS - SUNROOF
Electric sunroof - Fault finding chart87D
ALP 2
CONTINUED
Is the control correct?
YES
Disconnect the computer connector and the
sunroof switch (components 1579 and 317) and
use a multimeter to check the continuity and
insulation of connections 52J, 52H, 52G
between components 317 and 1579.
Are the continuity and insulation both
correct?
YES
Replace the sunroof computer (see MR 411
mechanical, 87D, Electric windows - sunroof,
Electric sunroof computer: Removal -
Refitting).NOReplace the control (see MR 411
Mechanical, 87D Electric windows -
Sunroof, Sunroof switch: Removal -
Refitting).
NOIf there is a repair method (See Technical
Note 6015A, Repairing electrical wiring,
Wiring: Precautions for repair), repair the
wiring, otherwise replace it.
When the wiring has been repaired, carry out
the initialisation (see Electric sunroof:
Initialisation).
A
Page 50 of 54

NOTESUse")
87D-50
MR-413-X44-87D000$944_eng.mif
V1
New TwingoELECTRIC WINDOWS - SUNROOF
Electric sunroof - Fault finding chart87D
ALP 3The sunroof does not close when driving
(anti-pinch is triggered)
NOTESUse Wiring Diagram Technical Note, New Twingo.
Carry out the various checks with the battery charged and + after ignition feed
switched on.
Does the sunroof operate when the vehicle is
stationary?
YES
Initialise the sunroof (see Electric sunroof:
Initialisation).
Is the fault still present?
YES
Measure the vehicle speed signal by connecting
a multimeter (in frequency mode) or an
oscilloscope between connection 47F of
connector R301 and the chassis earth (See
ALP 3 Procedure).
Is the vehicle speed signal correct?
YES
Disconnect the sunroof computer connector (see
MR 411 mechanical, 87D,
Electric windows-sunroof, Electric sunroof
computer: Removal - Refitting) and measure
the vehicle speed signal by connecting a
multimeter (in frequency mode) or an
oscilloscope between connection 47F and
connection MAM of component 1579 (See ALP3
Procedure).
Is the vehicle speed signal correct?
YES
NO See ALP 1.
NOFault solved
NO
Continuity fault on connection 47F between
component 1579 and connector R301. Pay
close attention to the intermediate
connector R339.
Disconnect the other components attached to
this connection before working on the wiring
(e.g. radio, electric power-assisted steering).
If there is a repair procedure (see
Technical Note 6015A, Repairing electrical
wiring, W iring: Precautions for repair),
repair the wiring, otherwise replace it.
NO
Replace the sunroof computer (see MR 411
mechanical, 87D, Electric windows -
sunroof, Electric sunroof computer:
Removal - Refitting).
A
Page 51 of 54
87D-51
MR-413-X44-87D000$944_eng.mif
V1
New TwingoELECTRIC WINDOWS - SUNROOF
Electric sunroof - Fault finding chart87D
ALP 3
CONTINUED
Check the insulation and continuity of
connection 47F between components 1094 and
1579; be careful of the intermediate connectors
R339 and R301.
Is the connection OK?
Carry out fault finding on the ABS (see 38 C,
Anti-lock braking system, Introduction).
If there is a repair method (See Technical
Note 6015A, Repairing electrical wiring,
Wiring: Precautions for repair), repair the
wiring, otherwise replace it.
After the wiring has been repaired, carry out
an initialisation (see Electric sunroof:
Initialisation).
Disconnect the other components attached to
this connection before working on the wiring
(e.g.: radio, electronic power-assisted
steering).
A
Page 52 of 54

1 - Set the oscilloscope with a time base of")
87D-52
MR-413-X44-87D000$944_eng.mif
V1
ELECTRIC WINDOWS - SUNROOF
Electric sunroof - Fault finding chartNew Twingo
87D
When using the oscilloscope (CLIP)
1 - Set the oscilloscope with a time base of 5 ms/div and a calibration of 5 V/div (as shown in the illustration).
2 - Convert the signal into time in seconds.
Example: T = 12 ms = 0.012 s.
3 - Convert this time into frequency.
E.g. F: 1/T = 1/0.012 = 83.333Hz
Oscilloscope or multimeter in frequency meter mode
To convert frequency to km/h, multiply the frequency by 18 and divide by 25.
E.g.: 83.333 (Hz) X 18/25 = 60 (km/h)
The frequency of the measured signal gives the approximate speed on the instrument panel.
ALP 3 Procedure
NOTESUse Wiring Diagram Technical Note, New Twingo.
Check that the sunroof works properly when the vehicle is stationary.
Use the diagnostic tool and/or a multimeter.
IMPORTANT
In order for the ABS computer to send a signal to connection 47F, run command AC195 using the CLIP tool. This
command generates a speed signal on the wire connection (approx. 100 Hz ) addressed to all the electrical
consumers of this information (radio, roof, etc.). This command (AC195) has no visible effect on the instrument
panel speedometer. For vehicles without ABS, carry out a road test.
Page 53 of 54

87D-53
MR-413-X44-87D000$944_eng.mif
V1
New TwingoELECTRIC WINDOWS - SUNROOF
Electric sunroof - Fault finding chart87D
ALP 4The sunroof is difficult to close or the anti-pinch is triggered
without any apparent obstacles
NOTESCarry out the various checks with the battery charged and + after ignition feed switched
on.
Initialise the sunroof (see Electric sunroof:
Initialisation).
Is the fault still present?
YES
Open the sunroof (if this is not possible see:
defect and safe mode) Remove the sunroof
motor (see MR 411 mechanical, 87D Electric
windows-sunroof, Sunroof opening motor:
Removal - Refitting).
Slide the moving panel of the sunroof manually.
Does the moving panel slide without a point
of resistance?
YES
Check that there is no point of resistance (on the
gear pinion) to affect the running of the electric
sunroof motor).
Does the motor run without a point of
resistance?
YES
Initialise the sunroof (see Electric sunroof:
Initialisation).
If the fault is still present, replace the sunroof
computer (see MR 411 mechanical systems,
87D, Electric windows-sunroof, Electric
sunroof computer: Removal - Refitting).
NOFault solved
NO
Replace the sunroof motor (see MR 411
mechanical systems, 87D, Electric
windows-sunroof, Electric sunroof motor:
Removal - Refitting).
NO
A
Page 54 of 54

87D-54
MR-413-X44-87D000$944_eng.mif
V1
New TwingoELECTRIC WINDOWS - SUNROOF
Electric sunroof - Fault finding chart87D
ALP 4
CONTINUED
Remove the sunroof mobile panel (see MR 412
Bodywork, 52A, Non-side opening element
mechanisms, Sunroof mobile panel: Removal
- Refitting). Visually check that no foreign
bodies (sand, leaves, etc.) are present in the
rails.
Are any foreign bodies present?
YES
Is the anti-pinch triggered when the sunroof
reaches the deflector?
YES
Remove the sunroof deflector (see MR 412
bodywork, 52A Non side opening elements
mechanism, sunroof deflector: Removal -
Refitting). Initialise the sunroof (see Electric
sunroof: Initialisation).
Is the anti-pinch still triggered?
YES
Replace the sunroof motor (see MR 411
mechanical systems, 87D, Electric windows -
sunroof, Electric sunroof motor: Removal -
Refitting).
NO
NO YESClean the mechanism and the rails. Refit the
sunroof mobile panel (see MR 412
Bodywork, 52A, Non-side opening
element mechanisms, Sunroof mobile
panel: Removal - Refitting).
Initialise the sunroof (see Electric sunroof:
Initialisation).
Replace the sunroof (see MR 412
Bodywork, Non-side opening element
mechanisms, Sunroof: Removal -
Refitting).
Replace the sunroof deflector (see MR 412
bodywork, 52A Non-side opening
elements mechanism, sunroof deflector:
Removal - Refitting). Initialise the sunroof
(see Electric sunroof: Initialisation).
A