2009 PONTIAC TORRENT window
[x] Cancel search: windowPage 172 of 436
Compass Calibration
The compass can be manually calibrated. Only calibrate
the compass in a magnetically clean and safe location,
such as an open parking lot, where driving the vehicle
in circles is not a danger. It is suggested to calibrate
away from tall buildings, utility wires, manhole covers,
or other industrial structures, if possible.
If CAL should ever appear in the DIC display, the
compass should be calibrated.
If the DIC display does not show a heading, for
example, N for North, or the heading does not change
after making turns, there may be a strong magnetic �eld
interfering with the compass. Such interference may be
caused by a magnetic CB or cell phone antenna mount,
a magnetic emergency light, magnetic note pad holder,
or any other magnetic item. Turn off the vehicle, move
the magnetic item, then turn on the vehicle and calibrate
the compass.To calibrate the compass, use the following procedure:Compass Calibration Procedure
1. Before calibrating the compass, make sure the
compass zone is set to the variance zone in
which the vehicle is located. See “Compass
Variance (Zone) Procedure” earlier in this section.
Do not operate any switches such as window,
sunroof, climate controls, seats, etc. during
the calibration procedure.
2. Press the vehicle information button until
PRESS
VTO CALIBRATE COMPAS (Compass)
displays.
3. Press the set/reset button to start the compass
calibration.
4. The DIC will display CALIBRATING: DRIVE IN
CIRCLES. Drive the vehicle in tight circles at less
than 5 mph (8 km/h) to complete the calibration.
The DIC will display CALIBRATION COMPLETE
for a few seconds when the calibration is complete.
The DIC display will then return to the
previous menu.
3-48
Page 237 of 436
Video Screen
The video screen is located in the overhead console.
To use the video screen, do the following:
1. Push the release button located on the overhead
console.
2. Move the screen to the desired position.
When the video screen is not in use, push it up into its
locked position.
If a DVD is playing and the screen is raised to its locked
position, the screen remains on, this is normal, and
the DVD continues to play through the previous audio
source. Use the remote control
Obutton orZthe disc
to turn off the screen.
The overhead console contains the IR transmitters
for the wireless headphones and the IR receivers for
the remote control. They are located at the rear of
the console.
Notice:Avoid directly touching the video screen,
as damage may occur. See “Cleaning the Video
Screen” later in this section for more information.
Remote Control
To use the remote control, aim it at the transmitter
window at the rear of the RSE overhead console and
press the desired button. Direct sunlight or very bright
light can affect the ability of the RSE transmitter to
receive signals from the remote control. If the remote
control does not seem to be working, the batteries may
need to be replaced. See “Battery Replacement” later in
this section. Objects blocking the line of sight can also
affect the function of the remote control.
If a CD or DVD is in the Radio DVD slot, the remote
control power button can be used to turn on the video
screen display and start the disc. The radio can also
turn on the video screen display. SeeRadio(s) on
page 3-67for more information.
Notice:Storing the remote control in a hot area or
in direct sunlight can damage it, and the repairs will
not be covered by the warranty. Storage in extreme
cold can weaken the batteries. Keep the remote
control stored in a cool, dry place.
3-113
Page 240 of 436
\(Clear):Press this button within three seconds after
inputting a numeric selection, to clear all numeric inputs.
}10 (Double Digit Entries):Press this button to
select chapter or track numbers greater than 9.
Press this button before inputting the number.
If the remote control becomes lost or damaged,
a new universal remote control can be purchased.
If this happens, make sure the universal remote
control uses a code set of Toshiba
®.
Battery Replacement
To change the remote control batteries, do the following:
1. Slide the rear cover back on the remote control.
2. Replace the two batteries in the compartment.
Make sure that they are installed correctly,
using the diagram on the inside of the battery
compartment.
3. Replace the battery cover.
If the remote control is to be stored for a long period
of time, remove the batteries and keep them in a cool,
dry place.
Problem Recommended Action
No power. The ignition might not be
turned ON/RUN or in
ACC/ACCESSORY.
The picture does not
�ll the screen. There
are black borders on
the top and bottom or
on both sides or it looks
stretched out.Check the display mode
settings in the setup menu
by pressing the display
menu button on the remote
control.
In auxiliary mode, the
picture moves or scrolls.Check the auxiliary input
connections at both
devices.
The remote control does
not work.Check to make sure there
is no obstruction between
the remote control and
the transmitter window.
Check the batteries to
make sure they are not
dead or installed
incorrectly.
After stopping the player,
I push Play but sometimes
the DVD starts where I left
off and sometimes at the
beginning.If the stop button was
pressed one time, the DVD
player resumes playing
where the DVD was
stopped. If the stop button
was pressed two times
the DVD player begins to
play from the beginning
of the DVD.
3-116
Page 259 of 436
Before Leaving on a Long Trip
To prepare your vehicle for a long trip, consider having
it serviced by your dealer/retailer before departing.
Things to check on your own include:
Windshield Washer Fluid:Reservoir full? Windows
clean — inside and outside?
Wiper Blades:In good shape?
Fuel, Engine Oil, Other Fluids:All levels checked?
Lamps:Do they all work and are lenses clean?
Tires:Are treads good? Are tires in�ated to
recommended pressure?
Weather and Maps:Safe to travel? Have
up-to-date maps?
Highway Hypnosis
Always be alert and pay attention to your surroundings
while driving. If you become tired or sleepy, �nd a
safe place to park your vehicle and rest.
Other driving tips include:
Keep the vehicle well ventilated.
Keep interior temperature cool.
Keep your eyes moving — scan the road ahead
and to the sides.
Check the rearview mirror and vehicle instruments
often.
4-15
Page 262 of 436
Blizzard Conditions
Being stuck in snow can be in a serious situation. Stay
with the vehicle unless there is help nearby. If possible,
use theRoadside Assistance Program on page 7-7.
To get help and keep everyone in the vehicle safe:
Turn on theHazard Warning Flashers on page 3-6.
Tie a red cloth to an outside mirror.
{CAUTION:
Snow can trap engine exhaust under the vehicle.
This may cause exhaust gases to get inside.
Engine exhaust contains carbon monoxide (CO)
which cannot be seen or smelled. It can cause
unconsciousness and even death.
If the vehicle is stuck in the snow:
Clear away snow from around the base of
your vehicle, especially any that is blocking
the exhaust pipe.
Check again from time to time to be sure
snow does not collect there.
CAUTION: (Continued)
CAUTION: (Continued)
Open a window about two inches (5 cm) on
the side of the vehicle that is away from the
wind to bring in fresh air.
Fully open the air outlets on or under the
instrument panel.
Adjust the Climate Control system to a setting
that circulates the air inside the vehicle and
set the fan speed to the highest setting.
See Climate Control System in the Index.
For more information about carbon monoxide, see
Engine Exhaust on page 2-35.
Snow can trap exhaust gases under your vehicle.
This can cause deadly CO (carbon monoxide) gas
to get inside. CO could overcome you and kill you.
You cannot see it or smell it, so you might not
know it is in your vehicle. Clear away snow from
around the base of your vehicle, especially any
that is blocking the exhaust.
Run the engine for short periods only as needed to
keep warm, but be careful.
To save fuel, run the engine for only short periods as
needed to warm the vehicle and then shut the engine off
and close the window most of the way to save heat.
4-18
Page 281 of 436
Driving with a Trailer
{CAUTION:
When towing a trailer, exhaust gases may collect
at the rear of the vehicle and enter if the liftgate,
trunk/hatch, or rear-most window is open.
Engine exhaust contains carbon monoxide (CO)
which cannot be seen or smelled. It can cause
unconsciousness and even death.
To maximize safety when towing a trailer:
Have the exhaust system inspected for
leaks and make necessary repairs before
starting a trip.
Never drive with the liftgate, trunk/hatch, or
rear-most window open.
Fully open the air outlets on or under the
instrument panel.
Adjust the Climate Control system to a setting
that brings in only outside air and set the fan
speed to the highest setting. See Climate
Control System in the Index.
For more information about carbon monoxide, see
Engine Exhaust on page 2-35.Towing a trailer requires a certain amount of experience.
Get to know the rig before setting out for the open
road. Get acquainted with the feel of handling and
braking with the added weight of the trailer. And always
keep in mind that the vehicle you are driving is now
longer and not as responsive as the vehicle is by itself.
Before starting, check all trailer hitch parts and
attachments, safety chains, electrical connectors, lamps,
tires and mirror adjustments. If the trailer has electric
brakes, start the vehicle and trailer moving and then
apply the trailer brake controller by hand to be sure the
brakes are working. This checks the electrical connection
at the same time.
During the trip, check occasionally to be sure that the
load is secure, and that the lamps and any trailer brakes
are still working.
4-37
Page 313 of 436
If No Steam Is Coming From The
Engine Compartment
If an engine overheat warning is displayed but no
steam can be seen or heard, the problem may not
be too serious. Sometimes the engine can get a little
too hot when the vehicle:
Climbs a long hill on a hot day.
Stops after high-speed driving.
Idles for long periods in traffic.
Tows a trailer.
If the overheat warning is displayed with no sign
of steam:
1. Turn the air conditioner off.
2. Turn the heater on to the highest temperature and
to the highest fan speed. Open the windows as
necessary.
3. If in a traffic jam, try to minimize engine load.
Shift to N (Neutral); otherwise, shift to the
highest gear while driving.
If the temperature overheat gage is no longer in the
overheat zone or an overheat warning no longer displays,
the vehicle can be driven. Continue to drive the vehicle
slow for about 10 minutes. Keep a safe vehicle distance
from the car in front of you. If the warning does not come
back on, continue to drive normally.If the warning continues, pull over, stop, and park the
vehicle right away.
If there is no sign of steam, idle the engine for
three minutes while parked. If the warning is still
displayed, turn off the engine until it cools down.
Also, see “Overheated Engine Protection Operating
Mode” later in this section.
Overheated Engine Protection
Operating Mode
This emergency operating mode lets the vehicle
be driven to a safe place in an emergency situation.
If an overheated engine condition exists, an overheat
protection mode which alternates �ring groups of
cylinders helps prevent engine damage. In this mode,
there is a signi�cant loss in power and engine
performance. The temperature gage indicates an
overheat condition exists. Driving extended distances
and/or towing a trailer in the overheat protection mode
should be avoided.
Notice:After driving in the overheated engine
protection operating mode, to avoid engine damage,
allow the engine to cool before attempting any repair.
The engine oil will be severely degraded. Repair the
cause of coolant loss, change the oil and reset the oil
life system. SeeEngine Oil on page 5-15.
5-29
Page 315 of 436
Windshield Washer Fluid
What to Use
When you need windshield or rear window washer �uid
be sure to read the instructions before use. If you will be
operating your vehicle in an area where the temperature
may fall below freezing, use a �uid that has sufficient
protection against freezing.
Adding Windshield Washer Fluid
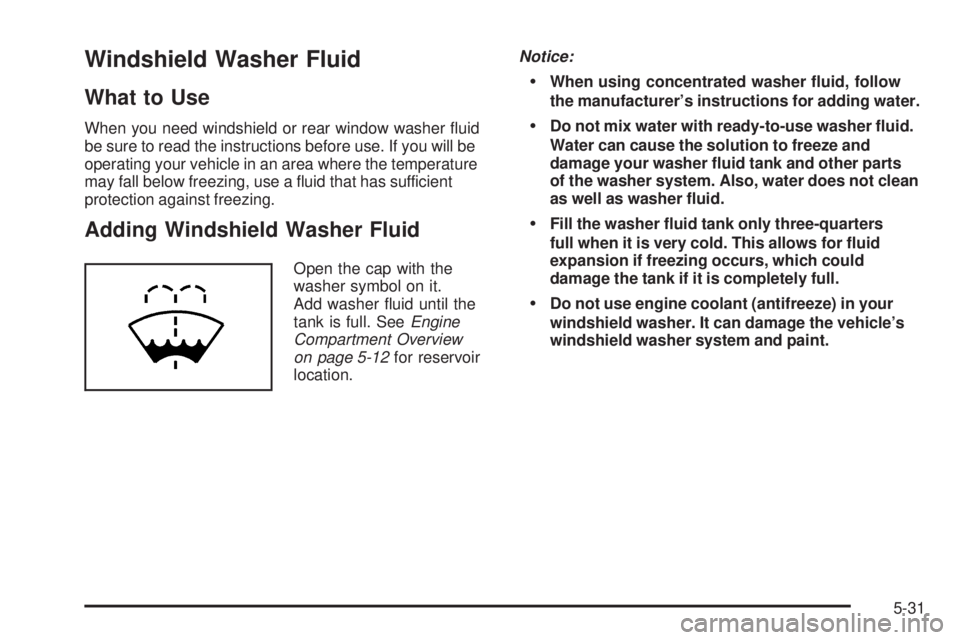
Open the cap with the
washer symbol on it.
Add washer �uid until the
tank is full. SeeEngine
Compartment Overview
on page 5-12for reservoir
location.Notice:
When using concentrated washer �uid, follow
the manufacturer’s instructions for adding water.
Do not mix water with ready-to-use washer �uid.
Water can cause the solution to freeze and
damage your washer �uid tank and other parts
of the washer system. Also, water does not clean
as well as washer �uid.
Fill the washer �uid tank only three-quarters
full when it is very cold. This allows for �uid
expansion if freezing occurs, which could
damage the tank if it is completely full.
Do not use engine coolant (antifreeze) in your
windshield washer. It can damage the vehicle’s
windshield washer system and paint.
5-31