2009 PONTIAC TORRENT door lock
[x] Cancel search: door lockPage 87 of 436
Programmable Automatic Door
Locks
Your vehicle has an automatic lock/unlock feature which
enables you to program the power door locks through
the Driver Information Center (DIC). SeeDIC Vehicle
Personalization on page 3-57for more information
on DIC programming.
Rear Door Security Locks
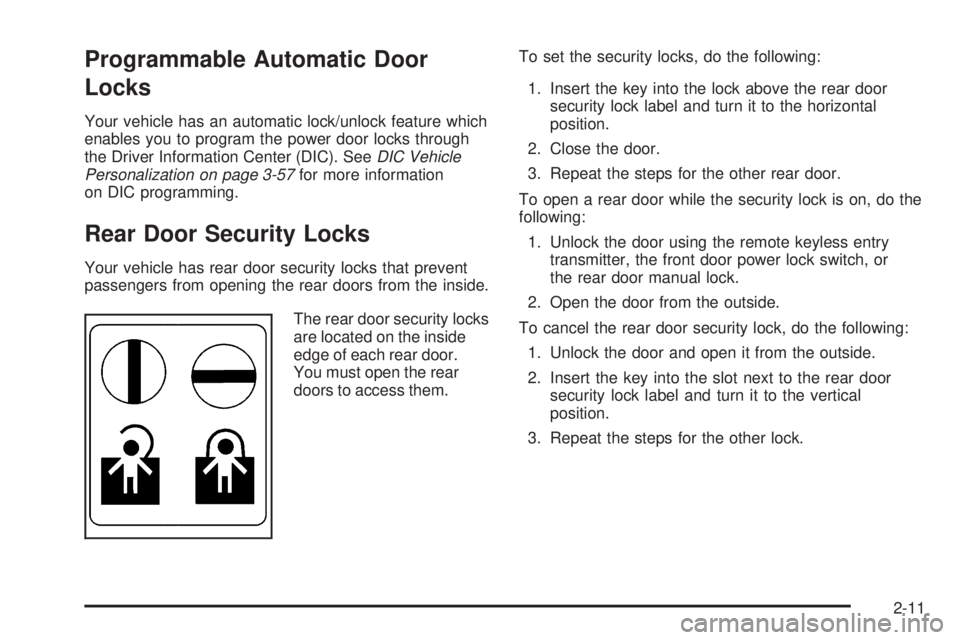
Your vehicle has rear door security locks that prevent
passengers from opening the rear doors from the inside.
The rear door security locks
are located on the inside
edge of each rear door.
You must open the rear
doors to access them.To set the security locks, do the following:
1. Insert the key into the lock above the rear door
security lock label and turn it to the horizontal
position.
2. Close the door.
3. Repeat the steps for the other rear door.
To open a rear door while the security lock is on, do the
following:
1. Unlock the door using the remote keyless entry
transmitter, the front door power lock switch, or
the rear door manual lock.
2. Open the door from the outside.
To cancel the rear door security lock, do the following:
1. Unlock the door and open it from the outside.
2. Insert the key into the slot next to the rear door
security lock label and turn it to the vertical
position.
3. Repeat the steps for the other lock.
2-11
Page 88 of 436

Lockout Protection
If you press the power door lock switch when the key is
in the ignition and any door is open, all the doors will
lock and only the driver’s door will unlock. Be sure
to remove the key from the ignition when locking
your vehicle.
If the keyless entry transmitter is used to lock the
doors and the key is in the ignition, a chime will sound
three times. All passenger doors will lock, but the driver’s
door will remain unlocked.
Liftgate
{CAUTION:
It can be dangerous to drive with the liftgate or
liftglass open because carbon monoxide (CO) gas
can come into your vehicle. You cannot see or
smell CO. It can cause unconsciousness and even
death. If you must drive with the liftgate open or if
CAUTION: (Continued)
CAUTION: (Continued)
electrical wiring or other cable connections must
pass through the seal between the body and the
liftgate or liftglass:
Make sure all other windows are shut.
Turn the fan on your climate control system to
its highest speed and select the control setting
that will force outside air into your vehicle.
See “Climate Control System” in the Index.
If you have air outlets on or under the
instrument panel, open them all the way.
SeeEngine Exhaust on page 2-35.
To unlock the liftgate, press the unlock button on the
Remote Keyless Entry (RKE) transmitter twice or use
the power door lock switch.
To lock the liftgate, press the lock button on the
RKE transmitter or use the power door lock switch.
The liftgate does not have a key lock cylinder.
To open the liftgate, press the touchpad centered on
the underside of the liftgate handle and pull up.
When closing the liftgate, use the molded handles to
pull the liftgate down. Push the liftgate closed until
it latches.
2-12
Page 91 of 436
Power Windows
{CAUTION:
Leaving children in a vehicle with the keys is
dangerous for many reasons, children or others
could be badly injured or even killed. They could
operate the power windows or other controls or
even make the vehicle move. The windows will
function and they could be seriously injured or
killed if caught in the path of a closing window.
Do not leave keys in a vehicle with children.
When there are children in the rear seat use the
window lockout button to prevent unintentional
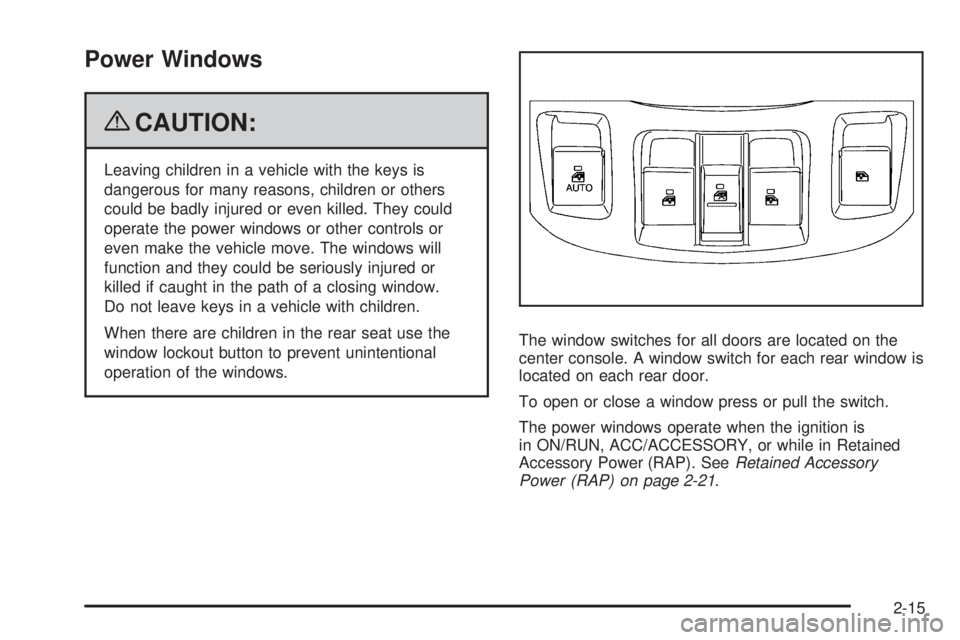
operation of the windows.The window switches for all doors are located on the
center console. A window switch for each rear window is
located on each rear door.
To open or close a window press or pull the switch.
The power windows operate when the ignition is
in ON/RUN, ACC/ACCESSORY, or while in Retained
Accessory Power (RAP). SeeRetained Accessory
Power (RAP) on page 2-21.
2-15
Page 93 of 436
Content Theft-Deterrent
Your vehicle has a content theft-deterrent alarm system.
To activate the theft-deterrent system:
1. Open the door.
2. Lock the door with the power door lock switch
or the Remote Keyless Entry (RKE) transmitter.
If you are using the RKE transmitter, the door
does not need to be open.
3. Close all doors.
The key must be removed from the ignition to arm
the system.
If the theft-deterrent system is activated and a door or
the liftgate is opened without using the RKE transmitter, a
10 second pre-alarm will occur, and the security light will
�ash. The horn will sound rapidly for 10 seconds. If you
do not press unlock on the RKE transmitter or insert
the key in the ignition and turn if from the LOCK/OFF
position, the alarm will go off. The horn will sound and
the headlamps will �ash for 30 seconds.
After the alarm has sounded for 30 seconds, the system
will re-arm itself automatically.
To disarm the theft-deterrent system, do one of the
following:
1. Unlock the doors with the RKE transmitter.
2. Insert the key in the ignition and turn it from the
LOCK/OFF position.
PASS-Key®III+ Electronic
Immobilizer
The PASS-Key III+ system operates on a radio
frequency subject to Federal Communications
Commission (FCC) Rules and with Industry Canada.
This device complies with Part 15 of the FCC Rules.
Operation is subject to the following two conditions:
1. This device may not cause harmful interference.
2. This device must accept any interference received,
including interference that may cause undesired
operation.
This device complies with RSS-210 of Industry Canada.
Operation is subject to the following two conditions:
1. This device may not cause interference.
2. This device must accept any interference received,
including interference that may cause undesired
operation of the device.
Changes or modi�cations to this system by other than
an authorized service facility could void authorization to
use this equipment.
PASS-Key III+ uses a radio frequency transponder in
the key that matches a decoder in the vehicle.
2-17
Page 114 of 436
Outside Convex Mirrors
{CAUTION:
A convex mirror can make things, like other
vehicles, look farther away than they really are.
If you cut too sharply into the right lane, you could
hit a vehicle on the right. Check the inside mirror
or glance over your shoulder before changing
lanes.
The passenger side mirror is convex shaped. A convex
mirror’s surface is curved so more can be seen from
the driver’s seat.
OnStar®System
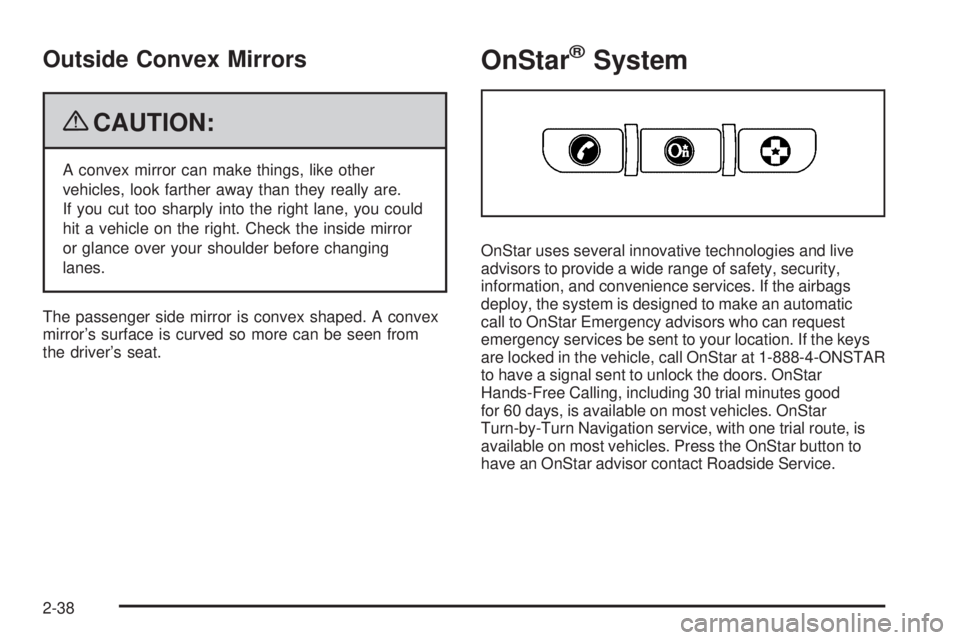
OnStar uses several innovative technologies and live
advisors to provide a wide range of safety, security,
information, and convenience services. If the airbags
deploy, the system is designed to make an automatic
call to OnStar Emergency advisors who can request
emergency services be sent to your location. If the keys
are locked in the vehicle, call OnStar at 1-888-4-ONSTAR
to have a signal sent to unlock the doors. OnStar
Hands-Free Calling, including 30 trial minutes good
for 60 days, is available on most vehicles. OnStar
Turn-by-Turn Navigation service, with one trial route, is
available on most vehicles. Press the OnStar button to
have an OnStar advisor contact Roadside Service.
2-38
Page 115 of 436
OnStar service is provided subject to the OnStar Terms
and Conditions included in the OnStar Subscriber glove
box literature.
Some services such as Remote Door Unlock or Stolen
Vehicle Location Assistance may not be available until
the owner of the vehicle registers with OnStar. After the
�rst prepaid year, contact OnStar to select a monthly
or annual subscription payment plan. If a payment plan
is not selected, the OnStar system and all services,
including airbag noti�cation and emergency services,
may be deactivated and no longer available. For more
information visit onstar.com (U.S.) or onstar.ca (Canada),
or press the OnStar button to speak with an advisor.
Not all OnStar services are available on all vehicles.
To check if this vehicle is able to provide the services
described below, or for a full description of OnStar
services and system limitations, see the OnStar Owner’s
Guide in the glove box or visit onstar.com (U.S.) or
onstar.ca (Canada), contact OnStar at 1-888-4-ONSTAR
(1-888-466-7827) or TTY 1-877-248-2080, or press the
OnStar button to speak with an OnStar advisor 24 hours
a day, 7 days a week.OnStar Services Available with the
Safe & Sound Plan
Automatic Noti�cation of Airbag Deployment
Advanced Automatic Crash Noti�cation (AACN)
(If equipped)
Link to Emergency Services
Roadside Assistance
Stolen Vehicle Location Assistance
Remote Door Unlock/Vehicle Alert
OnStar Vehicle Diagnostic Email
GM Goodwrench On Demand Diagnostics
OnStar Hands-Free Calling with 30 trial minutes
OnStar Virtual Advisor (U.S. Only)
OnStar Services Included with
Directions & Connections Plan
All Safe and Sound Plan Services
OnStar Turn-by-Turn Navigation (If equipped) or
Driving Directions - Advisor delivered
RideAssist
Information and Convenience Services
2-39
Page 118 of 436

Storage Areas
Glove Box
To open the glove box, pull the handle to the left and
pull the glove box door down until it stops and is
fully open.
Cupholders
Cupholders are located on the lower front of the center
console. Pull-out cupholders are located at the bottom
of the armrest and on the back of the rear seat center
console. Cupholders are also located on the rear seat
armrest.
Center Console Storage
Your vehicle has a center console armrest with storage
area. Use the lever on the front of the console to
open it.
Luggage Carrier
{CAUTION:
If something is carried on top of the vehicle that is
longer or wider than the luggage carrier — like
paneling, plywood, or a mattress — the wind can
catch it while the vehicle is being driven. This can
cause a driver to lose control. The item being
carried could be violently torn off, and this could
cause a collision, and damage the vehicle. Items
may be carried inside. Never carry something
longer or wider than the luggage carrier on top of
the vehicle.
If equipped, a luggage carrier allows you to load things
on top of your vehicle. The luggage carrier has side rails
attached to the roof, sliding crossrails, if the vehicle has
them, and places to use for tying things down. These let
you load some things on top of your vehicle, as long as
they are not wider or longer than the luggage carrier.
The roof rack crossrails lock along the straight section
of the side rail.
2-42
Page 119 of 436
Press the levers down until the locking mechanisms
fully engage to the side rail. Make sure each lever is in
the down position. The crossrail will not slide when
properly engaged.
To move the crossrail, pull up on the end levers on each
side of the crossrail to the upright position. This will
release the locking mechanism from the siderail. Lift and
place the crossrail into the new position. Press the levers
down until the locking mechanisms fully engage to the
side rail. Make sure each lever is in the down position.
The crossrail will not slide when properly engaged.
Notice:Loading cargo on the luggage carrier that
weighs more than 150 lbs (68 kg) or hangs over the
rear or sides of the vehicle may damage your vehicle.
When loading cargo, tie it to the crossrail and against
the siderail. Lock the crossrails to the far forward and
backward location to make sure the load is evenly
distributed on the luggage carrier.
Do not stand on the plastic lower body panels when
loading cargo on the luggage carrier.Loading cargo on the luggage carrier will make the
center of vehicle gravity higher. Avoid high speeds,
sudden starts, sharp turns, sudden braking or abrupt
maneuvers. This could result in loss of control of
the vehicle.
Do not exceed the maximum vehicle capacity when
loading your vehicle. For more information on vehicle
capacity and loading, seeLoading the Vehicle on
page 4-20.
To prevent damage or loss of cargo as you are driving,
check now and then to make sure the luggage carrier
crossrails are locked and cargo is still securely fastened.
When the luggage carrier is not in use, store the
crossrail inside the vehicle. If not possible, lock one
crossrail at the rear most position on the siderails and
lock the other crossrail above the opening of the
rear door to reduce wind noise.
2-43