2009 PONTIAC G8 set
[x] Cancel search: setPage 9 of 356
Heated Seats
On vehicles with heated front seats,
the controls are located on the center
console. To operate the heated seats
the ignition must be on.
L(Heated Seat):Press to turn on
the heated seat.
A light indicates that the feature is
working. The number of indicator
lights shows the level of heat
selected: one for low, two for
medium, and three for high. Press
the button to cycle through the
temperature settings and to turn the
heat off.
Rear Seats
Rear Seat Operation
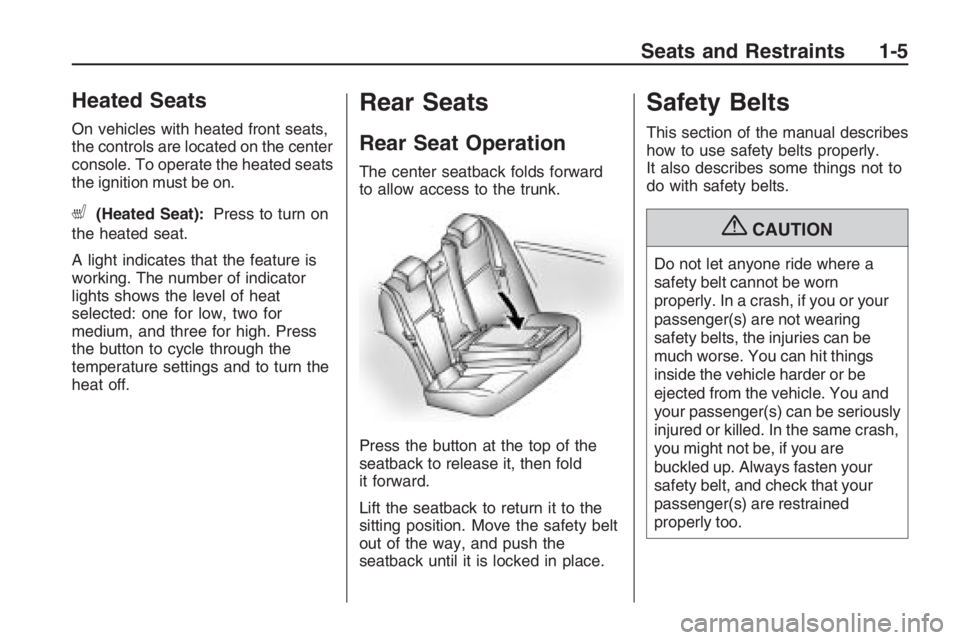
The center seatback folds forward
to allow access to the trunk.
Press the button at the top of the
seatback to release it, then fold
it forward.
Lift the seatback to return it to the
sitting position. Move the safety belt
out of the way, and push the
seatback until it is locked in place.
Safety Belts
This section of the manual describes
how to use safety belts properly.
It also describes some things not to
do with safety belts.
{CAUTION
Do not let anyone ride where a
safety belt cannot be worn
properly. In a crash, if you or your
passenger(s) are not wearing
safety belts, the injuries can be
much worse. You can hit things
inside the vehicle harder or be
ejected from the vehicle. You and
your passenger(s) can be seriously
injured or killed. In the same crash,
you might not be, if you are
buckled up. Always fasten your
safety belt, and check that your
passenger(s) are restrained
properly too.
Seats and Restraints 1-5
Page 42 of 356
Q:What are the different types of
add-on child restraints?
A:Add-on child restraints, which are
purchased by the vehicle’s
owner, are available in four basic
types. Selection of a particular
restraint should take into
consideration not only the child’s
weight, height, and age but also
whether or not the restraint will be
compatible with the motor vehicle
in which it will be used.
For most basic types of child
restraints, there are many
different models available.
When purchasing a child
restraint, be sure it is designed
to be used in a motor vehicle.
If it is, the restraint will have
a label saying that it meets
federal motor vehicle safety
standards.The restraint manufacturer’s
instructions that come with the
restraint state the weight and
height limitations for a particular
child restraint. In addition, there
are many kinds of restraints
available for children with
special needs.
{CAUTION
To reduce the risk of neck and
head injury during a crash, infants
need complete support. This is
because an infant’s neck is not
fully developed and its head
weighs so much compared with
the rest of its body. In a crash,
an infant in a rear-facing child
restraint settles into the restraint,
so the crash forces can be
distributed across the strongest
part of an infant’s body, the back
and shoulders. Infants should
always be secured in rear-facing
child restraints.
{CAUTION
A young child’s hip bones are still
so small that the vehicle’s regular
safety belt may not remain low
on the hip bones, as it should.
Instead, it may settle up around
the child’s abdomen. In a crash,
the belt would apply force on a
body area that is unprotected by
any bony structure. This alone
could cause serious or fatal
injuries. To reduce the risk of
serious or fatal injuries during a
crash, young children should
always be secured in appropriate
child restraints.
1-38 Seats and Restraints
Page 49 of 356
{CAUTION
Do not attach more than one child
restraint to a single anchor.
Attaching more than one child
restraint to a single anchor could
cause the anchor or attachment to
come loose or even break during a
crash. A child or others could be
injured. To reduce the risk of
serious or fatal injuries during a
crash, attach only one child
restraint per anchor.
{CAUTION
Children can be seriously injured
or strangled if a shoulder belt is
wrapped around their neck and
the safety belt continues to
tighten. Buckle any unused safety
belts behind the child restraint so
children cannot reach them. Pull
the shoulder belt all the way out
of the retractor to set the lock,
if your vehicle has one, after the
child restraint has been installed.
Notice:Do not let the LATCH
attachments rub against the
vehicle’s safety belts. This may
damage these parts. If necessary,
move buckled safety belts to avoid
rubbing the LATCH attachments.Do not fold the empty rear seat
with a safety belt buckled. This
could damage the safety belt or
the seat. Unbuckle and return the
safety belt to its stowed position.
1. Attach and tighten the lower
attachments to the lower
anchors. If the child restraint
does not have lower attachments
or the desired seating position
does not have lower anchors,
secure the child restraint with the
top tether and the safety belts.
Refer to your child restraint
manufacturer instructions and the
instructions in this manual.
1.1. Find the lower anchors for
the desired seating position.
1.2. Put the child restraint on
the seat.
1.3. Attach and tighten the
lower attachments on
the child restraint to the
lower anchors.
Seats and Restraints 1-45
Page 53 of 356
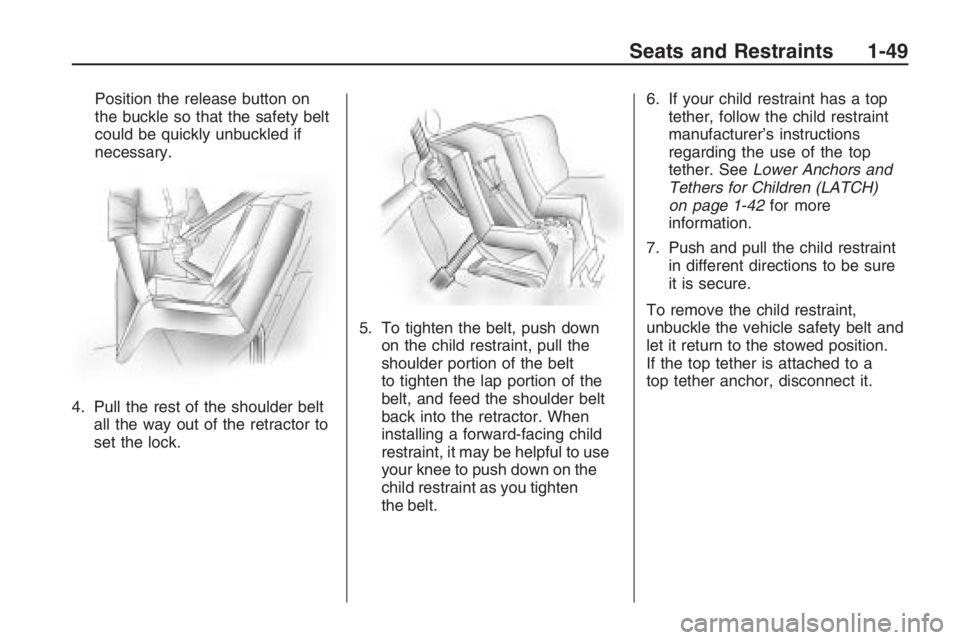
Position the release button on
the buckle so that the safety belt
could be quickly unbuckled if
necessary.
4. Pull the rest of the shoulder belt
all the way out of the retractor to
set the lock.5. To tighten the belt, push down
on the child restraint, pull the
shoulder portion of the belt
to tighten the lap portion of the
belt, and feed the shoulder belt
back into the retractor. When
installing a forward-facing child
restraint, it may be helpful to use
your knee to push down on the
child restraint as you tighten
the belt.6. If your child restraint has a top
tether, follow the child restraint
manufacturer’s instructions
regarding the use of the top
tether. SeeLower Anchors and
Tethers for Children (LATCH)
on page 1-42for more
information.
7. Push and pull the child restraint
in different directions to be sure
it is secure.
To remove the child restraint,
unbuckle the vehicle safety belt and
let it return to the stowed position.
If the top tether is attached to a
top tether anchor, disconnect it.
Seats and Restraints 1-49
Page 56 of 356
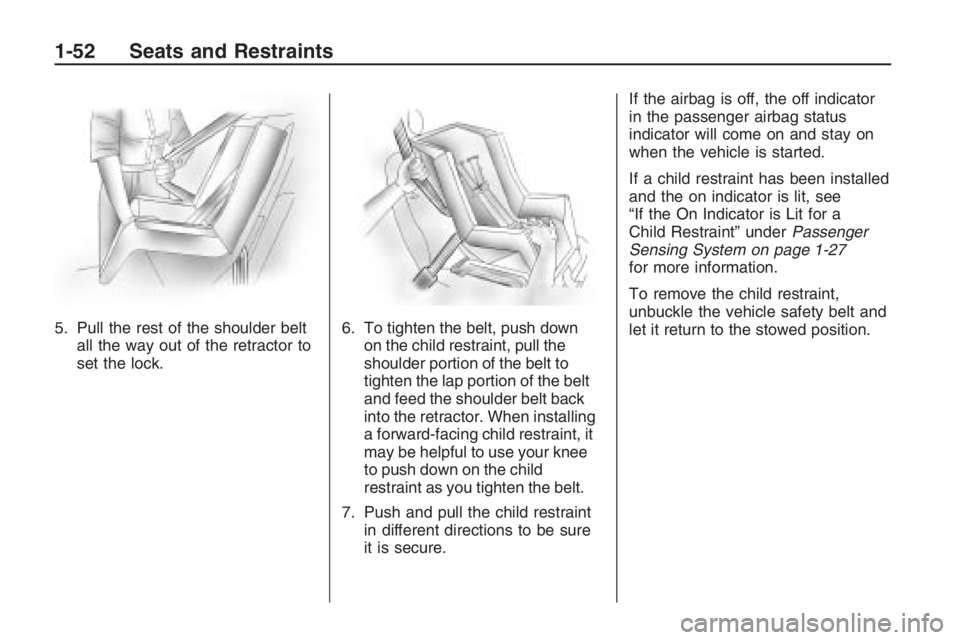
5. Pull the rest of the shoulder belt
all the way out of the retractor to
set the lock.6. To tighten the belt, push down
on the child restraint, pull the
shoulder portion of the belt to
tighten the lap portion of the belt
and feed the shoulder belt back
into the retractor. When installing
a forward-facing child restraint, it
may be helpful to use your knee
to push down on the child
restraint as you tighten the belt.
7. Push and pull the child restraint
in different directions to be sure
it is secure.If the airbag is off, the off indicator
in the passenger airbag status
indicator will come on and stay on
when the vehicle is started.
If a child restraint has been installed
and the on indicator is lit, see
“If the On Indicator is Lit for a
Child Restraint” underPassenger
Sensing System on page 1-27
for more information.
To remove the child restraint,
unbuckle the vehicle safety belt and
let it return to the stowed position.
1-52 Seats and Restraints
Page 60 of 356

Remote Keyless Entry
(RKE) System Operation
The Remote Keyless Entry (RKE)
transmitter functions will work
up to 195 feet (60 m) away from
the vehicle.
There are other conditions which
can affect the performance of
the transmitter. SeeRemote Keyless
Entry (RKE) System on page 2-3.The following functions may be
available if the vehicle has the
RKE system.Q(Lock):Press to lock all doors.
If enabled through the Driver
Information Center (DIC), the turn
signal indicators ash or the
horn sounds to indicate locking has
occurred. For more information
see “Flash Remote Lock” and “Beep
Remote Lock” underDIC Vehicle
Customization on page 4-31.
If any door is open when
Qis
pressed, the horn sounds ve times.
All doors lock except the open door.
If the driver door is open when
Qis
pressed, all doors lock except the
driver door.
Pressing
Qmay also arm the
content theft-deterrent system.
SeeContent Theft-Deterrent on
page 2-13.
K(Unlock):Press to unlock the
driver door or all doors depending
on the personalization setting.
To customize remote unlocking,
see “Two Stage Unlock” underDIC
Vehicle Customization on page 4-31.
If enabled through the DIC, the turn
signal indicators ash to indicate
unlocking has occurred. For more
information see “Flash Remote
Unlock” underDIC Vehicle
Customization on page 4-31.
Pressing
Kmay also disarm the
content theft-deterrent system.
SeeContent Theft-Deterrent on
page 2-13.
V(Remote Trunk Release):
Press and hold to unlock the trunk.
RKE with Remote Start Shown
2-4 Keys, Doors and Windows
Page 61 of 356

L(Vehicle Locator/Panic Alarm):
Press and release one time to locate
the vehicle. The exterior lamps ash
and the horn chirps.
Press and hold
Lfor at least
two seconds to sound the panic
alarm. The horn sounds and the turn
signals ash until
Lis pressed
again or the key is placed in the
ignition and turned to ON/RUN.
/(Remote Vehicle Start):
For vehicles with this feature,
press to start the engine from
outside the vehicle using the
RKE transmitter. SeeRemote
Vehicle Start on page 2-6for
additional information.
Personal Identity Keys
This system stores electronic
settings for two different keys.
The settings are stored when a
personal identity key is removed
from the ignition and recalled when
Qon the RKE transmitter is
pressed. For information on storing
climate control settings, radio
settings and trip computer settings,
see “Personal Identity Memories”
underRadio(s) on page 6-3,
“Ignition Keys” underClimate
Control System on page 7-1and
“Trip Computer” underDIC Vehicle
Customization on page 4-31.
Programming Transmitters
to the Vehicle
Only RKE transmitters programmed
to this vehicle will work. If a
transmitter is lost or stolen, a
replacement can be purchasedand programmed through your
dealer/retailer. When the
replacement transmitter is
programmed to this vehicle, all
remaining transmitters must also be
reprogrammed. Any lost or stolen
transmitters will no longer work once
the new transmitter is programmed.
Battery Replacement
Replace the battery if the Replace
Battery in Remote Key message
displays in the DIC. See “Replace
Battery in Remote Key” under
DIC Warnings and Messages on
page 4-26.
The battery is not rechargeable.
See your dealer/retailer to replace
the battery.
Keys, Doors and Windows 2-5
Page 62 of 356

Remote Vehicle Start
Your vehicle may have this feature
which allows you to start the
engine from outside the vehicle.
/(Remote Vehicle Start):
This button will be on the RKE
transmitter if you have remote start.
To enable and disable remote
start, see “Remote Start” under
DIC Vehicle Customization on
page 4-31.
Vehicles with an automatic climate
control system will default to a
heating or cooling mode depending
on the outside temperature during
a remote start. When the key
is turned to ON/RUN, the climate
control system will turn on at
the setting the vehicle was set to
when the vehicle was last turned off.Laws in some local communities
may restrict the use of remote
starters. For example, some laws
may require a person using remote
start to have the vehicle in view
when doing so. Check local
regulations for any requirements on
remote starting of vehicles.
If your vehicle is low on fuel,
do not use the remote start feature.
The vehicle may run out of fuel.
If your vehicle has the remote start
feature, the RKE transmitter
functions will have an increased
range of operation. However,
the range may be less while the
vehicle is running.
There are other conditions which
can affect the performance of
the transmitter, seeRemote Keyless
Entry (RKE) System on page 2-3
for additional information.Starting the Engine Using
Remote Start
To start the engine using the remote
start feature:
1. PressQon the RKE transmitter.
2. Press and hold
/for about
two seconds. The turn signal
lamps will briey ash to conrm
the vehicle has been started.
The parking lamps will turn
on and remain on as long as the
engine is running. The vehicle’s
doors will be locked.
3. After entering the vehicle during
a remote start, insert and turn
the key to ON/RUN to drive
the vehicle.
After a remote start, the engine
will automatically shut off
after 10 minutes unless a time
extension has been done or
the vehicle’s key is inserted into
the ignition switch and turned
to ON/RUN.
2-6 Keys, Doors and Windows