2009 OPEL ZAFIRA bonnet
[x] Cancel search: bonnetPage 11 of 228

In brief
11
Instrument panel overview
1 Light switch ........................ 108
Instrument illumination .......113
Rear fog light
....................... 112
Front fog lights ...................111
Headlight range
adjustment ......................... 109
2 Side air vents ...................... 124
3 Turn signals, headlight
flash, low beam and high
beam .................................. 111
Exit lighting .......................... 114
Parking light ........................ 112
Cruise control ....................... 93
4 Remote control on
steering wheel ......................77
5 Horn ...................................... 78
Driver's airbag ....................... 58
6 Instruments .......................... 83
7 Windscreen wipers,
windscreen washer
system, headlight washer
system .................................. 78
8 Centre air vents ................... 124 9
Left heated seat ....................49
Deflation detection system ..177
Tyre pressure monitoring
system
................................. 176
Ultrasonic parking sensors ... 89
Hazard warning flashers .....111
Central locking system ..........32
Sport mode ........................... 89
Right heated seat ..................49
Fuel selector ........................ 84
10 Info-Display ........................... 93
Trip computer ...................... 102
Electronic climate control
system ................................. 121
11 Front passenger airbag .........58
12 Glovebox .............................. 67
13 Infotainment system ............115
14 Climate control system ........ 118
15 Selector lever, manual
transmission ....................... 136
Manual transmission
automated ........................... 136
Automatic transmission .......131
16 Ashtray .................................. 82
17 Start/Stop button ..................29
18 Accelerator pedal ................127 19
Ignition switch with
steering wheel lock .............128
Sensor panel for
emergency operation of
Open&Start system ...............29
20 Brake pedal ......................... 140
21 Clutch pedal ........................ 127
22 Steering wheel adjustment ...77
23 Bonnet release lever ...........155
Page 37 of 228

Keys, doors and windows
37
It monitors: ■ Doors, load compartment, bonnet,
■ Passenger compartment,
■ Vehicle tilt, e.g. if it is raised,
■ Ignition.
Unlocking the vehicle deactivates
both systems simultaneously.
Note
Changes to the vehicle interior, such
as the use of seat covers, could
impair the function of passenger
compartment monitoring. Activation without monitoring of
passenger compartment and
vehicle tilt
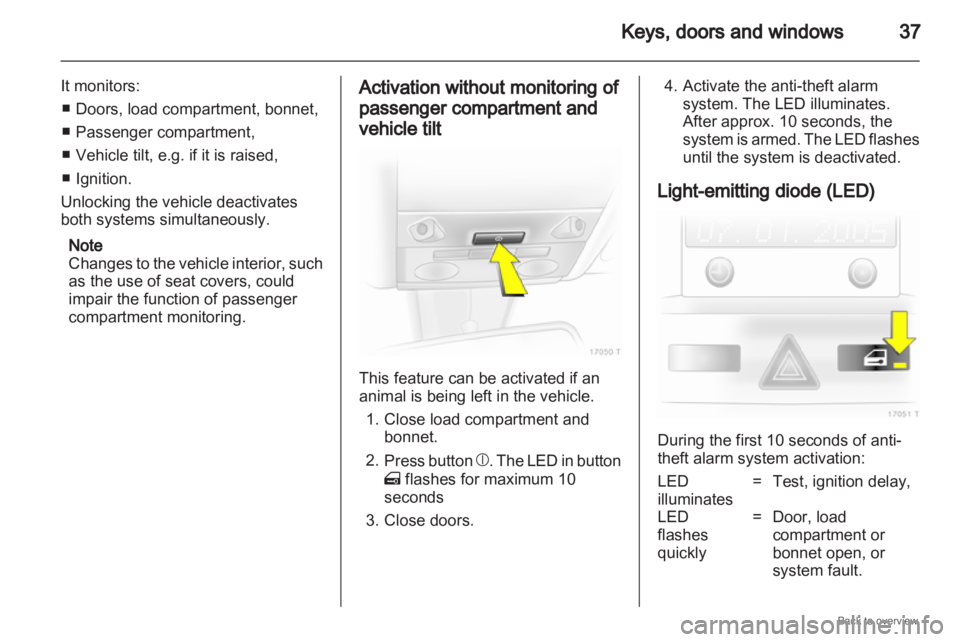
This feature can be activated if an
animal is being left in the vehicle.
1.
Close load compartment andbonnet.
2. Press button b. The LED in button
m flashes for maximum 10
seconds
3. Close doors. 4. Activate the anti-theft alarm
system. The LED illuminates.
After approx. 10 seconds, the
system
is armed. The LED flashes
until the system is deactivated.
Light-emitting diode (LED) During the first 10 seconds of anti-
theft alarm system activation:
LED
illuminates
= Test, ignition delay,
LED
flashes
quickly = Door, load
compartment or
bonnet open, or
system fault.
Page 140 of 228

140
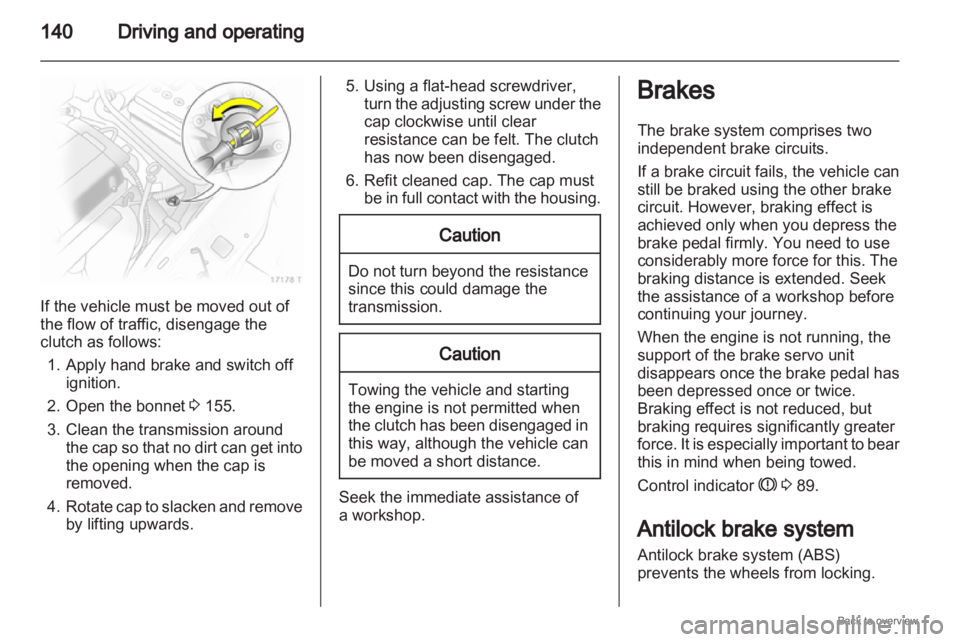
Driving and operatingIf the vehicle must be moved out of
the flow of traffic, disengage the
clutch as follows:
1.
Apply hand brake and switch offignition.
2. Open the bonnet 3 155.
3. Clean the transmission around the cap so that no dirt can get into
the opening when the cap is
removed.
4. Rotate cap to slacken and remove by lifting upwards. 5. Using a flat-head screwdriver,
turn
the adjusting screw under the
cap clockwise until clear
resistance can be felt. The clutch
has now been disengaged.
6. Refit cleaned cap. The cap must be in full contact with the housing. Caution
Do not turn beyond the resistance
since this could damage the
transmission.
Caution
Towing the vehicle and starting
the engine is not permitted when
the
clutch has been disengaged in
this way, although the vehicle can
be moved a short distance. Seek the immediate assistance of
a workshop. Brakes
The brake system comprises two
independent brake circuits.
If a brake circuit fails, the vehicle can
still be braked using the other brake
circuit. However, braking effect is
achieved only when you depress the
brake pedal firmly. You need to use
considerably more force for this. The
braking distance is extended. Seek
the assistance of a workshop before
continuing your journey.
When the engine is not running, the
support of the brake servo unit
disappears
once the brake pedal has
been depressed once or twice.
Braking effect is not reduced, but
braking requires significantly greater
force. It is especially important to bear
this in mind when being towed.
Control indicator R 3 89.
Antilock brake system
Antilock brake system (ABS)
prevents the wheels from locking.
Page 154 of 228

154
Vehicle care
Vehicle care
General Information ...................154
Vehicle checks ........................... 155
Bulb replacement .......................160
Electrical system ........................167
Vehicle tools .............................. 173
Wheels and tyres .......................174
Jump starting ............................. 185
Towing ....................................... 187
Appearance care .......................189 General Information
Accessories and vehicle
modifications
We
recommend to use Genuine Parts
and Accessories and factory
approved parts specific for your
vehicle type. We cannot assess or
guarantee for other products - even if
they have a regulatory or otherwise
granted approval.
Do not make any modifications to the
electrical system, e. g. changes of
electronic control units (chip tuning).
Vehicle storage
Storage for a long period of time
Following must be done if the vehicle
should be stored for several months:
■ Wash and wax the vehicle.
■ Have the wax in the engine compartment and underbody
checked.
■ Clean and preserve rubber seals.
■ Change engine oil. ■ Drain washer fluid reservoir.
■
Check coolant anti-freeze andcorrosion protection.
■ Adjust tyre pressure to the value specified for full load.
■ Park vehicle in dry, well ventilated place. Engage first or reverse gear
or set selector lever to P. Prevent
the vehicle from rolling.
■ Do not apply hand brake.
■ Open bonnet, close all doors and lock the vehicle.
■ Disconnect the clamp from the negative terminal of the vehicle
battery. Beware that all systems are
not functional, e.g. anti-theft alarm
system.
Putting back into operation
Following must be done if the vehicle
is putting back into operation: ■ Connect the clamp to the negative terminal of the vehicle battery.
Activate the electronic of the power
windows.
■ Check tyre pressure.
■ Fill up the washer fluid reservoir.
Page 155 of 228

Vehicle care
155
■ Check the engine oil level.
■ Check the coolant level.
■ Fit the number plate if necessary.
End-of-life vehicle
recovery
Information on end-of-life vehicle
recovery centres and the recycling of
end-of-life vehicles is available on our
website www.opel.com. Only entrust
this work to an authorised recycling
centre. Vehicle checks
Performing work
9
Warning Only perform engine compartment
checks when the ignition is off.
The cooling fan may start
operating
even if the ignition is off. 9
Danger The ignition system and Xenon
headlamps use extremely high
voltage. Do not touch.
The caps for topping up the engine oil,
the
coolant, the washing fluid and the
oil dipstick handle are yellow for ease
of identification.
Bonnet
Opening
Page 156 of 228

156
Vehicle care
Pull the release lever and return it to
its original position. Lift the safety catch upwards and
open the bonnet.
Air intake 3 125. Secure the bonnet support.
Closing
Before closing the bonnet, press the
support into the holder.
Lower
the bonnet and allow it to drop
into the catch. Check that the bonnet
is engaged.
Engine oil
Engine oil level is checked
automatically 3 91. It is advisable to
check the engine oil level manually
before embarking on a long journey. Check with the vehicle on a level
surface. The engine must be at
operating temperature and switched
off for at least 5 minutes.
Pull out the dipstick, wipe it clean,
insert
it to the stop on the handle, pull
out and read the engine oil level.
Insert dipstick to the stop on the
handle and make half a turn. Different dipsticks are used
depending on engine variant.
Page 189 of 228

Vehicle care
189
Appearance care
Exterior care
Locks
The
locks are lubricated at the factory
using a high quality lock cylinder
grease. Use de-icing agent only when
absolutely necessary, as this has
a degreasing effect and impairs lock
function. After using de-icing agent,
have the locks regreased by
a workshop.
Washing
The paintwork of your vehicle is
exposed to environmental influences.
Wash and wax your vehicle regularly.
When using automatic car washes,
select a programme that includes
waxing.
Bird droppings, dead insects, resin,
pollen and the like should be cleaned
off immediately, as they contain
aggressive constituents which can
cause paint damage. If using a car wash, comply with the
car
wash manufacturer's instructions.
The windscreen wipers and rear
window wiper must be switched off.
Remove antenna and external
accessories such as roof racks etc.
If you wash your vehicle by hand,
make sure that the insides of the
wheel housings are also thoroughly
rinsed out.
Clean edges and folds on opened
doors and the bonnet as well as the
areas they cover.
Thoroughly rinse and leather-off the
vehicle. Rinse leather frequently. Use
separate leathers for painted and
glass surfaces: remnants of wax on
the windows will impair vision.
Do not use hard objects to remove
spots of tar. Use tar removal spray on
painted surfaces.
Exterior lights
Headlamp and other lamp covers are
made of plastic. Do not use any
abrasive or caustic agents, do not use
an ice scraper, and do not clean them
dry. Polishing and waxing
Wax the vehicle regularly (at the
latest when water no longer beads).
Otherwise, the paintwork will dry out.
Polishing
is necessary only if the paint
has become dull or if solid deposits
have become attached to it.
Paintwork polish with silicone forms
a protective film, making waxing
unnecessary.
Plastic body parts must not be treated
with wax or polishing agents.
Windows and windscreen wiper
blades
Use a soft lint-free cloth or chamois
leather together with window cleaner
and insect remover.
When cleaning the rear window,
make sure the heating element inside
the window is not damaged.
For mechanical removal of ice, use
a sharp-edged ice scraper. Press the
scraper firmly against the glass so
that no dirt can get under it and
scratch the glass.
Page 198 of 228

198
Service and maintenanceService operations by year
1)
km ( x 1000) 1) 1
30 2
60 3
90 4
120 5
150
Undo wheel fastening (take care if tyre pressure monitoring system is present) and
tighten to torque: 110 Nm.
The wheel bolt taper should be greased or oiled lightly during assembly.
Check tyre condition. Check/correct tyre pressure (including spare wheel)
With tyre repair system - check completeness and expiry date of kit. Replace sealant
bottle every 4 years. X X
+
Annual service check if annual mileage exceeds 20 000 km
Visually inspect first-aid kit, (presence in designated stowage compartment,
completeness and expiry date), lashing eyes and warning triangle Every 2 years
Check/correct headlamp adjustment (including auxiliary headlamps) X X
Grease door hinges, door stop, lock cylinder, striker plate, bonnet lock, tailgate hinges,
wipe door stop check strap clean before greasing X X
Test drive, final inspection (check steering and ignition locks, instruments and indicator
lamps,
entire brake system, steering, air conditioning, engine, body and running gear),
reset service interval display with TECH 2) X X X X X
+: Additional operations.
o: Under extreme operating conditions and if required by country-specific conditions, the intervals are reduced.