2009 NISSAN QASHQAI air con
[x] Cancel search: air conPage 56 of 297

Downloaded from www.Manualslib.com manuals search engine Do not drive on dry, hard surfaced roads in
the LOCK position.
If the 4WD warning light blinks in the follow-
ing sequence while driving, proceed as in-
structed:
– Blinks rapidly (about twice a second)Pull off the road at a safe place and idle
the engine. The driving mode will change
to 2WD to prevent the 4WD system from
malfunctioning. The vehicle can be driven
again as soon as the warning light turns
off.
– Blinks slowly (about once every 2 seconds) Change the driving mode to 2WD and re-
duce the vehicle speed as soon as safely
possible.
If the warning light is still on after performing the
above operation, have the system checked by a
NISSAN dealer or qualified workshop as soon as
possible.
Water in fuel filter warning light
(where fitted)
If the warning light remains on or flashes irregularly
while the engine is running, there may be water in
the fuel filter. Should this happen, try to drain the
water from the fuel filter, see “Fuel filter (Diesel en-
gine models)” in the “8. Maintenance and
do-it-yourself” section. CAUTION
Failure to drain the water from the fuel filter can
cause serious damage to the engine. Contact a
NISSAN dealer or qualified workshop as soon as
possible.
INDICATOR LIGHTS
Automatic transmission check
indicator light (AT models)
This light indicates both the “Automatic transmis-
sion oil temperature warning” and the “Fail-safe op-
eration”.
Automatic transmission oil temperature
warning:
This light comes on when the automatic transmis-
sion oil temperature is too high. If the light comes on
while driving, reduce the vehicle speed as soon as
safely possible until the light turns off.
Fail-safe operation:
When the ignition switch is turned ON, the light
comes on for 2 seconds. If the light blinks, it may
indicate the automatic transmission is not function-
ing properly. Have your NISSAN dealer or qualified
workshop check and repair the transmission.
CAUTION
Continued vehicle operation when the automatic
transmission check warning light is on may dam-
age the automatic transmission.
Continuously Variable
Transmission (CVT) indicator
light (CVT models)
This light comes on briefly when the ignition is turned
to the ON position.
If the CVT light comes on during normal operation,
it may indicate that something is wrong with the
Continuously Variable Transmission (CVT). Have
your system checked by a NISSAN dealer or quali-
fied workshop.
NOTE
A CVT ELECTRONIC CONTROL SYSTEM WARN-
ING display (centre console — where fitted) will
come on when a malfunction may have occurred
to the transmission control system. The selected
Detailed Information key will then recommend
going to a NISSAN dealer for the system to be
checked.
Electronic Stability Program
(ESP) OFF indicator light
(where fitted)
The light comes on when the Electronic Stability
Programme (ESP) OFF switch is pushed to the OFF
position. This indicates that the ESP system is not
operating.
This light also comes on briefly when the ignition
switch is turned to the ON position. The light will
turn off after approximately 1 second if the ESP sys-
tem is operational.
Instruments and controls2-7
Page 57 of 297
Downloaded from www.Manualslib.com manuals search engine When the ESP OFF indicator light and SLIP indica-
tor light come on with the ESP system turned on, it
alerts the driver to the fact that the system’s fail-safe
mode is operating. This means that the system may
not be functioning properly. Have the system
checked by your NISSAN dealer or qualified work-
shop.
If an abnormality occurs in the system, the ESP sys-
tem function will be cancelled, but the vehicle is still
driveable. For additional information, see “Electronic
Stability Programme (ESP) system (where fitted)” in
the “5. Starting and driving” section.
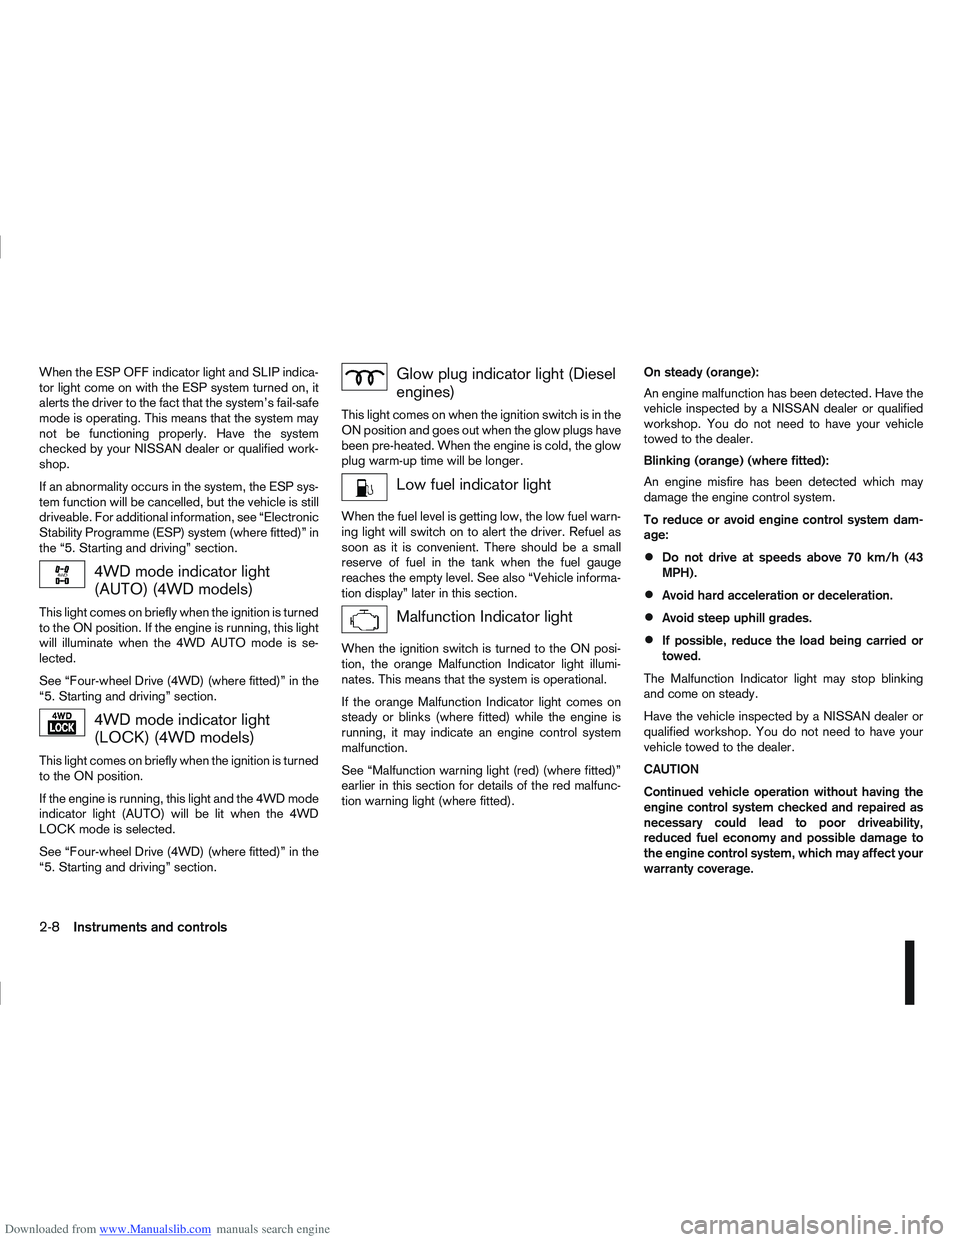
4WD mode indicator light
(AUTO) (4WD models)
This light comes on briefly when the ignition is turned
to the ON position. If the engine is running, this light
will illuminate when the 4WD AUTO mode is se-
lected.
See “Four-wheel Drive (4WD) (where fitted)” in the
“5. Starting and driving” section.
4WD mode indicator light
(LOCK) (4WD models)
This light comes on briefly when the ignition is turned
to the ON position.
If the engine is running, this light and the 4WD mode
indicator light (AUTO) will be lit when the 4WD
LOCK mode is selected.
See “Four-wheel Drive (4WD) (where fitted)” in the
“5. Starting and driving” section.
Glow plug indicator light (Diesel
engines)
This light comes on when the ignition switch is in the
ON position and goes out when the glow plugs have
been pre-heated. When the engine is cold, the glow
plug warm-up time will be longer.
Low fuel indicator light
When the fuel level is getting low, the low fuel warn-
ing light will switch on to alert the driver. Refuel as
soon as it is convenient. There should be a small
reserve of fuel in the tank when the fuel gauge
reaches the empty level. See also “Vehicle informa-
tion display” later in this section.
Malfunction Indicator light
When the ignition switch is turned to the ON posi-
tion, the orange Malfunction Indicator light illumi-
nates. This means that the system is operational.
If the orange Malfunction Indicator light comes on
steady or blinks (where fitted) while the engine is
running, it may indicate an engine control system
malfunction.
See “Malfunction warning light (red) (where fitted)”
earlier in this section for details of the red malfunc-
tion warning light (where fitted).On steady (orange):
An engine malfunction has been detected. Have the
vehicle inspected by a NISSAN dealer or qualified
workshop. You do not need to have your vehicle
towed to the dealer.
Blinking (orange) (where fitted):
An engine misfire has been detected which may
damage the engine control system.
To reduce or avoid engine control system dam-
age:
Do not drive at speeds above 70 km/h (43
MPH).
Avoid hard acceleration or deceleration.
Avoid steep uphill grades.
If possible, reduce the load being carried or
towed.
The Malfunction Indicator light may stop blinking
and come on steady.
Have the vehicle inspected by a NISSAN dealer or
qualified workshop. You do not need to have your
vehicle towed to the dealer.
CAUTION
Continued vehicle operation without having the
engine control system checked and repaired as
necessary could lead to poor driveability,
reduced fuel economy and possible damage to
the engine control system, which may affect your
warranty coverage.
2-8Instruments and controls
Page 62 of 297
Downloaded from www.Manualslib.com manuals search engine For more information, see “Seat belts” in the
“1. Safety — seats, seat belts and supplemental
restraint system” section
j4 Ignition knob warning (Intelligent Key
models)
The warning appears when the ignition knob is left
in the Acc or “OFF” position instead of completely
being turned to the LOCK position.
If this warning appears, turn the ignition knob to the
LOCK position.
When the ignition knob is in the ON position, a
buzzer will sound twice and the ignition knob warn-
ing shows when the ignition knob is turned to the
Acc or “OFF” position. This is to warn the driver that
the ignition knob is not in the LOCK position.
MT models:
Depress the ignition PUSH release button and turn
the ignition knob to the LOCK position.
AT or CVT models:
Make sure the gear selector lever is in the P (Park)
position and then turn the ignition switch to the
LOCK position.
See “Ignition knob (where fitted)” in the “5. Starting
and driving” section for further details.
CAUTION
The steering wheel can only be locked when
the ignition knob is in the LOCK position. Make
sure the ignition knob is in the LOCK position
before leaving the vehicle.
The emergency key can only be removed at
the LOCK position. Make sure the ignition
knob is in the LOCK position before removing
the emergency key.
See “Steering lock” in the “5. Starting and driving”
section for further details.
j5 Steering wheel lock warning
The warning appears when the ignition knob is
pressed, but not turned to the Acc or “OFF” posi-
tion within a short period. Move the steering wheel
to release the lock and turn the ignition knob to Acc
or ON. The warning will turn off in approximately 5
seconds.
See “Steering lock” in the “5. Starting and driving”
section for further details.
j6 Brake/Clutch warning (where fitted)
When starting your vehicle, it is necessary to oper-
ate the brake (CVT and AT models) or clutch pedal
(MT models).
For more information, see “Starting the engine” in
the “5. Starting and driving” section.
j7 Handbrake reminder
The reminder will come on if the handbrake is on
whilst the vehicle is being driven.
A buzzer will also sound.
j8 Intelligent Key detection warning
If the Intelligent Key is taken outside of the vehicle
ID recognition zone while the ignition knob is in the
Acc or ON position, the Intelligent Key detection
warning will be displayed and a buzzer will sound.
The Intelligent Key detection warning disappears
when the Intelligent Key is placed back in the pas-
senger compartment.
The message also appears when you try to start the
vehicle if the Intelligent Key is not detected within
the vehicle.
For more information, see “Integrated keyfob/re-
mote control system” in the “3. Pre-driving checks
and adjustments” section.
j9 Intelligent Key low battery warning
The Intelligent Key low battery warning may show if
a low battery voltage is detected when the ignition
knob is turned from “OFF” to the ON position.
For more information, see “Integrated keyfob/Intel-
ligent Key battery replacement” in the “8. Mainte-
nance and do-it-yourself” section.
j10Intelligent Key system fault warning
CAUTION
If the Intelligent Key system fault warning comes
on, it may indicate a system malfunction. We rec-
ommend that you contact a NISSAN dealer or
qualified workshop for repair.
Instruments and controls2-13
Page 64 of 297
![NISSAN QASHQAI 2009 Owners Manual Downloaded from www.Manualslib.com manuals search engine However reset is possible (only after the oil was
changed) using the [Service] menu item in the
[Settings] menu. See “[Maintenance]” later NISSAN QASHQAI 2009 Owners Manual Downloaded from www.Manualslib.com manuals search engine However reset is possible (only after the oil was
changed) using the [Service] menu item in the
[Settings] menu. See “[Maintenance]” later](/manual-img/5/56767/w960_56767-63.png)
Downloaded from www.Manualslib.com manuals search engine However reset is possible (only after the oil was
changed) using the [Service] menu item in the
[Settings] menu. See “[Maintenance]” later in this
section
Have the vehicle inspected by a NISSAN dealer
or qualified workshop if these conditions occur.
j20Distance to maintenance alert
(where fitted)
This alert reminds when maintenance is due in the
shown distance. The alert is shown for 10 seconds
at ignition ON, when the distance to the next main-
tenance interval is below 5000 km (3100 Miles).
The message is shown until the steering wheel
switch
ji (where fitted) is pressed.
NOTE
Visit a NISSAN dealer or qualified workshop
before the maintenance due alertj19reaches
0 km (miles) to perform maintenance (oil
change).
The maintenance interval will reduce faster
with certain types of driving, especially at low
speeds in urban conditions.
j21Tyre change alert
You can set a distance for changing tyres. See
“[Maintenance]” later in this section
j22Maintenance alert
You can set a distance for a non specific mainte-
nance item. See “[Maintenance]” later in this sec-
tion
j23Low temperature warning
If, during driving, the temperature falls below 4ºC
this alert will appear to indicate low outside air tem-
perature. You can switch the low temperature warn-
ing [On] or [Off]. See “[Units]” later in this section
CAUTION
Even if the alert is not on, there is no guarantee
that the road is free of hazards caused by in-
clement weather.
NOTE
The outside air temperature sensor is located at
the front of the vehicle. At low speeds the sensor
can be affected by engine heat, heat reflected
from the road surface and exhaust from other
vehicles, these influences can cause the display
to be inaccurate. To compensate, the outside air
temperature display is designed to react slowly
to increasing temperatures, but quickly to falling
temperatures.
j24Low fuel warning
This warning appears when the fuel level in the tank
is getting low. Refuel as soon as it is convenient,
preferably before the fuel gauge reaches the empty
position. For more information, see “Fuel gauge”
earlier in this section.
j25Driver alert
This warning appears when the previously set time
for a break is reached. You can set the time for up
to 6 hours in the setting menu. (See “Settings menu”
later in this section.)
Stop/Start System (where fitted)
For more information, see “Stop/Start System
(where fitted)” in the “5. Starting and driving” sec-
tion
j26Engine stop:
If the engine stops when the Stop/Start System is
activated, the message is shown.
j27Auto start deactivation:
If the engine stops when the Stop/Start System is
activated, and will not start automatically, the mes-
sage is shown.
j28System fault:
If the Stop/Start System is activated, but does not
operate correctly, the message is shown. Visit a
NISSAN dealer or qualified workshop.
Activating or deactivating using the Stop/Start
System OFF switch:
Using the Stop/Start System OFF switch activates
or deactivates the Stop/Start System. This is shown
in the vehicle information display:
j29 :The Stop/Start System OFF switch is
pushed to the “ON” position.
j30 :The Stop/Start System OFF switch is pushed to
the “OFF” position.
Instruments and controls2-15
Page 72 of 297
Downloaded from www.Manualslib.com manuals search engine REAR WINDOW
WARNING
In freezing temperatures the washer solution
may freeze on the rear window and obscure your
vision. Warm the rear window with the rear win-
dow defogger before you wash the rear window.
CAUTION
Do not operate the washer continuously for
more than 15 seconds.
Do not operate the washer if the reservoir
tank is empty or frozen.
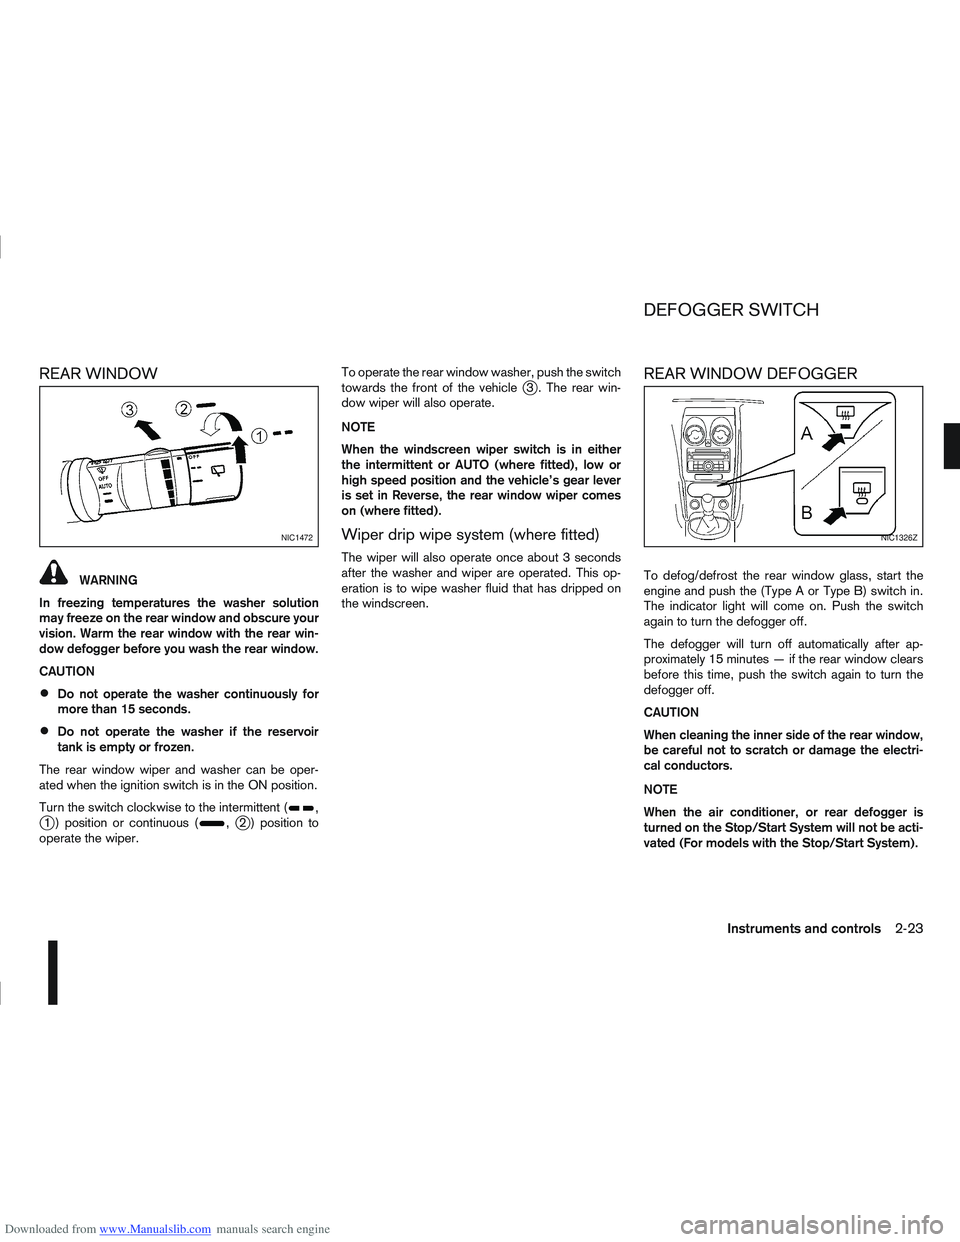
The rear window wiper and washer can be oper-
ated when the ignition switch is in the ON position.
Turn the switch clockwise to the intermittent (
,j1 ) position or continuous (,j2 ) position to
operate the wiper. To operate the rear window washer, push the switch
towards the front of the vehicle
j3 . The rear win-
dow wiper will also operate.
NOTE
When the windscreen wiper switch is in either
the intermittent or AUTO (where fitted), low or
high speed position and the vehicle’s gear lever
is set in Reverse, the rear window wiper comes
on (where fitted).
Wiper drip wipe system (where fitted)
The wiper will also operate once about 3 seconds
after the washer and wiper are operated. This op-
eration is to wipe washer fluid that has dripped on
the windscreen.
REAR WINDOW DEFOGGER
To defog/defrost the rear window glass, start the
engine and push the (Type A or Type B) switch in.
The indicator light will come on. Push the switch
again to turn the defogger off.
The defogger will turn off automatically after ap-
proximately 15 minutes — if the rear window clears
before this time, push the switch again to turn the
defogger off.
CAUTION
When cleaning the inner side of the rear window,
be careful not to scratch or damage the electri-
cal conductors.
NOTE
When the air conditioner, or rear defogger is
turned on the Stop/Start System will not be acti-
vated (For models with the Stop/Start System).
NIC1472NIC1326Z
DEFOGGER SWITCH
Instruments and controls2-23
Page 79 of 297
Downloaded from www.Manualslib.com manuals search engine WARNING
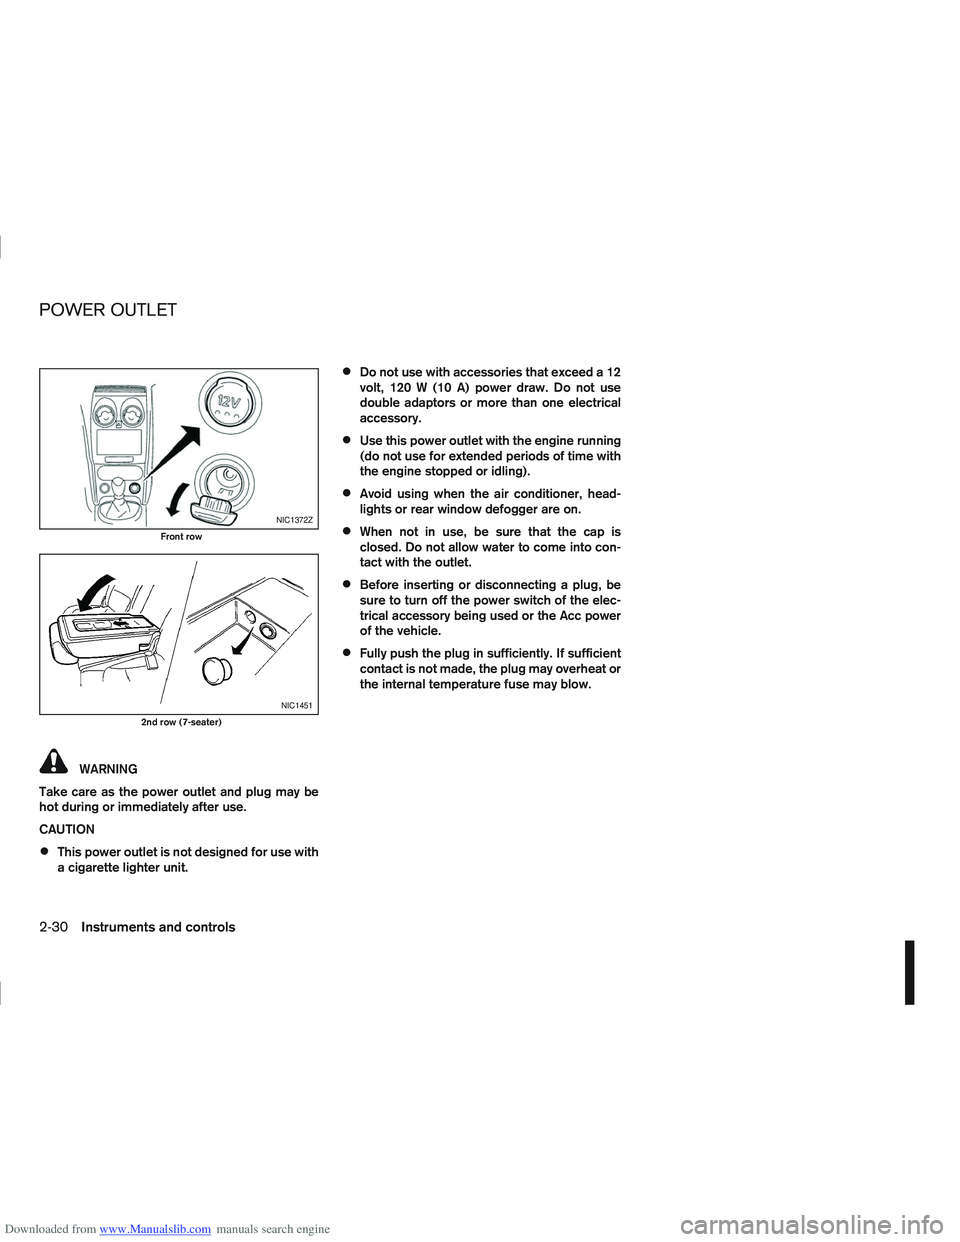
Take care as the power outlet and plug may be
hot during or immediately after use.
CAUTION
This power outlet is not designed for use with
a cigarette lighter unit.
Do not use with accessories that exceed a 12
volt, 120 W (10 A) power draw. Do not use
double adaptors or more than one electrical
accessory.
Use this power outlet with the engine running
(do not use for extended periods of time with
the engine stopped or idling).
Avoid using when the air conditioner, head-
lights or rear window defogger are on.
When not in use, be sure that the cap is
closed. Do not allow water to come into con-
tact with the outlet.
Before inserting or disconnecting a plug, be
sure to turn off the power switch of the elec-
trical accessory being used or the Acc power
of the vehicle.
Fully push the plug in sufficiently. If sufficient
contact is not made, the plug may overheat or
the internal temperature fuse may blow.
NIC1372Z
Front row
NIC1451
2nd row (7-seater)
POWER OUTLET
2-30Instruments and controls
Page 80 of 297
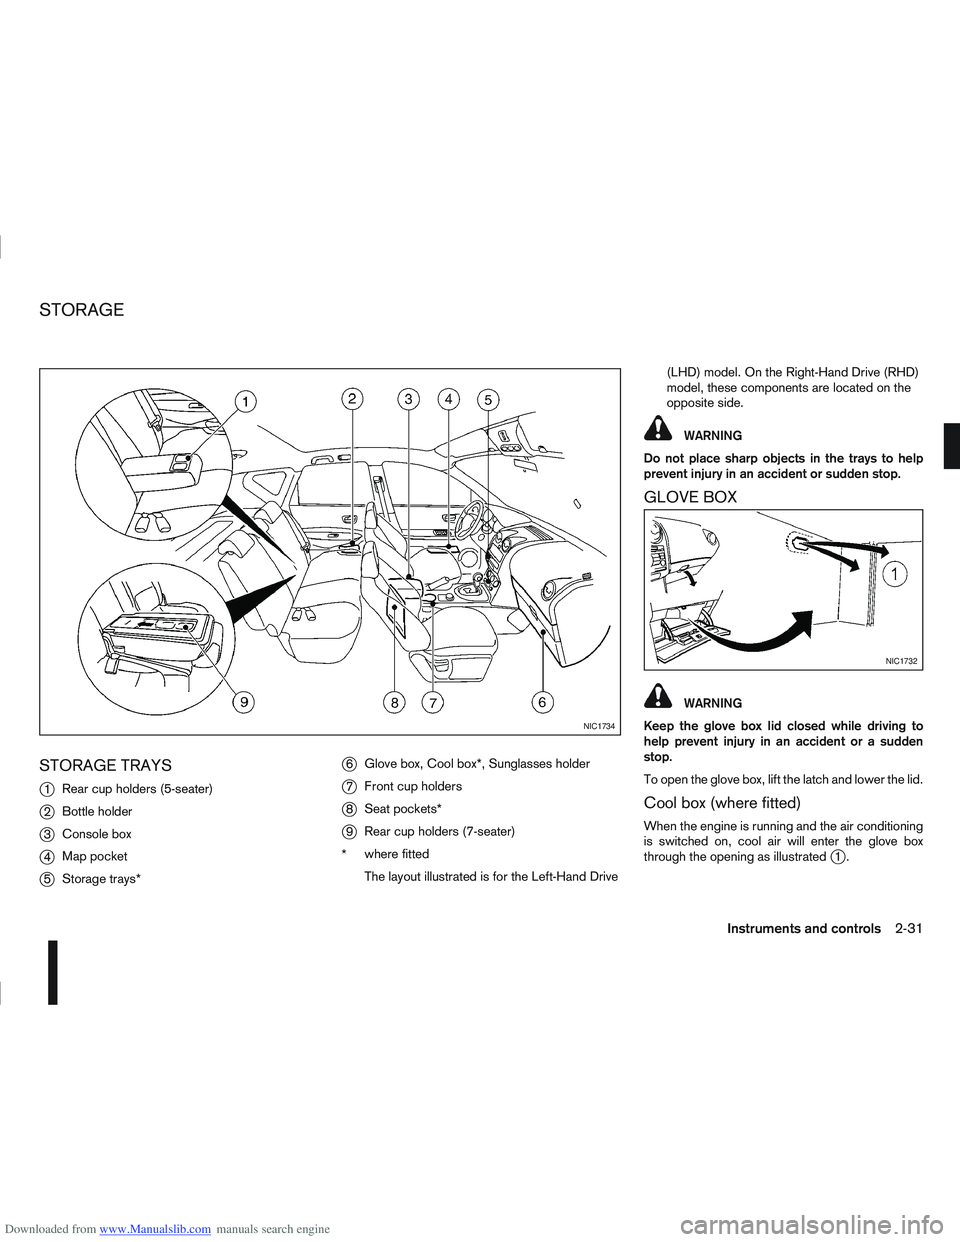
Downloaded from www.Manualslib.com manuals search engine STORAGE TRAYS
j
1Rear cup holders (5-seater)
j2Bottle holder
j3Console box
j4Map pocket
j5Storage trays*
j6Glove box, Cool box*, Sunglasses holder
j7Front cup holders
j8Seat pockets*
j9Rear cup holders (7-seater)
* where fitted
The layout illustrated is for the Left-Hand Drive (LHD) model. On the Right-Hand Drive (RHD)
model, these components are located on the
opposite side.
WARNING
Do not place sharp objects in the trays to help
prevent injury in an accident or sudden stop.
GLOVE BOX
WARNING
Keep the glove box lid closed while driving to
help prevent injury in an accident or a sudden
stop.
To open the glove box, lift the latch and lower the lid.
Cool box (where fitted)
When the engine is running and the air conditioning
is switched on, cool air will enter the glove box
through the opening as illustrated
j1.
NIC1734
NIC1732
STORAGE
Instruments and controls2-31
Page 95 of 297
Downloaded from www.Manualslib.com manuals search engine Locking the doors
1. Make sure you have the Intelligent Key with youwhen exiting the vehicle.
2. Close all doors.
3. Press any of the outside lock switches (front doors or back door).
– All the doors lock.
– The direction indicators flash once.
– Super Lock system equipped models: The Su-
per Lock system will be activated
CAUTION
Do not leave the duplicate Intelligent Key inside
the vehicle as the locking procedure logic will
not work.
NOTE
If the Intelligent Key is left in the vehicle and the
door/back door outside lock switch is pressed, a
buzzer will sound, warning the owner that the
Intelligent Key has been left inside the vehicle.
Unlocking the doors
For details on setting the unlock mode (anti-hijack or
convenience mode) see “Switching from Conve-
nience mode to Anti-hijack mode” earlier in this sec-
tion. Convenience mode:
Push the door/back door outside lock switch.
– All doors unlock.
– The direction indicators flash twice.
– The message [All door unlock] appears in the
vehicle information display.
Anti-hijack mode:
1. Push the door/back door outside lock switch.
– The corresponding door unlocks
– The direction indicators flash twice quickly
– The message [Single door unlock] appears in the vehicle information display.
2. Push the door/back door outside lock switch again within 5 seconds.
– All doors unlock.
– The direction indicators flash twice, slowly.
NOTE
External interference may impair the Intelligent
Key’s operation. In this case, use the emergency
key located in the Intelligent Key integrated key-
fob. See “Door locks” later in this section for fur-
ther details.
CAUTION
Make sure the Intelligent Key battery is in good
condition. Note that battery life may vary de-
pending on condition, amount of use, ambi-
ent temperature, etc.
The Intelligent Key contains a miniature radio
transmitter that may be affected when placed
near metal objects.
Keep the Intelligent Key away from mobile
phones, laptop computers and other metal
objects or electronics.
STARTING THE ENGINE WITH THE
INTELLIGENT KEY
See “Ignition knob (where fitted)” in the “5. Starting
and driving” section.
CAUTION
Make sure you carry the Intelligent Key with
you when starting and driving the vehicle.
If the Intelligent Key is too far away from the
passenger compartment, the vehicle may not
start. See “Intelligent Key operating range” in
the “3. Pre-driving checks and adjustments”
section
3-8Pre-driving checks and adjustments