2009 NISSAN MURANO reset
[x] Cancel search: resetPage 161 of 443
Black plate (161,1)
Model "Z51-D" EDITED: 2007/ 10/ 2
“TILTING TELESCOPIC STEERING COL-
UMN” earlier in this section and “OUTSIDE
MIRRORS” earlier in this section.
4. Push the SET switch and, within 5 seconds,
push the memory switch (1 or 2) .
The indicator light for the pushed memory
switch will stay on for approximately 5
seconds after pushing the switch.
If memory is stored in the same memory
switch, the previous memory will be deleted.
Linking key to a stored memory position
The key can be linked to a stored memory
position with the following procedure.
1. Follow one of the steps for storing a memory
position.
.While the indicator light for the memory
switch being set is illuminated for 5 sec-
onds, push the
button on the key.
.Push the ignition switch to the OFF position,
and then push the SET switch. Push the
button while pushing the memory
button while the indicator light stays on for
approximately 5 seconds.
If the indicator light blinks, the key is linked to
that memory setting.
Push the ignition switch to the OFF position, andthen push the
button on the key. The
driver’s seat, steering wheel and outside mirrors
will move to the memorized position.
Confirming memory storage
.Push the ignition switch to the ON position
and push the SET switch. If the main
memory has not been stored, the indicator
light will come on for approximately 0.5
second. When the memory has stored in
position, the indicator light will stay on for
approximately 5 seconds.
.If the battery cable is disconnected, or if the
fuse opens, the memory will be canceled. In
this case, reset the desired position using
the previous procedure.
.If optional keys are added to your vehicle,
the memory storage procedure to switch 1
or 2 and linking key procedure to a stored
memory position should be performed again
for each key. For additional Intelligent Key
information, see “KEYS” earlier in this
section.
Selecting the memorized position
1. Move the selector lever to the P (Park)
position.
2. Use one of the following methods to move
the driver’s seat, the outside mirrors and the
steering wheel..Push the ignition switch to the ON
position and push the memory switch
(1 or 2) .
.Within 45 seconds of opening the
driver’s door, push the memory switch
(1 or 2) .
The driver’s seat, steering column and
outside mirrors will move to the memorized
position with the indicator light flashing, and
then the light will stay on for approximately 5
seconds.
SYSTEM OPERATION
The automatic drive positioner system will not
work or will stop operating under the following
conditions:
.When the vehicle speed is above 4 MPH (7
km/h) (entry/exit function) .
.When the vehicle is driven (memory sto-
rage) .
.When the adjusting switch for the driver’s
seat and steering column is turned on while
the automatic drive positioner is operating.
.When the seat, steering column and outside
mirrors have already been moved to the
memorized position.
.When no position is stored in the memory
switch.
Pre-driving checks and adjustments3-31
Page 173 of 443
Black plate (171,1)
Model "Z51-D" EDITED: 2007/ 10/ 2
Vehicle information display
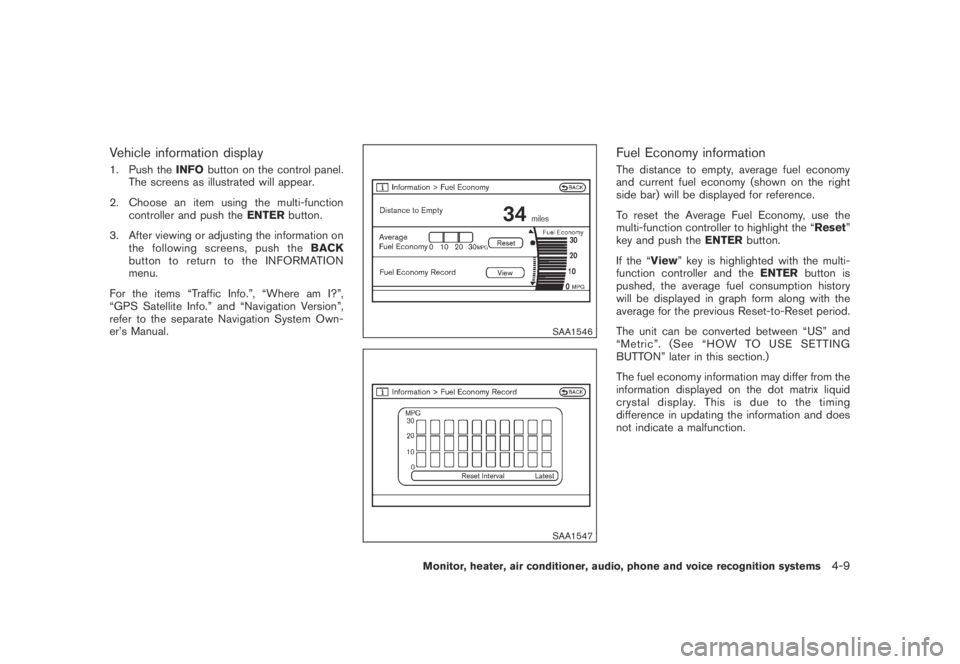
1. Push theINFObutton on the control panel.
The screens as illustrated will appear.
2. Choose an item using the multi-function
controller and push theENTERbutton.
3. After viewing or adjusting the information on
the following screens, push theBACK
button to return to the INFORMATION
menu.
For the items “Traffic Info.”, “Where am I?”,
“GPS Satellite Info.” and “Navigation Version”,
refer to the separate Navigation System Own-
er’s Manual.
SAA1546
SAA1547
Fuel Economy information
The distance to empty, average fuel economy
and current fuel economy (shown on the right
side bar) will be displayed for reference.
To reset the Average Fuel Economy, use the
multi-function controller to highlight the “Reset”
key and push theENTERbutton.
If the “View” key is highlighted with the multi-
function controller and theENTERbutton is
pushed, the average fuel consumption history
will be displayed in graph form along with the
average for the previous Reset-to-Reset period.
The unit can be converted between “US” and
“Metric”. (See “HOW TO USE SETTING
BUTTON” later in this section.)
The fuel economy information may differ from the
information displayed on the dot matrix liquid
crystal display. This is due to the timing
difference in updating the information and does
not indicate a malfunction.
Monitor, heater, air conditioner, audio, phone and voice recognition systems4-9
Page 174 of 443
Black plate (172,1)
Model "Z51-D" EDITED: 2007/ 10/ 2
SAA1554
Maintenance information
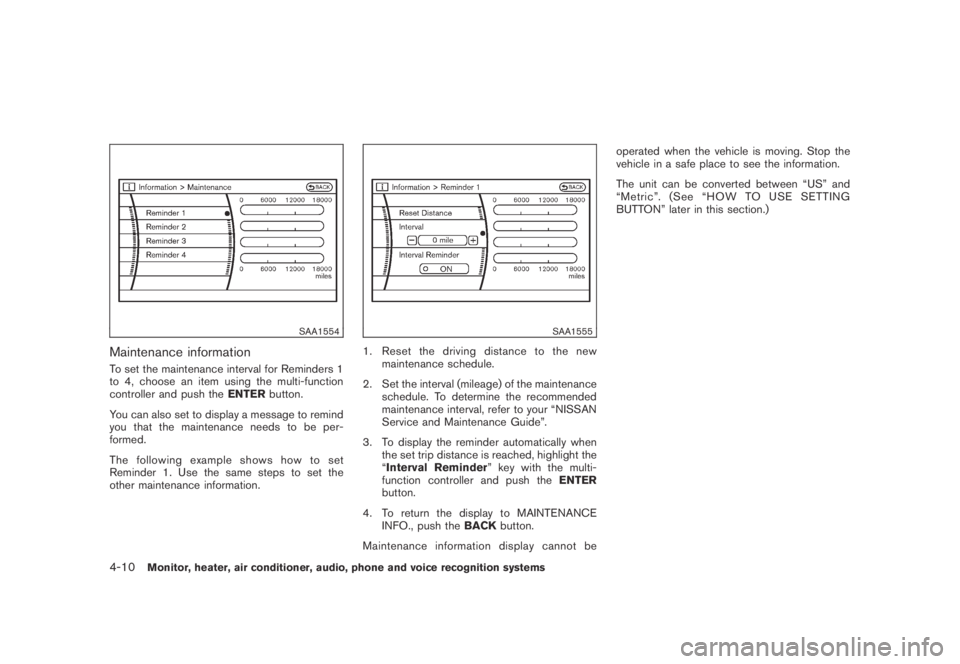
To set the maintenance interval for Reminders 1
to 4, choose an item using the multi-function
controller and push theENTERbutton.
You can also set to display a message to remind
you that the maintenance needs to be per-
formed.
The following example shows how to set
Reminder 1. Use the same steps to set the
other maintenance information.
SAA1555
1. Reset the driving distance to the new
maintenance schedule.
2. Set the interval (mileage) of the maintenance
schedule. To determine the recommended
maintenance interval, refer to your “NISSAN
Service and Maintenance Guide”.
3. To display the reminder automatically when
the set trip distance is reached, highlight the
“Interval Reminder” key with the multi-
function controller and push theENTER
button.
4. To return the display to MAINTENANCE
INFO., push theBACKbutton.
Maintenance information display cannot beoperated when the vehicle is moving. Stop the
vehicle in a safe place to see the information.
The unit can be converted between “US” and
“Metric”. (See “HOW TO USE SETTING
BUTTON” later in this section.)
4-10Monitor, heater, air conditioner, audio, phone and voice recognition systems
Page 175 of 443
Black plate (173,1)
Model "Z51-D" EDITED: 2007/ 10/ 2
SAA1611
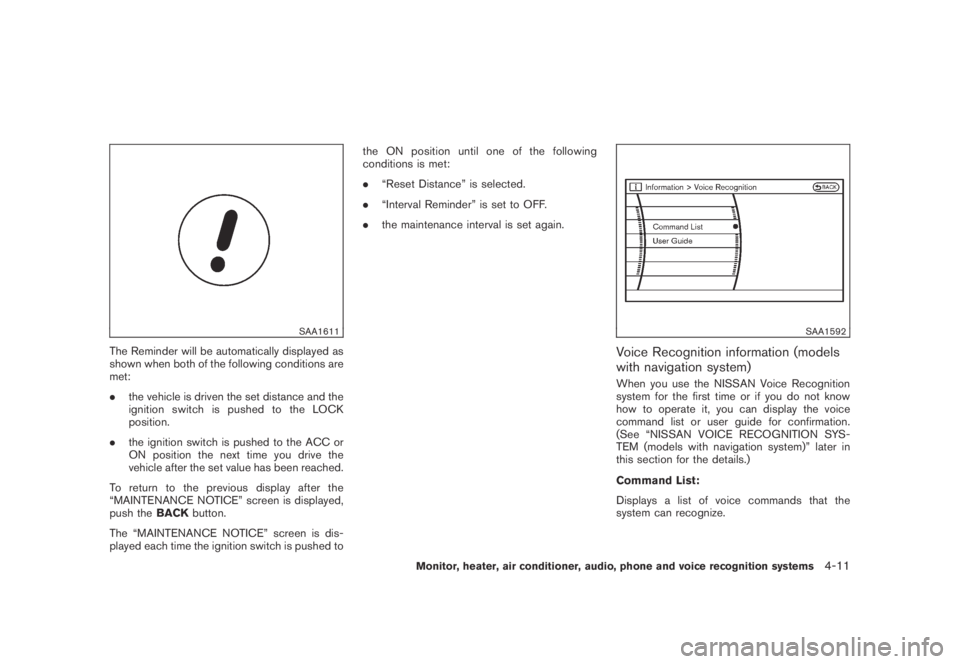
The Reminder will be automatically displayed as
shown when both of the following conditions are
met:
.the vehicle is driven the set distance and the
ignition switch is pushed to the LOCK
position.
.the ignition switch is pushed to the ACC or
ON position the next time you drive the
vehicle after the set value has been reached.
To return to the previous display after the
“MAINTENANCE NOTICE” screen is displayed,
push theBACKbutton.
The “MAINTENANCE NOTICE” screen is dis-
played each time the ignition switch is pushed tothe ON position until one of the following
conditions is met:
.“Reset Distance” is selected.
.“Interval Reminder” is set to OFF.
.the maintenance interval is set again.
SAA1592
Voice Recognition information (models
with navigation system)
When you use the NISSAN Voice Recognition
system for the first time or if you do not know
how to operate it, you can display the voice
command list or user guide for confirmation.
(See “NISSAN VOICE RECOGNITION SYS-
TEM (models with navigation system)” later in
this section for the details.)
Command List:
Displays a list of voice commands that the
system can recognize.
Monitor, heater, air conditioner, audio, phone and voice recognition systems4-11
Page 198 of 443
Black plate (196,1)
Model "Z51-D" EDITED: 2007/ 10/ 2
iPod®player (if so equipped)
.Some characters used in other lan-
guages (Chinese, Japanese, etc.) are
not displayed properly on the vehicle
center screen. We recommend using
English language characters with an
iPod
®.
.Large video podcast files cause slow
responses in the iPod
®. The vehicle
center display may momentarily black
out, but it will soon recover.
.If the iPod
®automatically selects large
video podcast files while in the shuffle
mode, the vehicle center display may
momentarily black out, but it will soon
recover.
.Improperly plugging in the iPod
®may
cause a checkmark to be displayed on
and off (flickering) . Always make sure
that the iPod
®is connected properly.
.The iPod
®nano (2nd Generation) will
continue to fast forward or rewind if it
is disconnected during a seek opera-
tion.
.An incorrect song title may appear
when the Play Mode is changed while
using the iPod
®nano (2nd Generation) .
.Audiobooks may not play in the sameorder as they appear on the iPod
®.
.The iPod
®nano (1st Generation) may
remain in fast forward or rewind mode
if it is connected during a seek opera-
tion. In this case, please manually reset
the iPod
®.
.If you are using an iPod
®(3rd Genera-
tion with Dock connector) , do not use
very long names for the song title,
album name or artist name to avoid
the iPod
®from resetting itself.
.Be careful not to do the following, or
the cable could be damaged and a loss
of function may occur.
—Bend the cable excessively (1.6 in (40
mm) radius minimum) .
—Twist the cable excessively (more
than 180 degrees) .
—Pull or drop the cable.
—Close the center console lid on the
cable or connectors.
—Store objects with sharp edges in the
storage where the cable is stored.
—Spill liquids on the cable and con-
nectors.
.Do not connect the cable to the iPod
®ifthe cable and/or connectors are wet. It
may damage the iPod
®.
.If the cable and connectors are ex-
posed to water, allow the cable and/or
connectors to dry completely before
connecting the cable to the iPod
®(wait
24 hours for it to dry) .
.If the connector is exposed to fluids
other than water, evaporative residue
may cause a short between the con-
nector pins. In this case, replace the
cable, otherwise damage to the iPod
®
and a loss of function may occur.
.If the cable is damaged (insulation cut,
connectors cracked, contamination
such as liquids, dust, dirt, etc. in the
connectors) , do not use the cable and
contact a NISSAN dealer to replace the
cable with a new one.
.When not in use for extended periods
of time, store the cable in a clean, dust
free environment at room temperature
and without direct sun exposure.
.Do not use the cable for any other
purposes other than its intended use in
the vehicle.
*iPod
®is a trademark of Apple Inc., registered in
the U.S. and other countries.
4-34Monitor, heater, air conditioner, audio, phone and voice recognition systems
Page 204 of 443

Black plate (202,1)
Model "Z51-D" EDITED: 2007/ 10/ 2
Adjusting sound quality:
Push the Audio control knob to change the
selecting mode as follows.
Bass?Treble?Fade?Balance?Beep
Rotate the Audio control knob to adjust Bass,
Treble, Fade and Balance to the desired level.
Fade adjusts the sound level between the front
and rear speakers and Balance adjusts the
sound between the right and left speakers.
To turn the beep sound off or on, rotate the
Audio control knob until the desired mode is
displayed. This turns on or off the beep sound
when audio buttons are pushed.
Once you have adjusted the sound quality to the
desired level, push the Audio control knob
repeatedly until the radio or CD display re-
appears. Otherwise, the radio or CD display will
automatically reappear after about 5 seconds.
CLOCK adjust:
Push the CLOCK adjust button for more than
1.5 seconds to turn on the CLOCK display.
See “CLOCK” in the “2. Instruments and
controls” section for the detailed clock adjust-
ment operation.
FM-AM radio operation
radio (FM/AM) band select:
Pushing the radio band select button will
change the band as follows:
AM?FM1?FM2?AM
When the radio band select button is pushed
while the ignition switch is in the ACC or ON
position, the radio will come on at the station last
played.
The last station/channel played will also come
on when the ON·OFF/VOL control knob is
pushed to ON.
If another audio source is playing when the radio
band select button is turned to ON, the audio
source will automatically be turned off and the
last radio station played will come on.
When the stereo broadcast signal is weak, the
radio will automatically change from stereo to
monaural reception.
TUNE (Tuning):
Turn the TUNE/FOLDER knob for manual tuning.
SEEK tuning:
Push the SEEK·CAT or TRACK button
orto tune from low to high or high to low
frequencies and to stop at the next broadcasting
station.
SCAN tuning:
Push the SCAN tuning button to tune from low
to high frequencies and stops at each broad-
casting station for 5 seconds. Pushing the
button again during this 5 seconds period will
stop SCAN tuning and the radio will remain
tuned to that station.
If the SCAN tuning button is not pushed within 5
seconds, SCAN tuning moves to the next
station.
*1to*6Station memory operations:
Twelve stations/channels can be set for the FM
band (6 for FM1, 6 for FM2) and 6 stations can
be set for the AM band.
1. Choose the radio band AM, FM1 or FM2
using the radio band select button.
2. Tune to the desired station using the SEEK,
SCAN or TUNE button.
3. Select the desired station/channel and keep
pushing any of the desired station preset
4-40Monitor, heater, air conditioner, audio, phone and voice recognition systems
Page 205 of 443
Black plate (203,1)
Model "Z51-D" EDITED: 2007/ 10/ 2
buttons*1to*6until a beep sound is
heard. (The radio mutes when the select
button is pushed.)
4. The channel indicator will then come on and
the sound will resume. Memorizing is now
complete.
5. Other buttons can be set in the same
manner.
If the battery cable is disconnected, or if the fuse
blows, the radio memory will be erased. In that
case, reset the desired stations.
Compact Disc (CD) changer operation
Push the ignition switch to the ACC or ON
position, push the LOAD button and insert the
compact disc into the slot with the label side
facing up. The compact disc will be guided
automatically into the slot and start playing.
After loading the disc, the number of tracks on
the disc and the play time will appear on the
display.
If the radio is already operating, it will auto-
matically turn off and the compact disc will play.
If the system has been turned off while the
compact disc was playing, pushing the ON·-
OFF/VOL control knob will start the compact
disc.
CD LOAD:
To insert a CD in the CD changer, push the
LOAD button for less than 1.5 seconds. Select
the loading position by pushing the CD insert
select button
*1to*6, then insert the CD.
To insert 6 CDs to the CD changer in
succession, push the LOAD button for more
than 1.5 seconds.
The inserted slot numbers will illuminate on the
display.
PLAY:
When the DISC (CD play) button is pushed with
the system off and the compact disc loaded, the
system will turn on and the compact disc will
start to play.
When the DISC button is pushed with the
compact disc loaded and the radio playing, the
radio will automatically be turned off and the
compact disc will start to play.
When the DISC button is pushed while a CD is
loaded and a medium is played using the
auxiliary input jacks, you can toggle back and
forth between CD and medium.
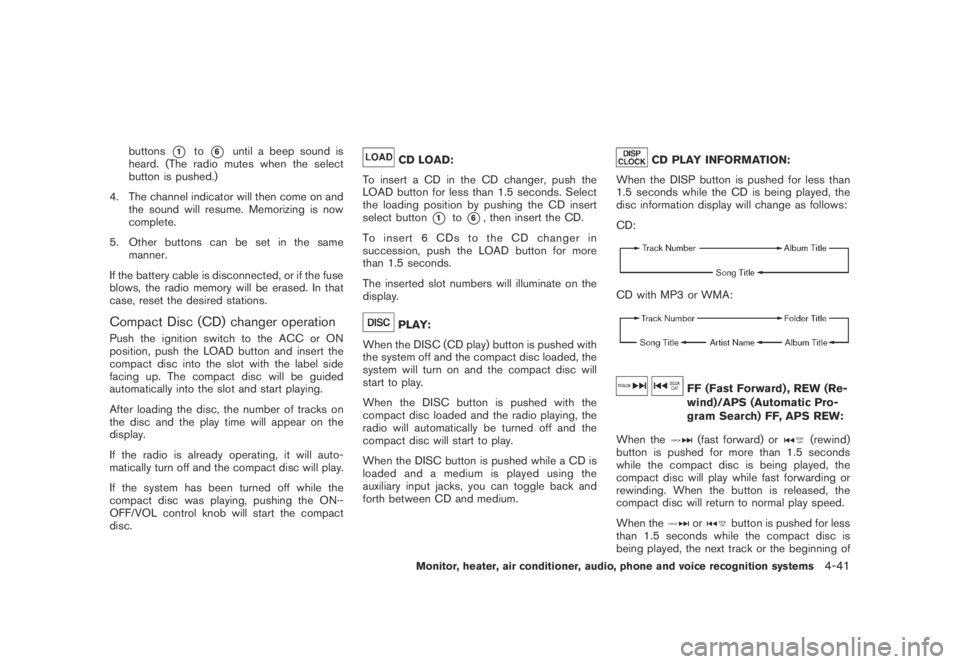
CD PLAY INFORMATION:
When the DISP button is pushed for less than
1.5 seconds while the CD is being played, the
disc information display will change as follows:
CD:
CD with MP3 or WMA:
FF (Fast Forward) , REW (Re-
wind)/APS (Automatic Pro-
gram Search) FF, APS REW:
When the
(fast forward) or(rewind)
button is pushed for more than 1.5 seconds
while the compact disc is being played, the
compact disc will play while fast forwarding or
rewinding. When the button is released, the
compact disc will return to normal play speed.
When the
orbutton is pushed for less
than 1.5 seconds while the compact disc is
being played, the next track or the beginning of
Monitor, heater, air conditioner, audio, phone and voice recognition systems4-41
Page 210 of 443
Black plate (208,1)
Model "Z51-D" EDITED: 2007/ 10/ 2
low frequencies and to stop at the next
broadcasting station.
.For XM satellite radio
Push the SEEK·CAT or TRACK button
orto tune to the first channel of the
next or previous category.
During satellite radio reception, the following
notices will be displayed under certain condi-
tions.
.NO SIGNAL (No signal is received while the
SAT tuner is connected.)
.OFF AIR (Broadcasting signed off)
.ANTENNA ERROR (Antenna connection
error)
.LOADING (When the initial setting is
performed)
.UPDATING (When the satellite radio sub-
scription is not active)
.INVALID CH (Invalid channel is received.)
SCAN tuning:
Push the SCAN tuning button to tune from low
to high frequencies and stops at each broad-
casting station for 5 seconds. Pushing the
button again during this 5 seconds period will
stop SCAN tuning and the radio will remaintuned to that station.
If the SCAN tuning button is not pushed within 5
seconds, SCAN tuning moves to the next
station.
*1to*6Station memory operations:
Twelve stations/channels can be set for the FM
band (6 for FM1, 6 for FM2) and the SAT radio
(6 for SAT1, 6 for SAT2) , and 6 stations can be
set for the AM band.
1. Choose the radio band using the radio band
select button.
2. Tune to the desired station using the SEEK,
SCAN or TUNE button.
3. Select the desired station/channel and keep
pushing any of the desired station preset
buttons
*1to*6until a beep sound is
heard. (The radio mutes when the select
button is pushed.)
4. The channel indicator will then come on and
the sound will resume. Memorizing is now
complete.
5. Other buttons can be set in the same
manner.
If the battery cable is disconnected, or if the fuse
blows, the radio memory will be erased. In that
case, reset the desired stations.Text:
When the “Text” key is selected with the multi-
function controller on the display and then the
ENTER button is pushed while the satellite radio
is being played, the text information will be
displayed on the screen.
.CH Name
.Category
.Name
.Title
.Other
Compact Disc (CD) player/changer op-
eration
Push the ignition switch to the ACC or ON
position, push the LOAD button (if so equipped)
and insert the compact disc into the slot with the
label side facing up. The compact disc will be
guided automatically into the slot and start
playing.
After loading the disc, the number of tracks on
the disc and the play time will appear on the
display.
If the radio is already operating, it will auto-
matically turn off and the compact disc will play.
If the system has been turned off while the
compact disc was playing, pushing the ON·-
4-46Monitor, heater, air conditioner, audio, phone and voice recognition systems