2009 NISSAN ARMADA service indicator
[x] Cancel search: service indicatorPage 97 of 465

Parking brake indicator
When the ignition key is in the ON position, the
light comes on when the parking brake is applied.
Low brake fluid warning light
When the ignition key is in the ON position, the
light warns of a low brake fluid level. If the light
comes on while the engine is running with the
parking brake not applied, stop the vehicle and
perform the following:
1. Check the brake fluid level. Add brake fluid
as necessary. See “Brake fluid” in the “Main-
tenance and do-it-yourself” section of this
manual.
2. If the brake fluid level is correct, have the
warning system checked by a NISSAN
dealer.
WARNING
cYour brake system may not be working
properly if the warning light is on. Driv-
ing could be dangerous. If you judge it
to be safe, drive carefully to the nearest
service station for repairs. Otherwise,
have your vehicle towed because driv-
ing it could be dangerous.cPressing the brake pedal with the en-
gine stopped and/or a low brake fluid
level may increase your stopping dis-
tance and braking will require greater
pedal effort as well as pedal travel.
cIf the brake fluid level is below the
MINIMUM or MIN mark on the brake
fluid reservoir, do not drive until the
brake system has been checked at a
NISSAN dealer.
Charge warning light
If this light comes on while the engine is running,
it may indicate the charging system is not func-
tioning properly. Turn the engine off and check
the generator belt. If the belt is loose, broken,
missing, or if the light remains on, see a NISSAN
dealer immediately.
CAUTION
cDo not ground electrical accessories
directly to the battery terminal. Doing
so will bypass the variable control sys-
tem and the vehicle battery may not
charge completely. Refer to “Variable
voltage control system” in the “Mainte-
nance and do-it-yourself” section later
in this manual.cDo not continue driving if the generator
belt is loose, broken or missing.
Check suspension warning
light (if so equipped)
This light may indicate a malfunction in the auto-
leveling suspension.
For additional information, refer to “Jacking up
vehicle and removing the damaged tire” in the “In
case of emergency” section of this manual.
Engine oil pressure
low/Engine coolant
temperature high warning
light
This light warns of low engine oil pressure or high
engine coolant temperature.
If the light flickers or comes on during normal
driving, pull off the road in a safe area, stop the
engine and allow it to cool. If the light remains on
after checking the oil and coolant, stop the en-
gineimmediatelyand call a NISSAN dealer or
other authorized repair shop.
This light is not designed to indicate a low
oil or low coolant level.Check the oil level
with the dipstick and check the coolant level on
the reservoir. See “Engine oil” and “Checking
engine coolant level” in the “Maintenance and
Instruments and controls2-15
ZREVIEW COPYÐ2009 Armada(wzw)
Owners ManualÐUSA_English(nna)
02/26/08Ðdebbie
X
ProCarManuals.com
Page 112 of 465
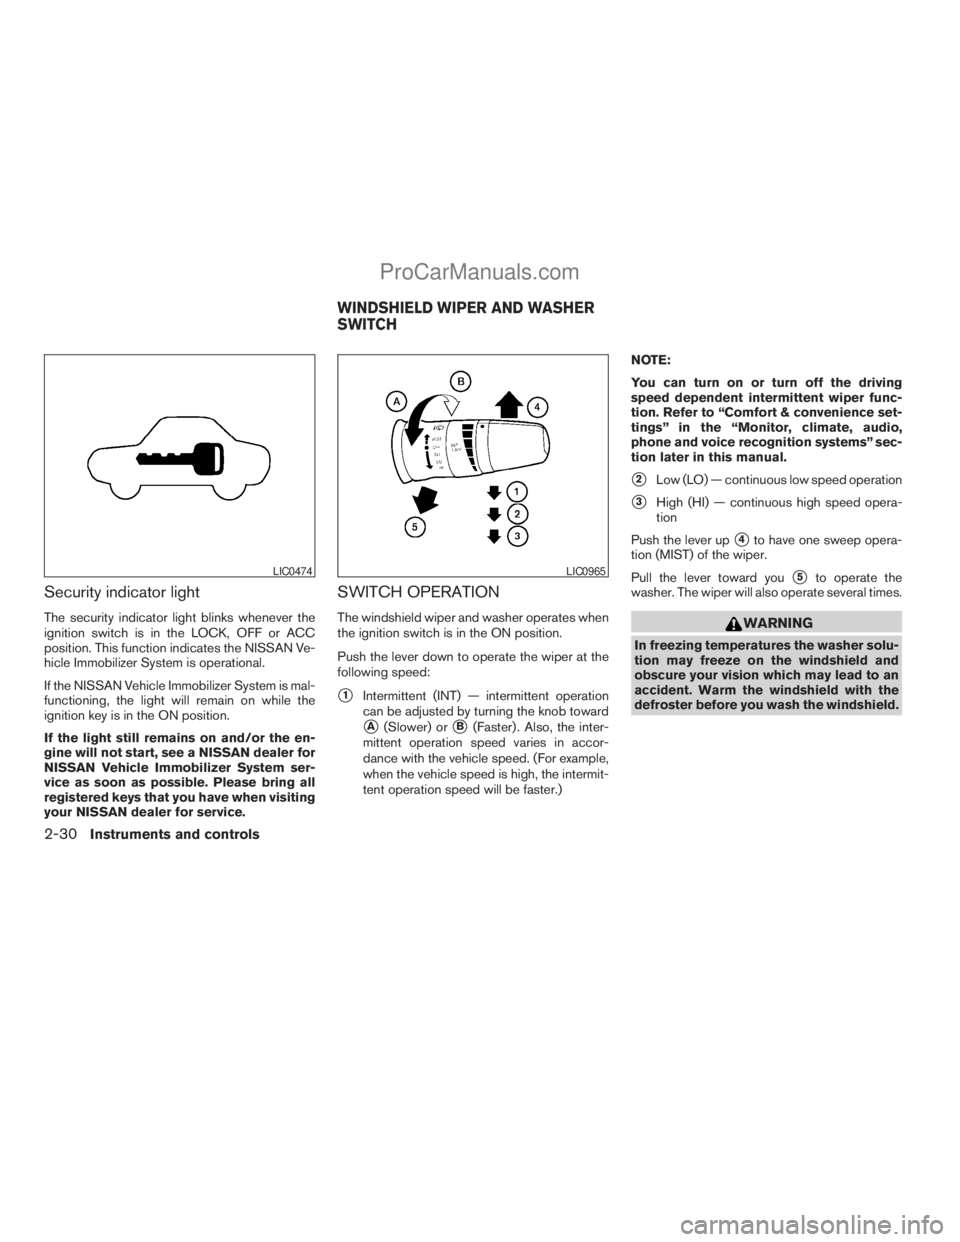
Security indicator light
The security indicator light blinks whenever the
ignition switch is in the LOCK, OFF or ACC
position. This function indicates the NISSAN Ve-
hicle Immobilizer System is operational.
If the NISSAN Vehicle Immobilizer System is mal-
functioning, the light will remain on while the
ignition key is in the ON position.
If the light still remains on and/or the en-
gine will not start, see a NISSAN dealer for
NISSAN Vehicle Immobilizer System ser-
vice as soon as possible. Please bring all
registered keys that you have when visiting
your NISSAN dealer for service.
SWITCH OPERATION
The windshield wiper and washer operates when
the ignition switch is in the ON position.
Push the lever down to operate the wiper at the
following speed:
s1Intermittent (INT) — intermittent operation
can be adjusted by turning the knob toward
sA(Slower) orsB(Faster) . Also, the inter-
mittent operation speed varies in accor-
dance with the vehicle speed. (For example,
when the vehicle speed is high, the intermit-
tent operation speed will be faster.)NOTE:
You can turn on or turn off the driving
speed dependent intermittent wiper func-
tion. Refer to “Comfort & convenience set-
tings” in the “Monitor, climate, audio,
phone and voice recognition systems” sec-
tion later in this manual.
s2Low (LO) — continuous low speed operation
s3High (HI) — continuous high speed opera-
tion
Push the lever up
s4to have one sweep opera-
tion (MIST) of the wiper.
Pull the lever toward you
s5to operate the
washer. The wiper will also operate several times.
WARNING
In freezing temperatures the washer solu-
tion may freeze on the windshield and
obscure your vision which may lead to an
accident. Warm the windshield with the
defroster before you wash the windshield.
LIC0474LIC0965
WINDSHIELD WIPER AND WASHER
SWITCH
2-30Instruments and controls
ZREVIEW COPYÐ2009 Armada(wzw)
Owners ManualÐUSA_English(nna)
02/26/08Ðdebbie
X
ProCarManuals.com
Page 230 of 465
The FM stereo indicator ST will illuminate during
FM stereo reception. When the stereo broadcast
signal is weak, the radio will automatically change
from stereo to monaural reception.
TUNE/FLDR (Tuning) knob:
To manually tune the radio, turn the TUNE/FLDR
knob to the right or left.
SEEK/CAT and TRACK
tuning buttons:
Press the SEEK/CAT
button or the
TRACKbutton for less than 1.5 seconds
to tune from high to low or low to high frequen-
cies and stop at the next broadcasting station.
SCAN tuning:
Press the SCAN button to stop at each broad-
casting station for 5 seconds. Pressing the
SCAN button again during this 5 second period
will stop scan tuning and the radio will remain
tuned to that station. If the SCAN button is not
pressed within 5 seconds, scan tuning moves to
the next station.
PRESET A·B·C (Station memory opera-
tions):
18 stations can be set for the FM, AM and SAT
(satellite, if so equipped) radio to the A, B and C
preset button in any combination of FM, AM or
SAT stations.1. Choose preset bank A, B or C using the
PRESET A·B·C select button.
2. Select the desired FM, AM or SAT station
band.
3. Tune to the desired station using manual,
SEEK or SCAN tuning. Press and hold any
of the desired station memory buttons (1 –
6) until a beep sound is heard.
4. The channel indicator will then come on and
the sound will resume. Programming is now
complete.
5. Other buttons can be set in the same man-
ner.
If the battery cable is disconnected, or if the fuse
opens, the radio memory will be canceled. In that
case, reset the desired stations.
Radio data system (RDS):
RDS stands for Radio Data System, and is a data
information service transmitted by some radio
stations on the FM band (not AM band) . Cur-
rently, most RDS stations are in large cities, but
many stations are now considering broadcasting
RDS data.
RDS can display:
cStation call sign, such as “WHFR 98.3”.
cStation name, such as “The Groove”.cMusic or programming type such as “Clas-
sical”, “Country”, or “Rock”.
cArtist and song information.
If the station broadcasts RDS information, the
RDS icon is displayed.
Compact disc (CD) changer operation
Turn the ignition key to the ACC or ON position
and press thebutton, then press one of
the CD insert (1–6) slots. Insert the compact disc
into the slot with the label side facing up. The
compact disc will be guided automatically into
the slot and start playing.
If the radio is already operating, it will automati-
cally turn off and the compact disc will play.
If the system has been turned off while the com-
pact disc was playing, pressing the
VOL/ON·OFF control knob will start the compact
disc.
button:
To insert a CD in the CD changer, press
the
button for less than 1.5 seconds. Se-
lect the loading slot by pressing the CD insert
select button (1 – 6) , then insert the CD.
To insert 6 CDs to the CD changer, press and
hold the
button for more than 1.5 seconds.
4-50Monitor, climate, audio, phone and voice recognition systems
ZREVIEW COPYÐ2009 Armada(wzw)
Owners ManualÐUSA_English(nna)
02/26/08Ðdebbie
X
ProCarManuals.com
Page 237 of 465
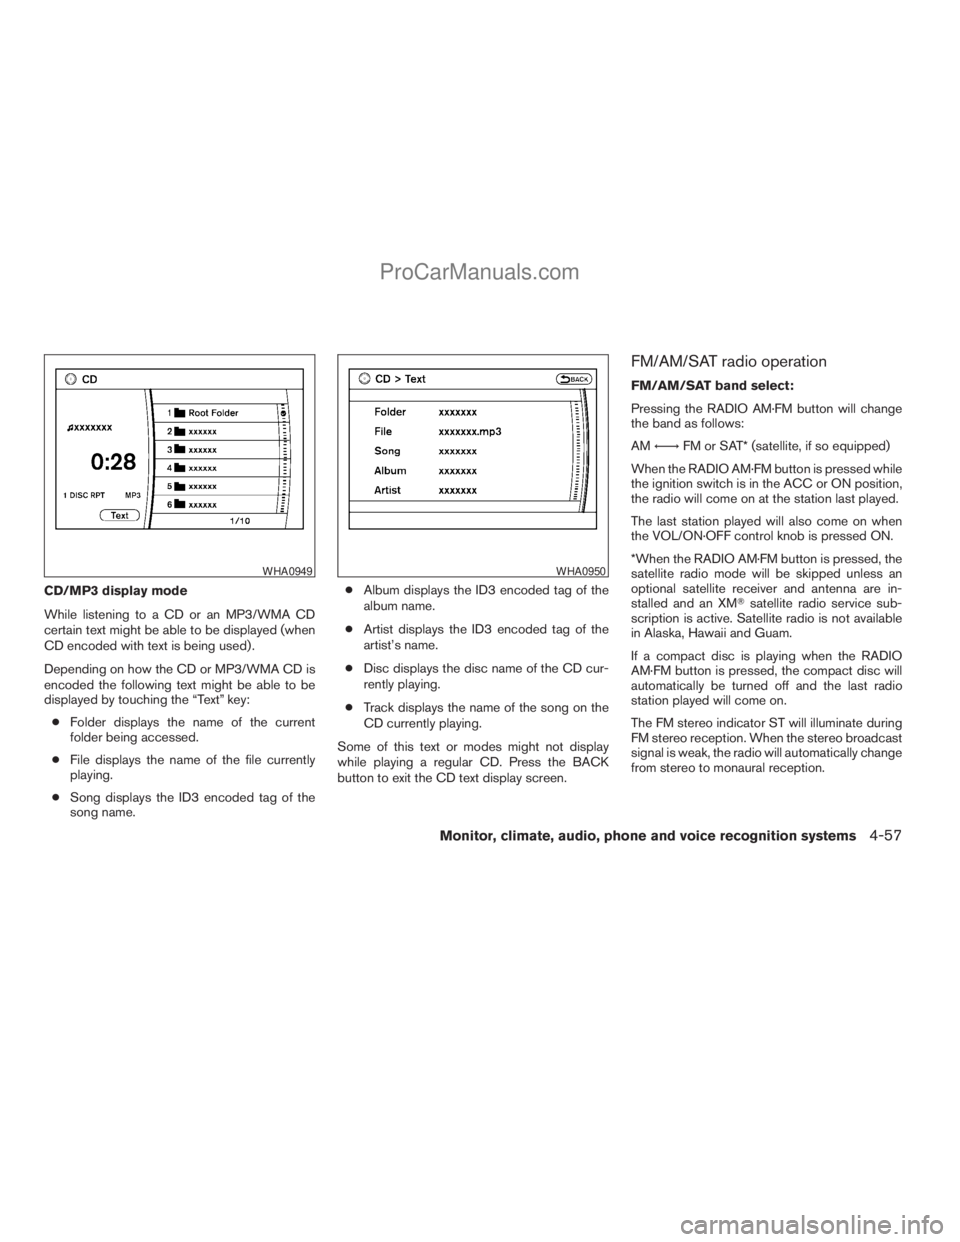
CD/MP3 display mode
While listening to a CD or an MP3/WMA CD
certain text might be able to be displayed (when
CD encoded with text is being used) .
Depending on how the CD or MP3/WMA CD is
encoded the following text might be able to be
displayed by touching the “Text” key:
cFolder displays the name of the current
folder being accessed.
cFile displays the name of the file currently
playing.
cSong displays the ID3 encoded tag of the
song name.cAlbum displays the ID3 encoded tag of the
album name.
cArtist displays the ID3 encoded tag of the
artist’s name.
cDisc displays the disc name of the CD cur-
rently playing.
cTrack displays the name of the song on the
CD currently playing.
Some of this text or modes might not display
while playing a regular CD. Press the BACK
button to exit the CD text display screen.
FM/AM/SAT radio operation
FM/AM/SAT band select:
Pressing the RADIO AM·FM button will change
the band as follows:
AMÃ!FM or SAT* (satellite, if so equipped)
When the RADIO AM·FM button is pressed while
the ignition switch is in the ACC or ON position,
the radio will come on at the station last played.
The last station played will also come on when
the VOL/ON·OFF control knob is pressed ON.
*When the RADIO AM·FM button is pressed, the
satellite radio mode will be skipped unless an
optional satellite receiver and antenna are in-
stalled and an XMTsatellite radio service sub-
scription is active. Satellite radio is not available
in Alaska, Hawaii and Guam.
If a compact disc is playing when the RADIO
AM·FM button is pressed, the compact disc will
automatically be turned off and the last radio
station played will come on.
The FM stereo indicator ST will illuminate during
FM stereo reception. When the stereo broadcast
signal is weak, the radio will automatically change
from stereo to monaural reception.
WHA0949WHA0950
Monitor, climate, audio, phone and voice recognition systems4-57
ZREVIEW COPYÐ2009 Armada(wzw)
Owners ManualÐUSA_English(nna)
02/26/08Ðdebbie
X
ProCarManuals.com
Page 238 of 465
TUNE/FLDR (Tuning) knob:
To manually tune the radio, turn the TUNE/FLDR
knob to the right or left.
SEEK/CAT and TRACK
tuning buttons:
Press the SEEK/CAT
button or the
TRACKbutton for less than 1.5 seconds
to tune from high to low or low to high frequen-
cies and stop at the next broadcasting station.
SCAN·RPT (SCAN tuning) button:
Press the SCAN·RPT button to initiate scan tun-
ing. Scan tuning will stop at each broadcasting
station for 5 seconds. Press the SCAN·RPT but-
ton again during this 5 second period to stop
scan tuning; the radio will remain tuned to that
station. If the SCAN·RPT button is not pressed
within 5 seconds, scan tuning moves to the next
station.
PRESET A·B·C (Station memory opera-
tions):
18 stations can be set for the FM, AM and SAT
(satellite, if so equipped) radio to the A, B and C
preset button in any combination of FM, AM or
SAT stations.
1. Choose preset bank A, B or C using the
PRESET A·B·C select button.2. Select the desired FM, AM or SAT station
band.
3. Tune to the desired station using manual,
SEEK or SCAN tuning. Press and hold any
of the desired station memory buttons (1 –
6) until a beep sound is heard.
4. The channel indicator will then come on and
the sound will resume. Programming is now
complete.
5. Other buttons can be set in the same man-
ner.
If the battery cable is disconnected, or if the fuse
opens, the radio memory will be canceled. In that
case, reset the desired stations.
Radio data system (RDS):
RDS stands for Radio Data System, and is a data
information service transmitted by some radio
stations on the FM band (not AM band) . Cur-
rently, most RDS stations are in large cities, but
many stations are now considering broadcasting
RDS data.
RDS can display:
cStation call sign, such as “WHFR 98.3”.
cStation name, such as “The Groove”.
cMusic or programming type such as “Clas-
sical”, “Country”, or “Rock”.cArtist and song information.
If the station broadcasts RDS information, the
RDS icon is displayed.
Compact disc (CD) player operation
Turn the ignition key to the ACC or ON position
and insert the compact disc into the slot with the
label side facing up. The compact disc will be
guided automatically into the slot and start play-
ing.
If the radio is already operating, it will automati-
cally turn off and the compact disc will play.
If the system has been turned off while the com-
pact disc was playing, pressing the
VOL/ON·OFF control knob will start the compact
disc.
DISC/AUX button:
When the DISC/AUX button is pressed with the
system off and the compact disc loaded, the
system will turn on and the compact disc will start
to play.
When the DISC/AUX button is pressed with the
compact disc loaded but the radio playing, the
radio will automatically be turned off and the
compact disc will start to play.
4-58Monitor, climate, audio, phone and voice recognition systems
ZREVIEW COPYÐ2009 Armada(wzw)
Owners ManualÐUSA_English(nna)
02/26/08Ðdebbie
X
ProCarManuals.com
Page 420 of 465
Wheel nut tightening torque:
98 ft-lb (133 N·m)
The wheel nuts must be kept tight-
ened to specifications at all times. It
is recommended that wheel nuts be
tightened to specification at each
tire rotation interval.
WARNING
cAfter rotating the tires, check and
adjust the tire pressure.
cRetighten the wheel nuts when
the vehicle has been driven for
600 miles (1,000 km) (also in
cases of a flat tire, etc.) .
cDo not include the spare tire in
the tire rotation.
cFor additional information re-
garding tires, refer to “Important
Tire Safety Information” (US) or
“Tire Safety Information”
(Canada) in the Warranty Infor-
mation Booklet.
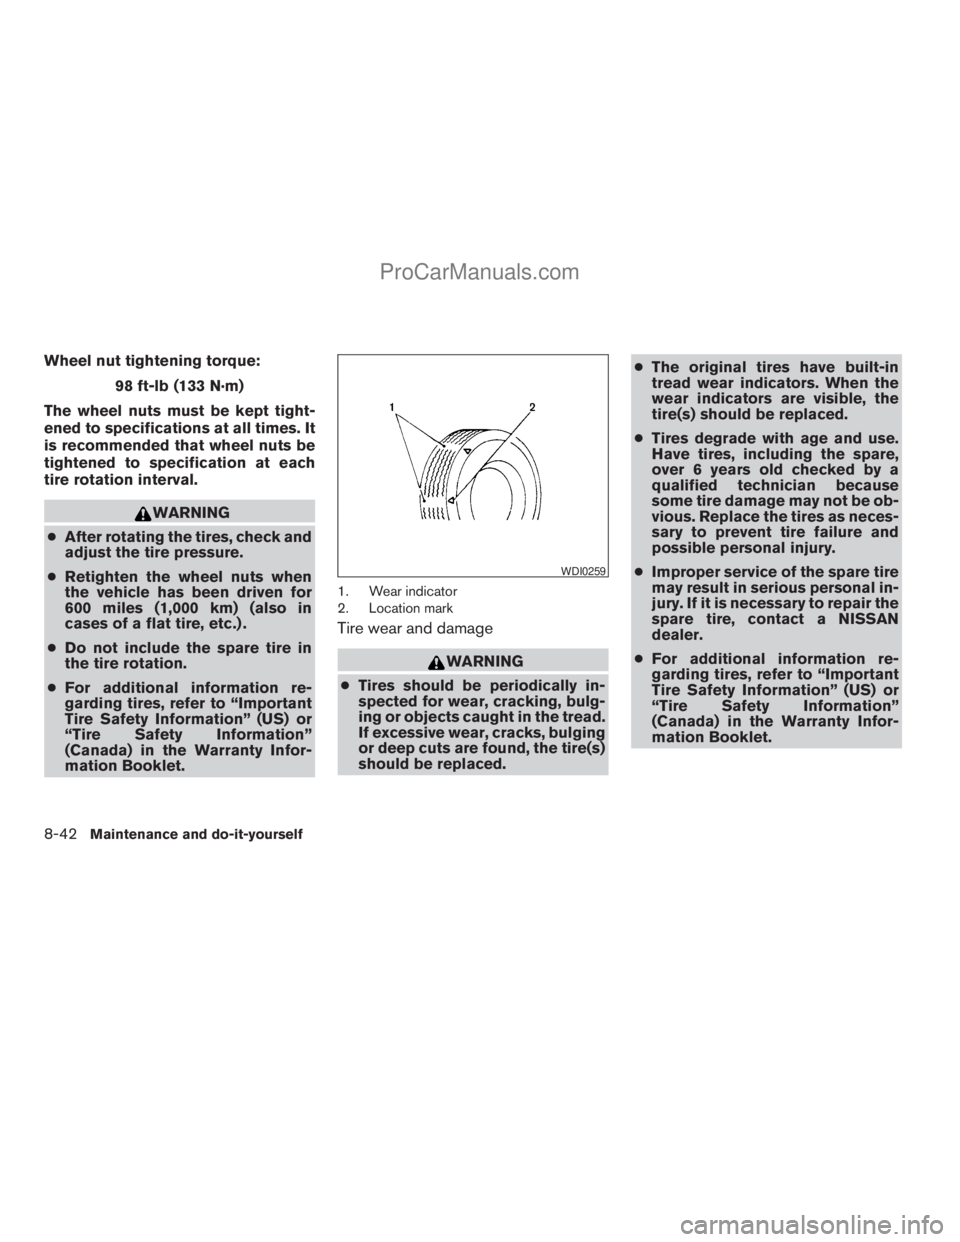
1. Wear indicator
2. Location mark
Tire wear and damage
WARNING
cTires should be periodically in-
spected for wear, cracking, bulg-
ing or objects caught in the tread.
If excessive wear, cracks, bulging
or deep cuts are found, the tire(s)
should be replaced.cThe original tires have built-in
tread wear indicators. When the
wear indicators are visible, the
tire(s) should be replaced.
cTires degrade with age and use.
Have tires, including the spare,
over 6 years old checked by a
qualified technician because
some tire damage may not be ob-
vious. Replace the tires as neces-
sary to prevent tire failure and
possible personal injury.
cImproper service of the spare tire
may result in serious personal in-
jury. If it is necessary to repair the
spare tire, contact a NISSAN
dealer.
cFor additional information re-
garding tires, refer to “Important
Tire Safety Information” (US) or
“Tire Safety Information”
(Canada) in the Warranty Infor-
mation Booklet.
WDI0259
8-42Maintenance and do-it-yourself
ZREVIEW COPYÐ2009 Armada(wzw)
Owners ManualÐUSA_English(nna)
02/26/08Ðdebbie
X
ProCarManuals.com
Page 449 of 465
1. Apply and hold the brake pedal.
2. Have someone place blocks on the downhill
side of the vehicle and trailer wheels.
3. After the wheel blocks are in place, slowly
release the brake pedal until the blocks ab-
sorb the vehicle load.
4. Apply the parking brake.
5. Shift the transmission into P (Park) .
6. Make sure the
indicator light (if so
equipped) indicates the transfer case is in
4H, 4L, or 2H and that the ATP light is off. If
the
indicator light is flashing, or the
ATP light is ON, make sure the transmission
is in P (Park) (AT) and turn the 4WD switch
to 2WD or 4H. See “Automatic transmission
park warning light” in the “Instruments and
controls” section and “Using four wheel
drive” in the “Starting and driving” section.
7. Turn off the engine.
To drive away:
1. Start the vehicle.
2. Apply and hold the brake pedal.
3. Shift the transmission into gear.
4. Release the parking brake.5. Drive slowly until the vehicle and trailer are
clear from the blocks.
6. Apply and hold the brake pedal.
7. Have someone retrieve and store the blocks.
cWhile going downhill, the weight of the
trailer pushing on the tow vehicle may de-
crease overall stability. Therefore, to main-
tain adequate control, reduce your speed
and shift to a lower gear. Avoid long or
repeated use of the brakes when descend-
ing a hill, as this reduces their effectiveness
and could cause overheating. Shifting to a
lower gear instead provides “engine brak-
ing” and reduces the need to brake as fre-
quently.
cIf the engine coolant temperature rises to a
high temperature, refer to “If your vehicle
overheats” in the “In case of emergency”
section of this owner’s manual.
cTrailer towing requires more fuel than normal
circumstances.
cAvoid towing a trailer for your vehicle’s first
500 miles (805 km) .
cFor the first 500 miles (805 km) that you do
tow, do not drive over 50 MPH (80 km/h).cHave your vehicle serviced more often than
at intervals specified in the recommended
Maintenance Schedule in the “NISSAN Ser-
vice and Maintenance Guide”.
cWhen making a turn, your trailer wheels will
be closer to the inside of the turn than your
vehicle wheels. To compensate for this,
make a larger than normal turning radius
during the turn.
cCrosswinds and rough roads will adversely
affect vehicle/trailer handling, possibly caus-
ing vehicle sway. When being passed by
larger vehicles, be prepared for possible
changes in crosswinds that could affect ve-
hicle handling.
Do the following if the trailer begins to sway:
1. Take your foot off the accelerator pedal to
allow the vehicle to coast and steer as
straight ahead as the road conditions allow.
This combination will help stabilize the ve-
hicle
– Do not correct trailer sway by steering or
applying the brakes.
2. When the trailer sway stops, gently apply the
brakes and pull to the side of the road in a
safe area.
Technical and consumer information9-27
ZREVIEW COPYÐ2009 Armada(wzw)
Owners ManualÐUSA_English(nna)
02/26/08Ðdebbie
X
ProCarManuals.com
Page 457 of 465
10 Index
4WD warning light...............2-16
A
Active Head Restraint..............1-9
Adjusting pedal position............3-28
Air bag (See supplemental restraint
system).....................1-49
Air bag system
Front (See supplemental front impact
air bag system)...............1-57
Air bag warning labels.............1-64
Air bag warning light...........1-64, 2-18
Air cleaner housing filter............8-17
Air conditioner
Air conditioner service...........4-39
Air conditioner specification label.....9-12
Air conditioner system refrigerant and
oil recommendations.............9-7
Heater and air conditioner controls. . . .4-36
Rear seat air conditioner..........4-38
Servicing air conditioner..........4-39
Alarm system
(See vehicle security system).........2-27
Anchor point locations.............1-32
Antenna.....................4-75
Anti-lock brake warning light......2-13, 2-14
Anti-lock Braking System (ABS)........5-29
Audible reminders................2-20
Audio system..................4-39
Compact Disc (CD) changer.......4-50Compact disc (CD) player.........4-58
Audio System
CompactFlash (CF) player.........4-60
Audio system
FM/AM/SAT radio with compact disc
(CD) changer................4-47
FM/AM/SAT radio with compact disc
(CD) player.................4-55
Audio System
Music Box hard-disk drive audio
system....................4-62
Audio system
Radio....................4-39
Rear audio controls.............4-74
Audio System
Settings................4-47, 4-55
Audio system
Steering wheel audio control switch. . . .4-73
Autolight switch.................2-33
Automatic
Automatic drive positioner.........3-32
Automatic power window switch.....2-53
Automatic transmission position indicator
light.....................2-27
Driving with automatic transmission. . . .5-14
Transmission selector lever lock
release....................5-16
Automatic anti-glare inside mirror.......3-29
Automatic transmission fluid temperature
gauge.......................2-9
AUX jack.................4-53, 4-60B
Battery......................8-13
Charge warning light............2-15
Before starting the engine...........5-12
Belt (See drive belt)..............8-15
Block heater
Engine....................5-35
BluetoothThands-free phone
system..................4-92, 4-107
Booster seats..................1-44
Brake
Anti-lock Braking System (ABS)......5-29
Brake fluid..................8-12
Brake light (See stop light).........8-30
Brake system................5-28
Brake warning light.............2-14
Brake wear indicators........2-20, 8-22
Parking brake operation..........5-17
Self-adjusting brakes............8-22
Brakes......................8-22
Break-in schedule................5-19
Brightness control
Instrument panel..............2-35
Brightness/contrast button.......4-16, 4-32
Bulb check/instrument panel..........2-13
Bulb replacement................8-30
ZREVIEW COPYÐ2009 Armada(wzw)
Owners ManualÐUSA_English(nna)
02/26/08Ðdebbie
X
ProCarManuals.com