2009 NISSAN ALTIMA COUPE reset
[x] Cancel search: resetPage 22 of 373
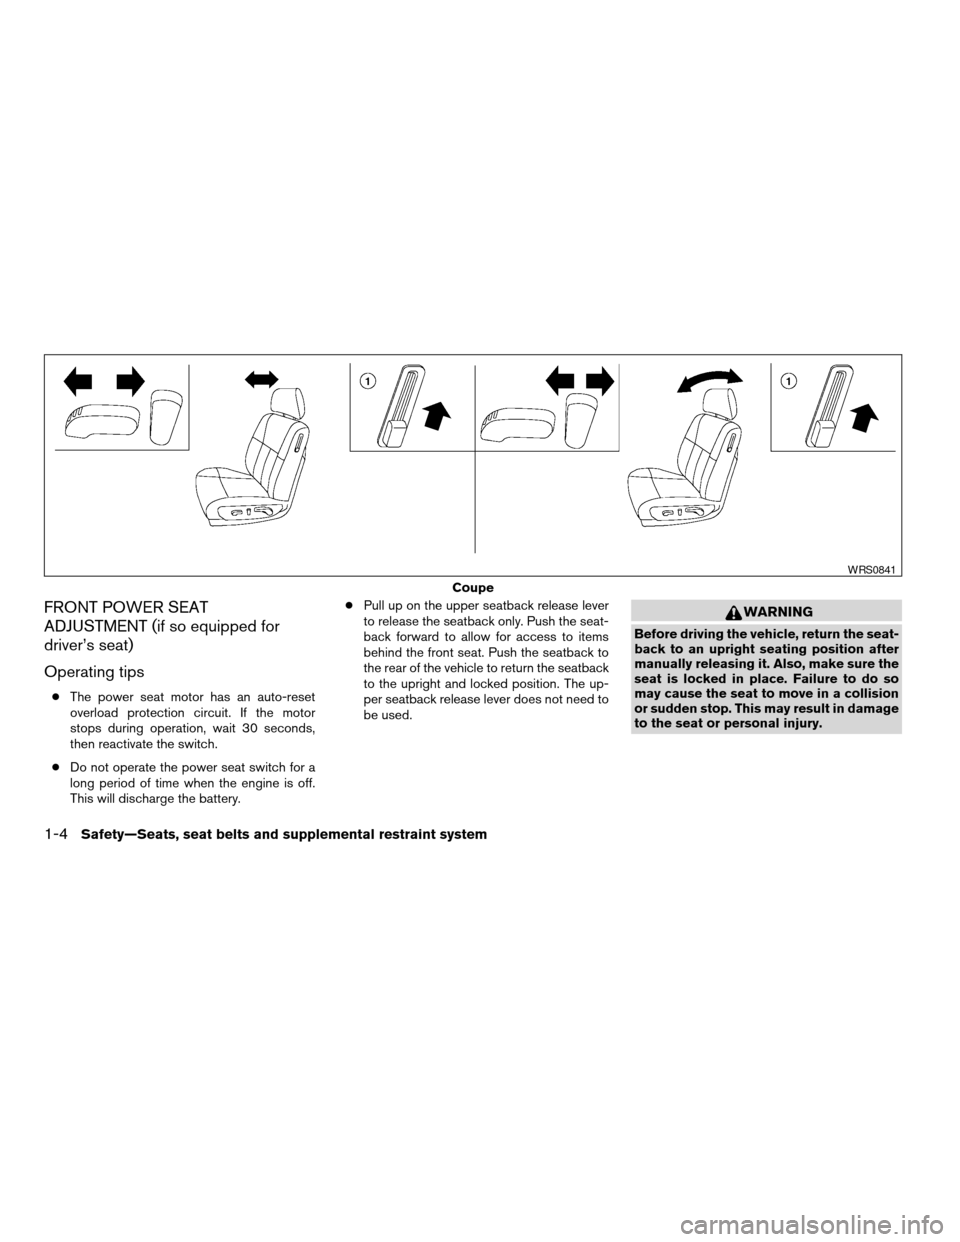
FRONT POWER SEAT
ADJUSTMENT (if so equipped for
driver’s seat)
Operating tips
cThe power seat motor has an auto-reset
overload protection circuit. If the motor
stops during operation, wait 30 seconds,
then reactivate the switch.
cDo not operate the power seat switch for a
long period of time when the engine is off.
This will discharge the battery.cPull up on the upper seatback release lever
to release the seatback only. Push the seat-
back forward to allow for access to items
behind the front seat. Push the seatback to
the rear of the vehicle to return the seatback
to the upright and locked position. The up-
per seatback release lever does not need to
be used.
WARNING
Before driving the vehicle, return the seat-
back to an upright seating position after
manually releasing it. Also, make sure the
seat is locked in place. Failure to do so
may cause the seat to move in a collision
or sudden stop. This may result in damage
to the seat or personal injury.
Coupe
WRS0841
1-4Safety—Seats, seat belts and supplemental restraint system
ZREVIEW COPYÐ2009 Altima(alt)
Owners Manual(owners)ÐUSA_English(nna)
02/03/09Ðdebbie
X
Page 82 of 373
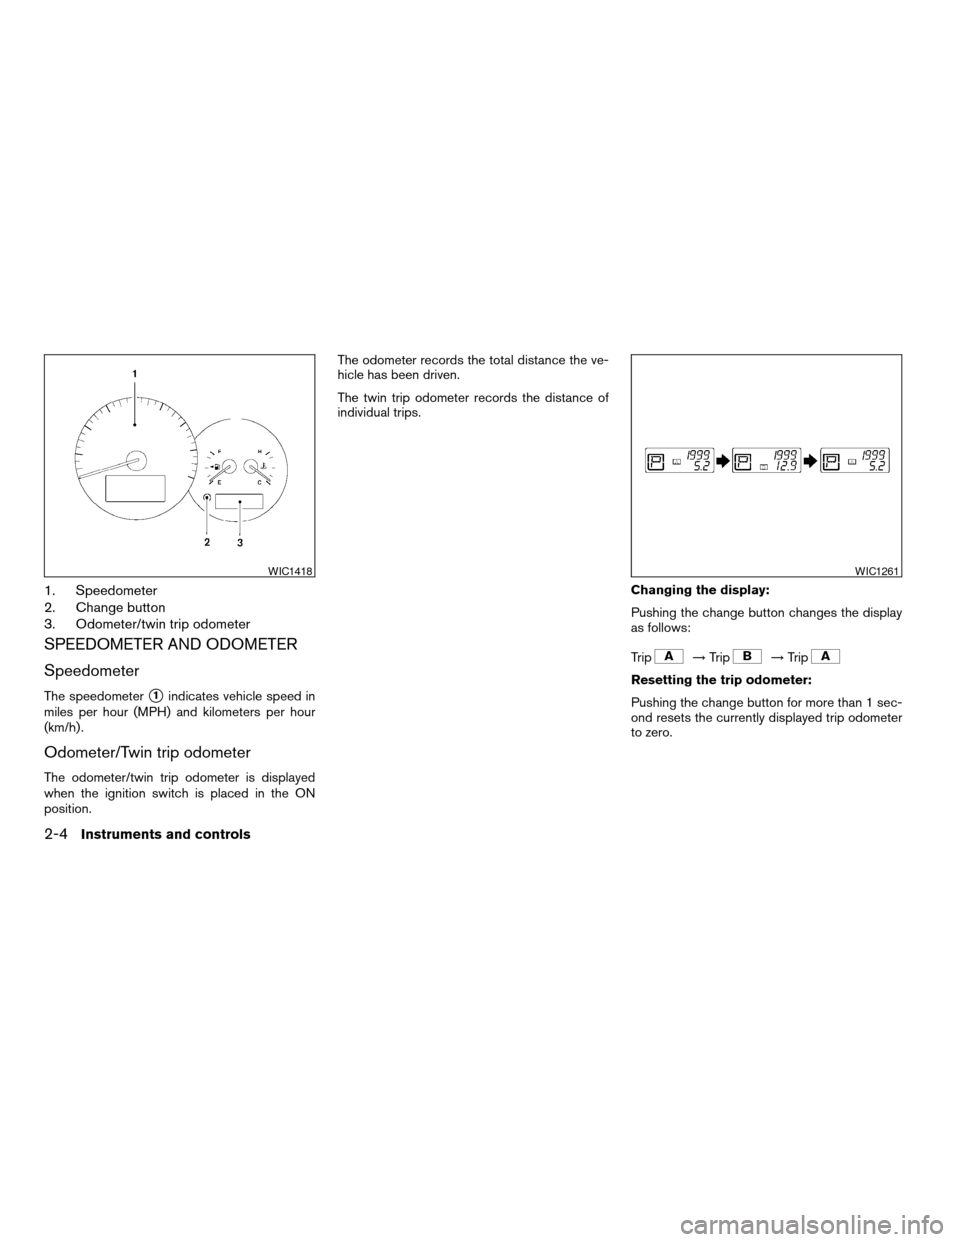
1. Speedometer
2. Change button
3. Odometer/twin trip odometer
SPEEDOMETER AND ODOMETER
Speedometer
The speedometers1indicates vehicle speed in
miles per hour (MPH) and kilometers per hour
(km/h) .
Odometer/Twin trip odometer
The odometer/twin trip odometer is displayed
when the ignition switch is placed in the ON
position.The odometer records the total distance the ve-
hicle has been driven.
The twin trip odometer records the distance of
individual trips.
Changing the display:
Pushing the change button changes the display
as follows:
Trip
!Trip!Trip
Resetting the trip odometer:
Pushing the change button for more than 1 sec-
ond resets the currently displayed trip odometer
to zero.
WIC1418WIC1261
2-4Instruments and controls
ZREVIEW COPYÐ2009 Altima(alt)
Owners Manual(owners)ÐUSA_English(nna)
02/03/09Ðdebbie
X
Page 91 of 373
cIf the light illuminates while driving,
avoid sudden steering maneuvers or
abrupt braking, reduce vehicle speed,
pull off the road to a safe location and
stop the vehicle as soon as possible.
Driving with under-inflated tires may
permanently damage the tires and in-
crease the likelihood of tire failure. Se-
rious vehicle damage could occur and
may lead to an accident and could re-
sult in serious personal injury. Check
the tire pressure for all four tires. Adjust
the tire pressure to the recommended
COLD tire pressure shown on the Tire
and Loading Information label located
in the driver’s door opening to turn the
low tire pressure warning light OFF. If
the light still illuminates while driving
after adjusting the tire pressure, a tire
may be flat. If you have a flat tire, re-
place it with a spare tire as soon as
possible.cWhen a spare tire is mounted or a wheel
is replaced tire pressure will not be in-
dicated, the TPMS will not function and
the low tire pressure warning light will
flash for approximately 1 minute. The
light will remain on after 1 minute. Con-
tact your NISSAN dealer as soon as
possible for tire replacement and/or
system resetting.
cReplacing tires with those not originally
specified by NISSAN could affect the
proper operation of the TPMS.
CAUTION
cThe TPMS is not a substitute for the
regular tire pressure check. Be sure to
check the tire pressure regularly.
cIf the vehicle is being driven at speeds
of less than 16 MPH (25 km/h) , the
TPMS may not operate correctly.
cBe sure to install the specified size of
tires to the 4 wheels correctly.
Master warning light
This light comes on when various vehicle infor-
mation display warnings appear.
NISSAN Intelligent Key™
warning light
The Intelligent Key warning light warns of a mal-
function with the electrical steering lock system
or the Intelligent Key system.
After the ignition switch is placed in the ON
position, this light comes on for about 2 seconds
and then turns off.
If the light comes on while the engine is stopped,
it may not be possible to free the steering lock or
to start the engine. If the light comes on while the
engine is running, you can drive the vehicle. How-
ever, in these cases, contact a NISSAN dealer for
repair as soon as possible.
See “NISSAN Intelligent Key™ ” in the “Pre-
driving checks and adjustments” section.
Seat belt warning light and
chime
The light and chime remind you to fasten your
seat belts. The light illuminates whenever the
ignition switch is placed in the ON or START
position and remains illuminated until the driver’s
seat belt is fastened. At the same time, the chime
sounds for about 6 seconds unless the driver’s
seat belt is securely fastened.
Instruments and controls2-13
ZREVIEW COPYÐ2009 Altima(alt)
Owners Manual(owners)ÐUSA_English(nna)
02/03/09Ðdebbie
X
Page 96 of 373
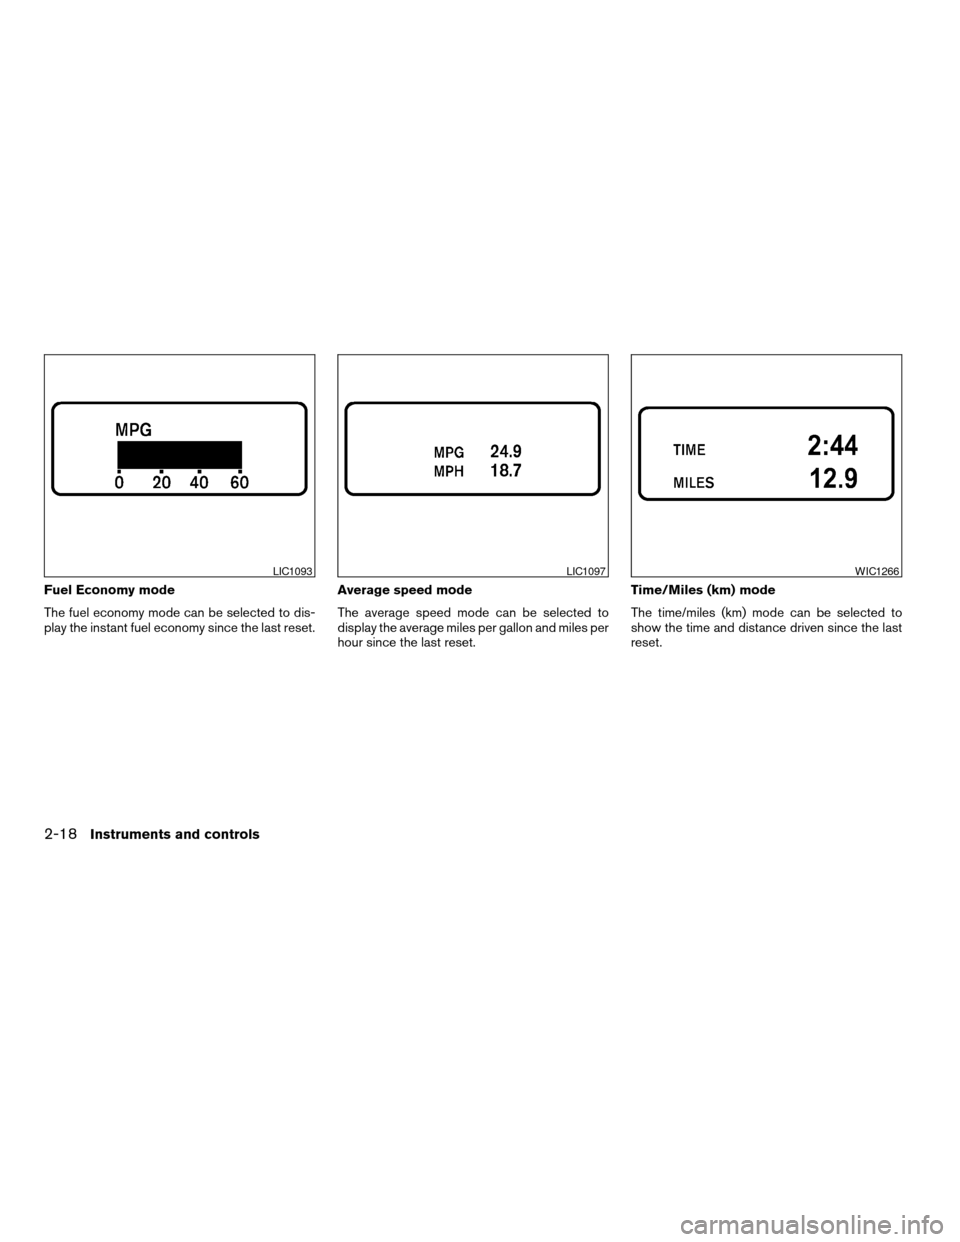
Fuel Economy mode
The fuel economy mode can be selected to dis-
play the instant fuel economy since the last reset.Average speed mode
The average speed mode can be selected to
display the average miles per gallon and miles per
hour since the last reset.Time/Miles (km) mode
The time/miles (km) mode can be selected to
show the time and distance driven since the last
reset.
LIC1093LIC1097WIC1266
2-18Instruments and controls
ZREVIEW COPYÐ2009 Altima(alt)
Owners Manual(owners)ÐUSA_English(nna)
02/03/09Ðdebbie
X
Page 98 of 373
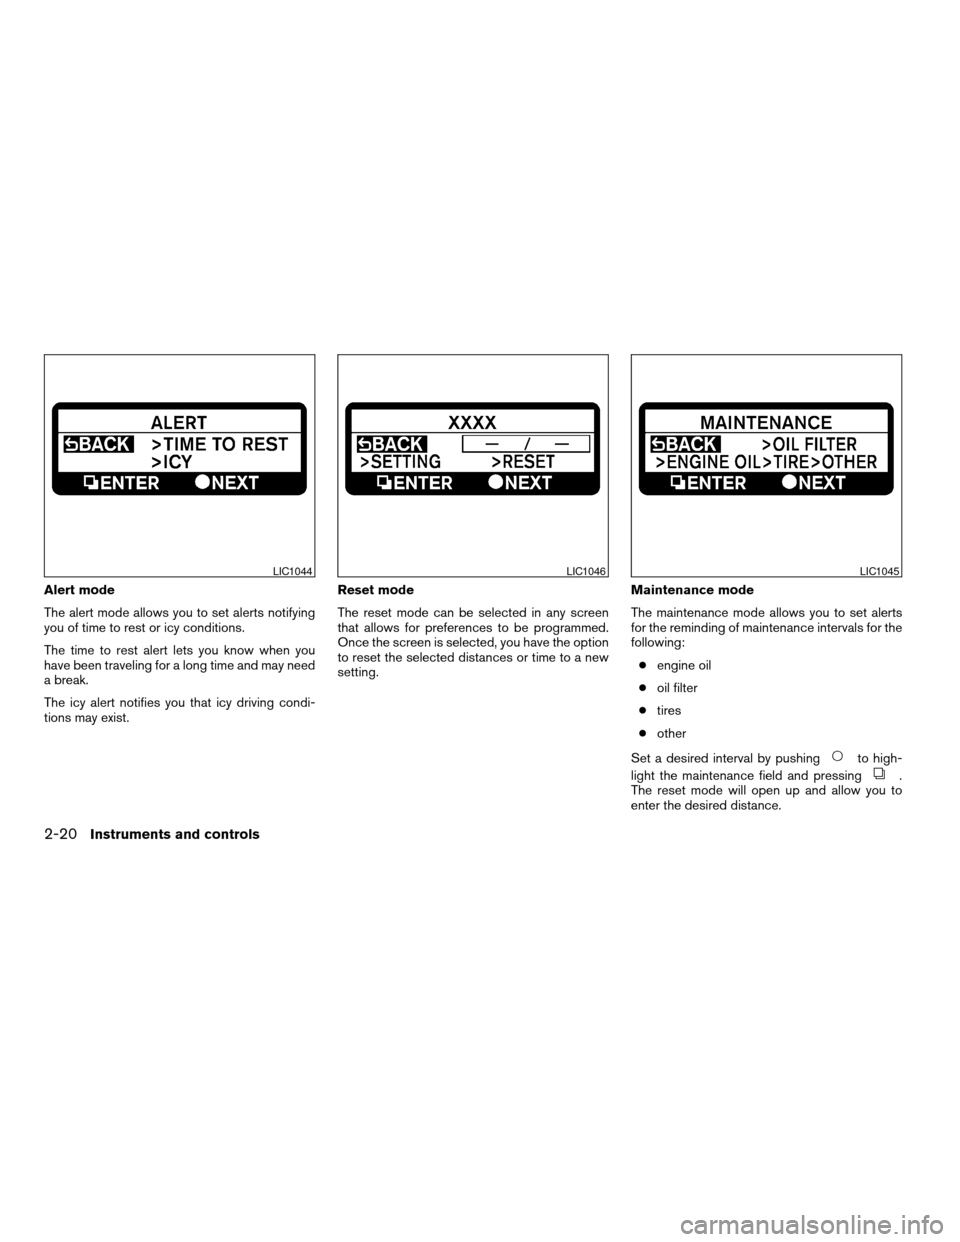
Alert mode
The alert mode allows you to set alerts notifying
you of time to rest or icy conditions.
The time to rest alert lets you know when you
have been traveling for a long time and may need
a break.
The icy alert notifies you that icy driving condi-
tions may exist.Reset mode
The reset mode can be selected in any screen
that allows for preferences to be programmed.
Once the screen is selected, you have the option
to reset the selected distances or time to a new
setting.Maintenance mode
The maintenance mode allows you to set alerts
for the reminding of maintenance intervals for the
following:
cengine oil
coil filter
ctires
cother
Set a desired interval by pushing
to high-
light the maintenance field and pressing
.
The reset mode will open up and allow you to
enter the desired distance.
LIC1044LIC1046LIC1045
2-20Instruments and controls
ZREVIEW COPYÐ2009 Altima(alt)
Owners Manual(owners)ÐUSA_English(nna)
02/03/09Ðdebbie
X
Page 109 of 373
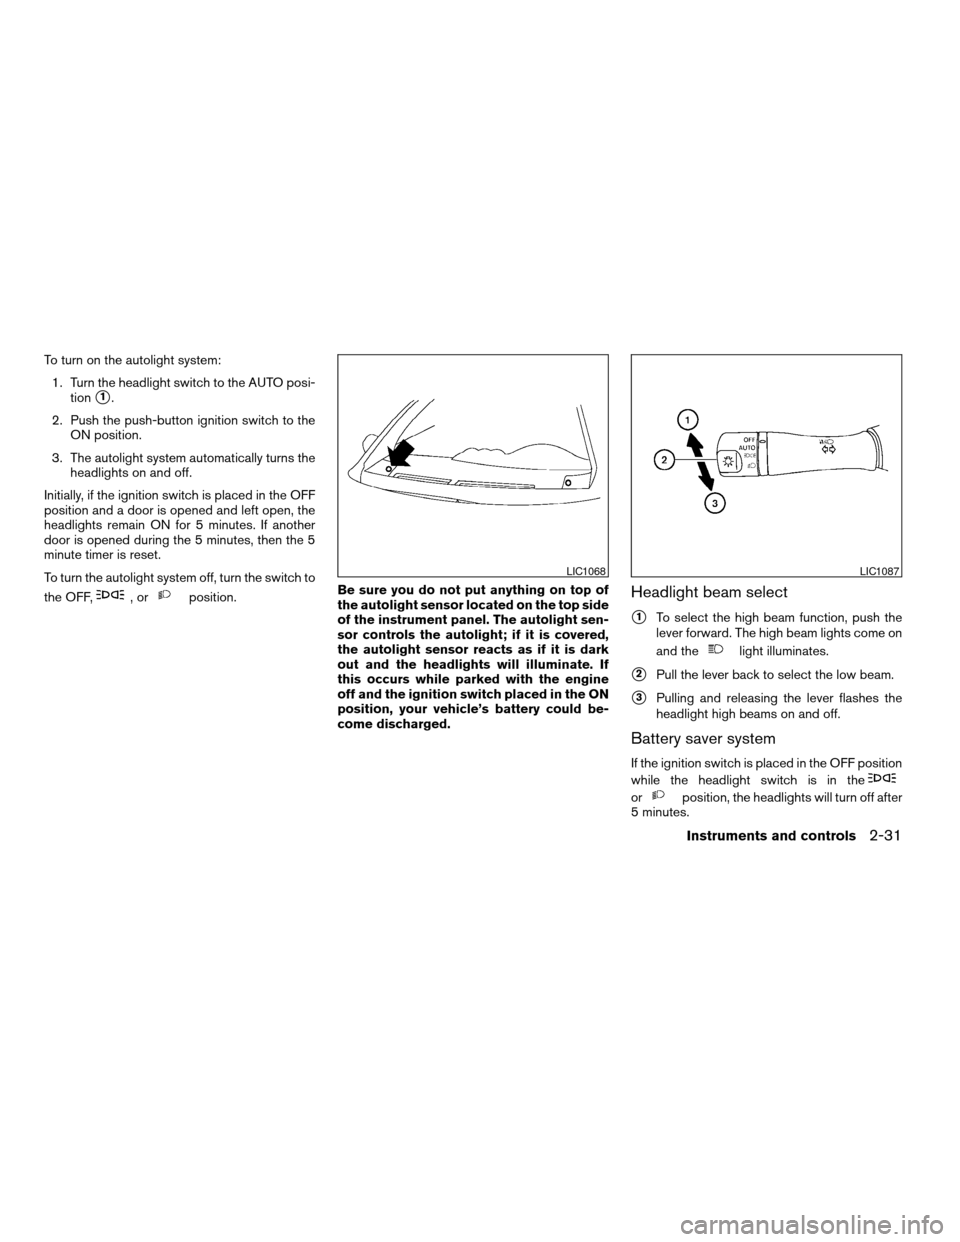
To turn on the autolight system:
1. Turn the headlight switch to the AUTO posi-
tion
s1.
2. Push the push-button ignition switch to the
ON position.
3. The autolight system automatically turns the
headlights on and off.
Initially, if the ignition switch is placed in the OFF
position and a door is opened and left open, the
headlights remain ON for 5 minutes. If another
door is opened during the 5 minutes, then the 5
minute timer is reset.
To turn the autolight system off, turn the switch to
the OFF,
,orposition.Be sure you do not put anything on top of
the autolight sensor located on the top side
of the instrument panel. The autolight sen-
sor controls the autolight; if it is covered,
the autolight sensor reacts as if it is dark
out and the headlights will illuminate. If
this occurs while parked with the engine
off and the ignition switch placed in the ON
position, your vehicle’s battery could be-
come discharged.Headlight beam select
s1To select the high beam function, push the
lever forward. The high beam lights come on
and the
light illuminates.
s2Pull the lever back to select the low beam.
s3Pulling and releasing the lever flashes the
headlight high beams on and off.
Battery saver system
If the ignition switch is placed in the OFF position
while the headlight switch is in the
orposition, the headlights will turn off after
5 minutes.
LIC1068LIC1087
Instruments and controls2-31
ZREVIEW COPYÐ2009 Altima(alt)
Owners Manual(owners)ÐUSA_English(nna)
02/03/09Ðdebbie
X
Page 125 of 373
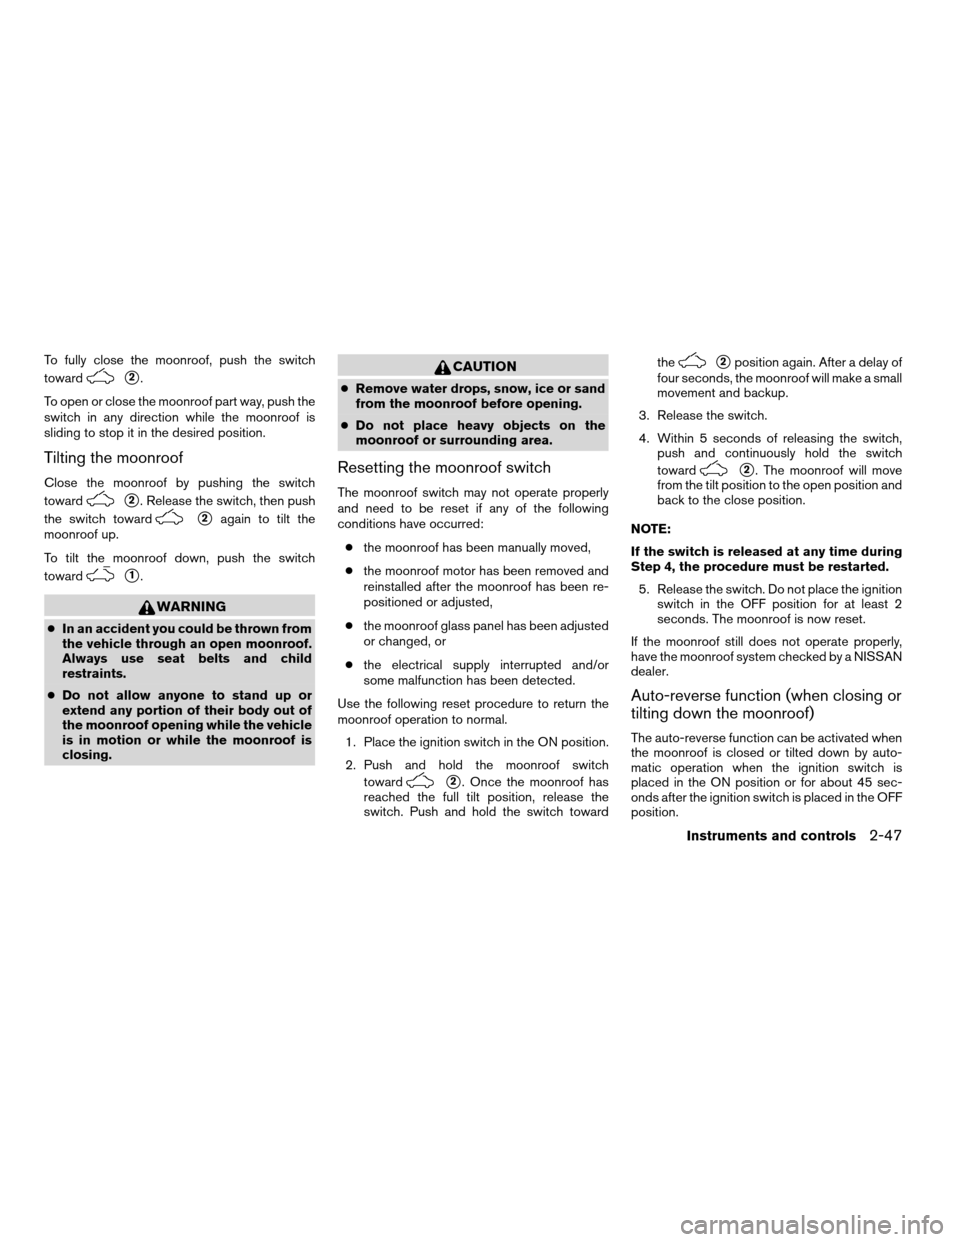
To fully close the moonroof, push the switch
toward
s2.
To open or close the moonroof part way, push the
switch in any direction while the moonroof is
sliding to stop it in the desired position.
Tilting the moonroof
Close the moonroof by pushing the switch
toward
s2. Release the switch, then push
the switch toward
s2again to tilt the
moonroof up.
To tilt the moonroof down, push the switch
toward
s1.
WARNING
cIn an accident you could be thrown from
the vehicle through an open moonroof.
Always use seat belts and child
restraints.
cDo not allow anyone to stand up or
extend any portion of their body out of
the moonroof opening while the vehicle
is in motion or while the moonroof is
closing.
CAUTION
cRemove water drops, snow, ice or sand
from the moonroof before opening.
cDo not place heavy objects on the
moonroof or surrounding area.
Resetting the moonroof switch
The moonroof switch may not operate properly
and need to be reset if any of the following
conditions have occurred:
cthe moonroof has been manually moved,
cthe moonroof motor has been removed and
reinstalled after the moonroof has been re-
positioned or adjusted,
cthe moonroof glass panel has been adjusted
or changed, or
cthe electrical supply interrupted and/or
some malfunction has been detected.
Use the following reset procedure to return the
moonroof operation to normal.
1. Place the ignition switch in the ON position.
2. Push and hold the moonroof switch
toward
s2. Once the moonroof has
reached the full tilt position, release the
switch. Push and hold the switch towardthe
s2position again. After a delay of
four seconds, the moonroof will make a small
movement and backup.
3. Release the switch.
4. Within 5 seconds of releasing the switch,
push and continuously hold the switch
toward
s2. The moonroof will move
from the tilt position to the open position and
back to the close position.
NOTE:
If the switch is released at any time during
Step 4, the procedure must be restarted.
5. Release the switch. Do not place the ignition
switch in the OFF position for at least 2
seconds. The moonroof is now reset.
If the moonroof still does not operate properly,
have the moonroof system checked by a NISSAN
dealer.
Auto-reverse function (when closing or
tilting down the moonroof)
The auto-reverse function can be activated when
the moonroof is closed or tilted down by auto-
matic operation when the ignition switch is
placed in the ON position or for about 45 sec-
onds after the ignition switch is placed in the OFF
position.
Instruments and controls2-47
ZREVIEW COPYÐ2009 Altima(alt)
Owners Manual(owners)ÐUSA_English(nna)
02/03/09Ðdebbie
X
Page 191 of 373
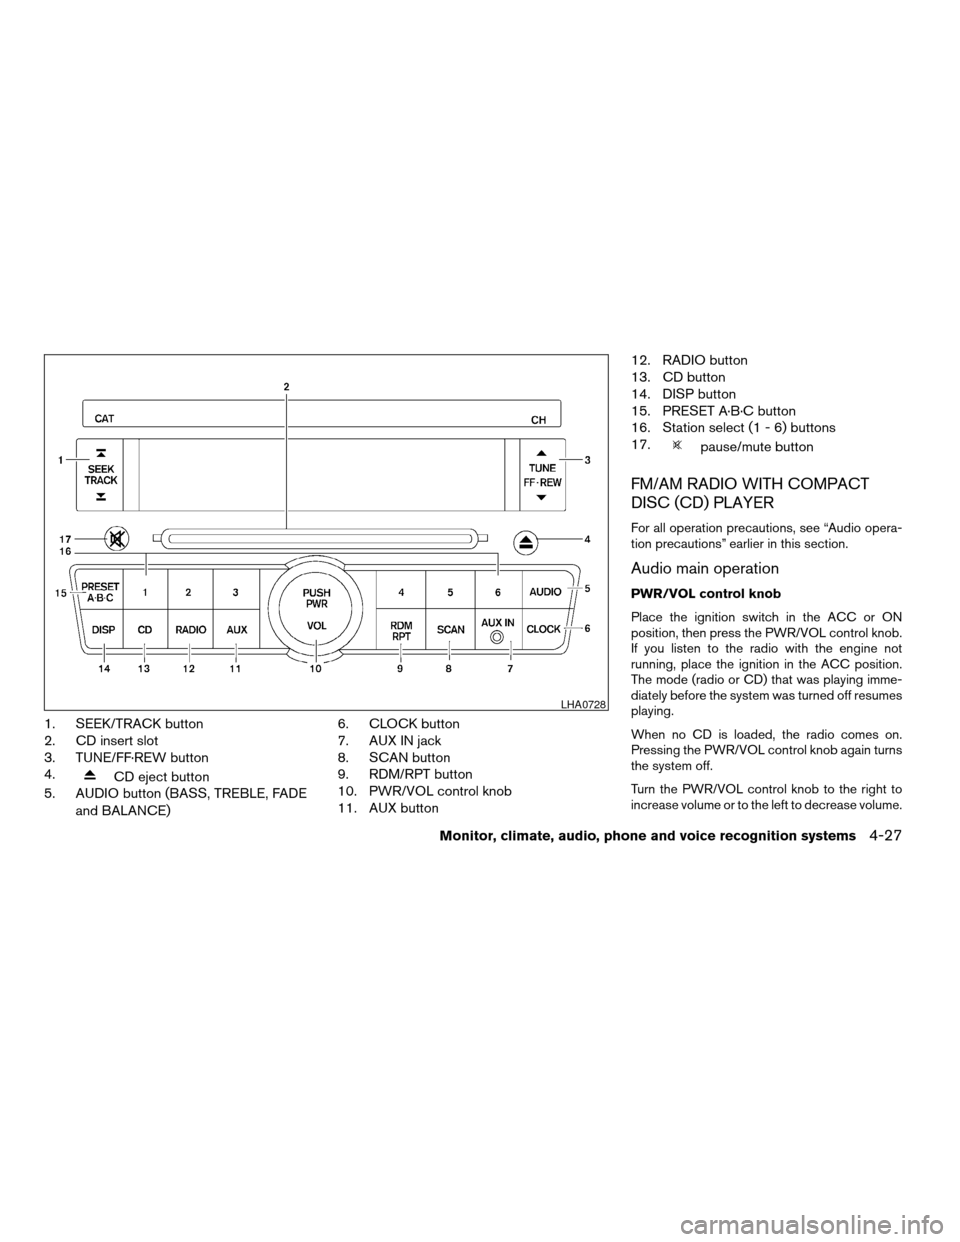
1. SEEK/TRACK button
2. CD insert slot
3. TUNE/FF·REW button
4.
CD eject button
5. AUDIO button (BASS, TREBLE, FADE
and BALANCE)6. CLOCK button
7. AUX IN jack
8. SCAN button
9. RDM/RPT button
10. PWR/VOL control knob
11. AUX button12. RADIO button
13. CD button
14. DISP button
15. PRESET A·B·C button
16. Station select (1 - 6) buttons
17.
pause/mute button
FM/AM RADIO WITH COMPACT
DISC (CD) PLAYER
For all operation precautions, see “Audio opera-
tion precautions” earlier in this section.
Audio main operation
PWR/VOL control knob
Place the ignition switch in the ACC or ON
position, then press the PWR/VOL control knob.
If you listen to the radio with the engine not
running, place the ignition in the ACC position.
The mode (radio or CD) that was playing imme-
diately before the system was turned off resumes
playing.
When no CD is loaded, the radio comes on.
Pressing the PWR/VOL control knob again turns
the system off.
Turn the PWR/VOL control knob to the right to
increase volume or to the left to decrease volume.
LHA0728
Monitor, climate, audio, phone and voice recognition systems4-27
ZREVIEW COPYÐ2009 Altima(alt)
Owners Manual(owners)ÐUSA_English(nna)
02/03/09Ðdebbie
X