Page 101 of 238
3. Touch the preferred destination facility key.
A list screen is displayed.
INFO:
If there is a particular Points of Interest type that
you intend to use frequently, you can store it in
the list of nearby Points of Interest.
“CUSTOMIZING NEARBY PLACES”
(page 6-26)4. Touch the preferred destination key from the
list.
The position of the selected location is dis-
played in the preview on the right side of the
screen.
INFO:
If the suggested route is already set, touch the
“Show Along Route” key; the system displays
only the facilities located along the route.LNV0235LNV0237LNV0236
4-36Setting a destination
�REVIEW COPY—2009 Altima(alt)
Navigation System OM—USA_English(nna)
05/22/08—debbie
�
Page 102 of 238

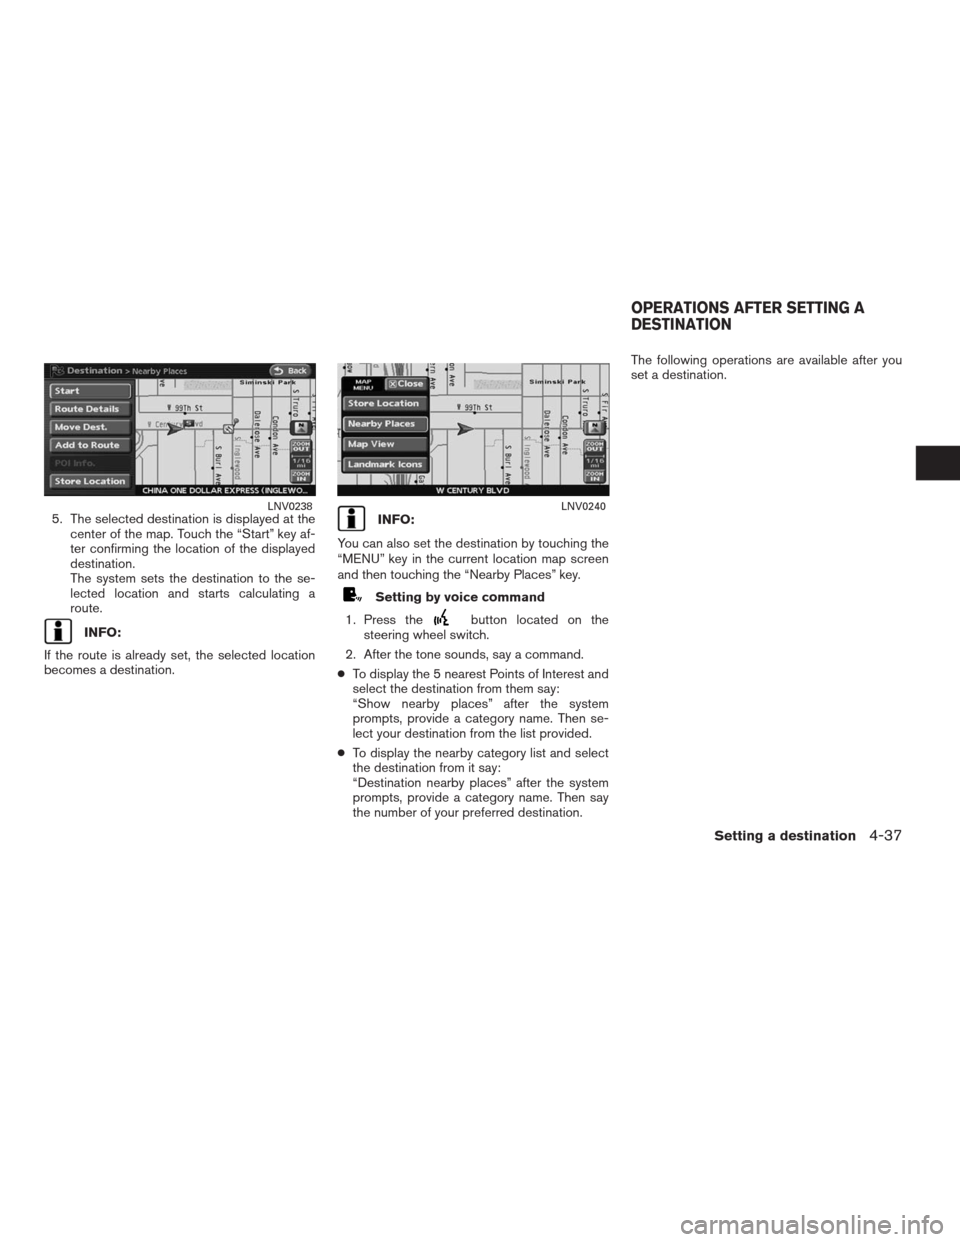
5. The selected destination is displayed at the
center of the map. Touch the “Start” key af-
ter confirming the location of the displayed
destination.
The system sets the destination to the se-
lected location and starts calculating a
route.
INFO:
If the route is already set, the selected location
becomes a destination.
INFO:
You can also set the destination by touching the
“MENU” key in the current location map screen
and then touching the “Nearby Places” key.
Setting by voice command
1. Press the
button located on the
steering wheel switch.
2. After the tone sounds, say a command.
●To display the 5 nearest Points of Interest and
select the destination from them say:
“Show nearby places” after the system
prompts, provide a category name. Then se-
lect your destination from the list provided.
●To display the nearby category list and select
the destination from it say:
“Destination nearby places” after the system
prompts, provide a category name. Then say
the number of your preferred destination.The following operations are available after you
set a destination.
LNV0238LNV0240
OPERATIONS AFTER SETTING A
DESTINATION
Setting a destination4-37
�REVIEW COPY—2009 Altima(alt)
Navigation System OM—USA_English(nna)
05/22/08—debbie
�
Page 103 of 238
AVAILABLE SETTING ITEMS
●Start:
Sets the destination. If the route is already
set, the location becomes the new
destination, and the route is recalculated.
●Route Details:
Displays the details of the current route.
“PROCEDURE AFTER SET-
TING A DESTINATION”
(page 5-2)●Move Dest.:
Displays a map screen where you can ad-
just the location of the destination.
●Add to Route:
Allows you to add a waypoint to the route
already set.
●POI Info.:
Allows you to view information about the fa-
cility that you have set as the destination if it
is included in the map DVD-ROM data.●Store Location:
Allows you to store the location in the Ad-
dress Book.
ADJUSTING THE LOCATION OF
THE DESTINATION
You can adjust the location of the destination by
moving the cross pointer across the map.
LNV0458
4-38Setting a destination
�REVIEW COPY—2009 Altima(alt)
Navigation System OM—USA_English(nna)
06/12/08—tbrooks
�
Page 105 of 238

3. Touch the “Destination” or “Waypoint” key.
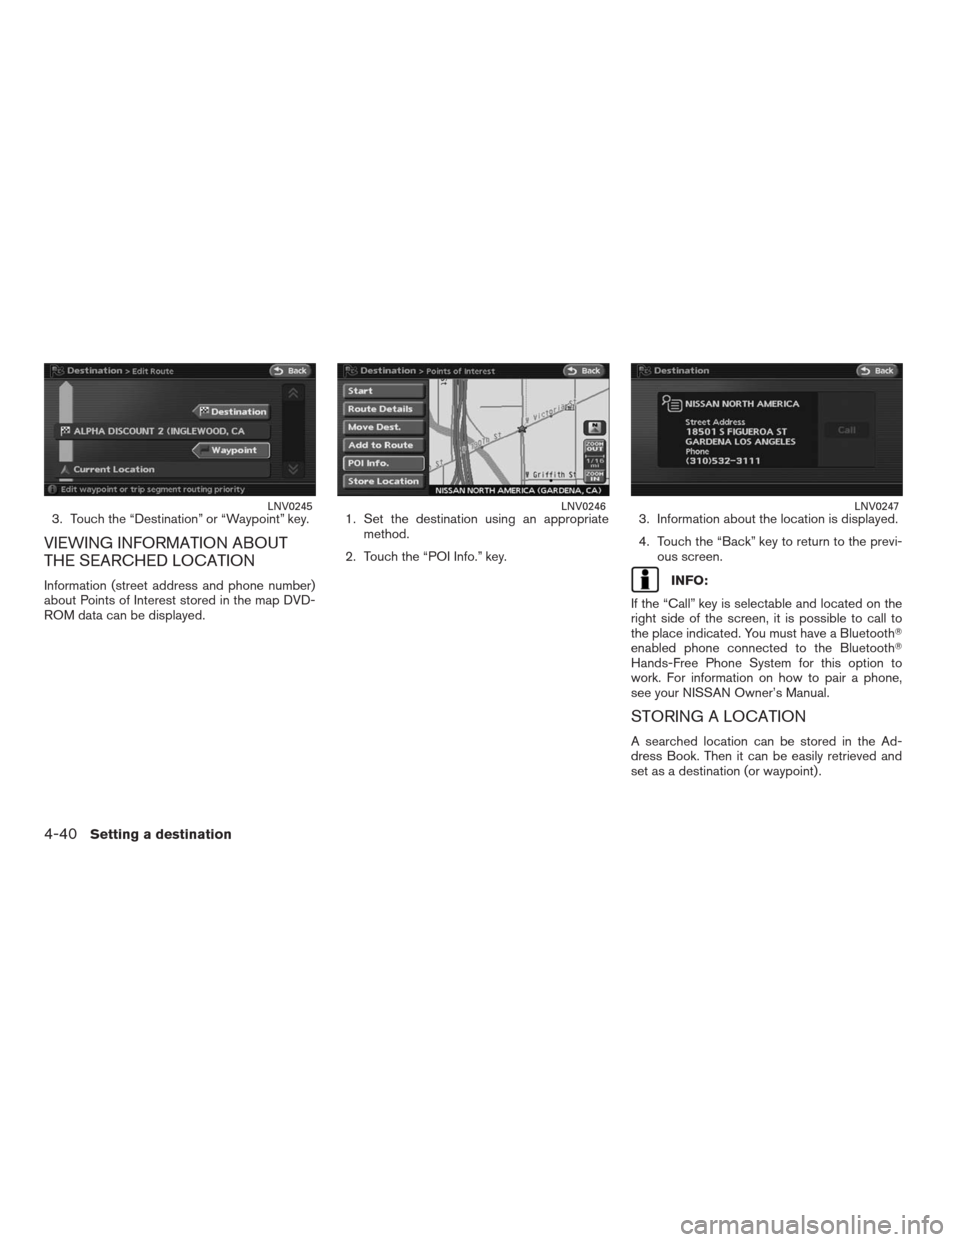
VIEWING INFORMATION ABOUT
THE SEARCHED LOCATION
Information (street address and phone number)
about Points of Interest stored in the map DVD-
ROM data can be displayed.1. Set the destination using an appropriate
method.
2. Touch the “POI Info.” key.3. Information about the location is displayed.
4. Touch the “Back” key to return to the previ-
ous screen.INFO:
If the “Call” key is selectable and located on the
right side of the screen, it is possible to call to
the place indicated. You must have a Bluetooth�
enabled phone connected to the Bluetooth�
Hands-Free Phone System for this option to
work. For information on how to pair a phone,
see your NISSAN Owner’s Manual.
STORING A LOCATION
A searched location can be stored in the Ad-
dress Book. Then it can be easily retrieved and
set as a destination (or waypoint) .
LNV0245LNV0246LNV0247
4-40Setting a destination
�REVIEW COPY—2009 Altima(alt)
Navigation System OM—USA_English(nna)
05/22/08—debbie
�
Page 106 of 238
1. Set the destination using an appropriate
method.
2. Touch the “Store Location” key.3. The location is stored in the Address Book.
The corresponding icon is displayed at the
set location on the map.LNV0248LNV0249
Setting a destination4-41
�REVIEW COPY—2009 Altima(alt)
Navigation System OM—USA_English(nna)
05/22/08—debbie
�
Page 110 of 238
STARTING ROUTE GUIDANCE
1. Touch the “Start” key. Route guidance
starts.
Available route conditions
●Short. Time (Blue):
Prioritizes by the shortest time.
●Min. FWY (Red):
Minimizes the use of freeways.
●Short. Dist. (Green):
Prioritizes by the shortest distance.
INFO:
●After you select a route, a preview is displayed
on the right side of the screen.
●The 3 routes may not always be different.
ADDING A DESTINATION OR
WAYPOINT
Before starting route guidance, you can add
destinations and/or waypoints. A total of 6 desti-
nations or waypoints can be set.
LNV0251LNV0252
Route guidance5-3
�REVIEW COPY—2009 Altima(alt)
Navigation System OM—USA_English(nna)
05/22/08—debbie
�
Page 111 of 238
1. Touch the “Add Way Pt.” key. 2. Use one of the appropriate methods for set-
ting a destination.
INFO:
The method of searching for a location is the
same as the one for a destination.
“4. Setting a destination”3. The selected location is displayed at the
center of the map. Touch the “Add to Route”
key after confirming the location.
INFO:
You can modify the location by touching the
“Move Dest.” key. The method of adjusting a lo-
cation is the same as the one for a destination.
“ADJUSTING THE LOCATION OF
THE DESTINATION” (page 4-38)
LNV0254LNV0255LNV0256
5-4Route guidance
�REVIEW COPY—2009 Altima(alt)
Navigation System OM—USA_English(nna)
05/22/08—debbie
�
Page 112 of 238
4. Touch the “Destination” key or “Waypoint”
key.
The system starts calculating a route that in-
cludes the added destination or waypoint.
When the calculation is finished, the route is
displayed.
INFO:
●If a waypoint was added, different routes can-
not be selected.
●If a destination was added, the prior destina-
tion becomes a waypoint.
MAP SCROLLING
To manually scroll the map to find a location or
set a destination.1. Touch the “Map Scroll” key. 2. Scroll along the map till you find your desti-
nation and touch the “OK” key.
To return to the previous screen touch the
“Back” key.
LNV0257LNV0258LNV0259
Route guidance5-5
�REVIEW COPY—2009 Altima(alt)
Navigation System OM—USA_English(nna)
05/22/08—debbie
�