2009 MITSUBISHI ASX key
[x] Cancel search: keyPage 165 of 368
CAUTION
l
Remove the key when leaving the vehicle.
In some countries, it is prohibited to leave
the key in the vehicle when parked. Starting
E00620600214
Tips for starting l Do
not operate the starter motor continuous-
ly longer than 10 seconds; doing so could
run down the battery. If the engine does not
start, turn the ignition switch back to
“LOCK”, wait a few seconds, and then try
again. Trying repeatedly with the starter mo-
tor still turning will damage the starter mech-
anism.
l [For diesel-powered vehicles]
While the vehicle is stationary with the
clutch pedal fully depressed, the engine revo-
lutions do not rise to over 3,000 rpm in order
to protect the engine even if the accelerator
pedal is depressed. WARNING
l Never
run the engine in a closed or poor-
ly ventilated area any longer than is nee-
ded to move your vehicle in or out of the
area. Carbon monoxide gases are odour-
less and can be fatal. CAUTION
l
Never
attempt to start the engine by push-
ing or pulling the vehicle.
l Do not run the engine at high rpm or
drive the vehicle at high speed until the en-
gine has had a chance to warm up. CAUTION
l
Release
the ignition key as soon as the en-
gine starts to avoid damaging the starter
motor.
Starting the engine (petrol-powered ve-
hicles) E00620700202
[For
vehicles equipped with keyless operation
system]
For information on operations for vehicles equip-
ped with the keyless operation system, refer to
“Keyless operation system: Starting” on page 1-15.
[Except for vehicles equipped with keyless oper-
ation system]
The starting procedure is as follows:
1. Insert the ignition key and fasten the seat belt.
2. Make sure the parking brake is applied.
3. Depress and hold the brake pedal.
4. Fully depress the clutch pedal (M/T).
5. On vehicles equipped with M/T, place thegearshift lever in the “N” (Neutral) position. Starting and driving
4-13 4
Page 166 of 368
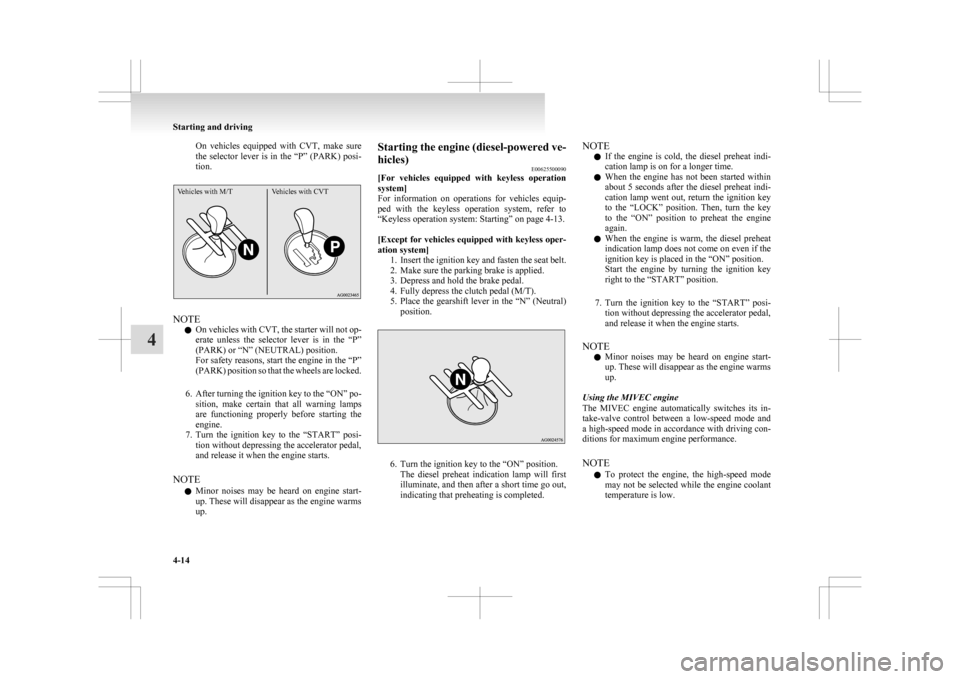
On vehicles equipped with CVT, make sure
the
selector lever is in the “P” (PARK) posi-
tion.
Vehicles with M/T Vehicles with CVTNOTE
l On
vehicles with CVT, the starter will not op-
erate unless the selector lever is in the “P”
(PARK) or “N” (NEUTRAL) position.
For safety reasons, start the engine in the “P”
(PARK) position so that the wheels are locked.
6. After turning the ignition key to the “ON” po- sition, make certain that all warning lamps
are functioning properly before starting the
engine.
7. Turn the ignition key to the “START” posi- tion without depressing the accelerator pedal,
and release it when the engine starts.
NOTE l Minor noises may be heard on engine start-
up. These will disappear as the engine warms
up. Starting the engine (diesel-powered ve-
hicles)
E00625500090
[For
vehicles equipped with keyless operation
system]
For information on operations for vehicles equip-
ped with the keyless operation system, refer to
“Keyless operation system: Starting” on page 4-13.
[Except for vehicles equipped with keyless oper-
ation system] 1. Insert the ignition key and fasten the seat belt.
2. Make sure the parking brake is applied.
3. Depress and hold the brake pedal.
4. Fully depress the clutch pedal (M/T).
5. Place the gearshift lever in the “N” (Neutral)position. 6. Turn the ignition key to the “ON” position.
The
diesel preheat indication lamp will first
illuminate, and then after a short time go out,
indicating that preheating is completed. NOTE
l If
the engine is cold, the diesel preheat indi-
cation lamp is on for a longer time.
l When the engine has not been started within
about 5 seconds after the diesel preheat indi-
cation lamp went out, return the ignition key
to the “LOCK” position. Then, turn the key
to the “ON” position to preheat the engine
again.
l When the engine is warm, the diesel preheat
indication lamp does not come on even if the
ignition key is placed in the “ON” position.
Start the engine by turning the ignition key
right to the “START” position.
7. Turn the ignition key to the “START” posi- tion without depressing the accelerator pedal,
and release it when the engine starts.
NOTE l Minor noises may be heard on engine start-
up. These will disappear as the engine warms
up.
Using the MIVEC engine
The MIVEC engine automatically switches its in-
take-valve control between a low-speed mode and
a high-speed mode in accordance with driving con-
ditions for maximum engine performance.
NOTE l To protect the engine, the high-speed mode
may not be selected while the engine coolant
temperature is low. Starting and driving
4-14
4
Page 180 of 368

CAUTION
l
Do not race the engine with brake pedal
pressed when the vehicle is stationary.
This can damage the CVT.
Also, when you depress the accelerator
pedal while holding down the brake ped-
al with the selector lever in the “D”
(DRIVE) position, the engine revolutions
may not rise as high as when performing
the same operation with the selector lever
in the “N” (NEUTRAL) position.
Passing acceleration E00602700037
To gain extra acceleration in “D” (DRIVE) posi-
tion,
push the accelerator to the floor. The CVT
will automatically downshift.
NOTE
l In sports mode, downshifts do not take place
when the accelerator is depressed all the way
to the floor.
Uphill/downhill driving E00603000037
DRIVING UPHILL
The
transmission may not upshift to a higher shift
position if the computer determines the current
speed cannot be maintained once a higher shift po-
sition is engaged.
For smoother vehicle performance, if you release
the throttle while climbing a steep grade, the trans-
mission may not upshift.
This is normal, as the computer is temporarily pre-
venting shifting. After reaching the top of the hill,
normal shift function will resume. DRIVING DOWNHILL
When
travelling down steep grades, the computer
may automatically select a lower shift position.
This function assists engine braking efforts, reduc-
ing the need for using the service brakes.
Waiting E00602800126
For short waiting periods, such as at traffic signals
the
vehicle can be left in selector lever position and
held stationary with the service brake.
For longer waiting periods with the engine running,
place the selector lever in the “N” (NEUTRAL) po-
sition and apply the parking brake, while holding
the vehicle stationary with the service brake. CAUTION
l
Never
hold the vehicle stationary while in
CVT on a hill with the accelerator, al-
ways apply the parking brake and/or serv-
ice brake.
Parking E00602900039
To park the vehicle, first bring it to a complete
stop,
fully engage the parking brake, and then
move the selector lever to the “P” (PARK) position.
If you are going to leave the vehicle unattended, al-
ways switch off the engine and carry the key. NOTE
l On
a slope, be sure to apply the parking
brake before moving the selector lever to the
“P” (PARK) position. If you move the selec-
tor lever to the “P” (PARK) position before
applying the parking brake, it may be diffi-
cult to disengage the selector lever from the
“P” (PARK) position when next you drive
the vehicle, requiring application of a strong
force to the selector lever to move from the
“P” (PARK) position.
When the CVT makes no speed change E00603100139
If the transmission does not change speeds while
driving,
or your vehicle does not pick up enough
speed when starting on an uphill slope, it may be
that there is something unusual happening in the
transmission, causing a safety device to activate.
We recommend you to have your vehicle checked
as soon as possible. Starting and driving
4-28
4
Page 187 of 368
WARNING
l Do not leave any objects near the brake
pedal or let a floor mat slide under it; do-
ing so could prevent the full pedal stroke
that would be necessary in an emergency.
Make sure that the pedal can be operated
freely at all times. Make sure the floor
mat is securely held in place.
Brake pad l Avoid hard braking situations.
New
brakes need to be broken-in by moder-
ate use for the first 200 km (124 miles).
l The disc brakes are provided with a warning
device which emits a shrieking metallic
sound while braking if the brake pads have
reached their wear limit. If you hear this
sound, have the brake pads replaced immedi-
ately. WARNING
l Driving
with worn brake pads will make
it harder to stop, and can cause an acci-
dent. Hill start assist*
E00628000155
The
hill start assist makes it easy to start off on a
steep uphill slope by preventing the vehicle from
moving backwards. It keeps the braking force for
about 2 seconds when you move your foot from the
brake pedal to the accelerator pedal. CAUTION
l
Do
not overly rely on the hill start assist
to prevent backwards movement of the ve-
hicle. Under certain circumstances, even
when hill start assist is activated, the vehi-
cle may move backwards if the brake ped-
al is not sufficiently depressed, if the vehi-
cle is heavily loaded, or if the road is very
steep or slippery.
l The hill start assist is not designed to
keep the vehicle stopped in place on up-
hill slopes for more than 2 seconds.
l When facing uphill, do not rely on using
the hill start assist to maintain a stopped
position as an alternative to depressing
the brake pedal.
Doing so could result in an accident.
l Do not perform the following operation
while the hill start assist is operating.
[Except for vehicles equipped with key-
less operation system]
Turn the ignition switch to the “LOCK”
or “ACC” position.
[Vehicles equipped with keyless operation
system]
Put the operation mode in OFF or ACC.
The hill start assist could stop operating,
which could result in an accident. To operate
E00628100172
1. Stop
the vehicle completely using the brake
pedal.
2. On vehicles equipped with M/T, place the
gearshift lever into the 1 st
position.
On vehicles equipped with CVT, place the se-
lector lever into the “D” position.
NOTE l When reversing on an uphill slope, place the
gearshift lever or the selector lever into the
“R” position.
3. Release the brake pedal and the hill start as- sist will maintain the braking force applied
while stopping for approximately 2 seconds.
4. Depress the accelerator pedal and the hill start assist gradually will decrease the brak-
ing force as the vehicle starts moving.
NOTE l The hill start assist is activated when all of
the following conditions are met.
• The engine is running.(The hill start assist will not be activated
while the engine is starting or immediate-
ly after the engine is started.) Starting and driving
4-35 4
Page 196 of 368
NOTE
l If
the cruise control is on when the following
operation is performed, cruise control will be
on automatically the next time you start the
engine. The “CRUISE” indication lamp will
also be on.
[Except vehicles equipped with keyless oper-
ation system]
Turn the ignition switch to the “LOCK” or
“ACC” position.
[Vehicles equipped with keyless operation
system]
Put the operation mode in OFF or ACC.
l If the battery voltage is insufficient, the mem-
ory data for the cruise control may be erased.
As a result, the “CRUISE” indication lamp
may not come on when you restart the engine.
If this happens, press the “ON OFF” switch
once again to turn on the cruise control.
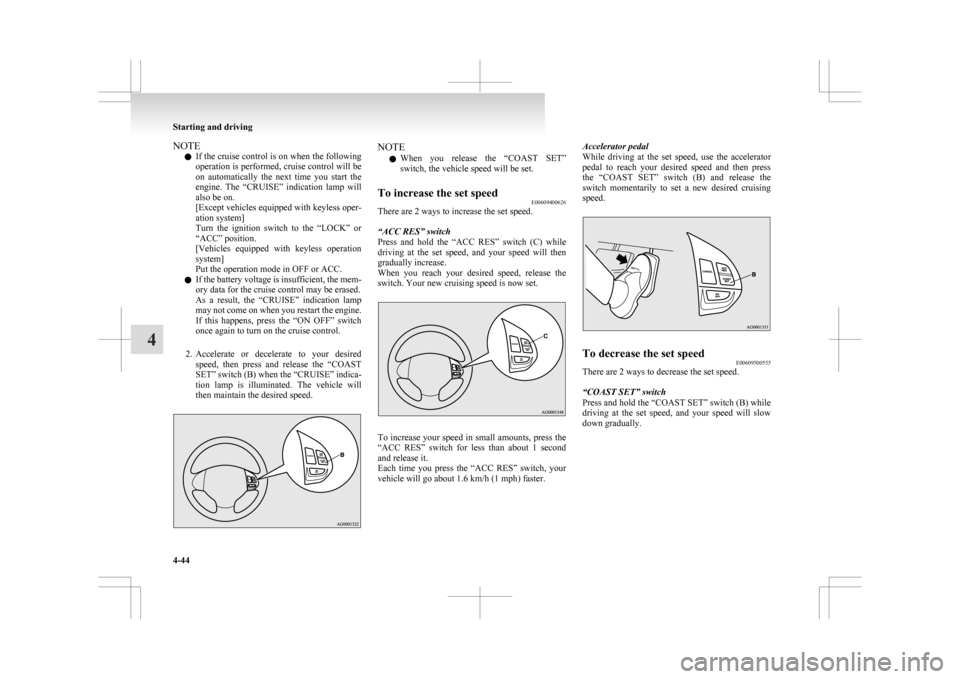
2. Accelerate or decelerate to your desired speed, then press and release the “COAST
SET” switch (B) when the “CRUISE” indica-
tion lamp is illuminated. The vehicle will
then maintain the desired speed. NOTE
l When
you release the “COAST SET”
switch, the vehicle speed will be set.
To increase the set speed E00609400626
There are 2 ways to increase the set speed.
“ACC RES” switch
Press
and hold the “ACC RES” switch (C) while
driving at the set speed, and your speed will then
gradually increase.
When you reach your desired speed, release the
switch. Your new cruising speed is now set. To increase your speed in small amounts, press the
“ACC
RES” switch for less than about 1 second
and release it.
Each time you press the “ACC RES” switch, your
vehicle will go about 1.6 km/h (1 mph) faster. Accelerator pedal
While
driving at the set speed, use the accelerator
pedal to reach your desired speed and then press
the “COAST SET” switch (B) and release the
switch momentarily to set a new desired cruising
speed. To decrease the set speed
E00609500555
There are 2 ways to decrease the set speed.
“COAST SET” switch
Press and hold the “COAST SET” switch (B) while
driving
at the set speed, and your speed will slow
down gradually. Starting and driving
4-44
4
Page 199 of 368
![MITSUBISHI ASX 2009 1.G Owners Manual l
[Except vehicles equipped with keyless oper-
ation system]
Turn the ignition switch to the “LOCK” or
“ACC” position.
Put the operation mode in OFF or ACC.
l “CRUISE” indication l MITSUBISHI ASX 2009 1.G Owners Manual l
[Except vehicles equipped with keyless oper-
ation system]
Turn the ignition switch to the “LOCK” or
“ACC” position.
Put the operation mode in OFF or ACC.
l “CRUISE” indication l](/manual-img/19/7566/w960_7566-198.png)
l
[Except vehicles equipped with keyless oper-
ation system]
Turn the ignition switch to the “LOCK” or
“ACC” position.
Put the operation mode in OFF or ACC.
l “CRUISE” indication lamp is turned OFF. Reversing sensor system*
E00615500215
This
system operates when you are backing the ve-
hicle. It uses corner and back sensors to detect an
obstacle and sounds a buzzer to inform you of the
approximate distance to the obstacle. CAUTION
l
The reversing sensor system assists you in
determining the approximate distance be-
tween
the vehicle and an obstacle located
behind the vehicle. It has limitations in
terms of detectable areas and objects,
and may not properly detect some ob-
jects. Therefore, do not place excessive
confidence in the reversing sensor system
and operate the vehicle as carefully as
you would do with a vehicle not equipped
with this system.
l Make sure to check the surroundings
with your own eyes to ensure safety. Do
not operate the vehicle by relying on the
reversing sensor system alone.
Obstacle detection areas E00615600346
The detection areas of the corner and back sensors
are
limited to those shown in the illustration. More-
over, the sensors are unable to detect low or thin ob-
jects or objects near the rear bumper. Thus, make
sure to check the surroundings as you operate the
vehicle in a safe manner. Corner and back sensor locations
There
are two corner sensors (A) at the corners of
the rear bumper, and two back sensors (B) in the
centre of the rear bumper. Reversing sensor system detection areas
Depending
on whether the vehicle is equipped with
a towing bar, you can change the reversing sensor
system between the standard mode and the towing
bar mode. The towing bar mode changes the sys-
tem to exclude the area in which the towing bar is
mounted from the detection areas. Starting and driving
4-47 4
Page 254 of 368

Connecting the Bluetooth
®
2.0 inter-
face and Bluetooth ®
device
E00760600073
Before
you can make or receive hands-free calls or
play music using the Bluetooth ®
2.0 interface func-
tion, you must pair the Bluetooth ®
device and Blue-
tooth ®
2.0 interface.
NOTE l Pairing is required only when the device is
used for the first time. Once the device has
been paired with the Bluetooth ®
2.0 inter-
face, you only need to bring the device into
the vehicle next time and the device will au-
tomatically connect to the Bluetooth ®
2.0 in-
terface (if supported by the device). The de-
vice must have Bluetooth ®
turned ON to con-
nect.
Up to 7 Bluetooth ®
devices can be paired with the
Bluetooth ®
2.0 interface.
If multiple paired Bluetooth ®
devices are available
in the vehicle, the cellular phone or music player
most recently connected is automatically connected
to the Bluetooth ®
2.0 interface.
You can also change a Bluetooth ®
device to be con-
nected.
To pair
To pair a Bluetooth ®
device with the Bluetooth ®
2.0 interface, follow the steps below. 1. Stop your vehicle in a safe area, put the gear-shift lever in the “N” (Neutral) position
(M/T) or the selector lever in the “P”
(PARK) position (CVT) and pull the parking
brake lever. NOTE
l You
cannot pair Bluetooth ®
devices with the
Bluetooth ®
2.0 interface unless the vehicle is
parked. Before paring a Bluetooth ®
device
with the Bluetooth ®
2.0 interface, confirm
that the vehicle is parked in a safe location.
2. Press the SPEECH button.
3. Say “Setup”.
4. Say “Pairing options.”
5. The voice guide will say “Select one of the following: pair, edit, delete, or list.” Say
“Pair.”
NOTE l If 7 devices have already been paired, the
voice guide will say “Maximum devices
paired” and then the system will end the pair-
ing process. To register a new device, delete
one device and then repeat the pairing process.
(Refer to “Selecting a device: Deleting a de-
vice” on page 5-47.)
6. The voice guide will say “Please say a 4-dig- it pairing code.” Say a 4-digit number.
When the confirmation function is on, the sys-
tem will confirm whether the number said is
acceptable. Answer “Yes.”
Answer “No” to return to pairing code selec-
tion.
NOTE l Some Bluetooth ®
devices require a specific
pairing code.
Please refer to the device manual for pairing
code requirements. l
The pairing code entered here is only used
for the Bluetooth ®
connection certification.
It is any 4-digit number the user would like
to select.
Remember the pairing code as it needs to be
keyed into the Bluetooth ®
device later in the
pairing process.
Depending on the connection settings of the
Bluetooth ®
device, this code may have to be
entered each time you connect the Blue-
tooth ®
device to the Bluetooth ®
2.0 inter-
face. For the default connection settings, re-
fer to the instructions for the device.
7. The voice guide will say “Start pairing proce- dure on the device. See the device manual
for instructions.” Enter in the Bluetooth ®
de-
vice the 4-digit number you have registered
in Step 6.
NOTE l If the Bluetooth ®
2.0 interface cannot recog-
nize the Bluetooth ®
device, the voice guide
will say “Pairing has timed out” and the pair-
ing process will be cancelled.
Confirm that the device you are pairing sup-
ports Bluetooth ®
, and try pairing it again.
l If you enter the wrong number, the voice
guide will say “Pairing failed” and the pair-
ing process will be cancelled.
Confirm the number is right, and try pairing
it again.
8. The voice guide will say “Please say the name of the device after the beep.” You can
assign a desired name for the Bluetooth ®
de- For pleasant driving
5-46
5
Page 270 of 368
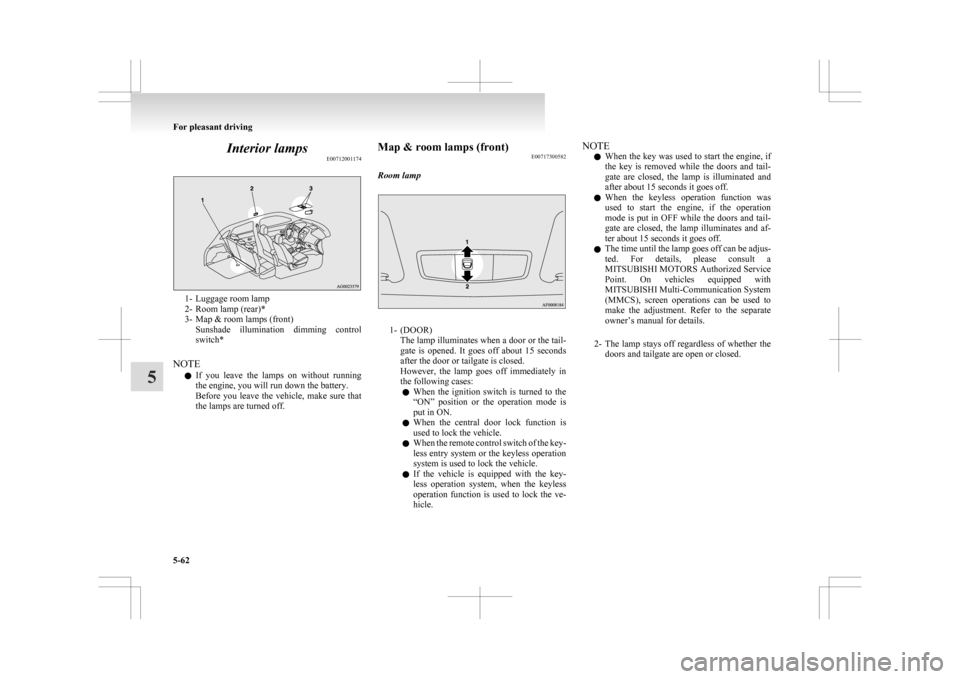
Interior lamps
E007120011741- Luggage room lamp
2-
Room lamp (rear)*
3- Map & room lamps (front) Sunshade illumination dimming control
switch*
NOTE l If you leave the lamps on without running
the engine, you will run down the battery.
Before you leave the vehicle, make sure that
the lamps are turned off. Map & room lamps (front)
E00717300582
Room lamp 1- (DOOR)
The
lamp illuminates when a door or the tail-
gate is opened. It goes off about 15 seconds
after the door or tailgate is closed.
However, the lamp goes off immediately in
the following cases:
l When the ignition switch is turned to the
“ON” position or the operation mode is
put in ON.
l When the central door lock function is
used to lock the vehicle.
l When the remote control switch of the key-
less entry system or the keyless operation
system is used to lock the vehicle.
l If the vehicle is equipped with the key-
less operation system, when the keyless
operation function is used to lock the ve-
hicle. NOTE
l When
the key was used to start the engine, if
the key is removed while the doors and tail-
gate are closed, the lamp is illuminated and
after about 15 seconds it goes off.
l When the keyless operation function was
used to start the engine, if the operation
mode is put in OFF while the doors and tail-
gate are closed, the lamp illuminates and af-
ter about 15 seconds it goes off.
l The time until the lamp goes off can be adjus-
ted. For details, please consult a
MITSUBISHI MOTORS Authorized Service
Point. On vehicles equipped with
MITSUBISHI Multi-Communication System
(MMCS), screen operations can be used to
make the adjustment. Refer to the separate
owner’s manual for details.
2- The lamp stays off regardless of whether the doors and tailgate are open or closed. For pleasant driving
5-62
5