2009 MITSUBISHI ASX remote control
[x] Cancel search: remote controlPage 52 of 368
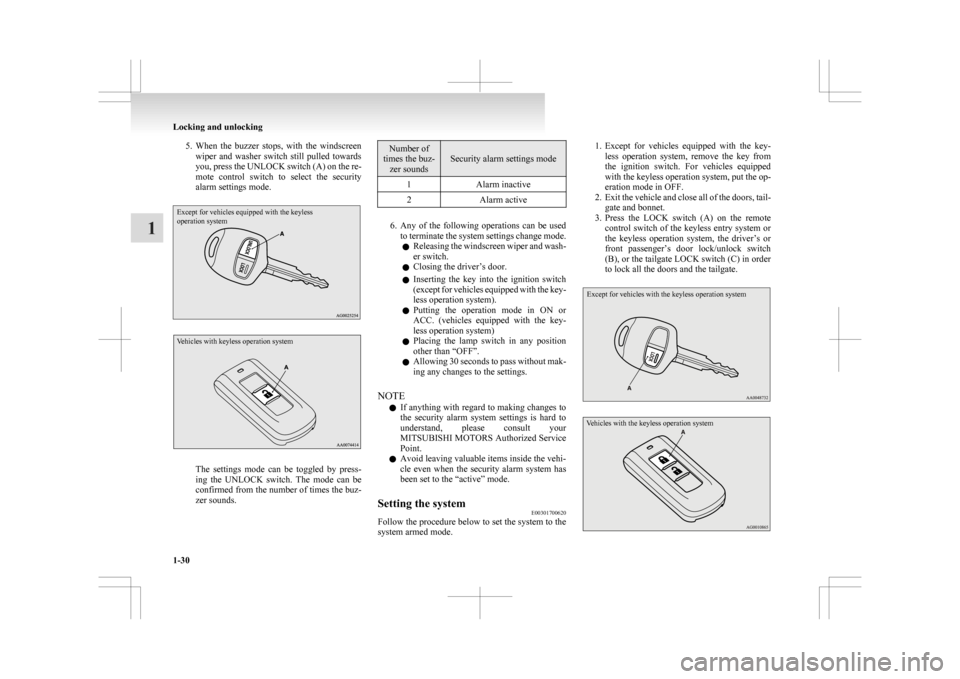
5. When the buzzer stops, with the windscreen
wiper and washer switch still pulled towards
you, press the UNLOCK switch (A) on the re-
mote control switch to select the security
alarm settings mode.
Except for vehicles equipped with the keyless
operation system
Vehicles with keyless operation system The settings mode can be toggled by press-
ing
the UNLOCK switch. The mode can be
confirmed from the number of times the buz-
zer sounds. Number of
times the buz- zer sounds Security alarm settings mode
1 Alarm inactive
2 Alarm active 6. Any
of the following operations can be used
to terminate the system settings change mode.
l Releasing the windscreen wiper and wash-
er switch.
l Closing the driver’s door.
l Inserting the key into the ignition switch
(except for vehicles equipped with the key-
less operation system).
l Putting the operation mode in ON or
ACC. (vehicles equipped with the key-
less operation system)
l Placing the lamp switch in any position
other than “OFF”.
l Allowing 30 seconds to pass without mak-
ing any changes to the settings.
NOTE l If anything with regard to making changes to
the security alarm system settings is hard to
understand, please consult your
MITSUBISHI MOTORS Authorized Service
Point.
l Avoid leaving valuable items inside the vehi-
cle even when the security alarm system has
been set to the “active” mode.
Setting the system E00301700620
Follow the procedure below to set the system to the
system armed mode. 1. Except
for vehicles equipped with the key-
less operation system, remove the key from
the ignition switch. For vehicles equipped
with the keyless operation system, put the op-
eration mode in OFF.
2. Exit the vehicle and close all of the doors, tail- gate and bonnet.
3. Press the LOCK switch (A) on the remote control switch of the keyless entry system or
the keyless operation system, the driver’s or
front passenger’s door lock/unlock switch
(B), or the tailgate LOCK switch (C) in order
to lock all the doors and the tailgate.
Except for vehicles with the keyless operation system
Vehicles with the keyless operation system Locking and unlocking
1-30
1
Page 54 of 368
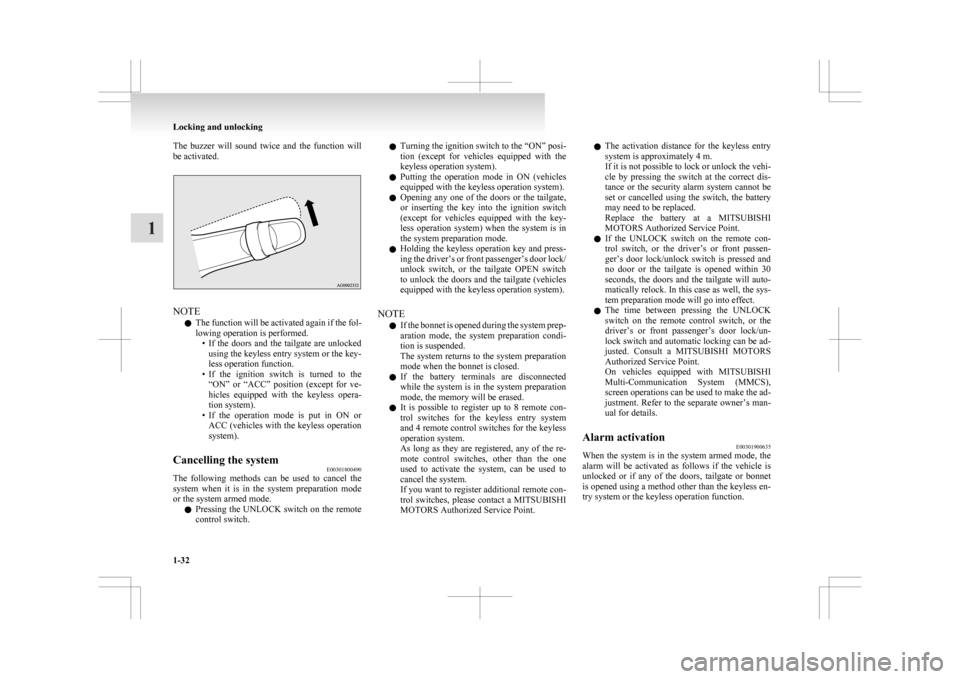
The buzzer will sound twice and the function will
be activated.
NOTE
l The
function will be activated again if the fol-
lowing operation is performed. • If the doors and the tailgate are unlockedusing the keyless entry system or the key-
less operation function.
• If the ignition switch is turned to the “ON” or “ACC” position (except for ve-
hicles equipped with the keyless opera-
tion system).
• If the operation mode is put in ON or ACC (vehicles with the keyless operation
system).
Cancelling the system E00301800490
The following methods can be used to cancel the
system
when it is in the system preparation mode
or the system armed mode.
l Pressing the UNLOCK switch on the remote
control switch. l
Turning
the ignition switch to the “ON” posi-
tion (except for vehicles equipped with the
keyless operation system).
l Putting the operation mode in ON (vehicles
equipped with the keyless operation system).
l Opening any one of the doors or the tailgate,
or inserting the key into the ignition switch
(except for vehicles equipped with the key-
less operation system) when the system is in
the system preparation mode.
l Holding the keyless operation key and press-
ing the driver’s or front passenger’s door lock/
unlock switch, or the tailgate OPEN switch
to unlock the doors and the tailgate (vehicles
equipped with the keyless operation system).
NOTE l If the bonnet is opened during the system prep-
aration mode, the system preparation condi-
tion is suspended.
The system returns to the system preparation
mode when the bonnet is closed.
l If the battery terminals are disconnected
while the system is in the system preparation
mode, the memory will be erased.
l It is possible to register up to 8 remote con-
trol switches for the keyless entry system
and 4 remote control switches for the keyless
operation system.
As long as they are registered, any of the re-
mote control switches, other than the one
used to activate the system, can be used to
cancel the system.
If you want to register additional remote con-
trol switches, please contact a MITSUBISHI
MOTORS Authorized Service Point. l
The activation distance for the keyless entry
system is approximately 4 m.
If it is not possible to lock or unlock the vehi-
cle by pressing the switch at the correct dis-
tance or the security alarm system cannot be
set or cancelled using the switch, the battery
may need to be replaced.
Replace the battery at a MITSUBISHI
MOTORS Authorized Service Point.
l If the UNLOCK switch on the remote con-
trol switch, or the driver’s or front passen-
ger’s door lock/unlock switch is pressed and
no door or the tailgate is opened within 30
seconds, the doors and the tailgate will auto-
matically relock. In this case as well, the sys-
tem preparation mode will go into effect.
l The time between pressing the UNLOCK
switch on the remote control switch, or the
driver’s or front passenger’s door lock/un-
lock switch and automatic locking can be ad-
justed. Consult a MITSUBISHI MOTORS
Authorized Service Point.
On vehicles equipped with MITSUBISHI
Multi-Communication System (MMCS),
screen operations can be used to make the ad-
justment. Refer to the separate owner’s man-
ual for details.
Alarm activation E00301900635
When the system is in the system armed mode, the
alarm
will be activated as follows if the vehicle is
unlocked or if any of the doors, tailgate or bonnet
is opened using a method other than the keyless en-
try system or the keyless operation function. Locking and unlocking
1-32
1
Page 55 of 368
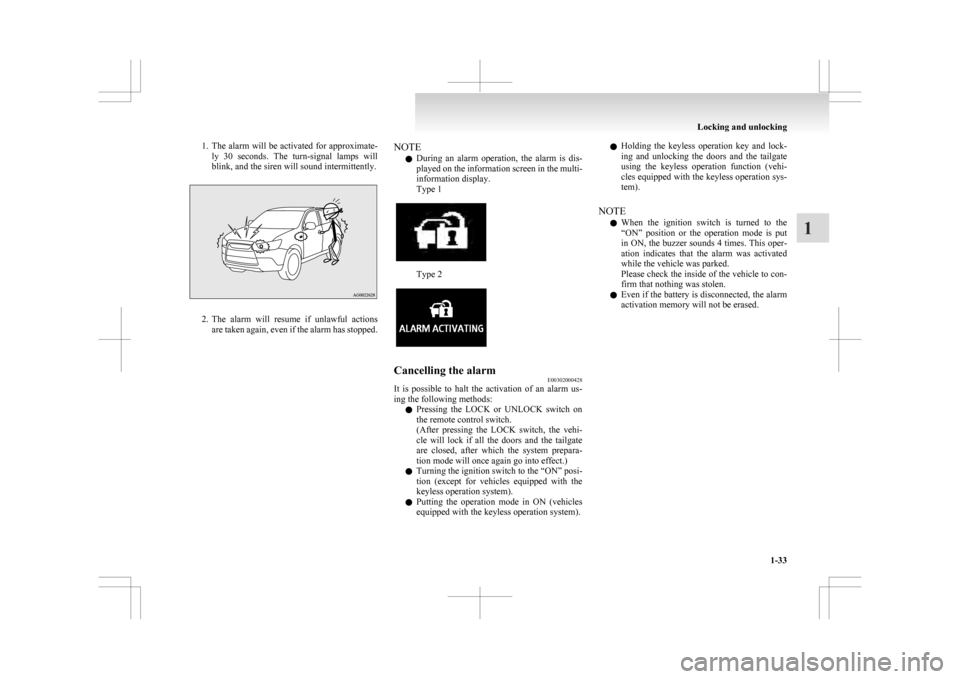
1. The alarm will be activated for approximate-
ly 30 seconds. The turn-signal lamps will
blink, and the siren will sound intermittently. 2. The
alarm will resume if unlawful actions
are taken again, even if the alarm has stopped. NOTE
l During
an alarm operation, the alarm is dis-
played on the information screen in the multi-
information display.
Type 1 Type 2
Cancelling the alarm
E00302000428
It is possible to halt the activation of an alarm us-
ing the following methods:
l Pressing
the LOCK or UNLOCK switch on
the remote control switch.
(After pressing the LOCK switch, the vehi-
cle will lock if all the doors and the tailgate
are closed, after which the system prepara-
tion mode will once again go into effect.)
l Turning the ignition switch to the “ON” posi-
tion (except for vehicles equipped with the
keyless operation system).
l Putting the operation mode in ON (vehicles
equipped with the keyless operation system). l
Holding
the keyless operation key and lock-
ing and unlocking the doors and the tailgate
using the keyless operation function (vehi-
cles equipped with the keyless operation sys-
tem).
NOTE l When the ignition switch is turned to the
“ON” position or the operation mode is put
in ON, the buzzer sounds 4 times. This oper-
ation indicates that the alarm was activated
while the vehicle was parked.
Please check the inside of the vehicle to con-
firm that nothing was stolen.
l Even if the battery is disconnected, the alarm
activation memory will not be erased. Locking and unlocking
1-33 1
Page 141 of 368

Dipper (High/Low beam change)
E00506200329
When
the lamp switch is in the “ ”
position, the
beam changes from high to low (or low to high)
each time the lever is pulled fully (1). While the high-
beam is on, the high-beam indication lamp in the in-
strument cluster will also illuminate. Headlamp flasher
E00506300199
The high-beams flash when the lever is pulled slight-
ly (2), and will go off when it is released.
When
the high-beam is on, the high-beam indica-
tion lamp in the instrument cluster will illuminate.
NOTE
l The high-beams can also flash when the
lamp switch is OFF.
l If you turn the lamps off with the headlamps
set to high-beam, the headlamps are automat-
ically returned to their low-beam setting
when the lamp switch is next turned to the
“ ” position. Welcome light*
E00528900254
This
function turns on the position and tail lamps
for about 30 seconds after the UNLOCK switch
(A) on the remote control transmitter is pressed
when the combination headlamps and dipper
switch is in the “OFF” or “AUTO” position (for ve-
hicles equipped with the automatic lamp control).
On vehicles equipped with automatic lamp control,
the welcome light function will operate only when
it is dark outside the vehicle. NOTE
l While
the welcome light function is operat-
ing, perform one of the following operations
to cancel the function. • Push the LOCK switch (B) on the remotecontrol transmitter. • Turn the combination headlamps and dip-
per switch to the “ ” or “ ” position.
• Turn
the ignition switch to the “ON” po-
sition or put the operation mode in ON.
l It is possible to modify functions as follows:
• The headlamps can be set to come on inthe low beam setting instead of the posi-
tion and tail lamps.
• The welcome light function can be deacti- vated.
For further information, please contact
your MITSUBISHI MOTORS Author-
ized Service Point.
On vehicles equipped with MITSUBISHI
Multi-Communication System (MMCS),
screen operations can be used to make
the adjustment. Refer to the separate own-
er’s manual for details.
Coming home light E00529000236
This function turns on the headlamps in the low
beam
setting for about 30 seconds after the ignition
switch is turned to the “OFF” position or the opera-
tion mode is put in OFF. Instruments and controls
3-47 3
Page 162 of 368
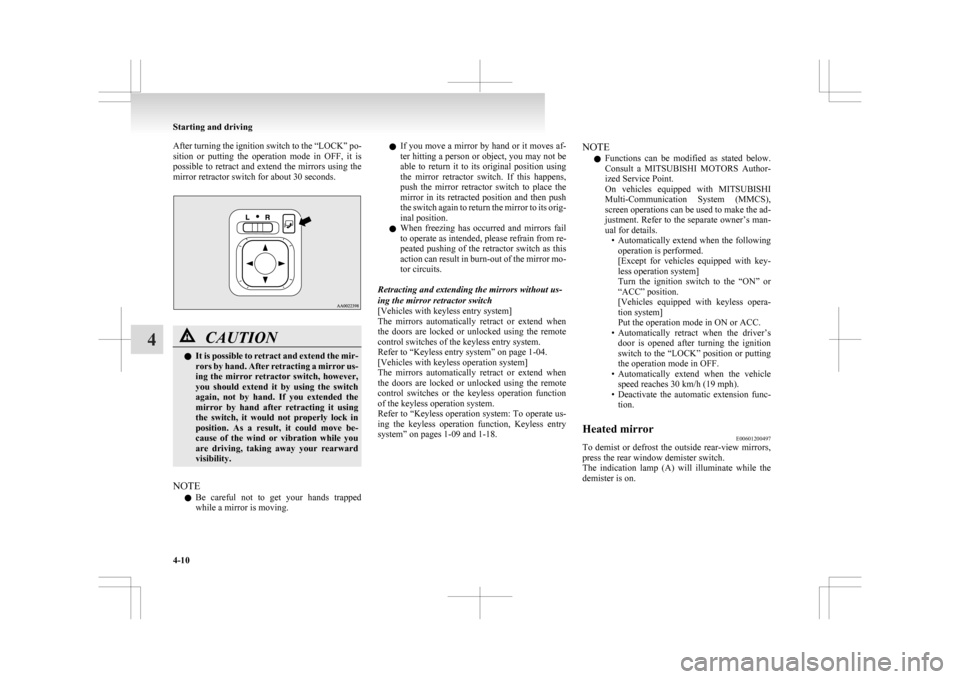
After turning the ignition switch to the “LOCK” po-
sition
or putting the operation mode in OFF, it is
possible to retract and extend the mirrors using the
mirror retractor switch for about 30 seconds. CAUTION
l
It
is possible to retract and extend the mir-
rors by hand. After retracting a mirror us-
ing the mirror retractor switch, however,
you should extend it by using the switch
again, not by hand. If you extended the
mirror by hand after retracting it using
the switch, it would not properly lock in
position. As a result, it could move be-
cause of the wind or vibration while you
are driving, taking away your rearward
visibility.
NOTE l Be
careful not to get your hands trapped
while a mirror is moving. l
If
you move a mirror by hand or it moves af-
ter hitting a person or object, you may not be
able to return it to its original position using
the mirror retractor switch. If this happens,
push the mirror retractor switch to place the
mirror in its retracted position and then push
the switch again to return the mirror to its orig-
inal position.
l When freezing has occurred and mirrors fail
to operate as intended, please refrain from re-
peated pushing of the retractor switch as this
action can result in burn-out of the mirror mo-
tor circuits.
Retracting and extending the mirrors without us-
ing the mirror retractor switch
[Vehicles with keyless entry system]
The mirrors automatically retract or extend when
the doors are locked or unlocked using the remote
control switches of the keyless entry system.
Refer to “Keyless entry system” on page 1-04.
[Vehicles with keyless operation system]
The mirrors automatically retract or extend when
the doors are locked or unlocked using the remote
control switches or the keyless operation function
of the keyless operation system.
Refer to “Keyless operation system: To operate us-
ing the keyless operation function, Keyless entry
system” on pages 1-09 and 1-18. NOTE
l Functions
can be modified as stated below.
Consult a MITSUBISHI MOTORS Author-
ized Service Point.
On vehicles equipped with MITSUBISHI
Multi-Communication System (MMCS),
screen operations can be used to make the ad-
justment. Refer to the separate owner’s man-
ual for details. • Automatically extend when the followingoperation is performed.
[Except for vehicles equipped with key-
less operation system]
Turn the ignition switch to the “ON” or
“ACC” position.
[Vehicles equipped with keyless opera-
tion system]
Put the operation mode in ON or ACC.
• Automatically retract when the driver’s door is opened after turning the ignition
switch to the “LOCK” position or putting
the operation mode in OFF.
• Automatically extend when the vehicle speed reaches 30 km/h (19 mph).
• Deactivate the automatic extension func- tion.
Heated mirror E00601200497
To demist or defrost the outside rear-view mirrors,
press the rear window demister switch.
The
indication lamp (A) will illuminate while the
demister is on. Starting and driving
4-10
4
Page 209 of 368

Ventilators
.................................................................................... 5-02
Heater/Air conditioning ................................................................ 5-03
Important operation tips for the air conditioning
..........................5-09
Air purifier.................................................................................... 5-10
Audio system*.............................................................................. 5-10
To play tracks from USB device* ................................................5-22
To play tracks from a Bluetooth ®
device (vehicles with
Bluetooth ®
2.0 interface)..........................................................5-30
To use the external audio input function* ....................................5-32
Steering wheel audio remote control switches* ...........................5-33
Error codes.................................................................................... 5-35
Error codes (iPod)......................................................................... 5-36
Error codes (USB memory device) ..............................................5-37
Handling of compact discs ........................................................... 5-38
Antenna......................................................................................... 5-39
Digital clock* ............................................................................... 5-39
Link System* ................................................................................ 5-41
Bluetooth ®
2.0 interface* ............................................................. 5-41
USB input terminal* ..................................................................... 5-57
Sun visors..................................................................................... 5-59
Ashtray*........................................................................................5-60
Cigarette lighter* .......................................................................... 5-60
Accessory socket.......................................................................... 5-61
Interior lamps ................................................................................ 5-62
Storage spaces...............................................................................5-65
Cup holder.................................................................................... 5-68
Bottle holder ................................................................................. 5-69
Rear shelf panel* .......................................................................... 5-69
Assist grips................................................................................... 5-70
Coat hook*.................................................................................... 5-70 Luggage hooks..............................................................................
5-70For pleasant driving
5
Page 241 of 368
NOTE
l The
connected audio equipment cannot be op-
erated with the vehicle’s audio system.
l For information on how to connect and oper-
ate the audio equipment, refer to the owner’s
manual for the equipment. Steering wheel audio remote
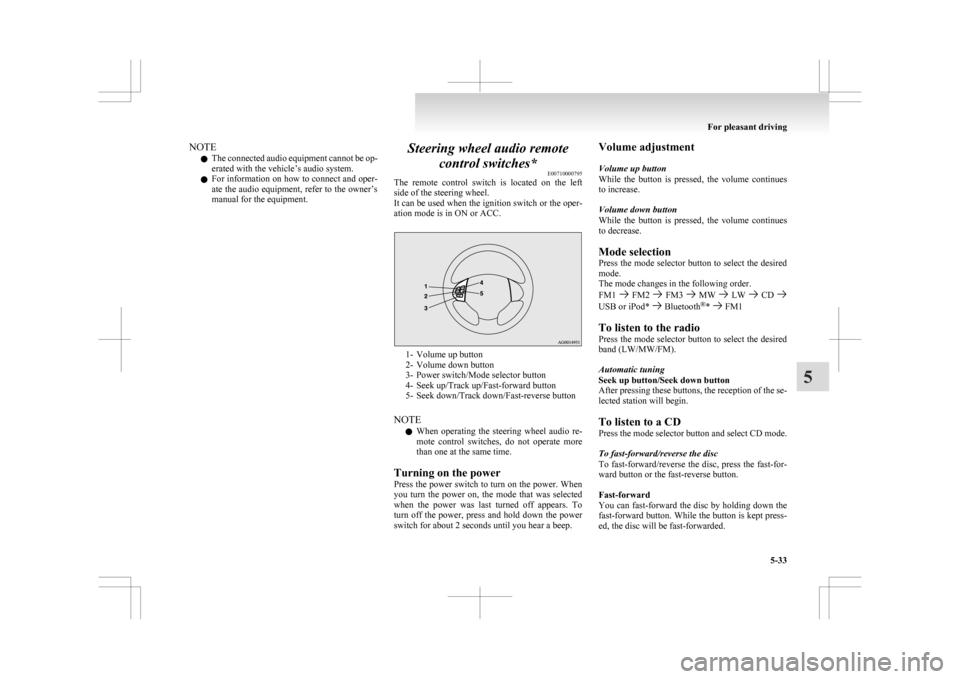
control switches* E00710000795
The
remote control switch is located on the left
side of the steering wheel.
It can be used when the ignition switch or the oper-
ation mode is in ON or ACC. 1- Volume up button
2-
Volume down button
3- Power switch/Mode selector button
4- Seek up/Track up/Fast-forward button
5- Seek down/Track down/Fast-reverse button
NOTE l When operating the steering wheel audio re-
mote control switches, do not operate more
than one at the same time.
Turning on the power
Press the power switch to turn on the power. When
you turn the power on, the mode that was selected
when the power was last turned off appears. To
turn off the power, press and hold down the power
switch for about 2 seconds until you hear a beep. Volume adjustment
Volume up button
While
the button is pressed, the volume continues
to increase.
Volume down button
While the button is pressed, the volume continues
to decrease.
Mode selection
Press the mode selector button to select the desired
mode.
The mode changes in the following order.
FM1 FM2 FM3 MW LW CD
USB or iPod* Bluetooth
®
* FM1
To listen to the radio
Press
the mode selector button to select the desired
band (LW/MW/FM).
Automatic tuning
Seek up button/Seek down button
After pressing these buttons, the reception of the se-
lected station will begin.
To listen to a CD
Press the mode selector button and select CD mode.
To fast-forward/reverse the disc
To fast-forward/reverse the disc, press the fast-for-
ward button or the fast-reverse button.
Fast-forward
You can fast-forward the disc by holding down the
fast-forward button. While the button is kept press-
ed, the disc will be fast-forwarded.
For pleasant driving
5-33 5
Page 270 of 368
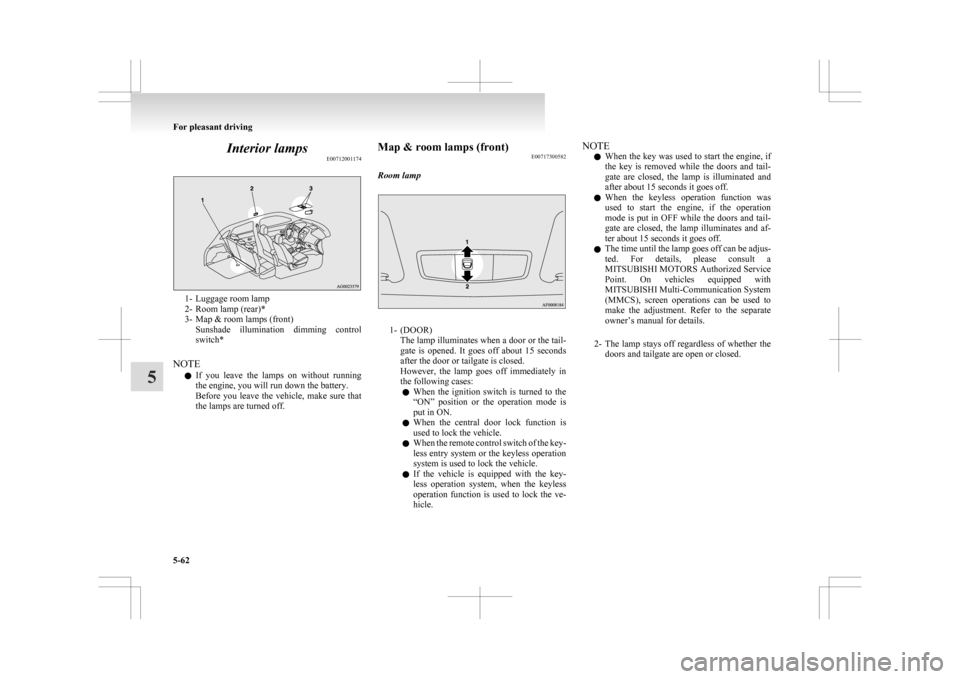
Interior lamps
E007120011741- Luggage room lamp
2-
Room lamp (rear)*
3- Map & room lamps (front) Sunshade illumination dimming control
switch*
NOTE l If you leave the lamps on without running
the engine, you will run down the battery.
Before you leave the vehicle, make sure that
the lamps are turned off. Map & room lamps (front)
E00717300582
Room lamp 1- (DOOR)
The
lamp illuminates when a door or the tail-
gate is opened. It goes off about 15 seconds
after the door or tailgate is closed.
However, the lamp goes off immediately in
the following cases:
l When the ignition switch is turned to the
“ON” position or the operation mode is
put in ON.
l When the central door lock function is
used to lock the vehicle.
l When the remote control switch of the key-
less entry system or the keyless operation
system is used to lock the vehicle.
l If the vehicle is equipped with the key-
less operation system, when the keyless
operation function is used to lock the ve-
hicle. NOTE
l When
the key was used to start the engine, if
the key is removed while the doors and tail-
gate are closed, the lamp is illuminated and
after about 15 seconds it goes off.
l When the keyless operation function was
used to start the engine, if the operation
mode is put in OFF while the doors and tail-
gate are closed, the lamp illuminates and af-
ter about 15 seconds it goes off.
l The time until the lamp goes off can be adjus-
ted. For details, please consult a
MITSUBISHI MOTORS Authorized Service
Point. On vehicles equipped with
MITSUBISHI Multi-Communication System
(MMCS), screen operations can be used to
make the adjustment. Refer to the separate
owner’s manual for details.
2- The lamp stays off regardless of whether the doors and tailgate are open or closed. For pleasant driving
5-62
5